HomeKnowledge baseFresha academy
Update client details
Back
  1. Knowledge base•
  2. Clients•
  3. Update client details

Update client details

In this guide, you’ll learn how to manage a client’s profile and track all their information in one place.

In this article

  • Add a client's personal information to their profile
  • Add a client's address to their profile
  • Add emergency contacts for clients
  • Update a client's settings

Add a client's personal information to their profile

You can update client details while scheduling an appointment, creating a sale, or through your client list.

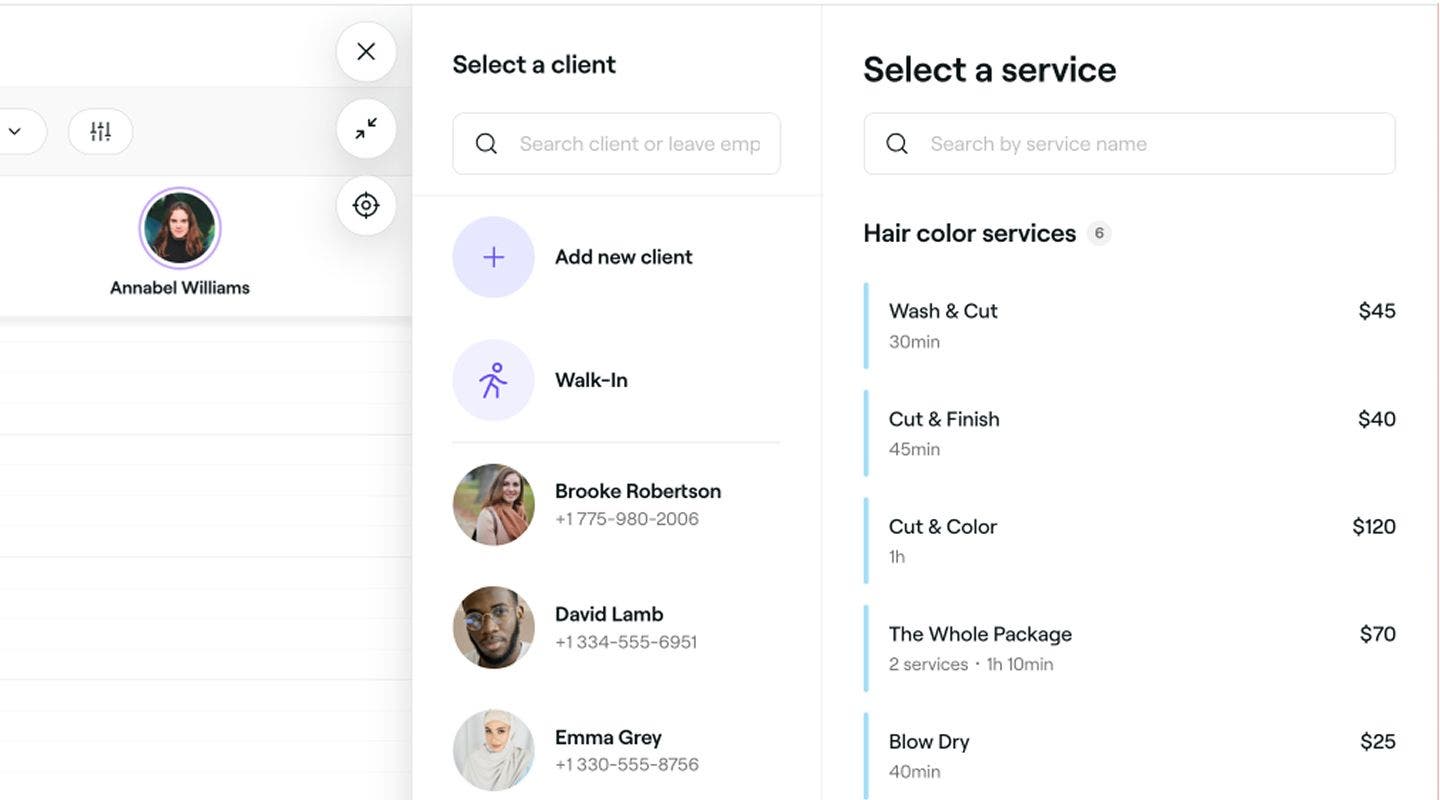
  1. When scheduling an appointment, select an existing client from the left panel of the appointment view.
    personal_info_web_1.jpg
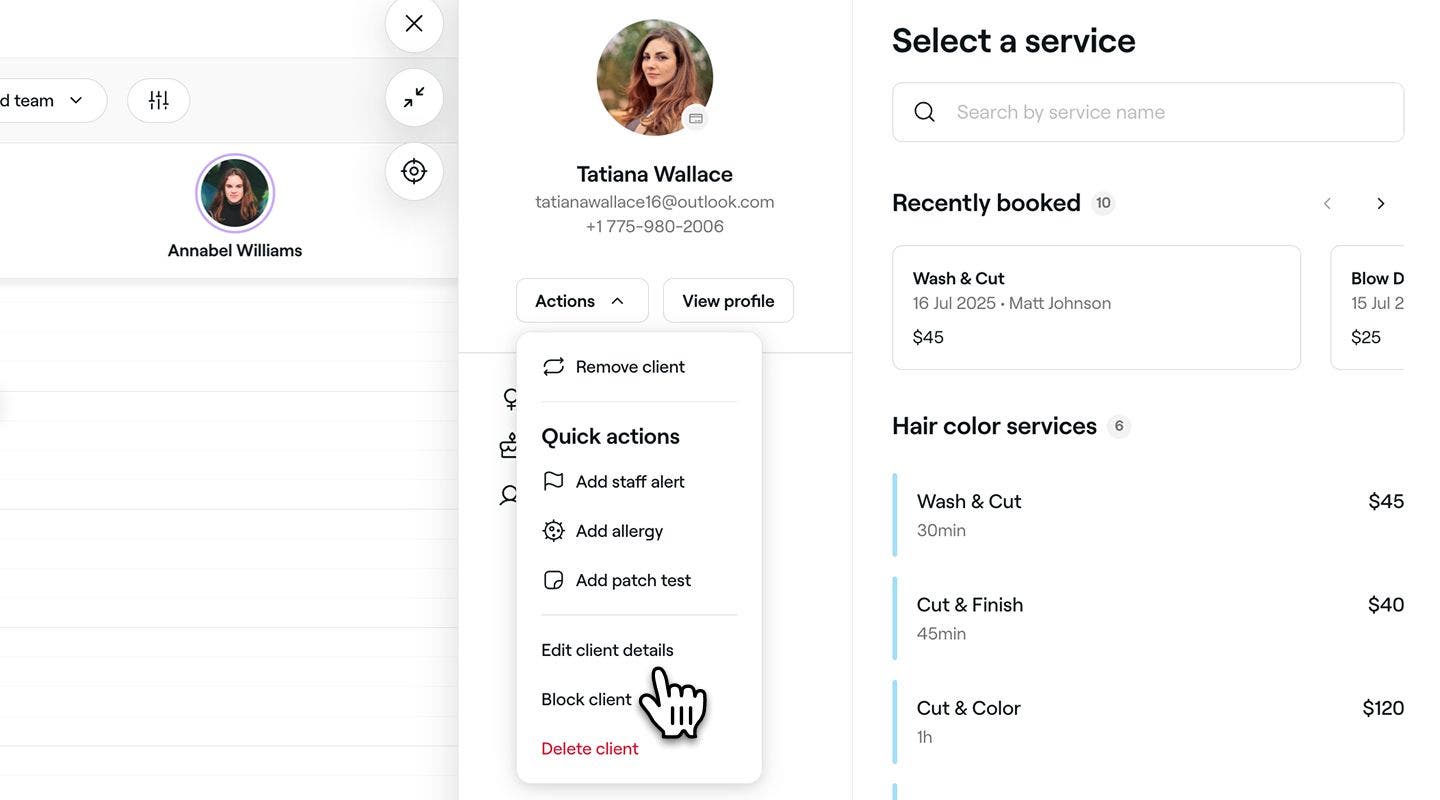
  2. Click on the Actions button, then choose Edit client details to update the client's profile.
    personal_info_web_2.jpg
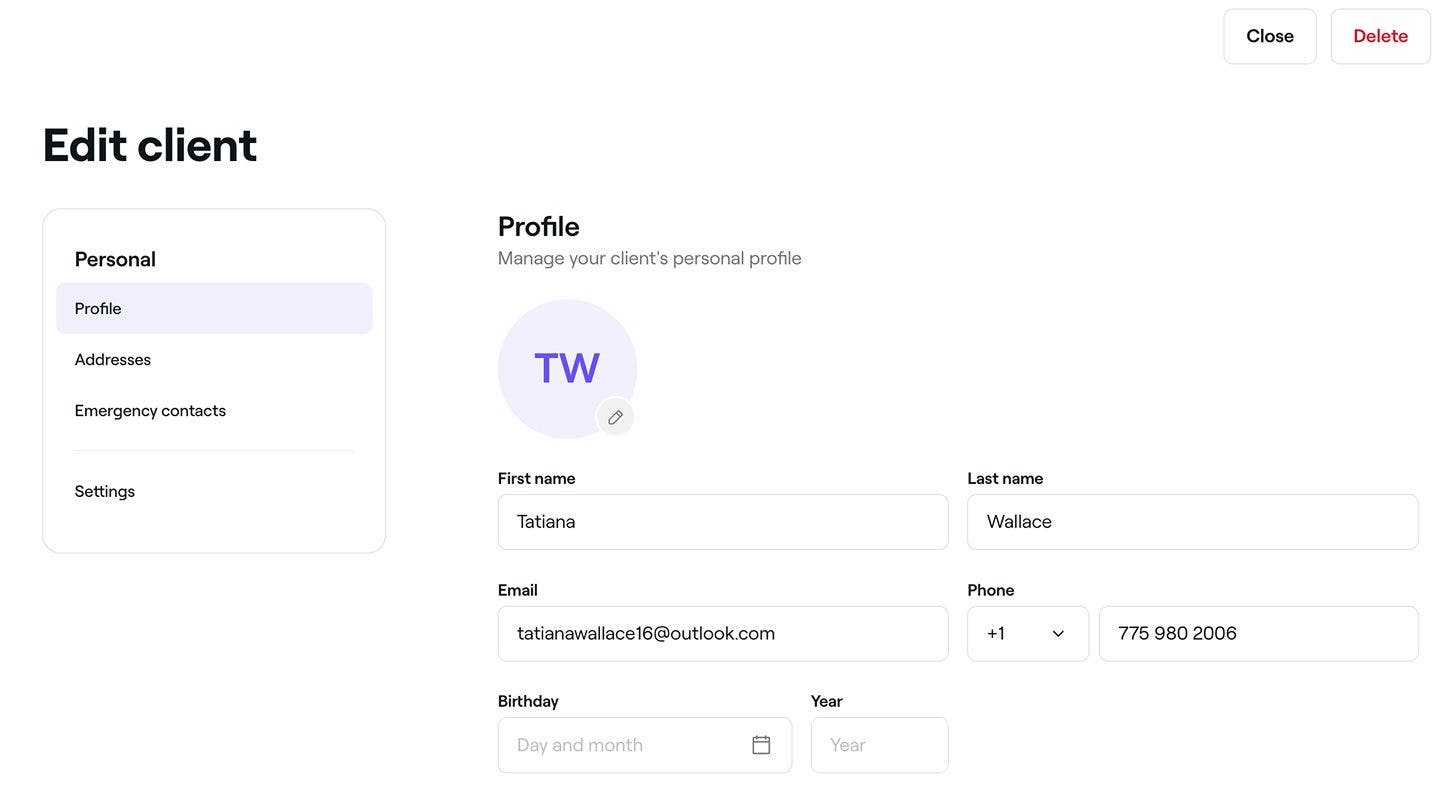
  3. In the Edit client view, click on the Edit icon on the profile photo to upload a new photo for the client.
    personal_info_web_3.jpg
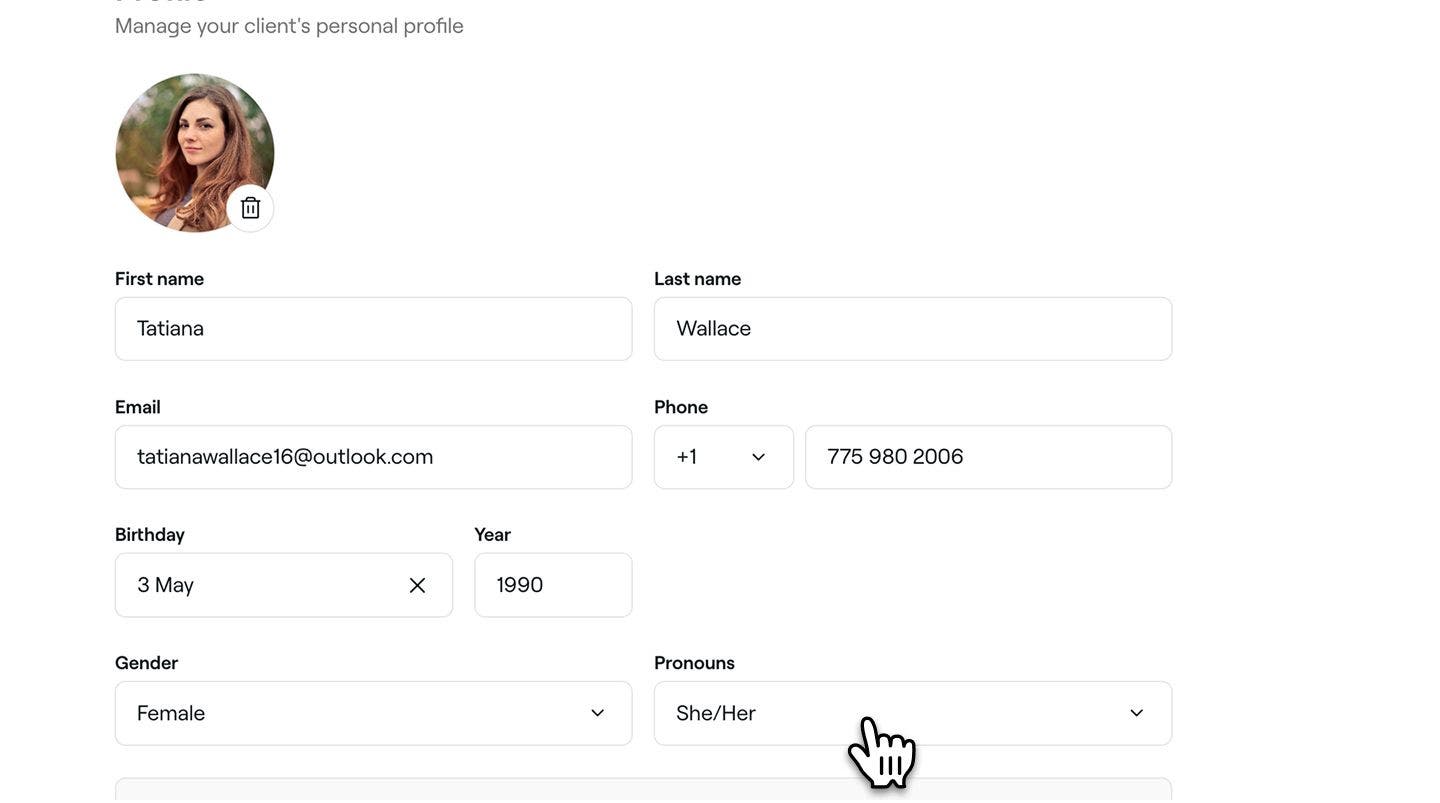
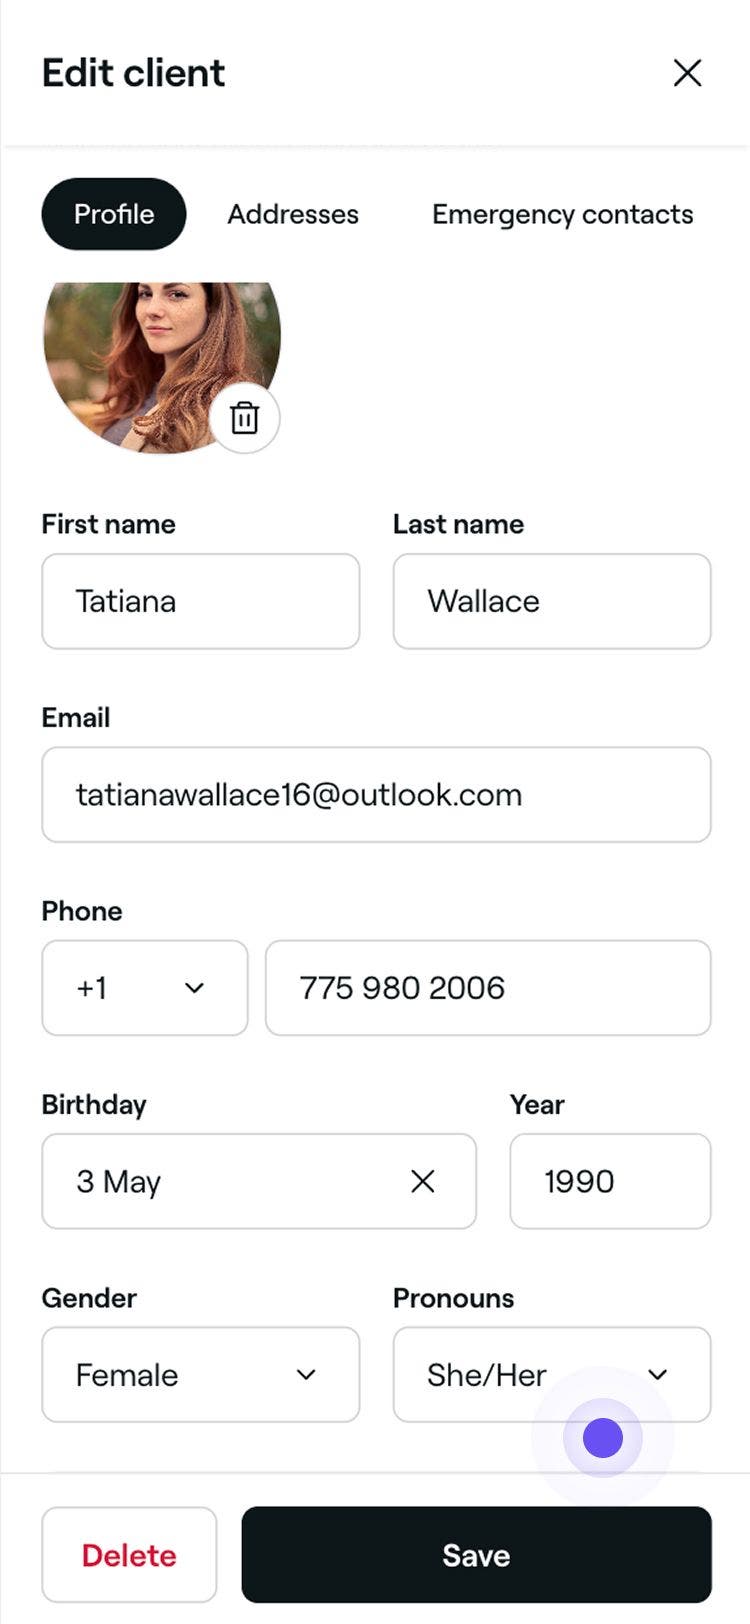
  4. Under Profile, add the client's Date of birth, Gender, and Pronouns. 
    personal_info_web_4.jpg
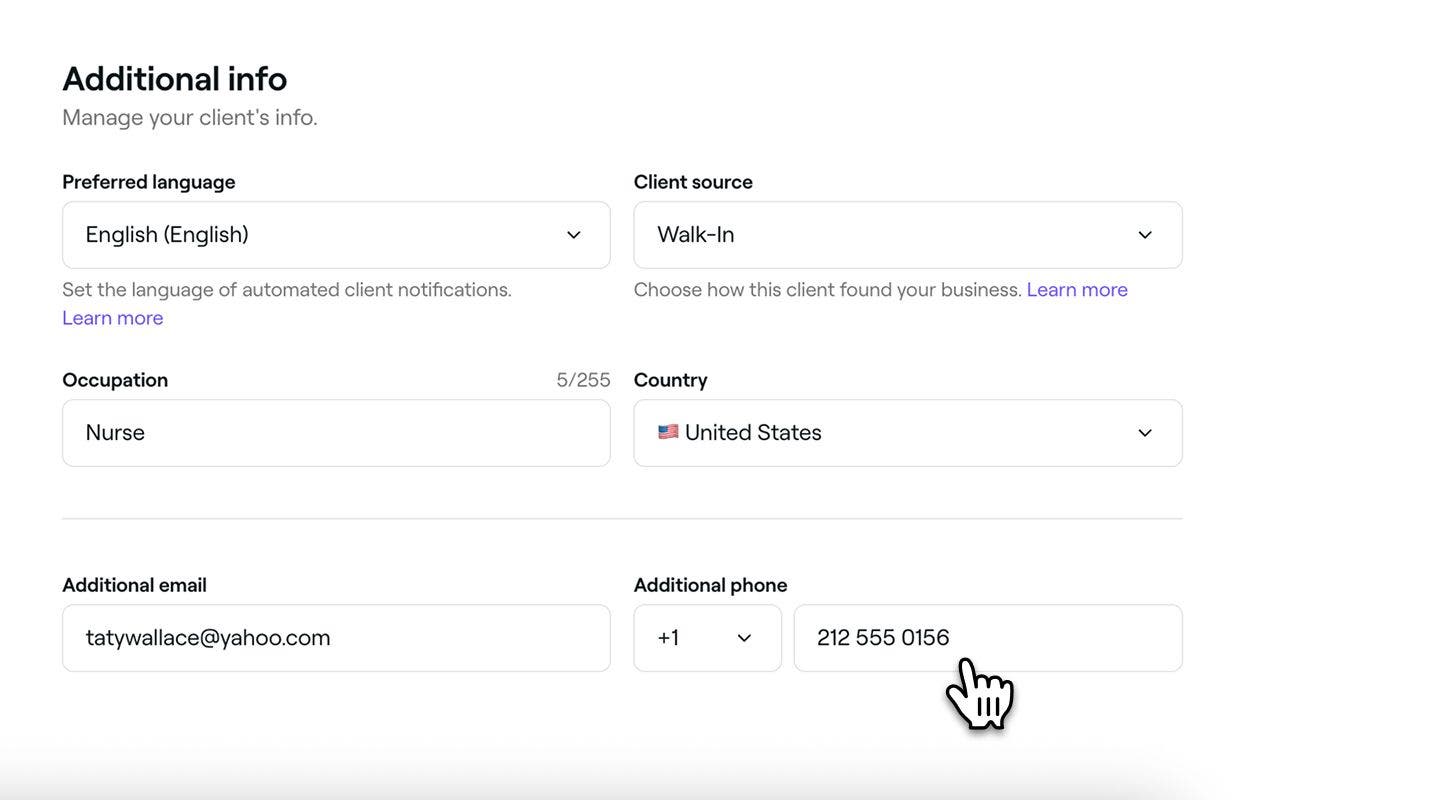
  5. Under Additional info, provide the following details:
    1. Preferred language: Select the language the client prefers to receive automated messages in.
    2. Client source: Choose how the client discovered your business. You can create new options in your Client source settings.
    3. Occupation, Nationality, and any additional contact details.
      personal_info_web_5.jpg
  6. Click on the Save button in the top right to update the client's profile details.
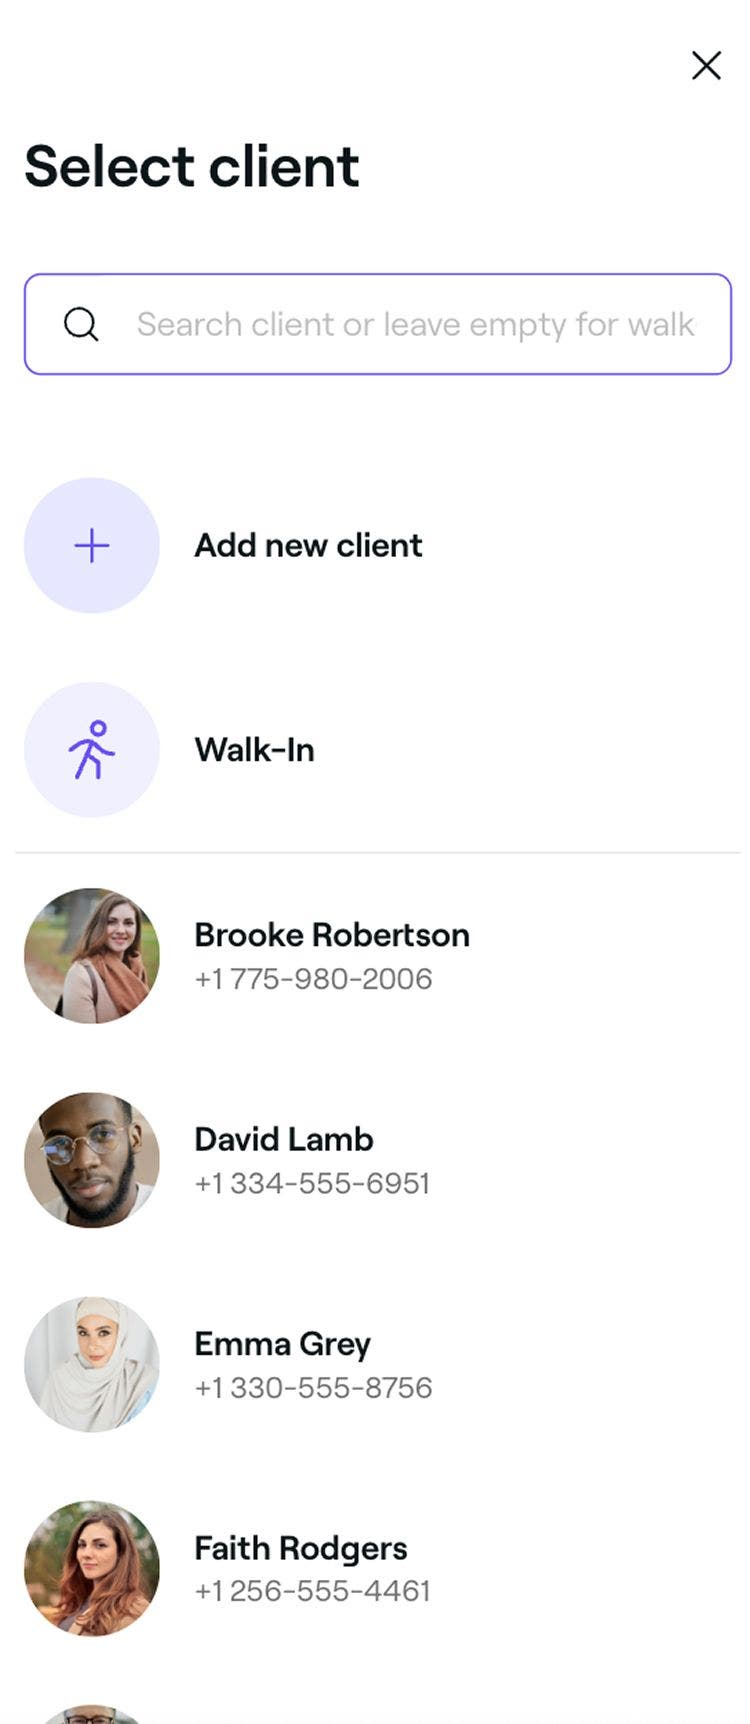
  1. When scheduling an appointment, select an existing client from the appointment view. 
    personal_info_mob_1.jpg
  2. Once a service has been selected, tap  on the Actions button at the top, then select Edit client details to update the client’s profile.
    personal_info_mob_2.jpg
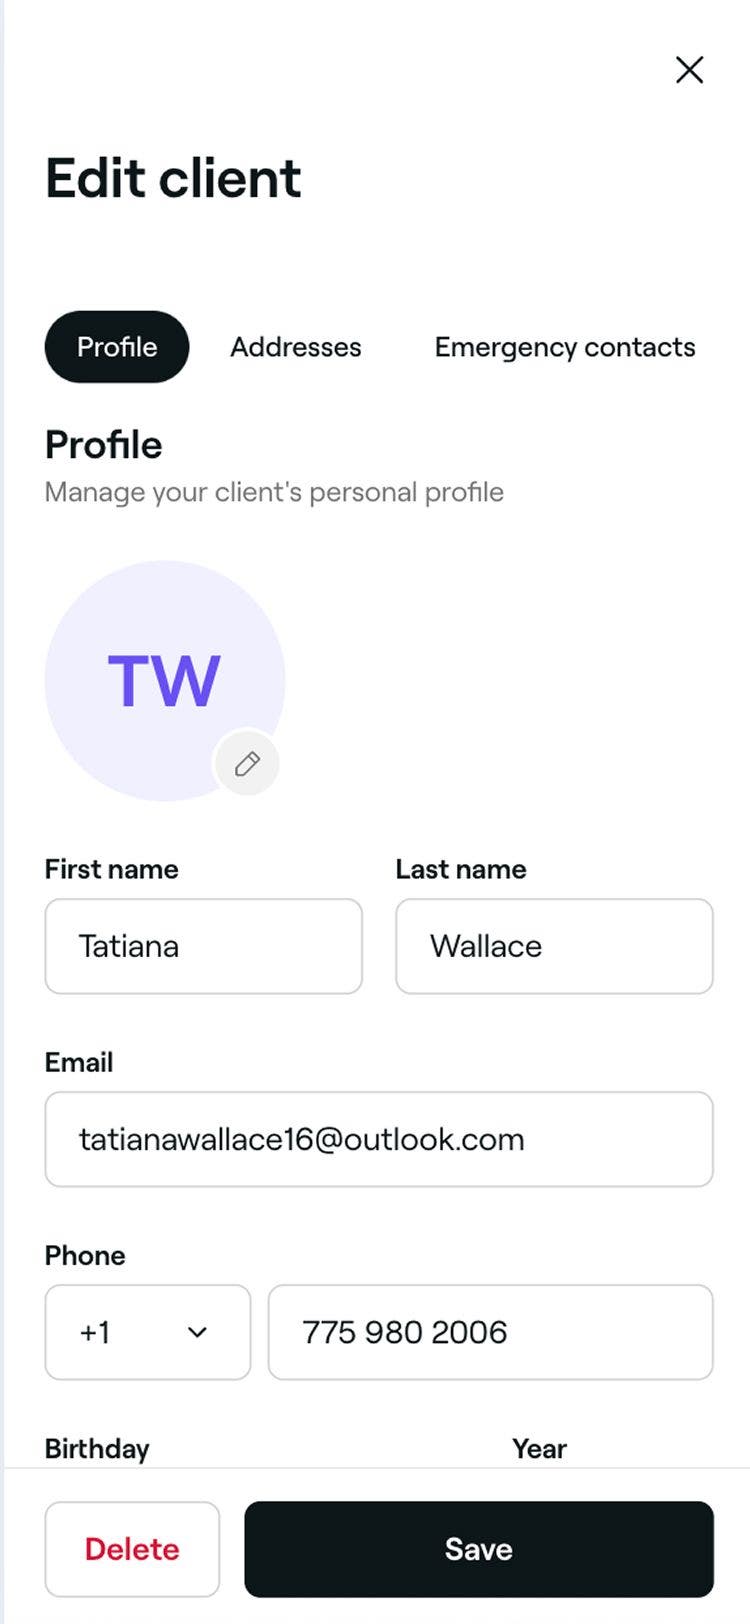
  3. In the Edit client view, tap on the Edit icon on the profile photo to upload a new photo for the client.  
    personal_info_mob_3.jpg
  4. Under Profile, add the client's Date of birth, Gender, and Pronouns. 
    personal_info_mob_4.jpg
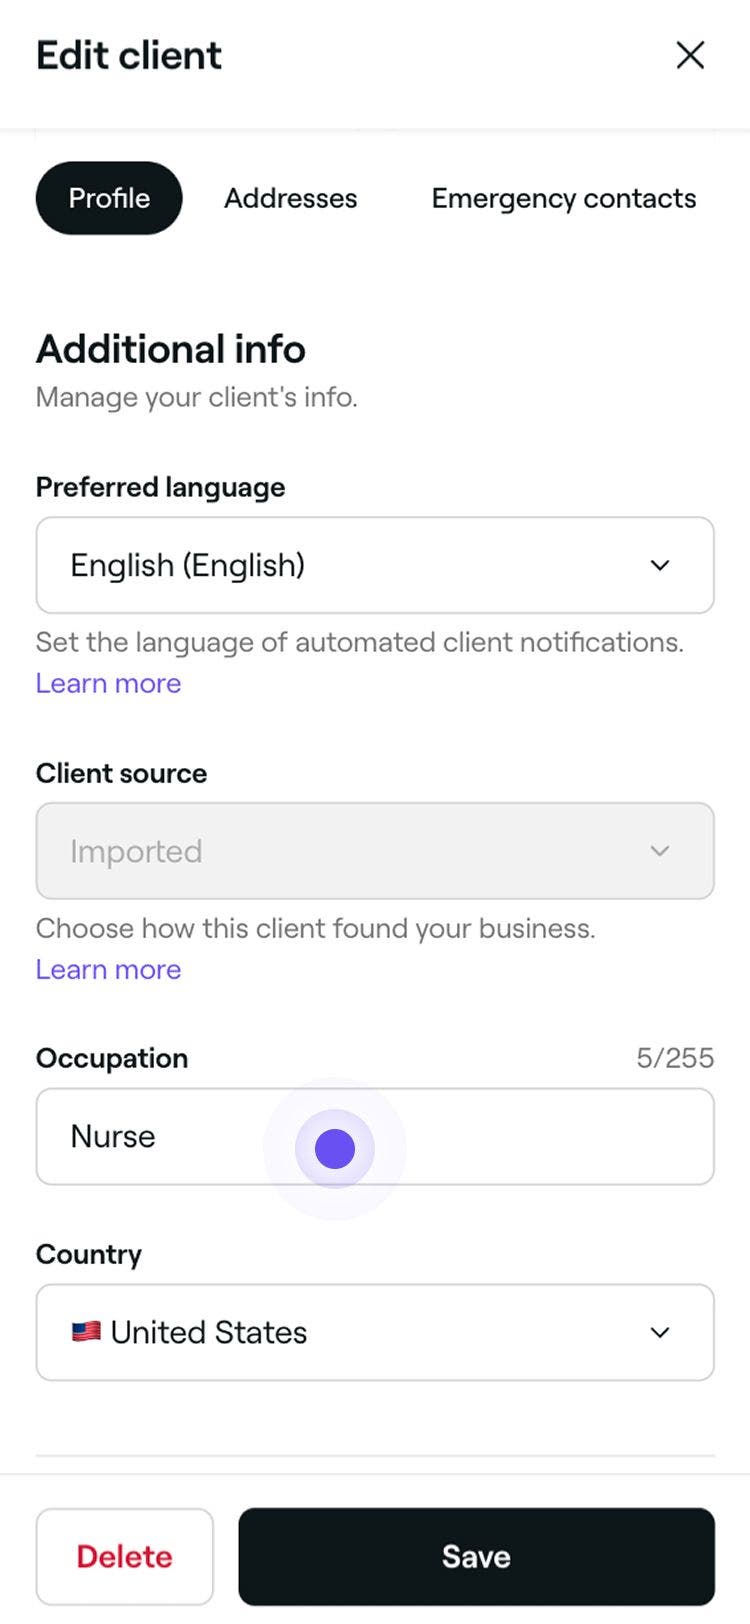
  5. Under Additional info, provide the following details:
    1. Preferred language: Select the language the client prefers to receive automated messages in.
    2. Client source: Choose how the client discovered your business. You can create new options in your Client source settings.
    3. Occupation, Nationality, and any additional contact details.
      personal_info_mob_5.jpg
  6. Tap on the Save button at the bottom to update the client's profile details.
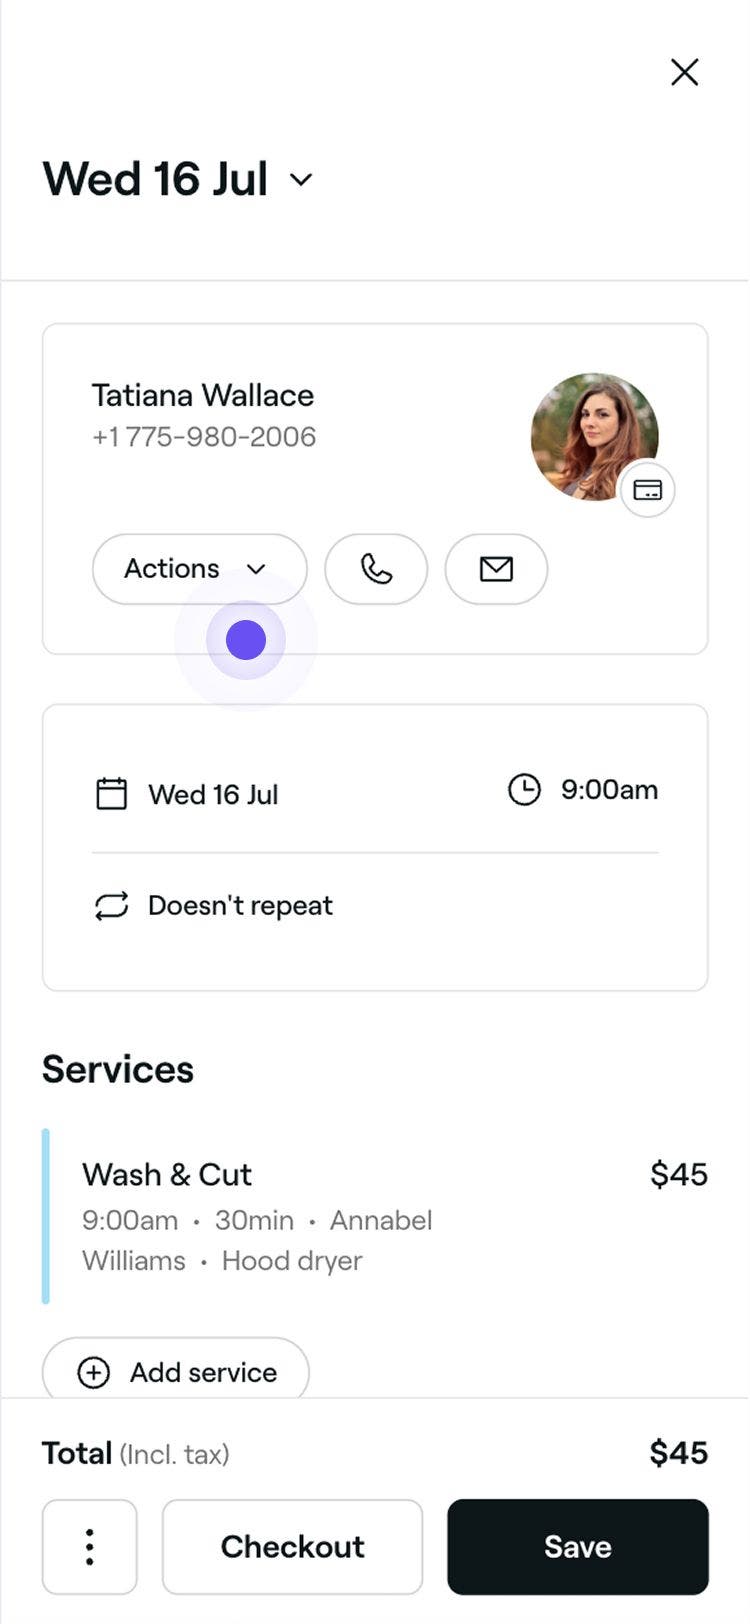
After you save the changes, the client’s profile will show their updated photo, personal details, and contact information.

Clients with a Fresha account can update their own details, and those changes will appear automatically in their profile. If you update their details yourself, your version will only be visible in your workspace and won’t update their marketplace profile.

Add a client's address to their profile

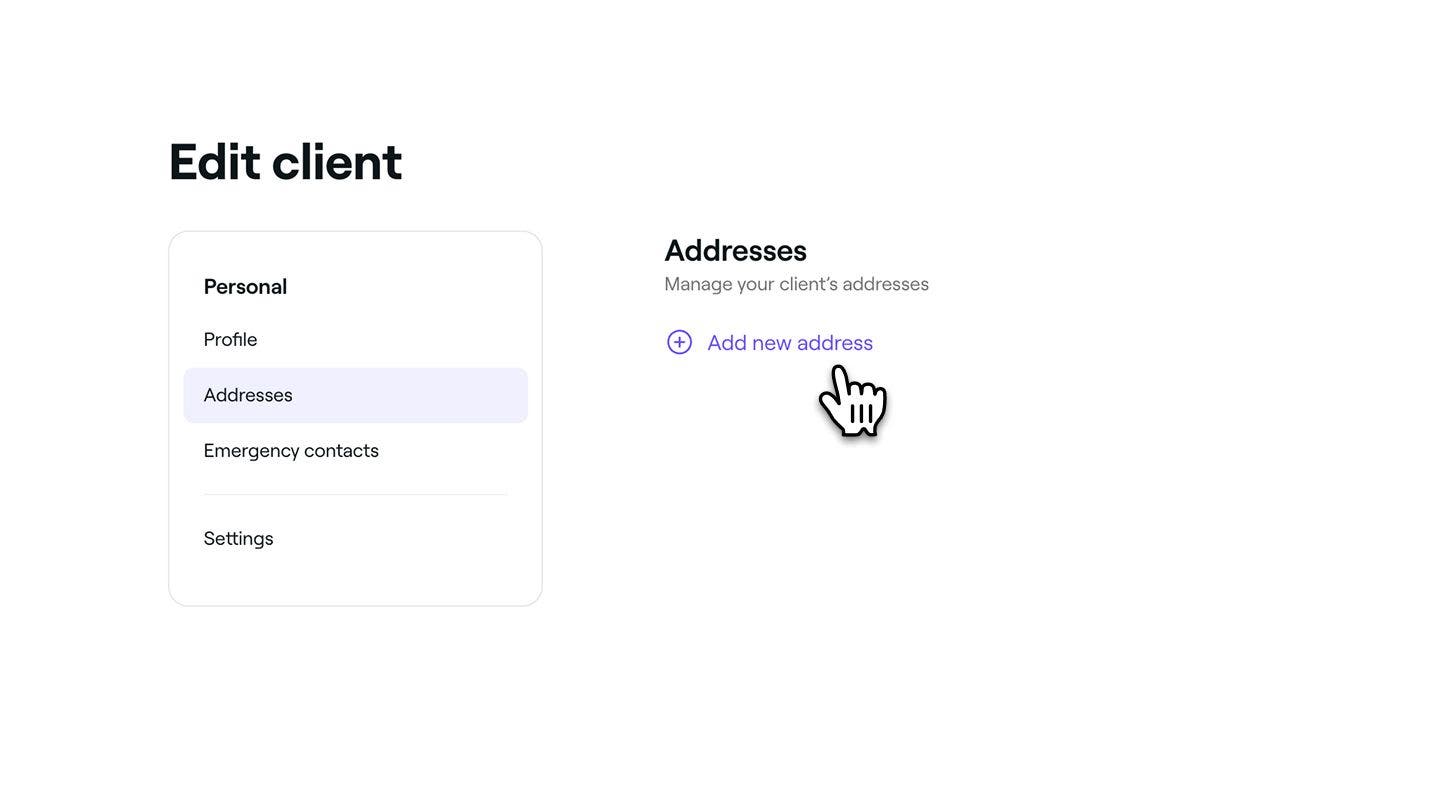
  1. In the Edit client view, select Addresses from the left menu panel and click on Add new address.
    add_address_web_3.jpg
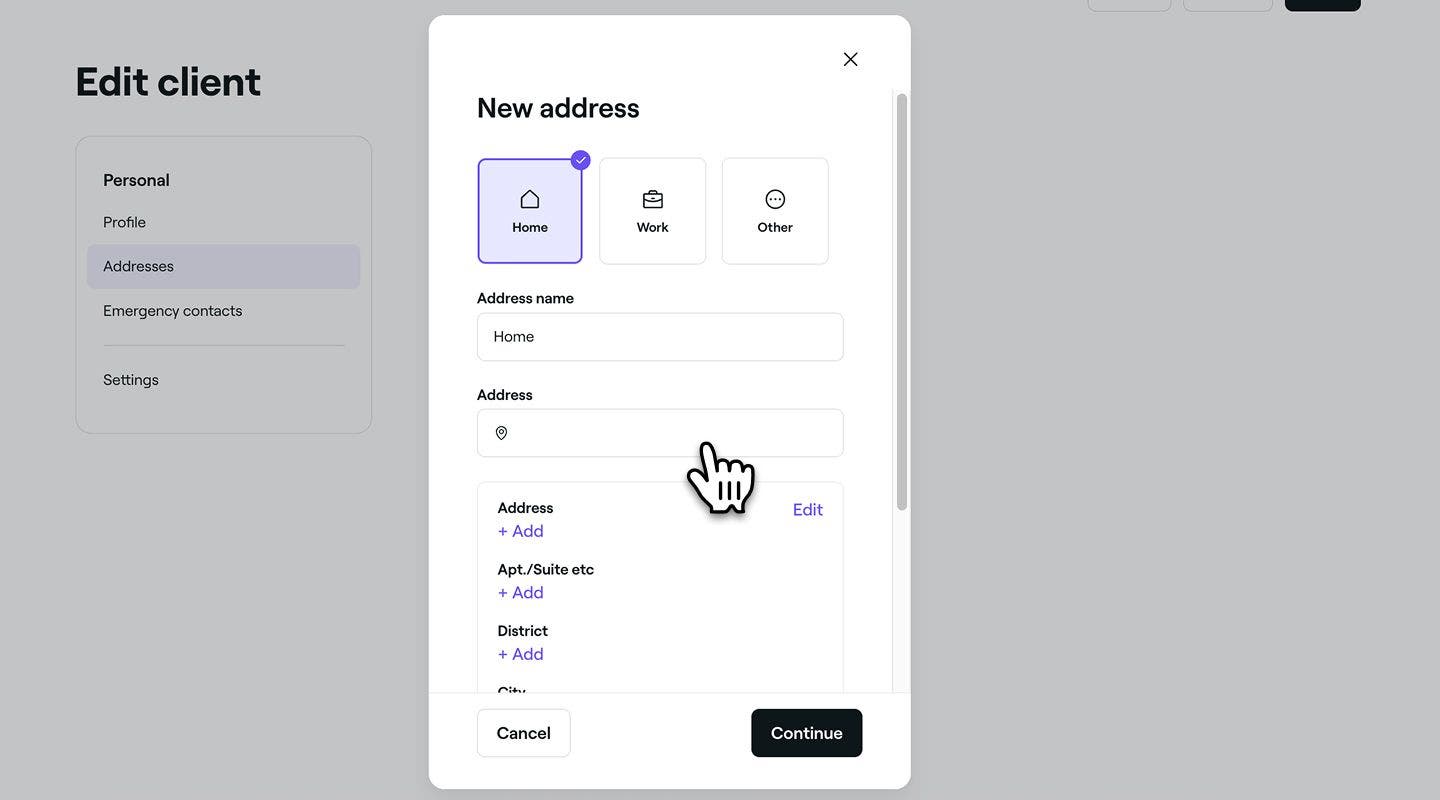
  2. Select an address type in the pop-up, enter the address name, and under Address, start typing the address and select from the suggested options. Once selected, click on the Continue button. 
    add_address_web_4.jpg
  3. Click on the Save button in the top right to update the client's profile details.
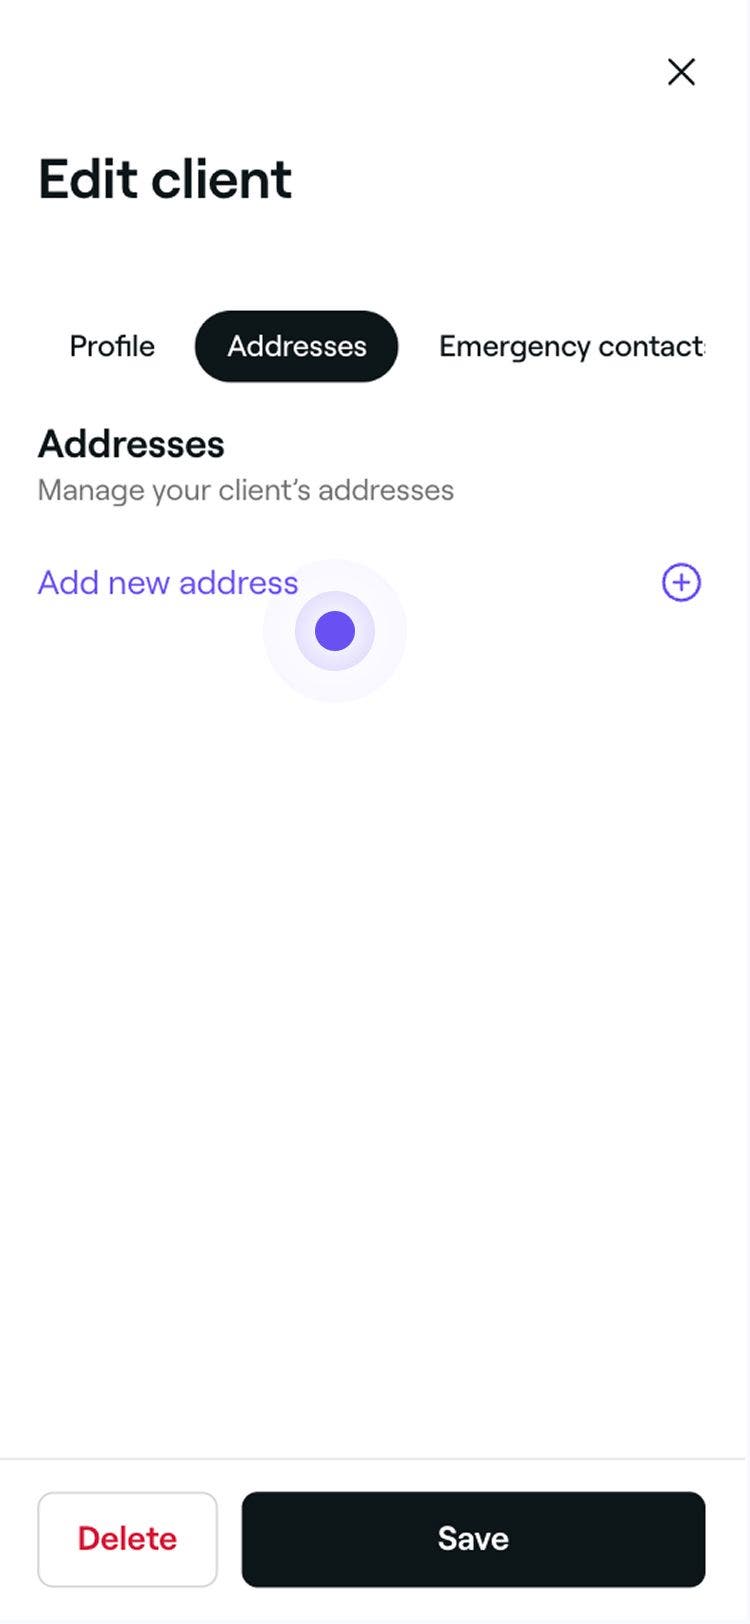
  1. In the Edit client view, select Addresses from the menu bar at the top and tap on Add new address.
    add_address_mob_3.jpg
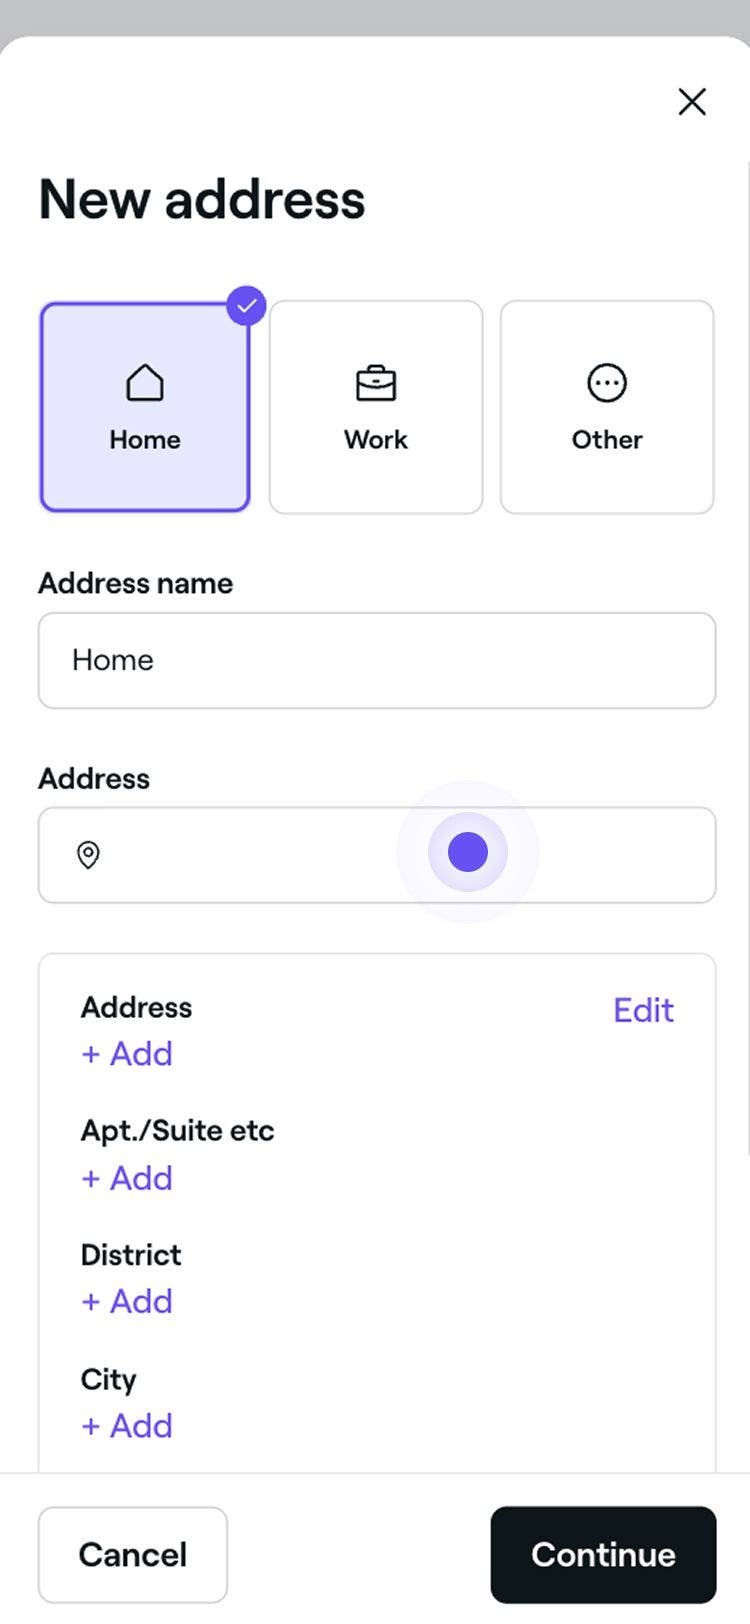
  2. Select an address type in the pop-up, enter the address name, and under Address, start typing the address and select from the suggested options. Once selected, tap on the Continue button. 
    add_address_mob_4.jpg
  3. Tap on the Save button at the bottom to update the client's profile details.
After saving, the client’s profile will be updated with the new address.
You can edit or remove the address at any time by following the same steps.

Add emergency contacts for clients

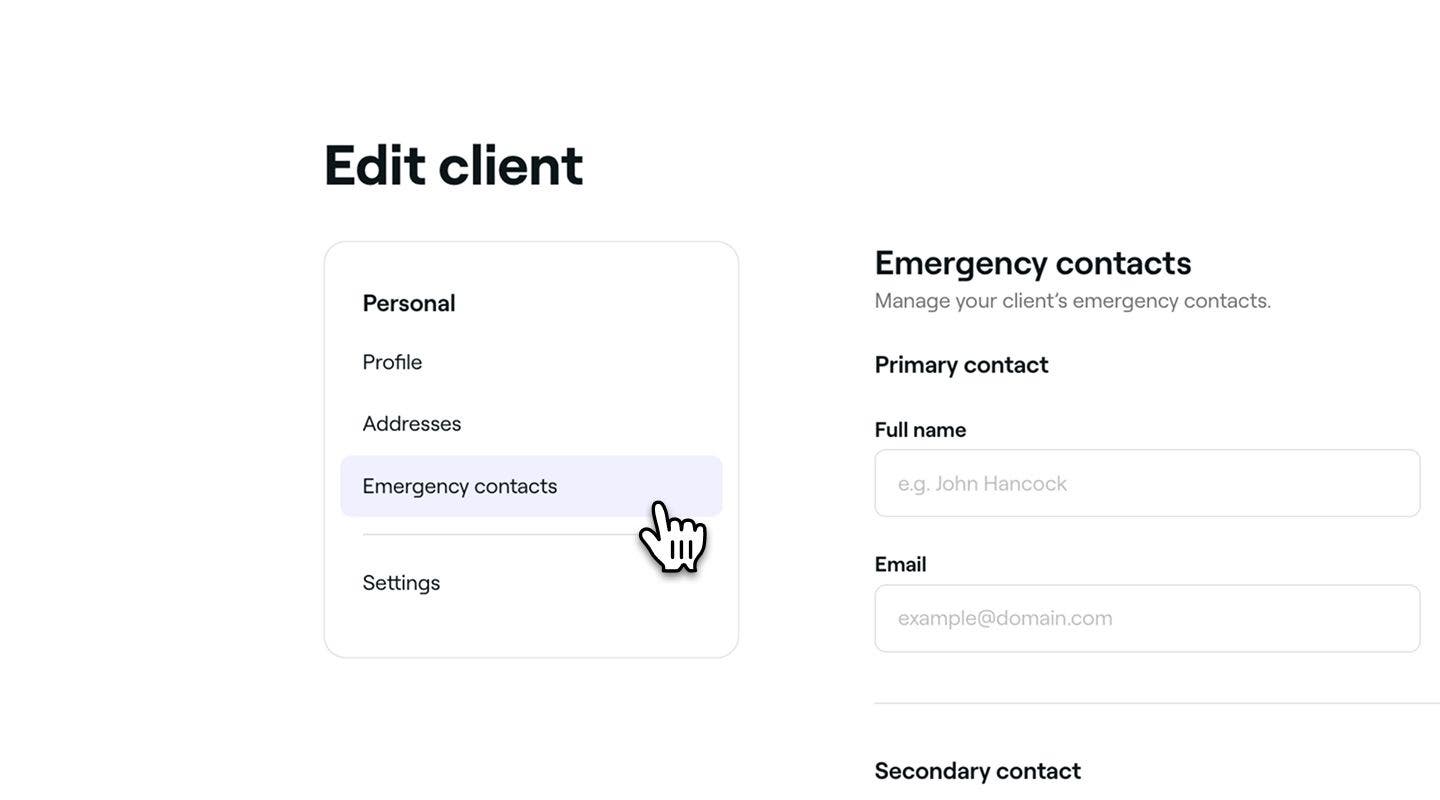
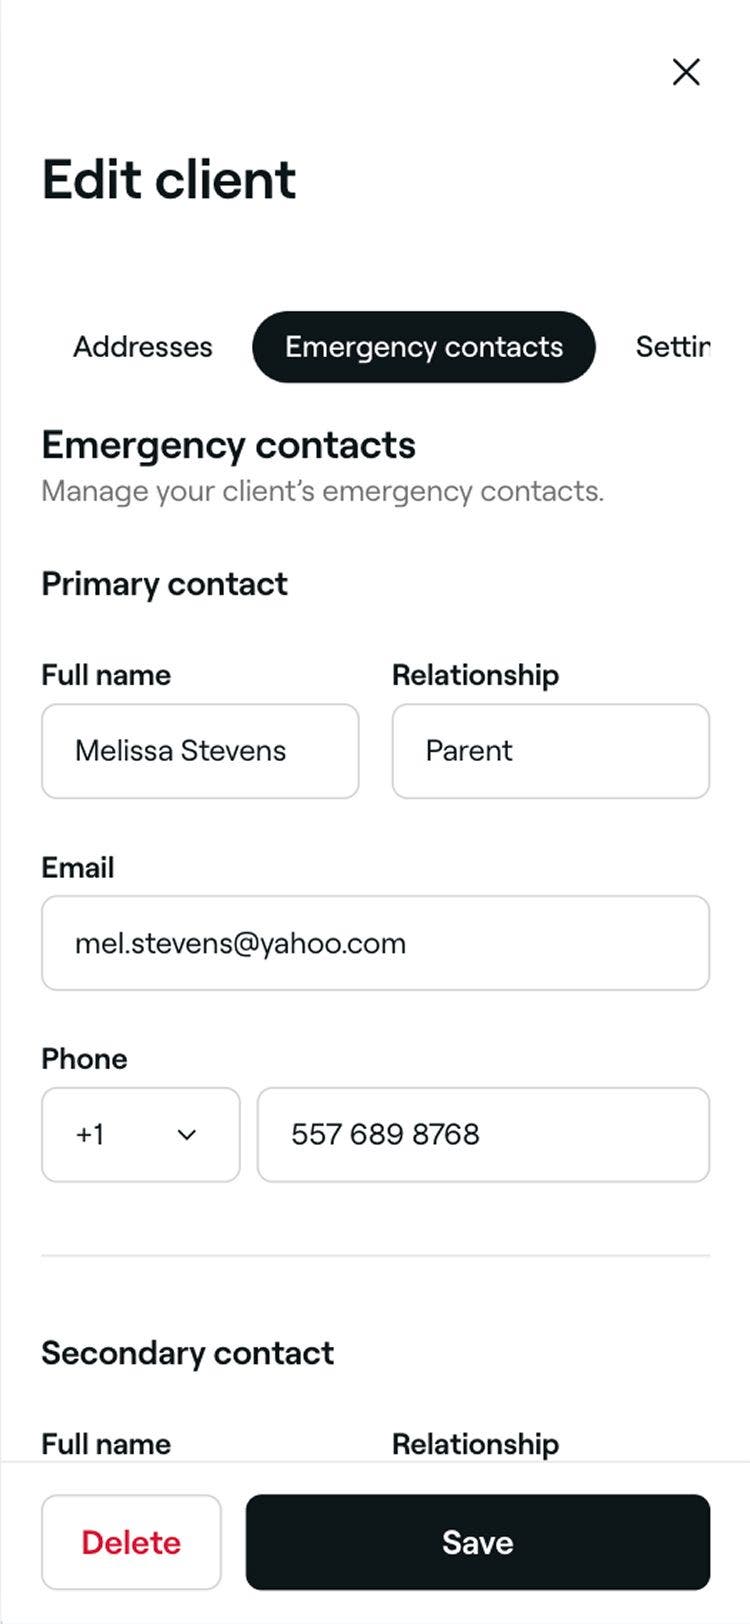
  1. In the Edit client view, select Emergency contacts from the left menu panel.
    Add_emergency_contact_web_3.jpg
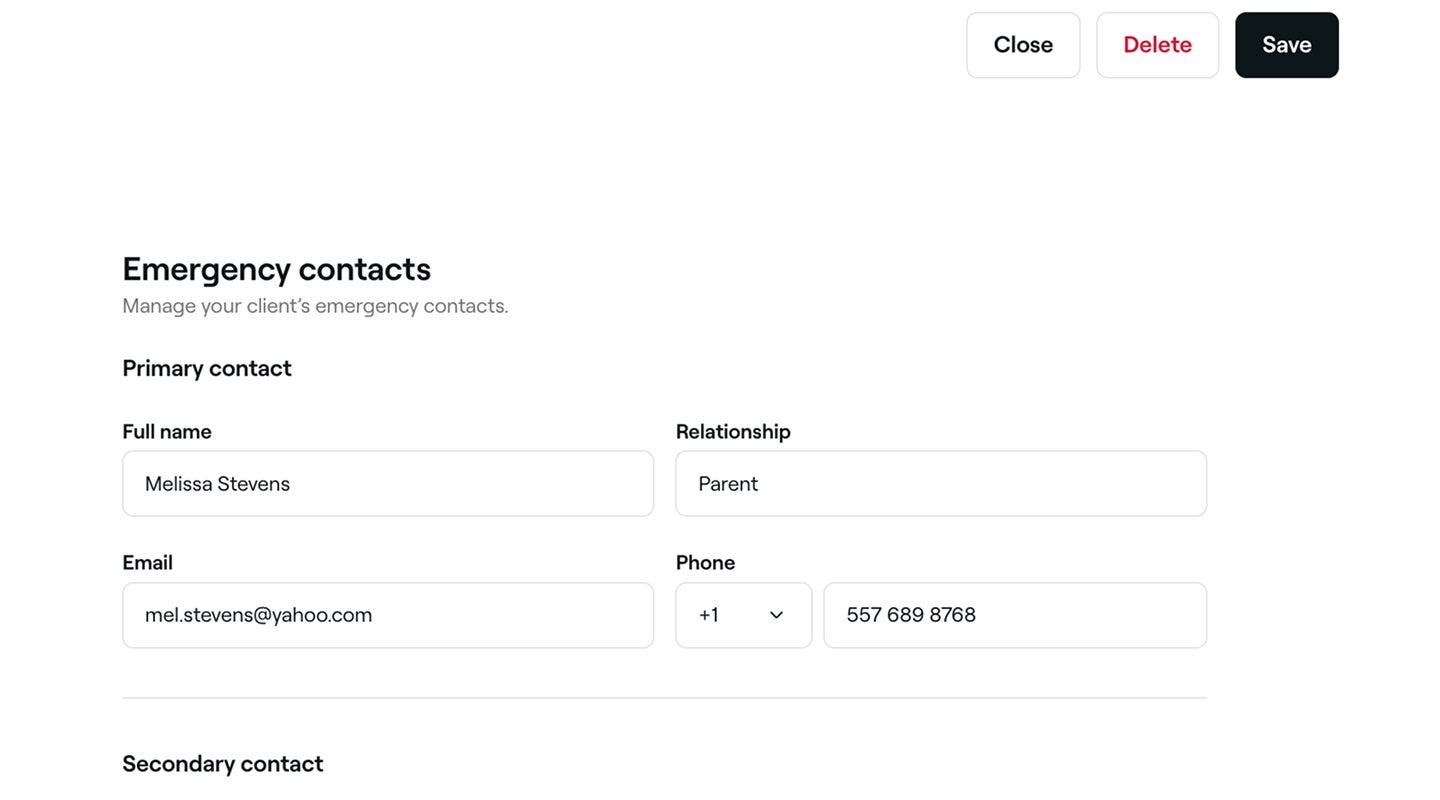
  2. Under Emergency contacts, provide the following details for the Primary and Secondary contact:
    1. Full name: The contact’s first and last name.
    2. Relationship: How they are connected to the client, for example partner, parent, friend.
    3. Email: A valid email address
    4. Phone:  A contact number
      Add_emergency_contact_web_4.jpg
  3. Click on the Save button in the top right to update the client's profile details.
  1. In the Edit client view, select Emergency contacts from the menu bar at the top.  
  2. Under Emergency contacts, provide the following details for the Primary and Secondary contact:
    1. Full name: The contact’s first and last name.
    2. Relationship: How they are connected to the client, for example, partner, parent, friend.
    3. Email: A valid email address
    4. Phone:  A contact number
      Add_emergency_contact_mob_4.jpg
  3. Tap on the Save button at the bottom to update the client's profile details.
Once saved, the emergency contact will be added to the client's profile. You can update it at any time by following the same steps.

Update a client's settings

You can manage a client’s settings for appointment updates, marketing messages, and upfront payment requirements directly from their profile.

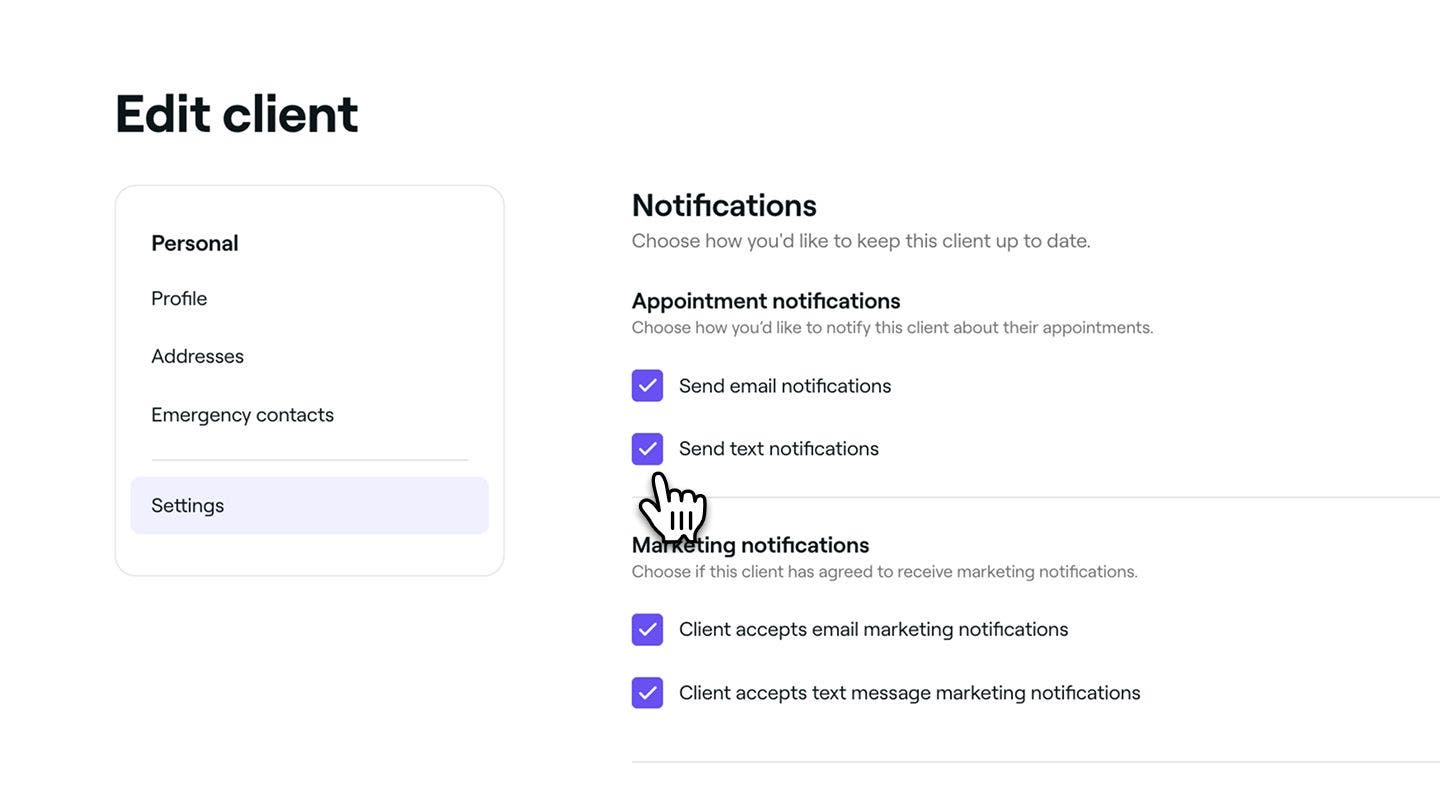
  1. In the Edit client view, select Settings from the left menu panel.
  2. Under Appointment notifications and Marketing notifications, tick the checkboxes to choose whether the client receives updates by email, text message, or both.
    client_settings_web_4.jpg
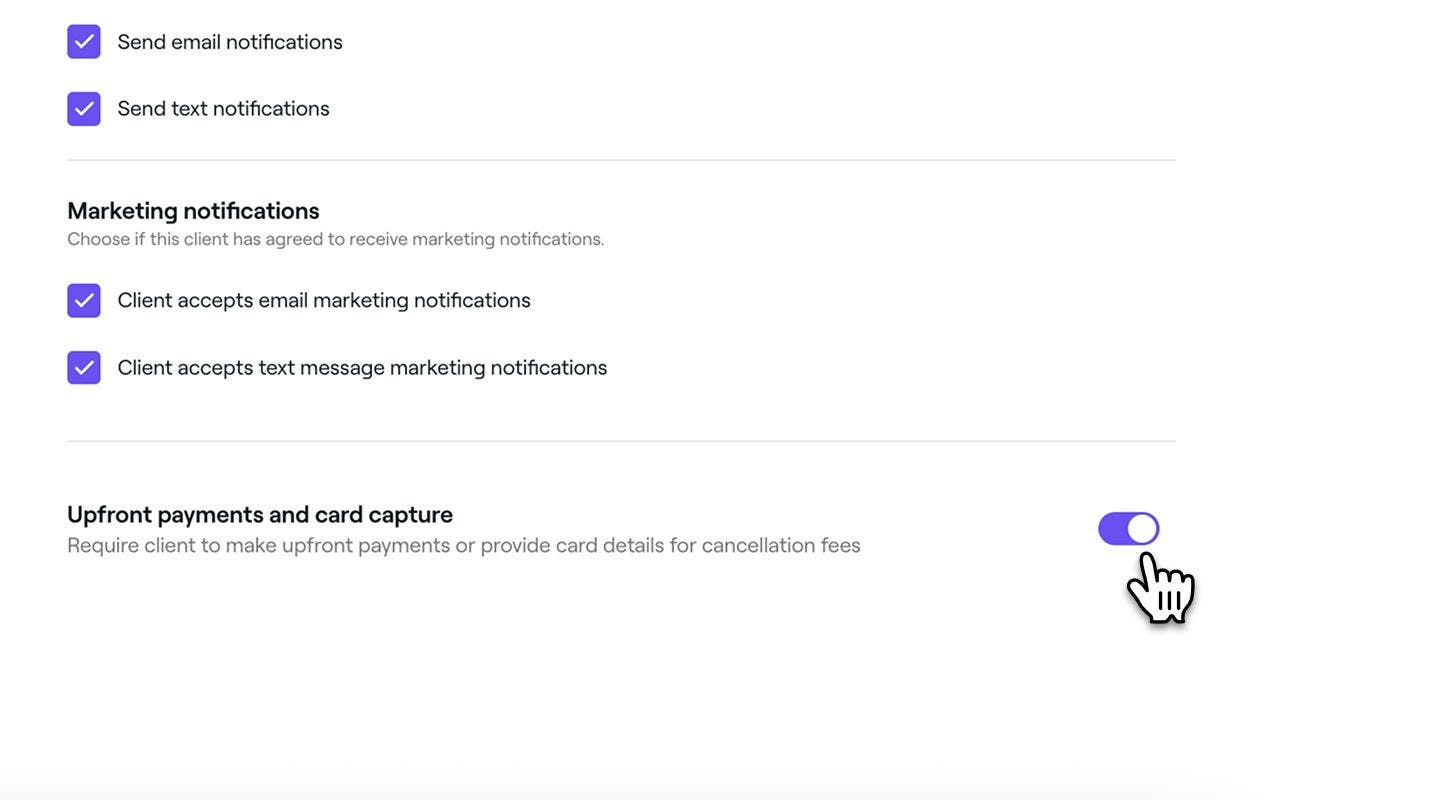
  3. If payment processing is enabled, use the toggle under Upfront payments and card capture to require the client to pay in advance or confirm the booking with a card.
    client_settings_web_5.jpg
  4. Click on the Save button in the top right to update the client's profile details.
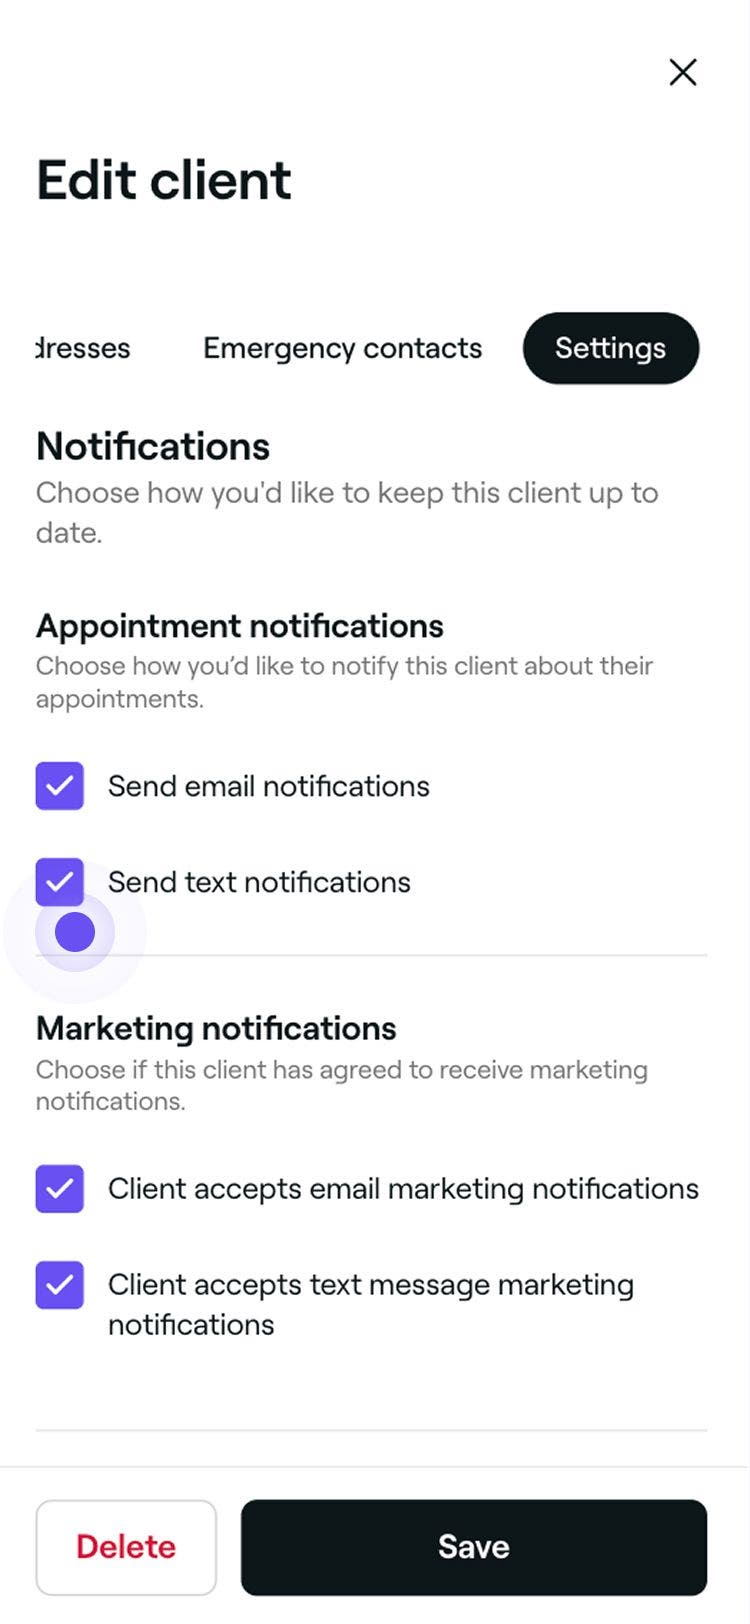
  1. In the Edit client view, select Settings from the menu bar at the top.
  2. Under Appointment notifications and Marketing notifications, tick the checkboxes to choose whether the client receives updates by email, text message, or both.
    client_settings_mob_4.jpg
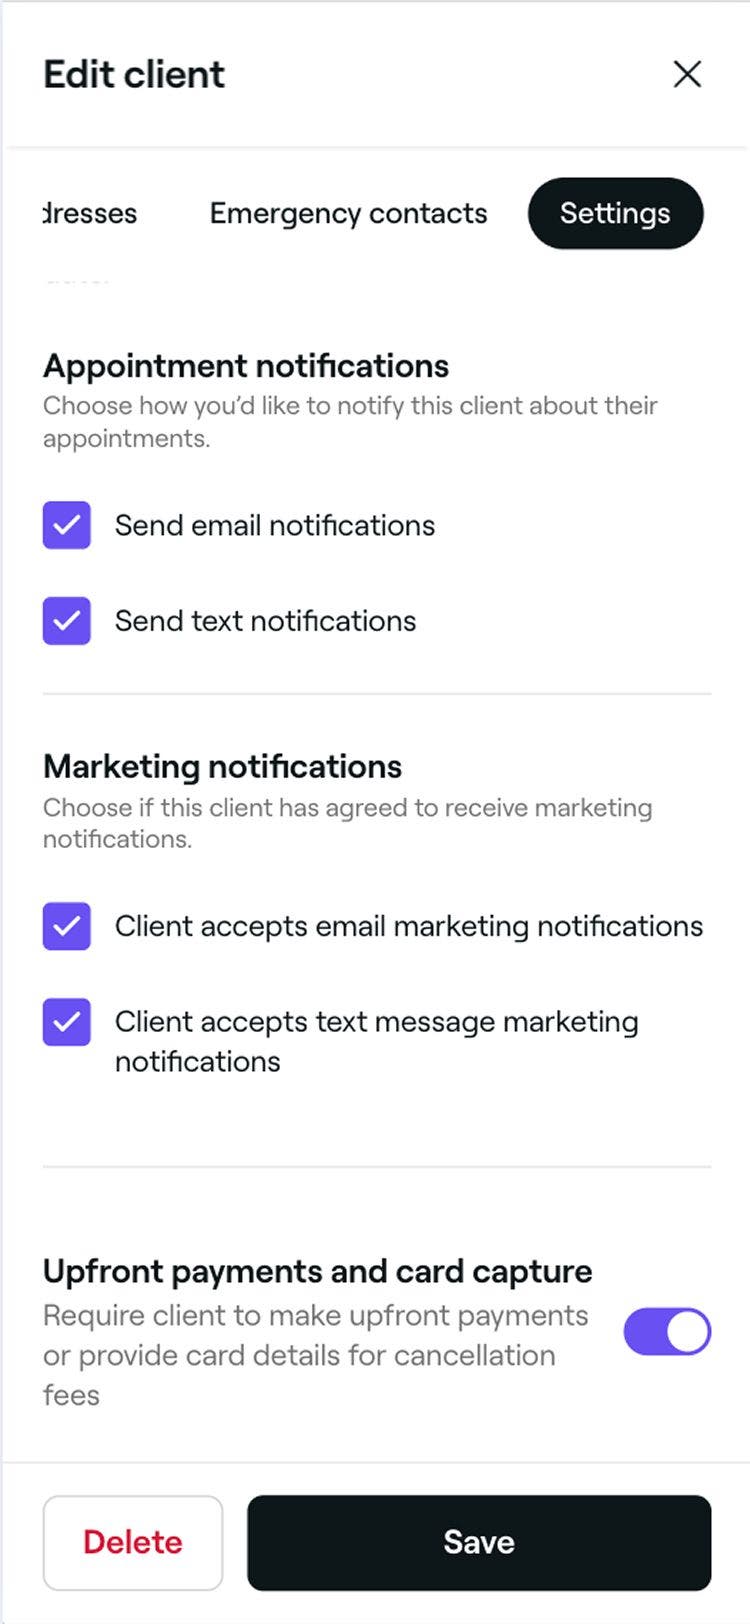
  3. If payment processing is enabled, use the toggle under Upfront payments and card capture to require the client to pay in advance or confirm the booking with a card.
    clinet_settings_mob_5.jpg
  4. Tap on the Save button at the bottom to update the client's profile details.
Saving the changes updates the client’s notification and payment settings for future appointments.

FAQs

    • You can choose which channels you want to use to send marketing messages to a client from their client profile. Clients separately control whether they want to receive marketing from your business.

      Marketing messages are only sent through a channel when you've enabled it and the client is subscribed. If a client unsubscribes, they need to update their own preferences in order to receive marketing from your business again.

      An asterisk (*) next to a client’s contact details means the information was manually updated and may differ from their Fresha marketplace profile. You can restore the original details by selecting Restore original details in the client’s profile.

      Check past appointments, as the client profile might have been deleted by a team member or by the client. Also, check your Profile settings to make sure you’re logged into the correct Fresha account with the right email.

      The ticks next to your client's name, phone number, and email address show whether they have a Fresha account and which contact details have been verified. A tick next to your client's name means they have a Fresha account, while ticks next to their phone number or email address indicate which contact details have been verified.

      You can update your client's email address or phone number at any time. Open Clients, select the Actions button, then choose Edit client details. Under Email or Phone, update the contact details as needed. If you want to restore the client's verified contact information, select Reset below the field.


Client profiles


Related articles

Fresha academy courses
Course video preview

Manage your clients

5 lessons•9 mins

See all courses

Was this guide helpful?

Client profiles

Create client profiles

Add new clients to your business and keep their information organized in one place.

Update client details

Update client information for accurate records and improved service.

Assign tags to clients

Create tags and assign them to clients to identify and target key client groups.

Add notes to client profiles

Keep important client information organized by storing notes in their profiles.

Add files to client profiles

Store documents and images directly in client profiles.

Add staff alerts to client profiles

Enhance client management by adding staff alerts to highlight key information.

Record an allergy

Store client allergy information and keep your team informed for safety.

Record client patch tests

Incorporating patch tests for certain services to detect potential allergies.

View client history

Track client activity with ease by viewing a client's appointments, sales, and purchased items.

Manage client wallets

View a client's wallet balance and transaction history for better financial management.

Manage client rewards

Set up rewards that clients can earn with points, reach through tiers, or receive manually.

Add client referrals manually

Manually add client referrals in client profiles, so you always know who’s bringing new clients to your business.

Block clients from booking

Restrict online booking for clients who have missed multiple appointments.

Delete client profiles

Manage your client list by permanently deleting clients who no longer book with you.

Related articles

Create your online profile

Manage your Fresha marketplace profile to attract new clients and showcase your business effectively.

Create client profiles

Add new clients to your business and keep their information organized in one place.

Marketplace new client fees

The Marketplace New Client Fee is a one-time charge per new client from the marketplace.

Fresha academy courses
Course video preview

Manage your clients

5 lessons•9 mins

See all courses
Fresha
Get the app

About Fresha

Careers

Help and support

Blog

Sitemap

For business

For partners

Pricing

Features

Scheduling

Point of sale

Payments

Capital

Marketplace

Support

Status

Legal

Privacy Policy

Terms of service

Terms of use

Find us on social

Facebook
Linkedin
Instagram

© 2026 Fresha.com SV Ltd