HomeKnowledge baseFresha academy
Track how clients discover your business
Back
  1. Knowledge base•
  2. Clients•
  3. Track how clients discover your business

Track how clients discover your business

In this guide, you’ll learn to create client sources to help understand your client base better.

In this article

  • How client sources work
  • Add a new client source
  • Adjust the client source in a profile
  • Reporting on client sources

How client sources work

Client sources help you track how clients discovered your business. They appear in each client’s profile and in the Client list report, giving you insight into which channels bring in the most clients.  There are default sources already like Marketplace, Walk-in, and Book now link, but you can add new ones anytime.

Add a new client source

  1. From the main menu on the left of your screen, go to Settings.
  2. Click on the Clients category to manage your client source settings.  Client settings fresha.jpg
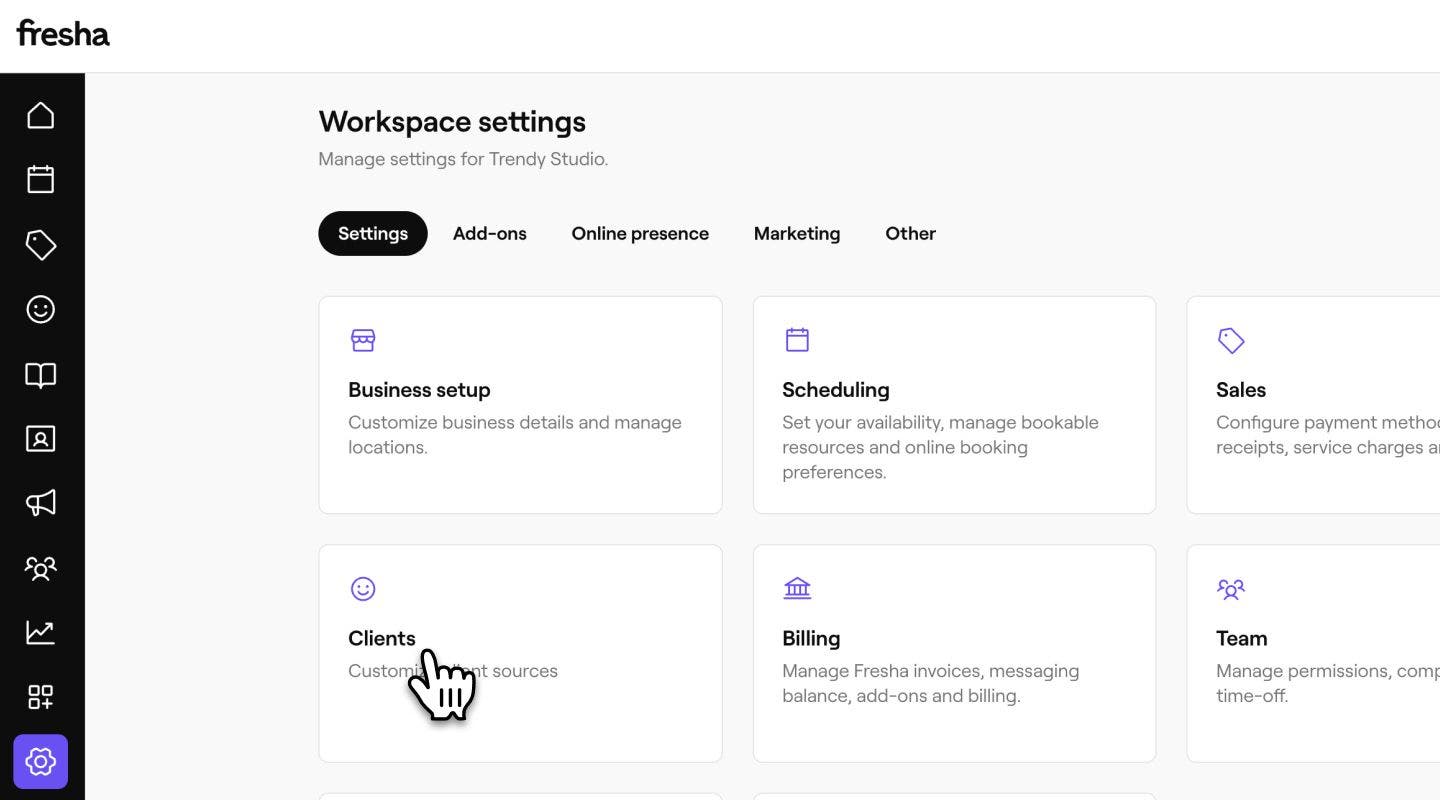
  3. In the left menu panel, select Client sources to view and manage your list of sources. 
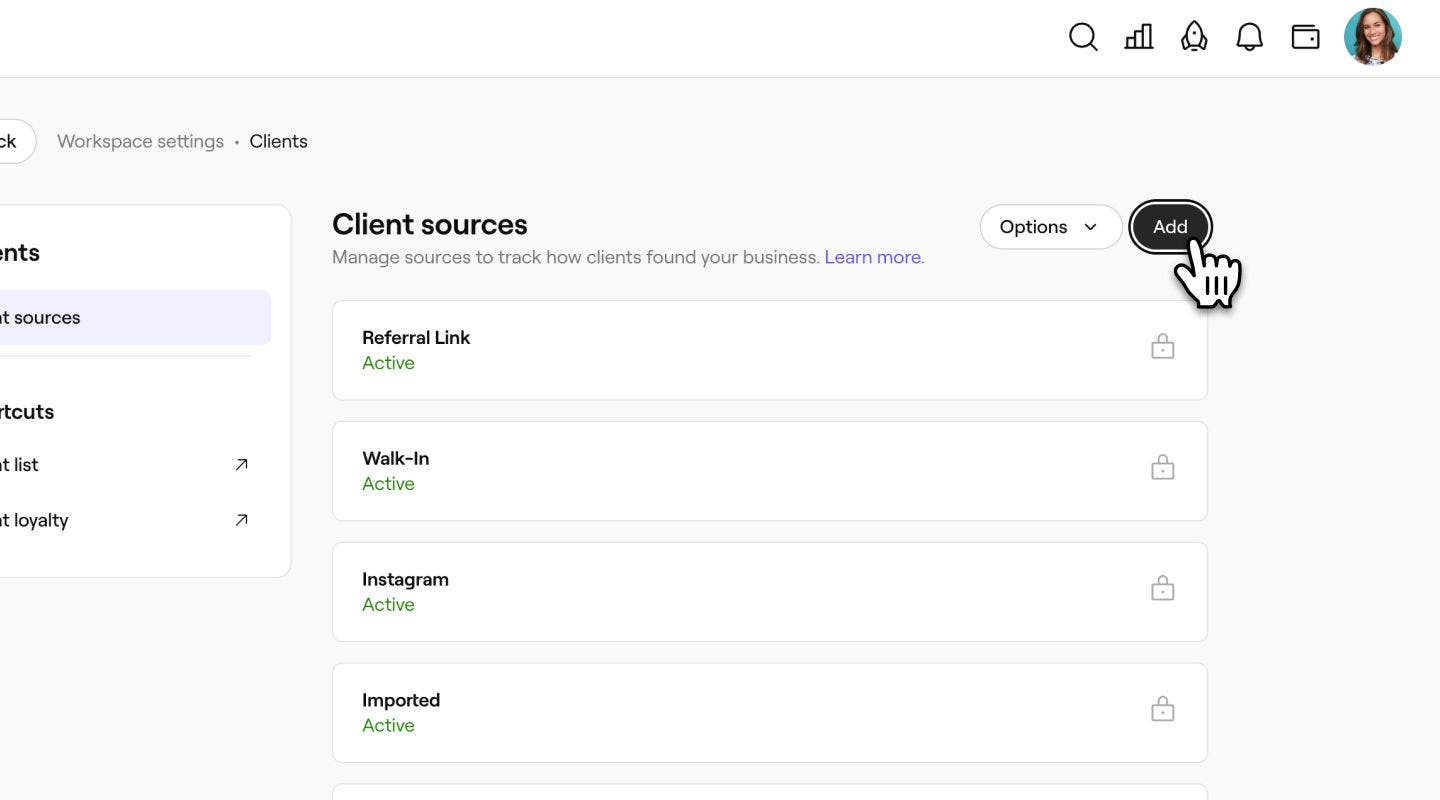
  4. In the top right of the sources list, click on the Add button to create a new source. Add new client source Fresha.jpg
  5. In the Add client sources view, enter a Client source name. Name new client source Fresha.jpg
  6. Click on the Add button in the top right to save the new source.
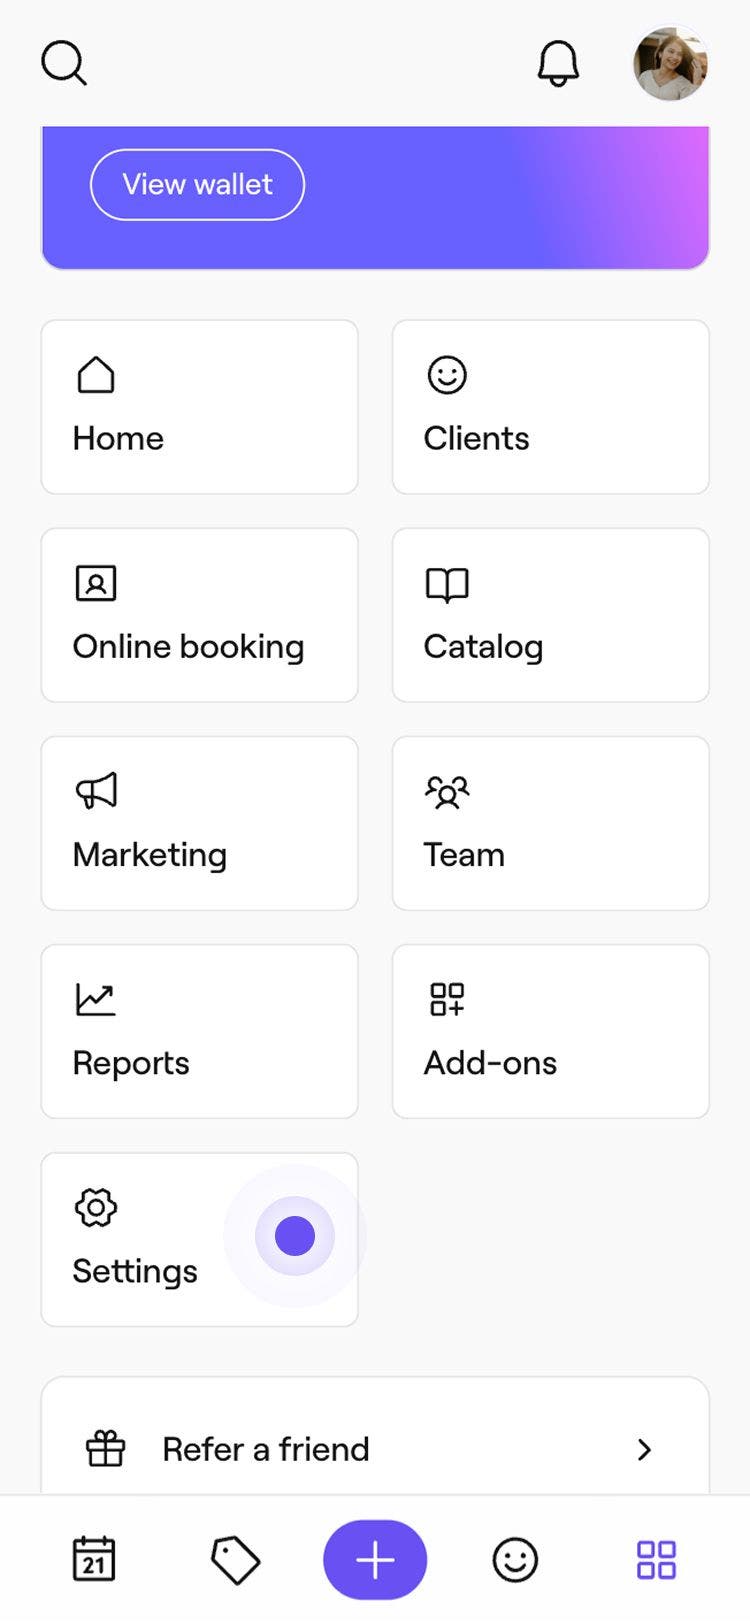
  1. From the main menu at the bottom of your device, tap on the More icon and open Settings.Group 193.jpg
  2. Tap on Clients to manage your client source settings. 
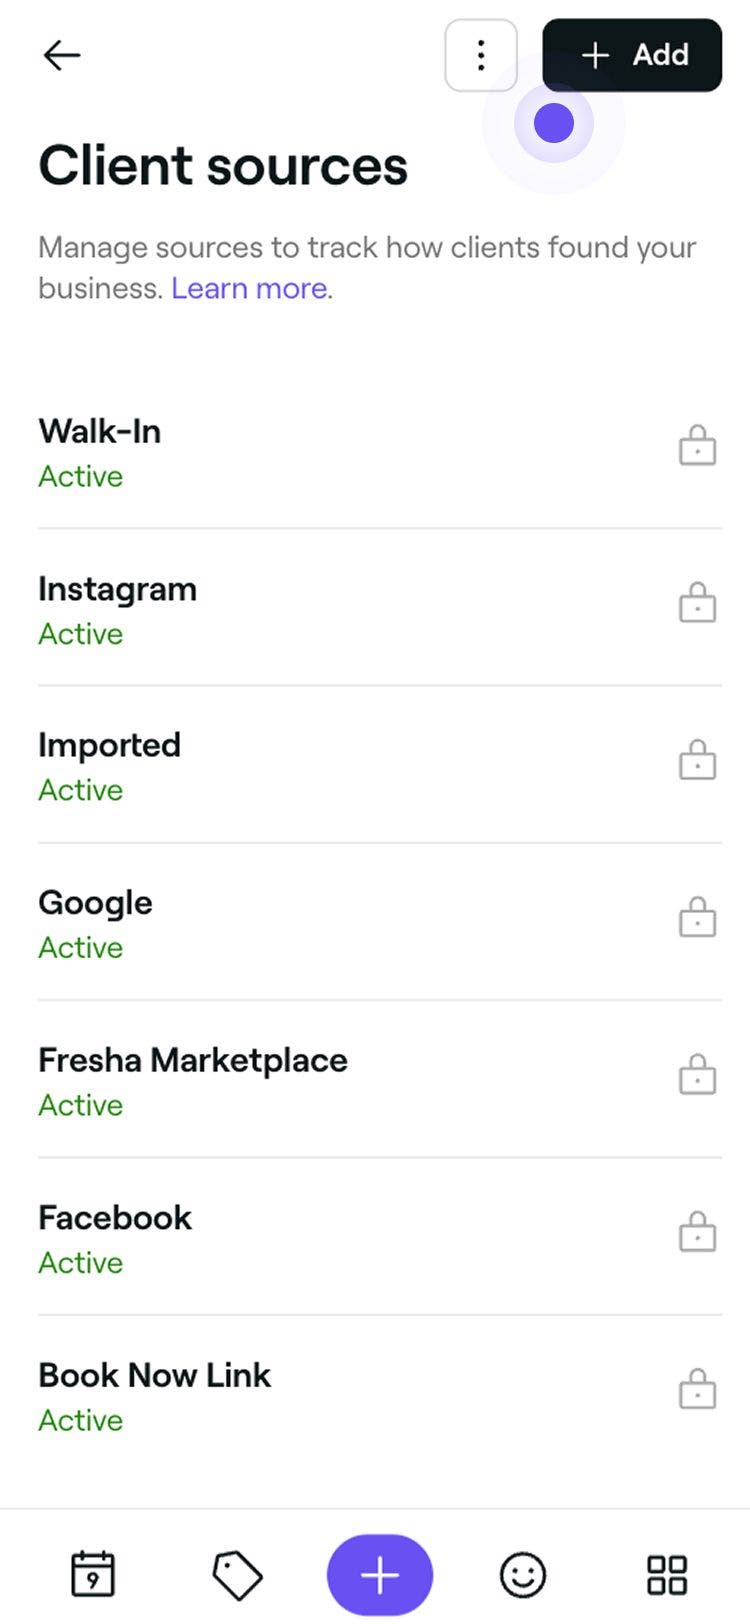
  3. In the menu, select Client sources to view and manage your list of sources.
  4. In the top right of the sources list, tap on the Add button to create a new source.
    client_sources_mob_4.jpg
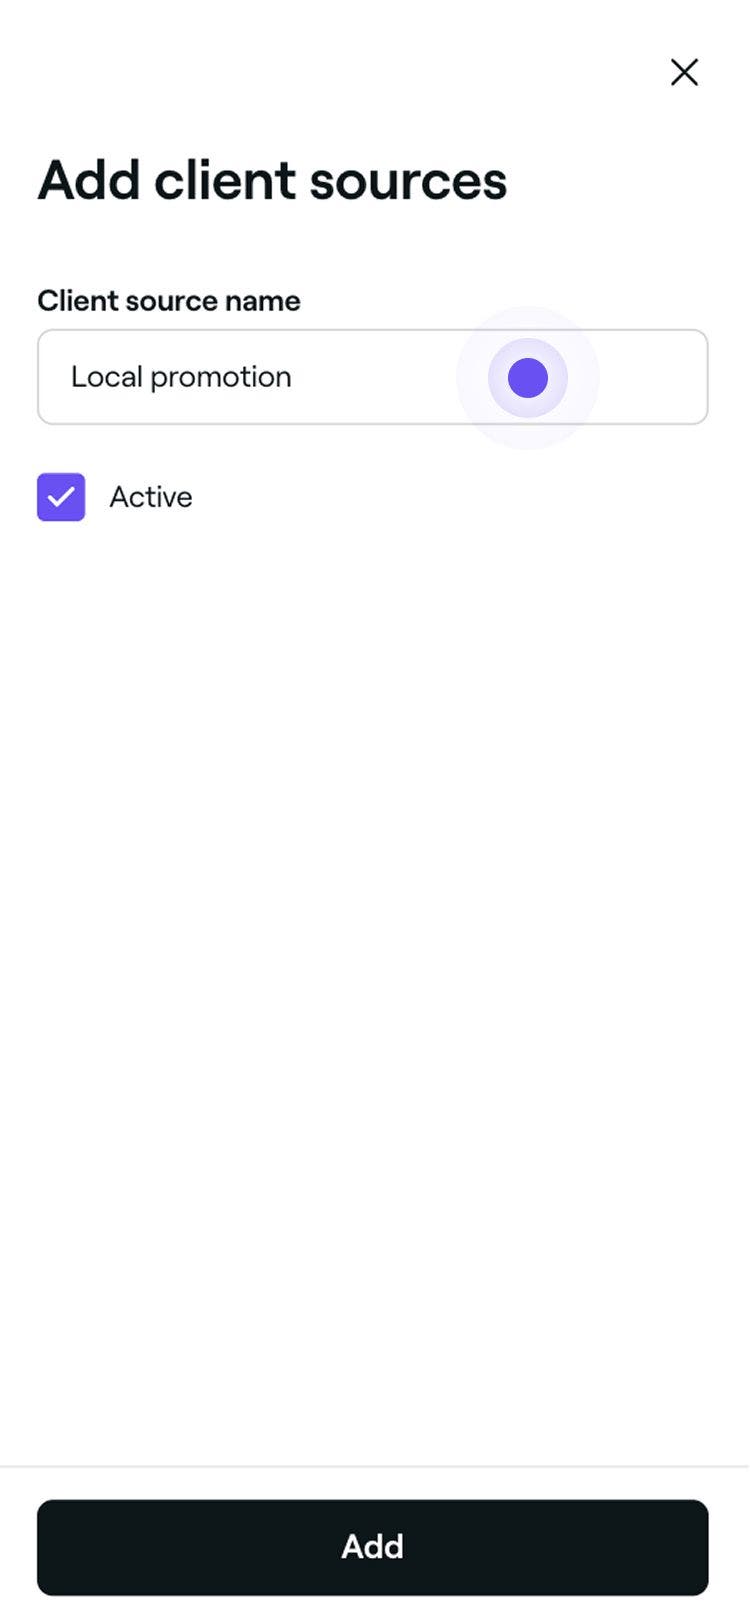
  5. In the Add client sources view, enter a Client source name.
    client_sources_mob_5.jpg
  6. Tap on the Add button at the bottom to save the new source.

Once saved, the new client source will appear in your list and can be selected when updating a client’s profile. You can edit, delete, or reorder sources by clicking on Actions next to the source.

Adjust the client source in a profile

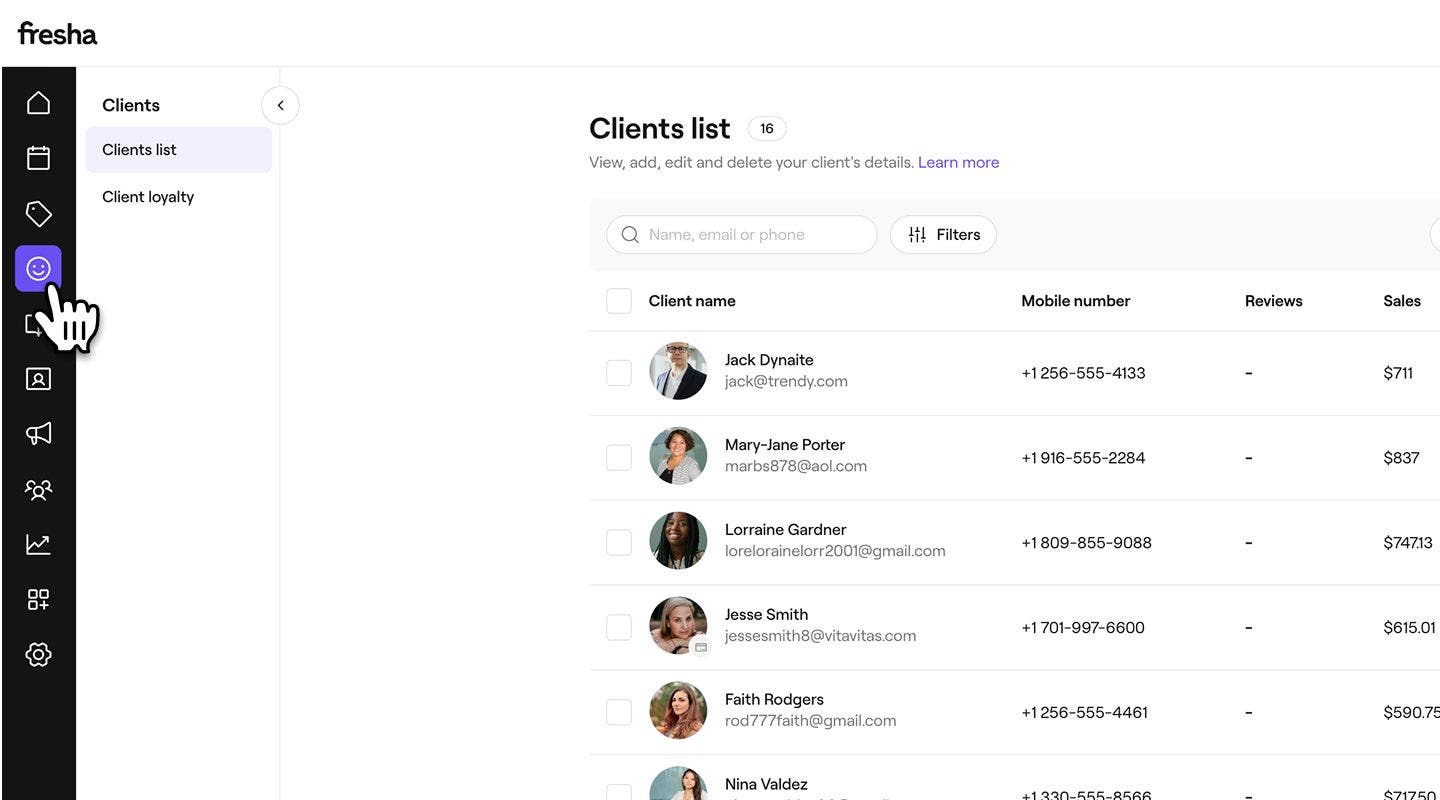
  1. From the main menu on the left of your screen, go to Clients.
  2. Select Clients list from the left menu panel.
    Adjust_client_source_web_1.jpg
  3. Select a client from your client list to open their profile. 
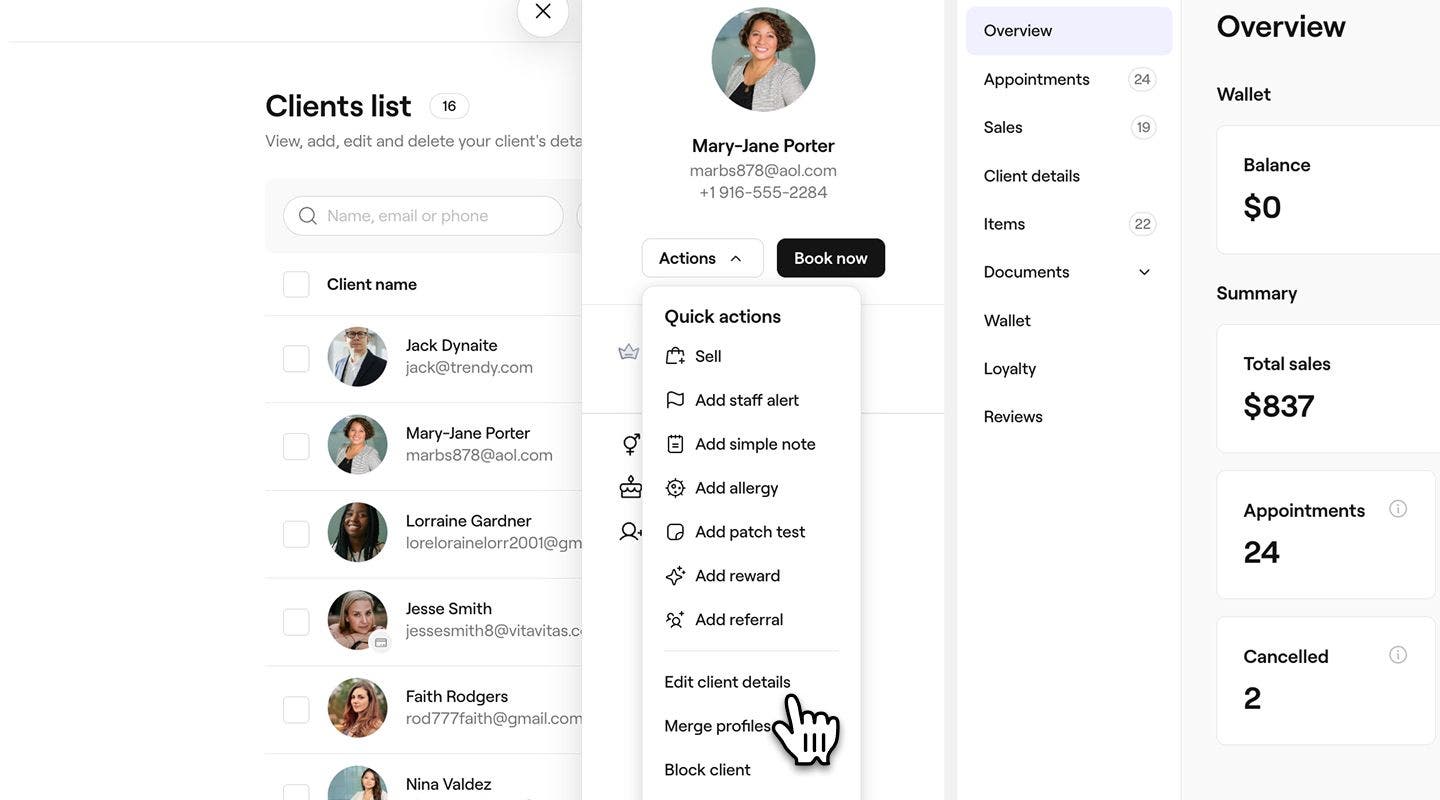
  4. In the left panel of the client view, click the Actions button and select Edit client details. 
    Adjust_client_source_web_3.jpg
  5. In the Edit client view, scroll down to Additional info to adjust the client source. 
  6. Under Client source, use the drop-down to select another source. 
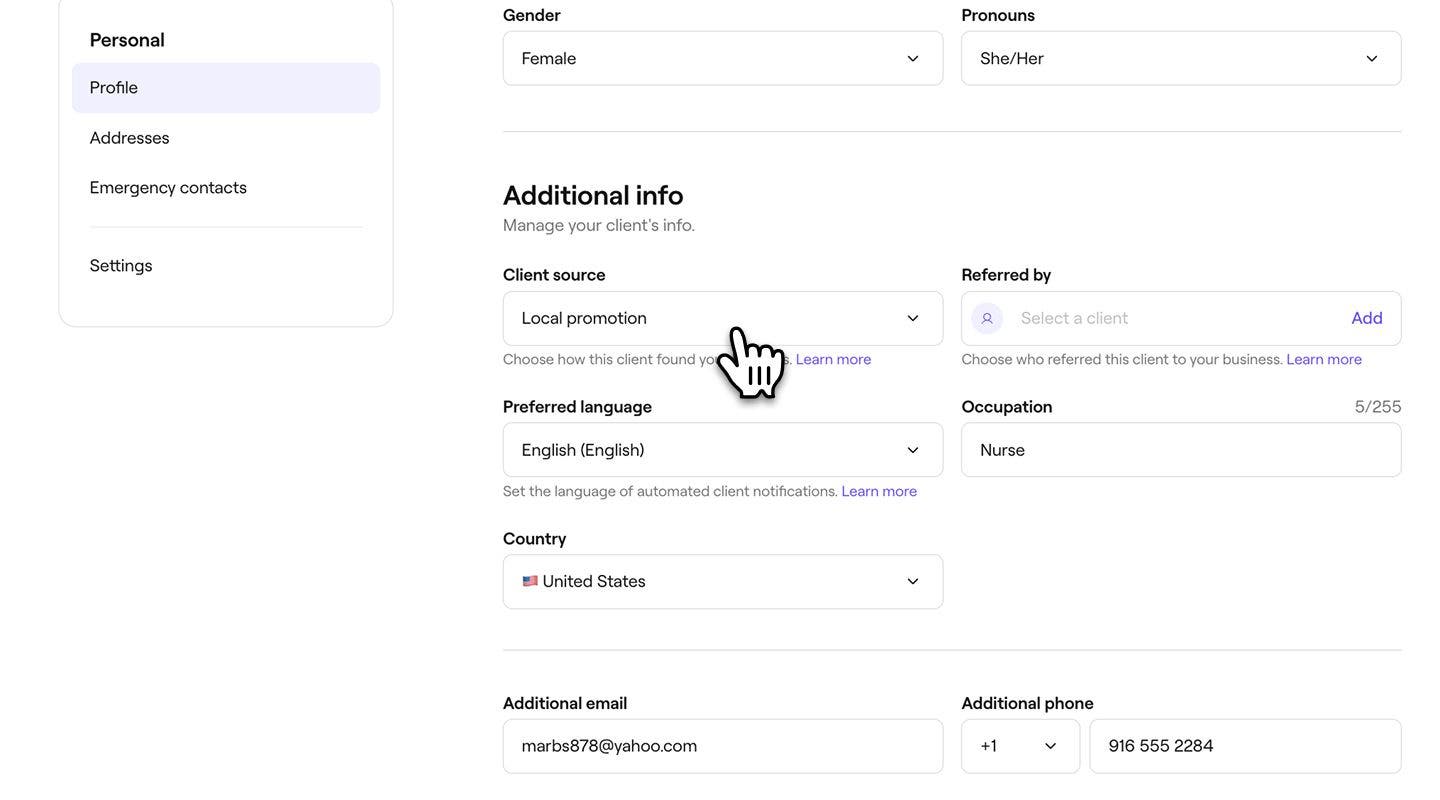
    Adjust_client_source_web_4.jpg
  7. Click on the Save button in the top right to update the client's profile details.
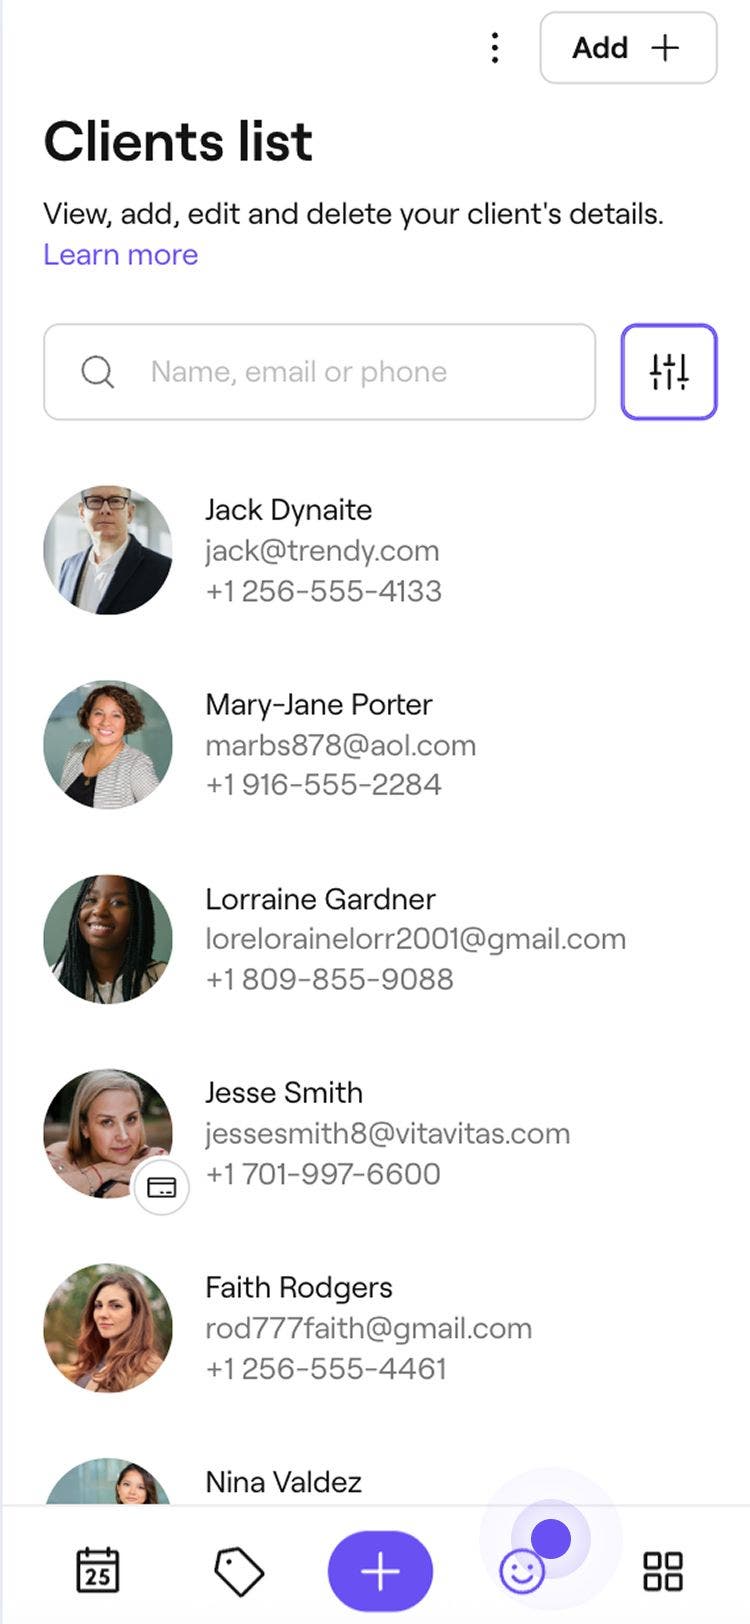
  1. From the main menu at the bottom of your screen, tap on the Client icon to open your Client list.
    Adjust_client_source_mob_1.jpg
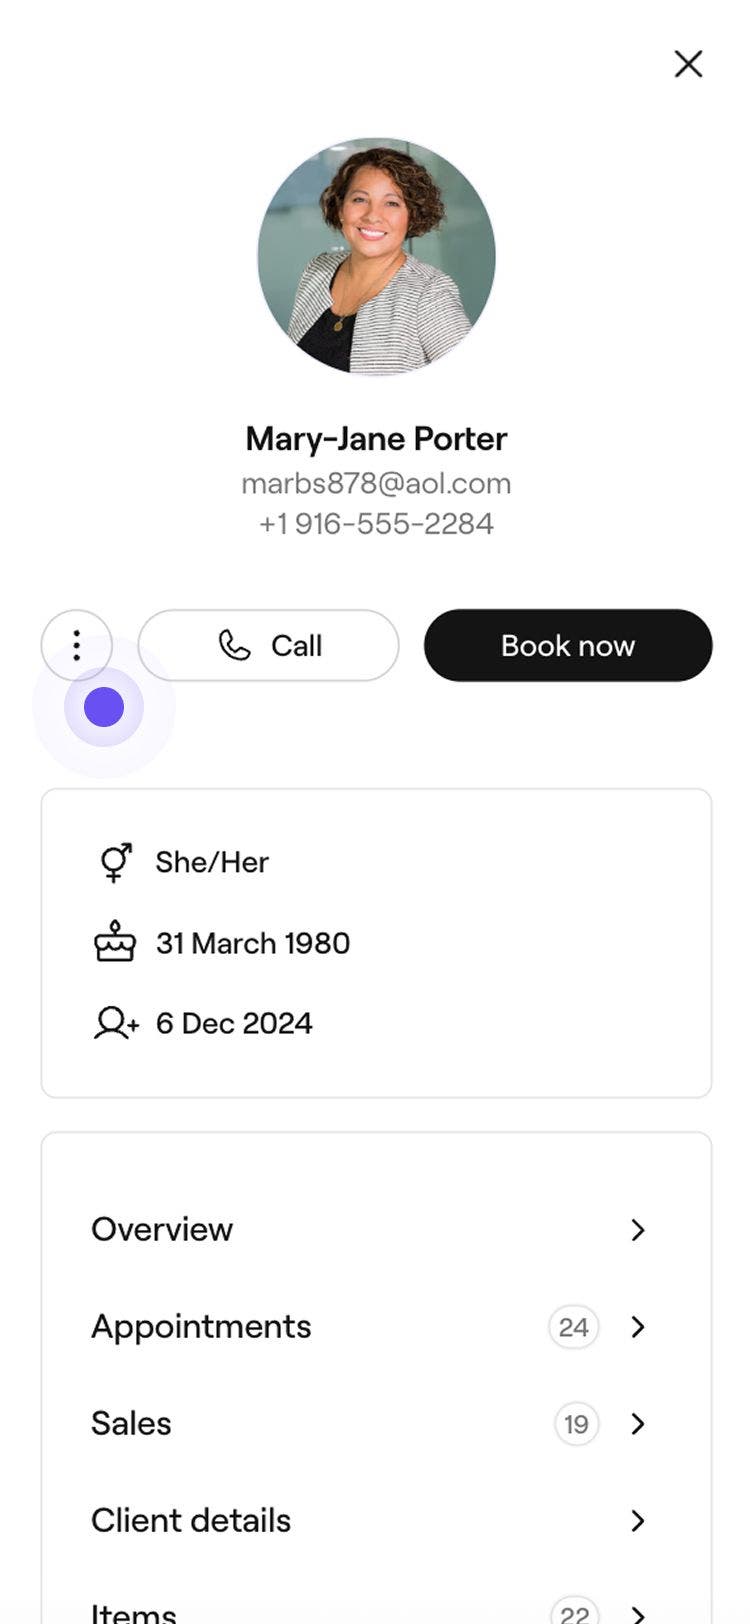
  2. In the client view, tap on Actions (three dots) and select Edit client details.
    Adjust_client_source_mob_2.jpg
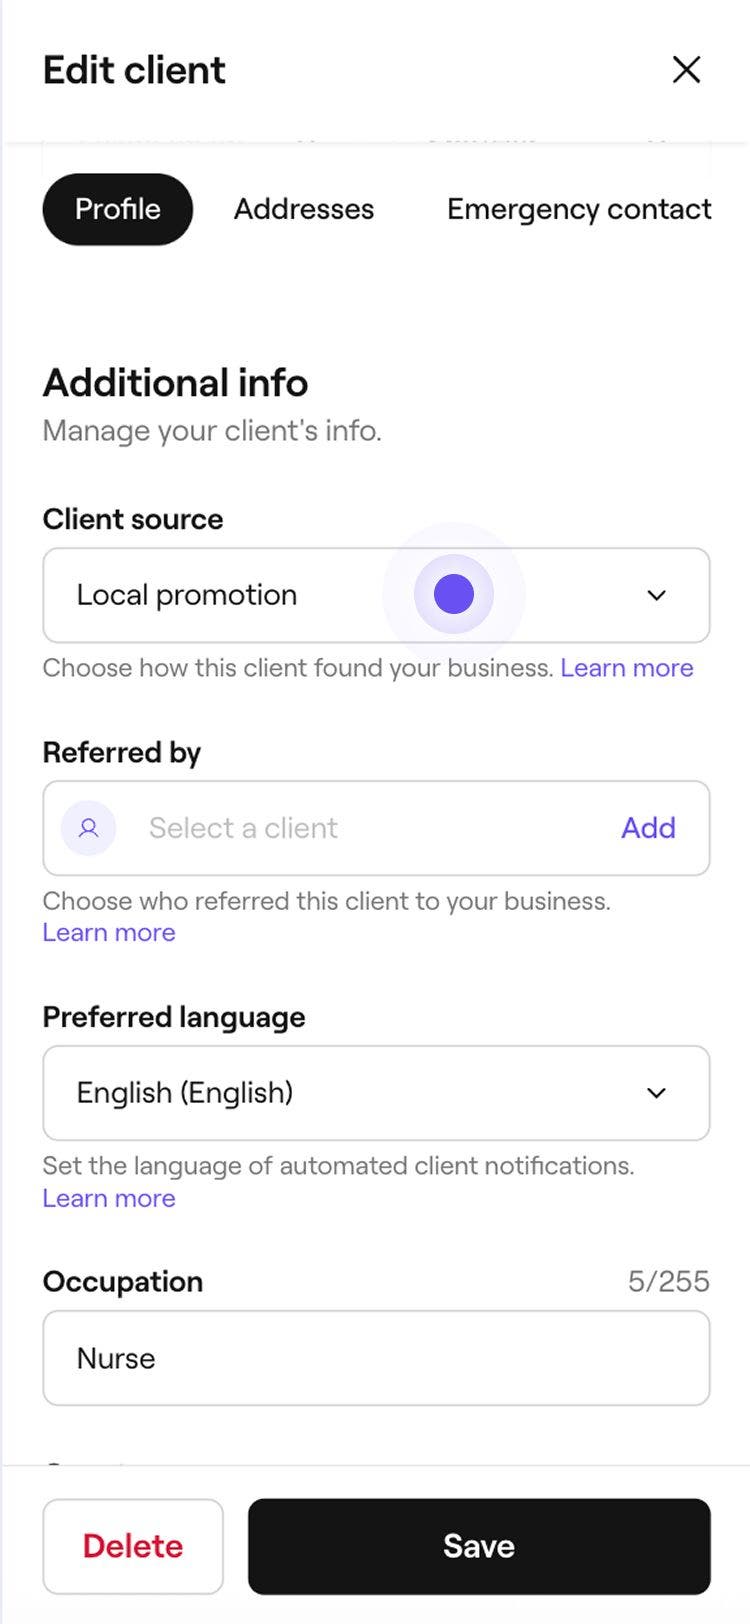
  3. In the Edit client view, scroll down to Additional info to adjust the client source. 
  4. Under Client source, use the drop-down to select another source. 
    Adjust_client_source_mob_4.jpg
  5. Tap on the Save button at the bottom to update the client's profile details.
Once saved, the updated client source is reflected in the client’s profile and client reporting.

Reporting on client sources 

Client sources appear in your Client reporting to help you understand where your clients are coming from. This insight makes it easier to track which sources bring in the most clients.

FAQs

    • Default client sources, shown with a padlock, cannot be edited or removed because they are automatically triggered when a client books through specific channels.

      When a client source is renamed, this will automatically update the client's profile if they have been previously assigned to that source.

      Yes, you can update the source for any manually added client at any time. Default sources, which appear with a padlock, are automatically assigned and cannot be changed.


Client list


Related articles

Was this guide helpful?

Client list

Import your existing client list

Transition your business to Fresha by importing your existing client list.

Merge client profiles

Clean up your client list by merging duplicate profiles into a single, unified record.

Track how clients discover your business

Distinguish appointment types by assigning them colors based on service, team or status.

Export your client list

Export your client list for a clear and organized view of key client info.

Manage your client list

Delete or block multiple clients at once.

Related articles

Create client profiles

Add new clients to your business and keep their information organized in one place.

Add notes to client profiles

Keep important client information organized by storing notes in their profiles.

Import your existing client list

Transition your business to Fresha by importing your existing client list.

Fresha
Get the app

About Fresha

Careers

Help and support

Blog

Sitemap

For business

For partners

Pricing

Features

Scheduling

Point of sale

Payments

Capital

Marketplace

Support

Status

Legal

Privacy Policy

Terms of service

Terms of use

Find us on social

Facebook
Linkedin
Instagram

© 2026 Fresha.com SV Ltd