HomeKnowledge baseFresha academy
Create appointments
Back
  1. Knowledge base•
  2. Calendar and schedule•
  3. Create appointments

Create appointments

In this guide, you’ll learn how to schedule appointments into your Fresha calendar. There are two ways to create an appointment:

In this article

  • Create an appointment for a specific time
  • Find an available time when creating an appointment

Create an appointment for a specific time

  1. From the main menu on the left of your screen, go to Calendar.

  2. When using the Day view, click directly on a time slot in the calendar and select Add appointment from the pop-up to open a new appointment view.

    Create_an_appointment_for_a_specific_time_web_2 copy.jpg

  3. In the left panel of the appointment, click Add client to select an Existing client, create a New client, or leave the appointment as a Walk-in.
    Create_an_appointment_for_a_specific_time_web_3.jpg

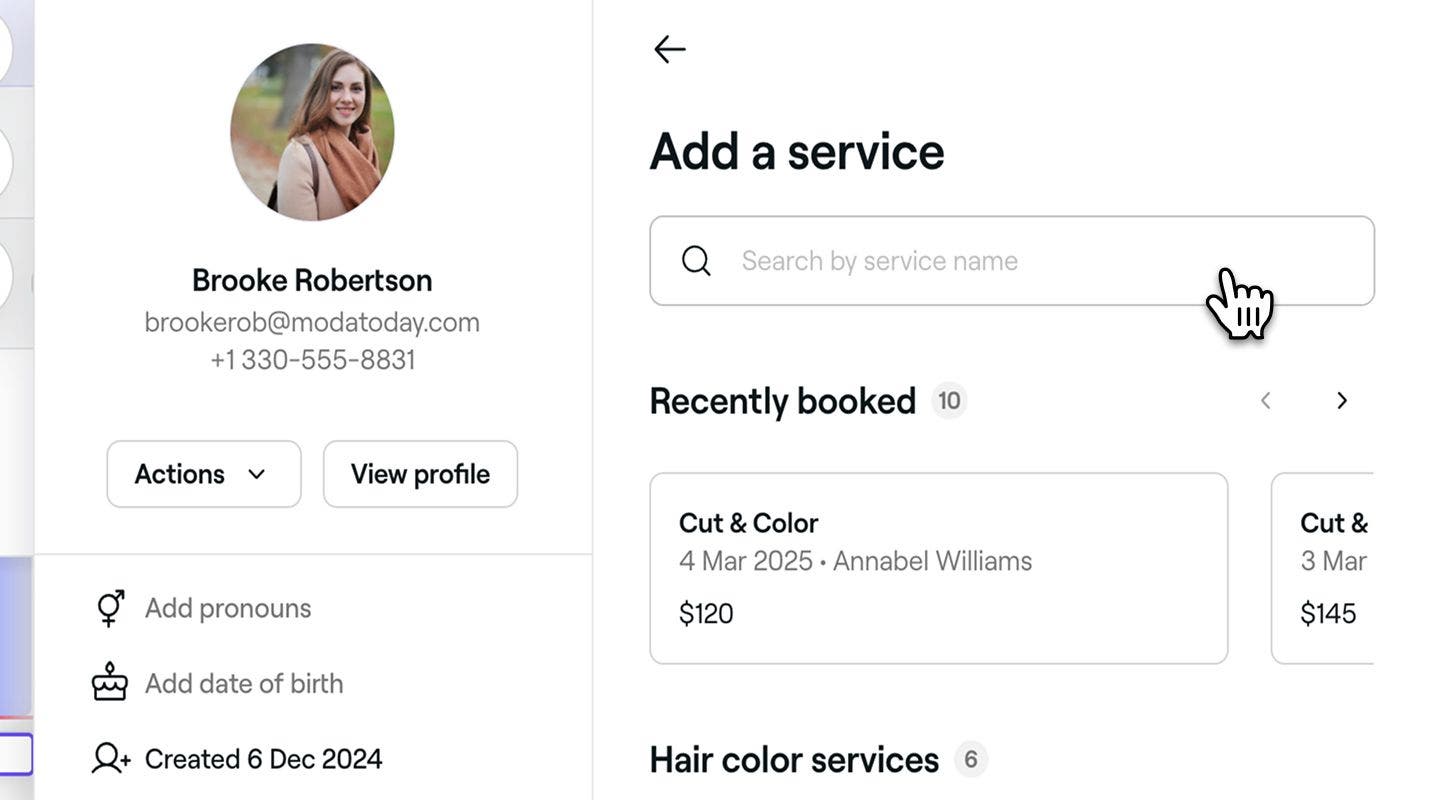
  4. Search for or select a service from the list on the right panel to add it to the appointment.

    1. To add more services to the appointment, click the Add service button.
    2. To customize service details, simply click on the service.
      create group appointments lesson 4 (1).jpg
  5. Click the Save button at the bottom to schedule the appointment in your calendar.

  1. From the main menu along the bottom of your screen, tap on the Calendar icon.

  2. When using the Day view, tap directly on a time slot in the calendar and select Add appointment to open a new appointment.   
    Create_an_appointment_for_a_specific_time_mob_2.jpg

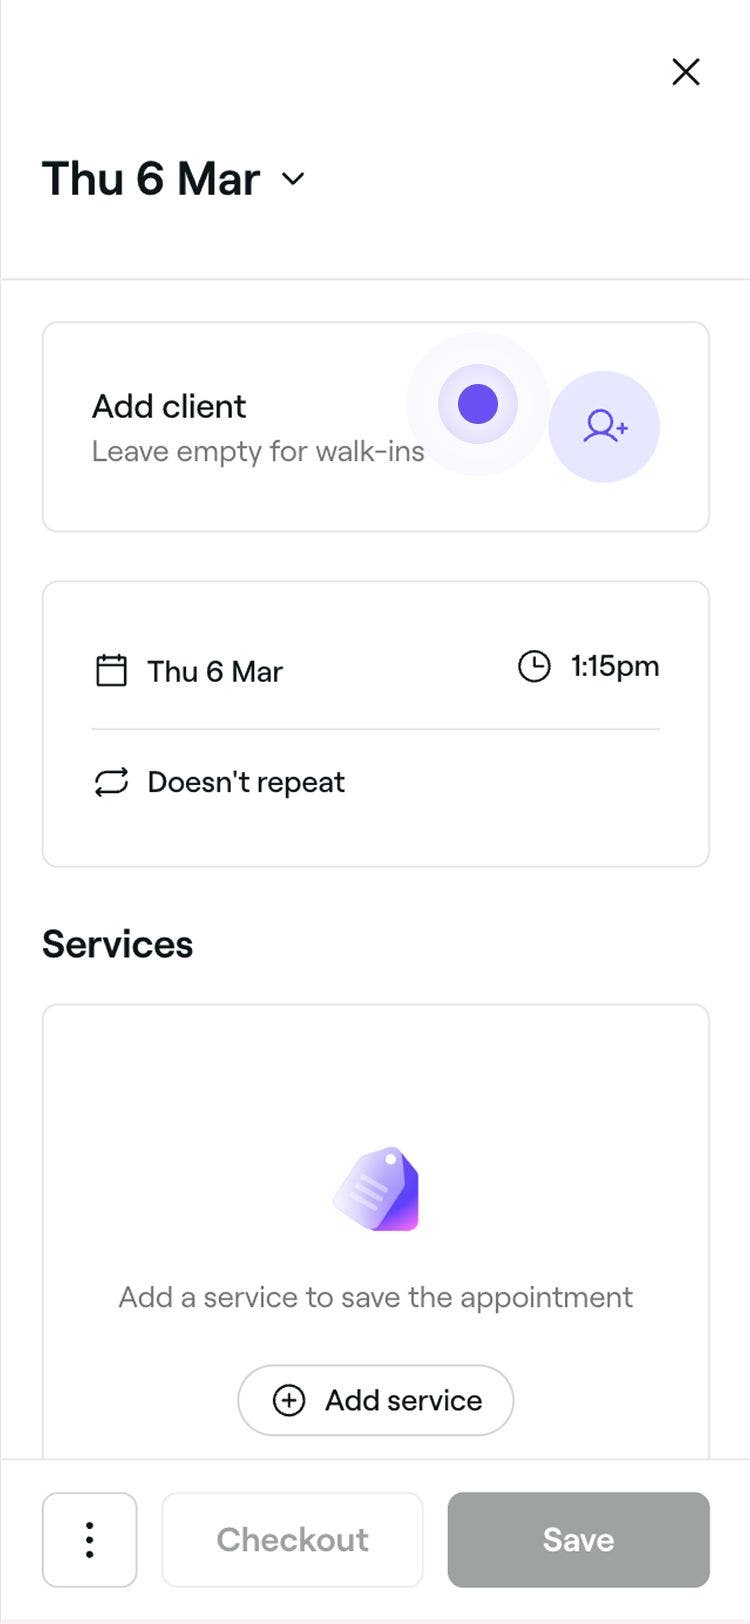
  3. At the top of the appointment view, tap on Add client and select an Existing client, create a New client, or leave the appointment as a Walk-in.

    App_add_client_appointment_lesson_3.jpg

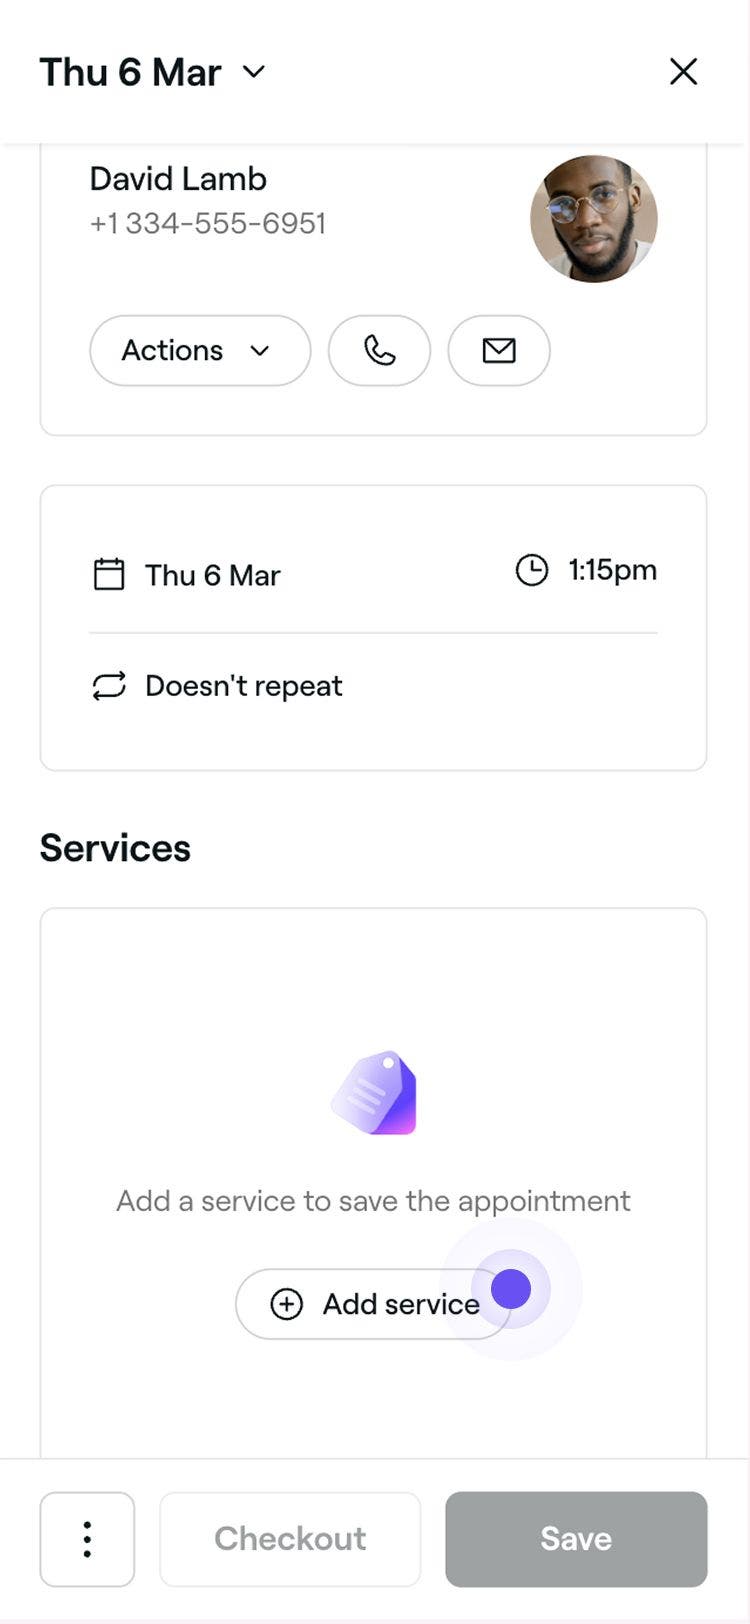
  4. Under Services, tap Add service to search for or select a service from the list to add it to the appointment. 

    1. To add more services to the appointment, tap the Add service button. 
    2. To customize service details, simply tap on the service. app_add_service_to_appointment_lesson_4.jpg
  5. Tap the Save button at the bottom to schedule the appointment in your calendar.
The client will receive a confirmation message based on your notification settings. If appointment protection is enabled, they’ll be required to make an upfront payment or add their card details to secure the booking.

To add notes, forms, or apply payment policies to an appointment click Actions (three dots) at the bottom of the appointment view.

Find an available time when creating an appointment

  1. From the main menu on the left of your screen, go to Calendar.

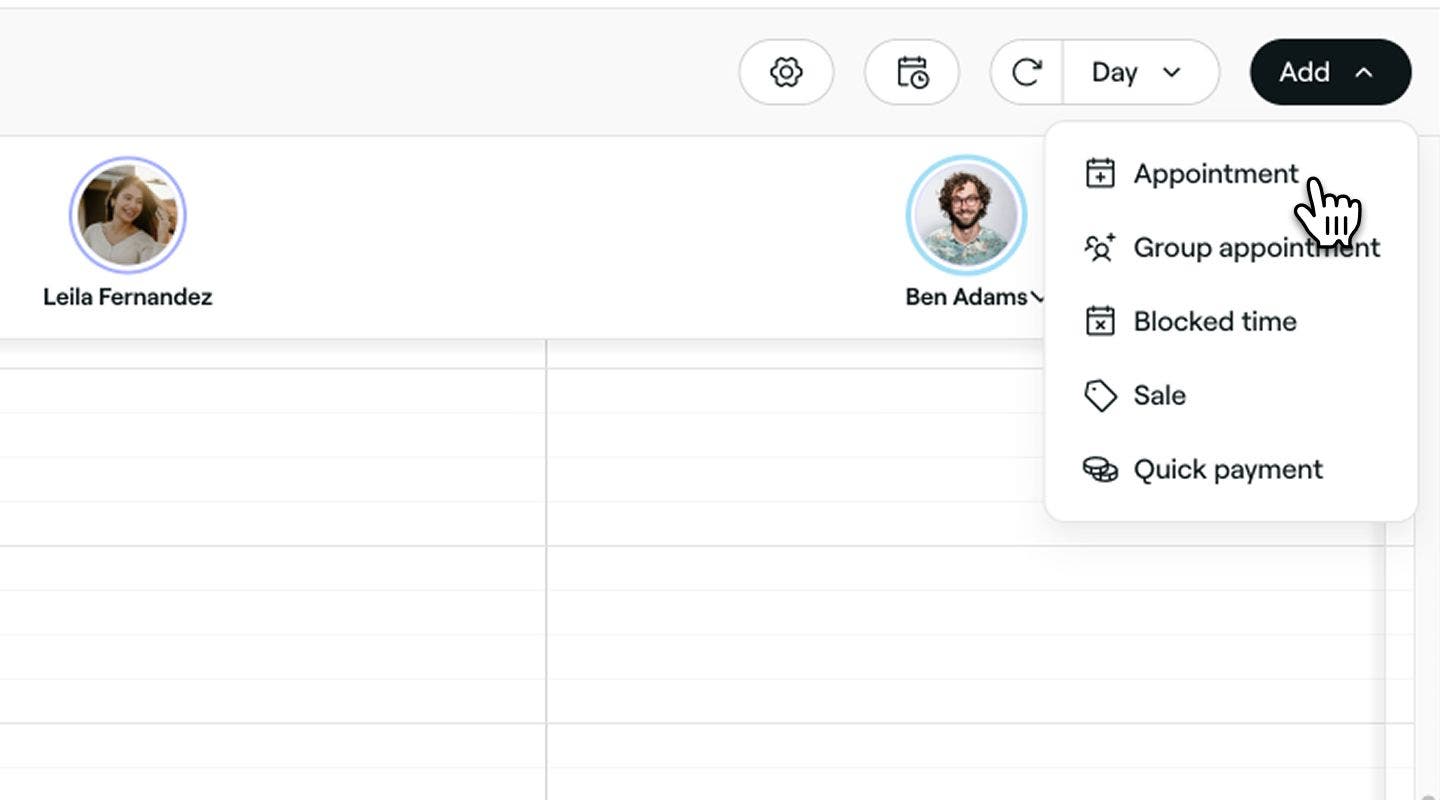
  2. Click on the Add button in the calendar toolbar and select Appointment from the panel.
    Find_an_available_time_web_2.jpg

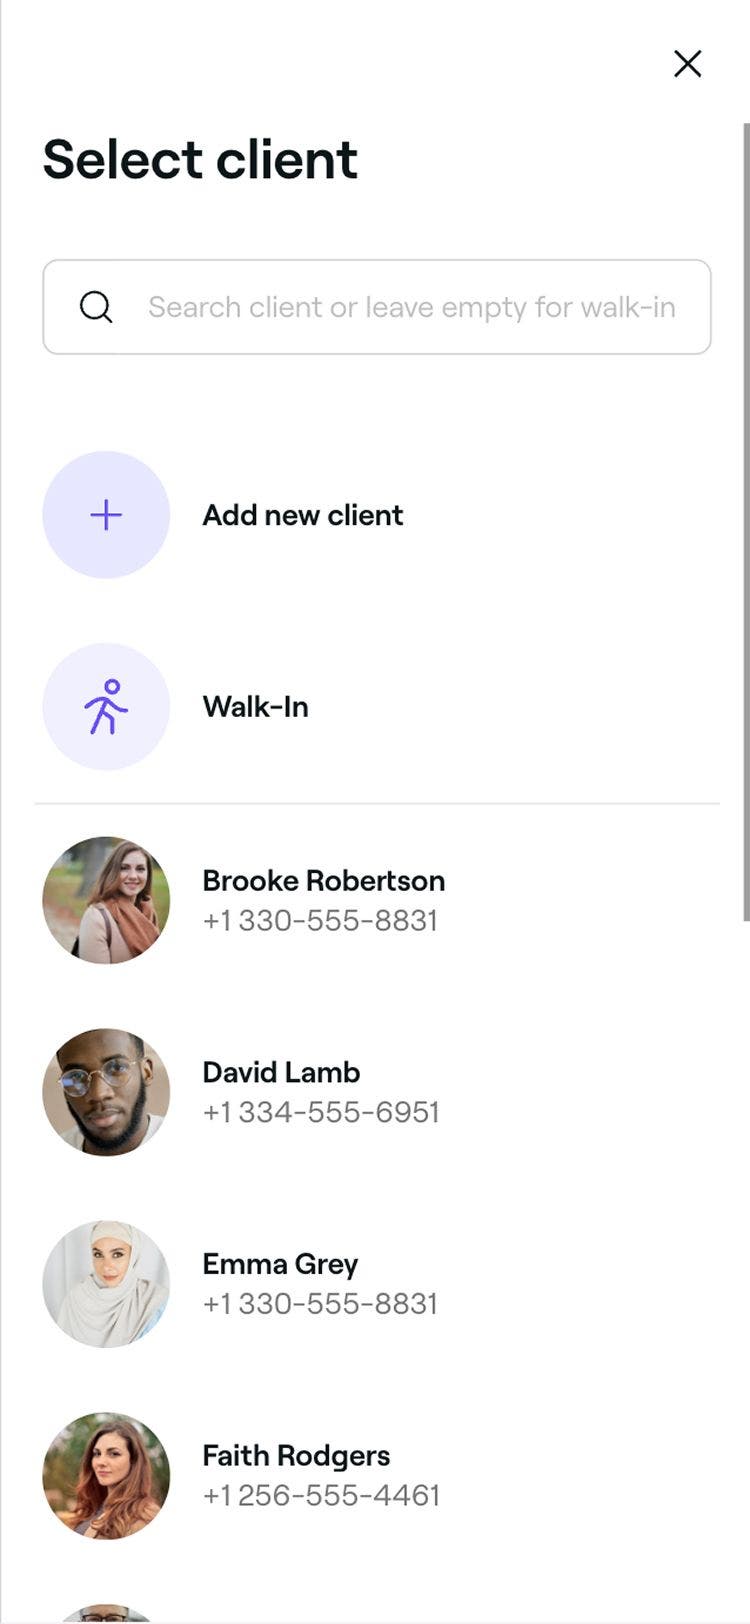
  3. In the left panel of the appointment view, click Add client to select an Existing client, create a New client, or leave the appointment as a Walk-in.

  4. Search for or select a service from the list on the right panel to add it to the appointment. 

    1. To add more services to the appointment, click the Add service button. 
    2. To customize service details, simply click on the service.
    3. If the client requests a specific team member, add or update this directly on the service.

    Find an available time when creating an appointment _5.jpg

  5. Click on the Continue button at the bottom to view available time slots.

  6. Use the date selector to find and select an available slot. If no slots are available, try the following options:

    1. Click Next available date to find the soonest open slot.
    2. Click Check all professionals to see full availability.
    3. Click Join the waitlist to add the appointment to your waitlist. This is only available if a client has been added.
  7. Click on the Continue button at the bottom of the appointment view to review the details.

  8. Click on the Save button to schedule the appointment in your calendar.
  1. From the main menu along the bottom of your screen, tap the Plus (+) icon.

    Find_an_available_time_mob_2.jpg

  2. Tap on the Appointment option to open the appointment view.

    add_appointment_mobile.jpg

  3. Select an Existing client, create a New client, or leave the appointment as a Walk-in.

    app_add_client_lesson_3.jpg

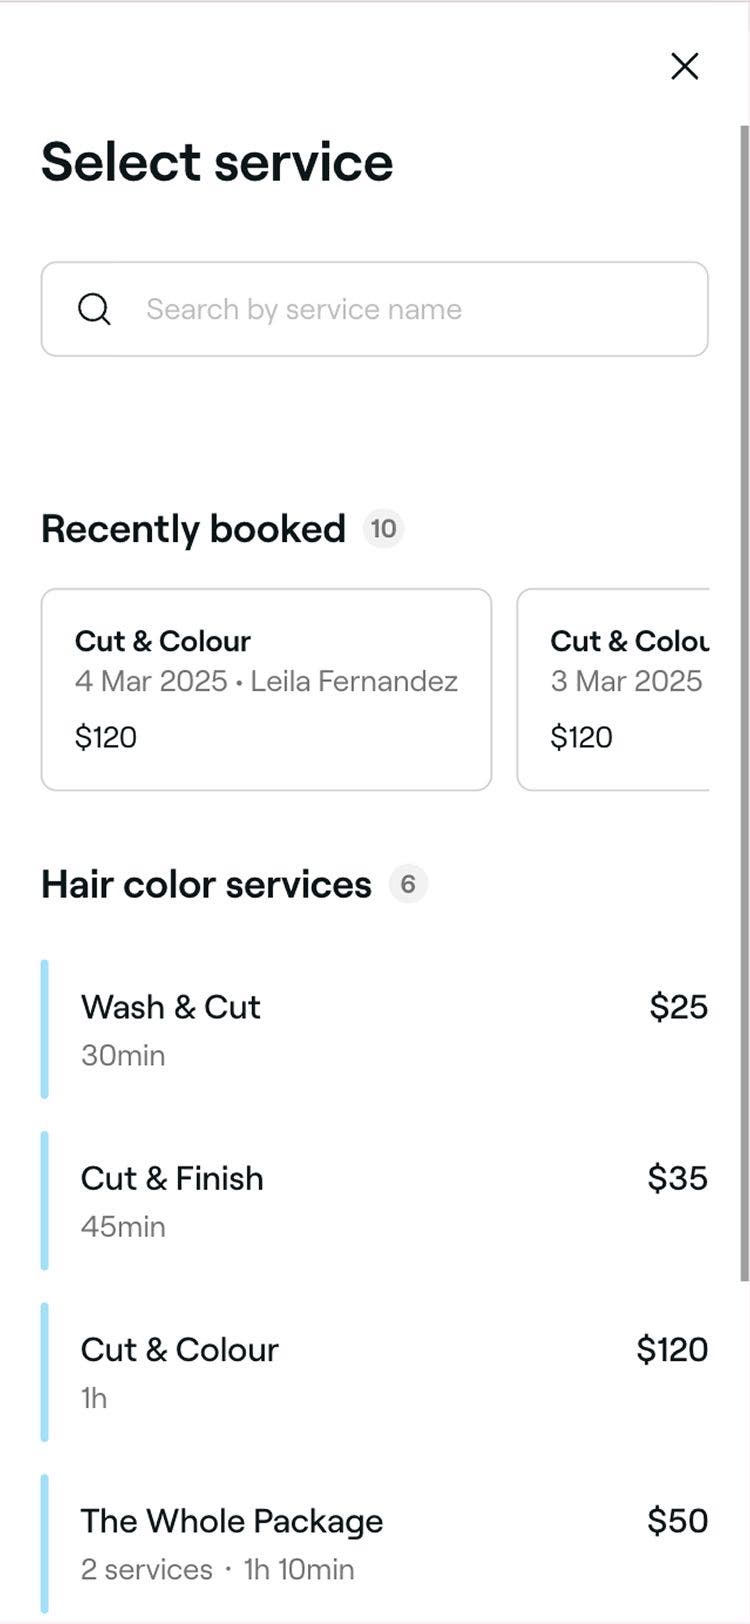
  4. Under Services in the appointment view, tap Add service to search for or select a service from the list to add it to the appointment. 

    1. To add more services to the appointment, tap the Add service button. 

    2. To customize service details, simply tap on the service.

    3. If the client requests a specific team member, use the dropdown on the service to assign this.

      app_add_service_lesson_4.jpg

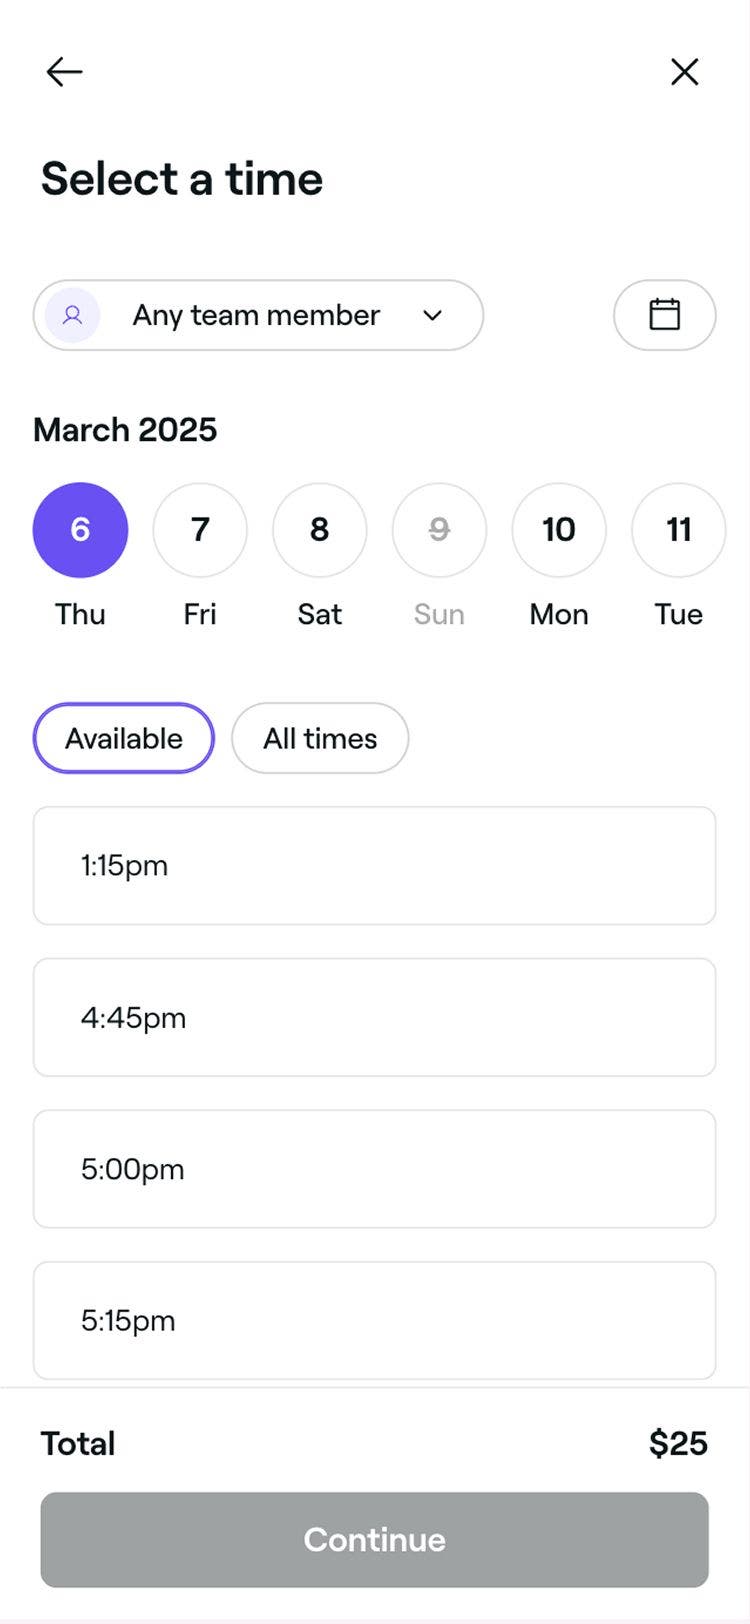
  5. Tap on the Continue button at the bottom to view available time slots.

    app_assign_appointment_to_team_member_lesson_4.jpg

  6. Use the date selector to find and select available slots. If no slots are available, try the following options:

    1. Tap Next available date to find the soonest open slot. 
    2. Tap Check all professionals to see full availability.
    3. Tap Join the waitlist to add the appointment to your waitlist. This is only available if a client has been added.
  7. Tap on the Continue button at the bottom to review the details. 

  8. Tap on the Save button at the bottom to schedule the appointment in your calendar.

FAQs

    • The heart icon on a booking shows that the client has chosen their preferred team member to provide the service for the appointment. You add or update this while customizing the service details within an appointment.

      When scheduling appointments in your calendar, you will be able to double book appointments within the same time slot.

      Yes, you can schedule and manage group appointments in your calendar, and allow allowing multiple clients to book together online. To set up group appointments in your calendar, choose to either create a new group appointment or group existing appointments together.

      Yes, you can create a series of repeat appointments for your regular clients, so they always get their favorite time slots. Just adjusting the frequency by opening an appointment and clicking Doesn't repeat in the top right of the appointment view. Choose how often the appointment should repeat and set an end date for the series. Click Apply changes, then Save to confirm and create the recurring appointments. These can be easily managed together or individually

      You can add three types of extra time to services. Processing time, blocked time, or extra servicing time can be added to individual services and bundles or directly to appointments in your calendar. To find out more about these extra time types and how to add them, read more in Add extra time to services and appointments.

      When a client selects "Any professional", Fresha automatically assigns the appointment to an eligible team member (a team member who is bookable online, assigned to the service, available at the scheduled time, and working at the location). If multiple team members are eligible, the booking goes to the employee with the most free time that day, ensuring balanced workload distribution across your team.


Appointments


Related articles


Recommended articles

Fresha academy courses
Course video preview

Getting started with Fresha

9 lessons•12 mins

Course video preview

Schedule appointments

6 lessons•6 mins

See all courses

Was this guide helpful?

Appointments

Create appointments

Start scheduling appointments with detailed client and service information.

Create repeat appointments

Schedule repeating appointments for regular clients to secure specific slots every time.

Create and manage group appointments

Schedule and manage group bookings, allowing multiple clients to attend together.

Update appointments

Edit appointment details to keep your calendar accurate and up to date.

Update appointment statuses

Track appointments in your calendar at a glance using appointment statuses.

Reschedule appointments

Move appointments to a different slots while keeping all other details unchanged.

Cancel appointments

Remove unwanted or accidental bookings from your calendar to free up availability.

Mark appointments as no-shows

Track missed appointments by marking clients as no-shows when they don't attend after the scheduled time.

Complete appointments

Check out appointments to mark them as completed for accurate reporting, marketing and more.

Apply Deals and discounts to appointments

Offer clients the best discounts by applying deals directly at checkout.

Related articles

Manage scheduled shifts for team members

Learn how to use advanced scheduling to create manageable team shifts.

Manage bookable resources

Create bookable resources for services and learn how to check availability easily.

Recommended articles

Create a Fresha account as a business owner

Start your Fresha journey by setting up your personal account with key details.

Fresha academy courses
Course video preview

Getting started with Fresha

9 lessons•12 mins

Course video preview

Schedule appointments

6 lessons•6 mins

See all courses
Fresha
Get the app

About Fresha

Careers

Help and support

Blog

Sitemap

For business

For partners

Pricing

Features

Scheduling

Point of sale

Payments

Capital

Marketplace

Support

Status

Legal

Privacy Policy

Terms of service

Terms of use

Find us on social

Facebook
Linkedin
Instagram

© 2026 Fresha.com SV Ltd