Update appointments
In this guide, you’ll learn how to update details within an appointment, including client information, service details and the appointment status.
In this article
Remove or replace clients in an appointment
- Open an appointment.
- From the left panel of the appointment view, click on Actions under the client's profile.
- Select Remove client to remove them from the appointment.
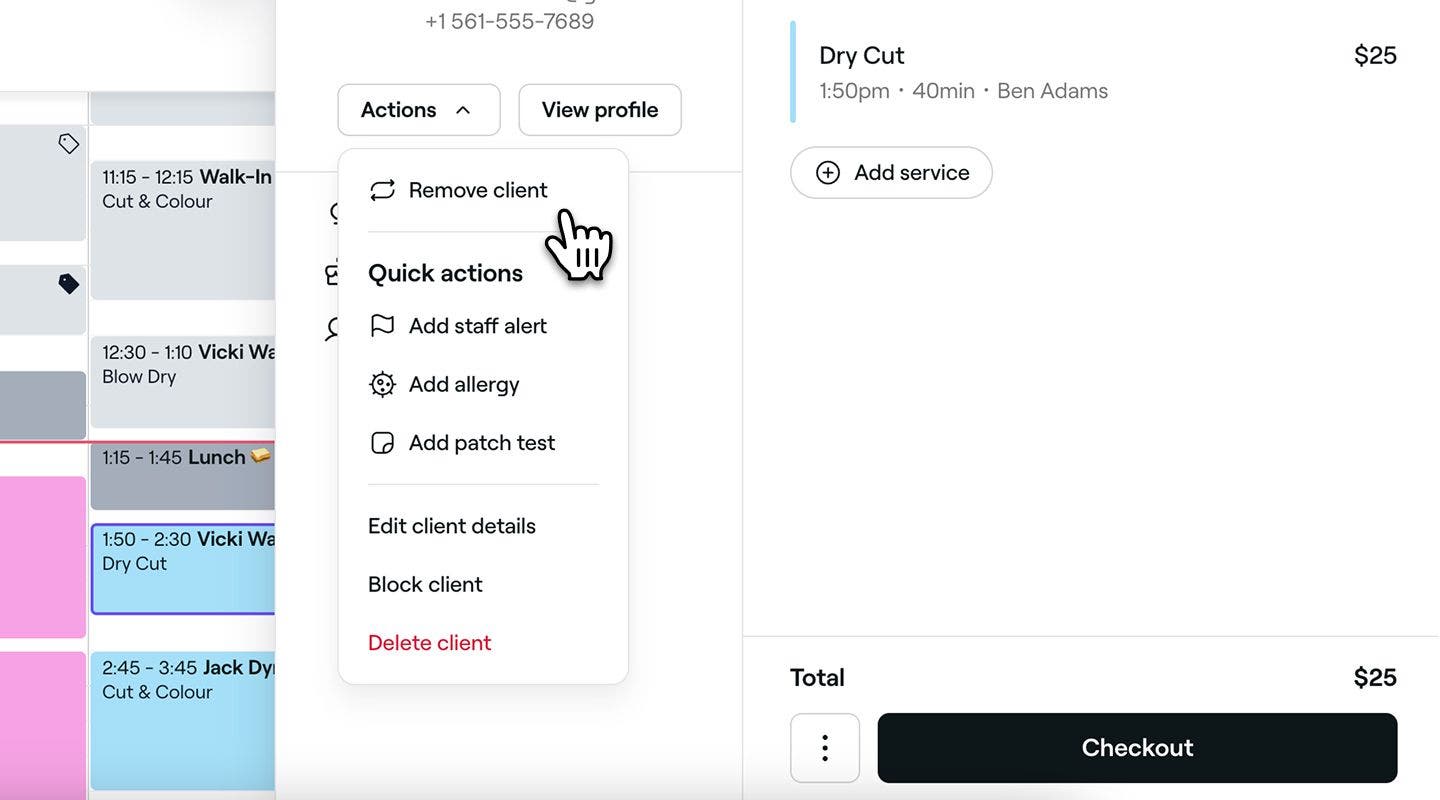
- To assign another client to the appointment, click Add client in the left panel.
- Click on the Save button to update the appointment.

Clients can only be removed or replaced on appointments that were booked in the calendar by your team, or do not have a payment policy accepted by the client.
Customize services in an appointment
-
Open an appointment.
-
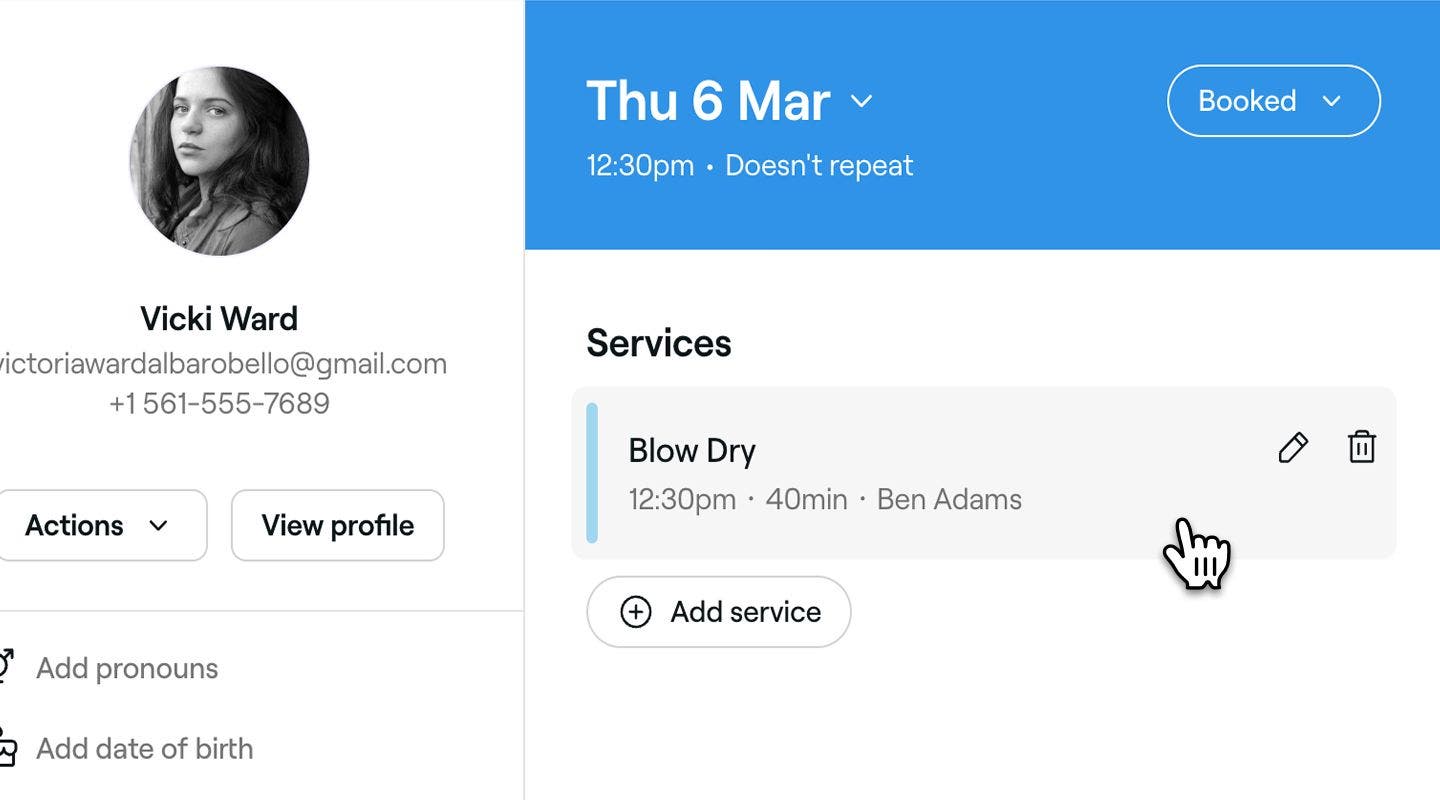
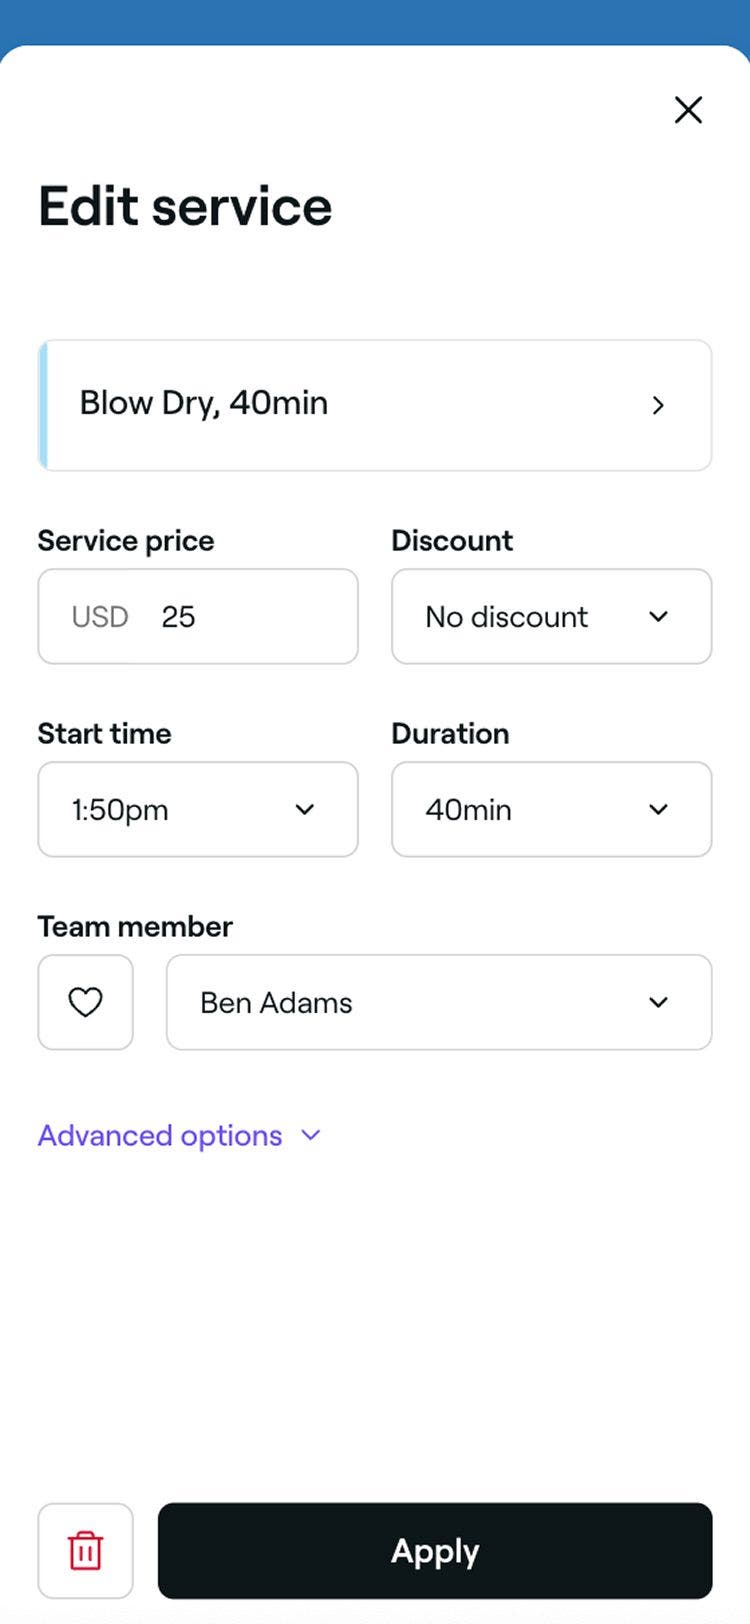
From the appointment view, click on a service to open the edit service view.
-
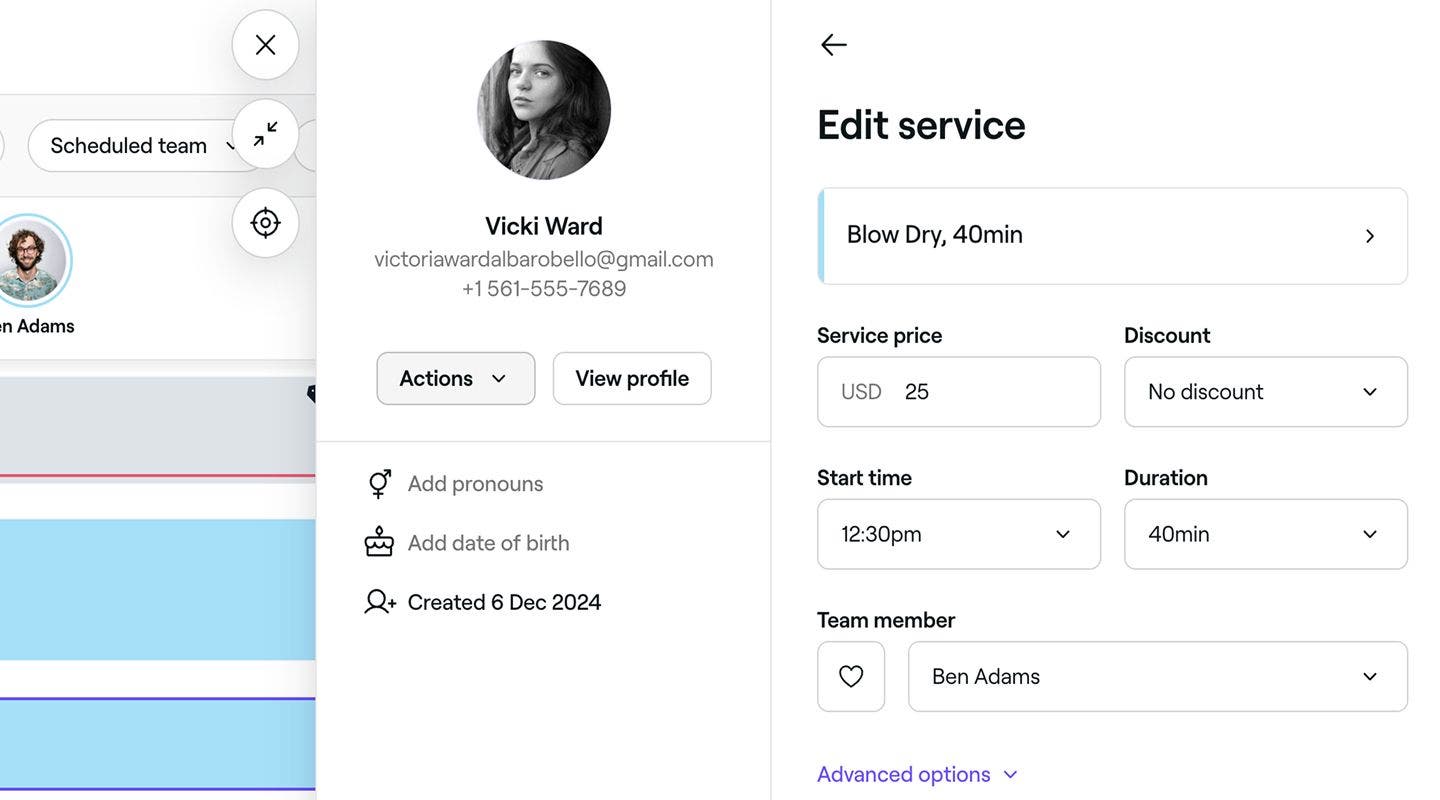
Update the relevant details, including:
- Service type
- Price and discount
- Start time and duration
- Team member booked
- Resources booked
- Advanced options like extra time
-
Click on the Apply button at the bottom of the appointment view to update the service details.
-
Click on the Save button to update the appointment.


Remove services from an appointment
- Open an appointment.
- From the appointment view, click on the service you want to remove to open the details.
- Click the Trash icon at the bottom of the service details view.
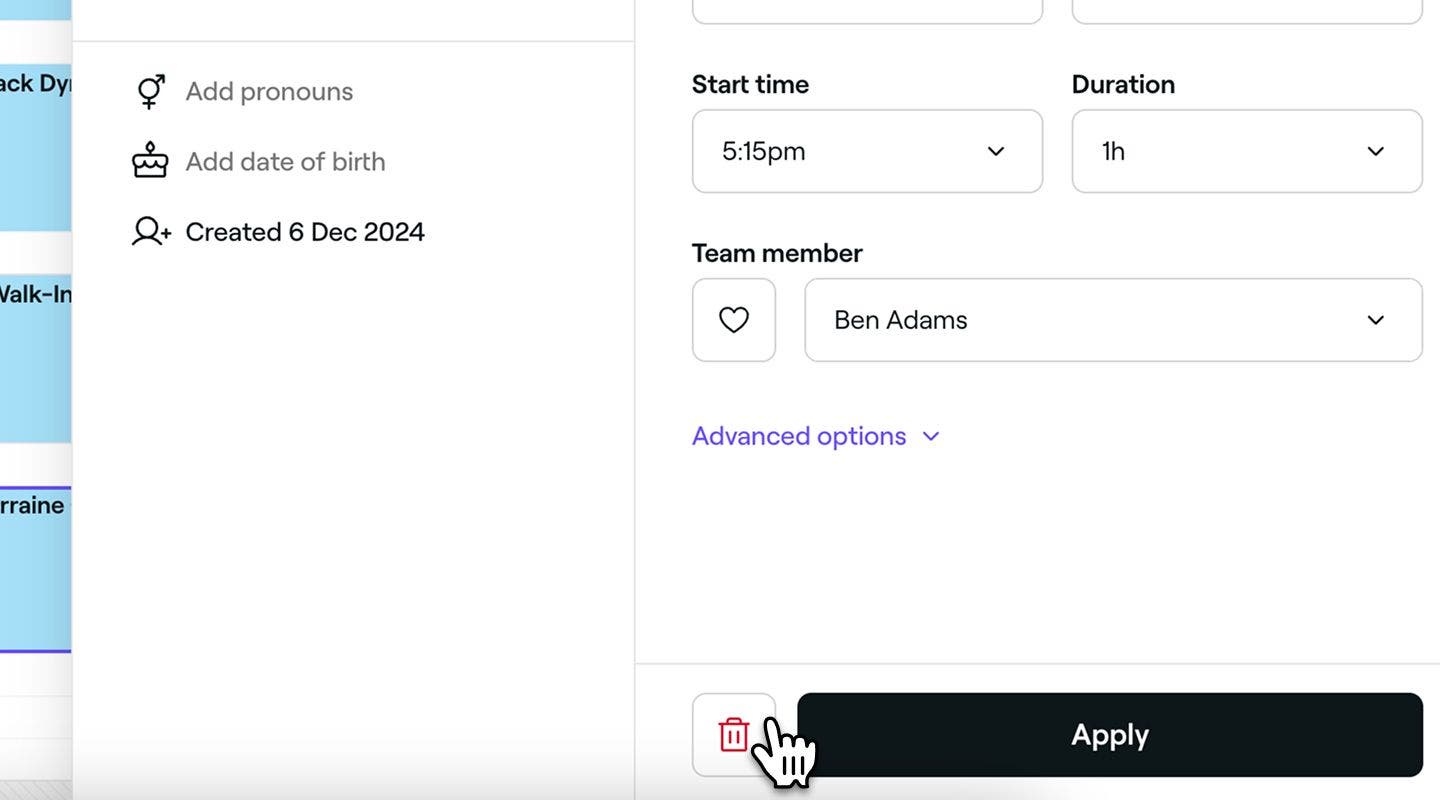
- Click Continue in the confirmation pop-up.
- Click on the Save button to update the appointment.
Add and update notes in an appointment
- Open an appointment.
- Click on Actions (three dots) at the bottom left of the appointment view.
- Select Add a note to open the pop-up.
- Enter your note in the text field, using the formatting toolbar to add bold text, lists, or other formatting. To include a file, click Upload and select a file from your device.
- Click on the Save button to add the note.
The note appears in the appointment's Records section, along with the date and team member who added it. To make changes, open the note in the Records section, or click Actions next to it, then select Edit. Update the text or attachments, then click Save.
To remove the note, click Actions, select Delete, then confirm in the pop-up.
You can update appointment status to keep track bookings at a glance and trigger appointment notifications for your clients.
FAQs
You can remove a client from an appointment either while creating an appointment or after it has been scheduled. To do this, click Actions under the client’s name in the left panel and select Remove client. The appointment will then be marked as a Walk-in. However, clients who booked online, confirmed their booking with a card, or paid a deposit cannot be removed from the appointment.
You can print a detailed list of your appointments from the Sales section in the main menu on the left. Select Appointments, set the date range using the filters, and click Export. You can then download your data in PDF, Excel, or CSV format for printing. If you only need bookings for a specific date, you can take a screenshot of your calendar in the preferred view and print it.
If an appointment has already been checked out and completed, the client has received the service and made the payment, locking the appointment details from further changes. This means you cannot edit the appointment.
Yes, you can prevent clients from updating or cancelling their own appointments by setting a cancellation and rescheduling deadline in your online booking settings to restrict clients from making changes after a specified time.
To schedule an appointment in your calendar, at least one service will need to be added. For consultations we suggest creating a dedicated “Consultation” service and adding this to appointments when required.
Appointment notes are private and only visible to you and your team. They’re specific to each appointment and cannot be seen by clients.
No, changing an appointment's duration will keep its original price.
Yes, if the appointment was created as a repeat appointment, you can update the entire series in one go. When making any changes to any appointment in the series, you'll be given the option to apply the changes to just that appointment or all future appointments.
Yes, you can. Go to your Appointments list and use the search bar to filter by the client’s name or appointment reference. You can also apply filters to narrow down the date range. Once you’ve found the appointments you need, click the Export button in the top right and choose your preferred format from PDF, CSV, or Excel.