Manage bookable resources
Learn how to create and manage resources, such as rooms and equipment, that can be assigned to services.
In this article
How resources work
Resources represent the rooms, equipment, or spaces in your business that are used during appointments. When a resource is assigned to a service, it becomes unavailable for the duration of the appointment to prevent double bookings.
For example, a business might create resources such as “Massage couch 1” and “Massage couch 2”. When a client books a massage linked to a resource, an available massage room will automatically be assigned to the appointment based on availability.
To keep your resources organised, you can group similar resources into resource types. For example, you might create a resource type called "Massage couches" and add each couch resource under that type. This makes it easier to manage resources and view availability in your calendar.
Create a resource
-
From the main menu on the left of your screen, go to Settings.
-
Click on the Scheduling category to manage your resources.
-
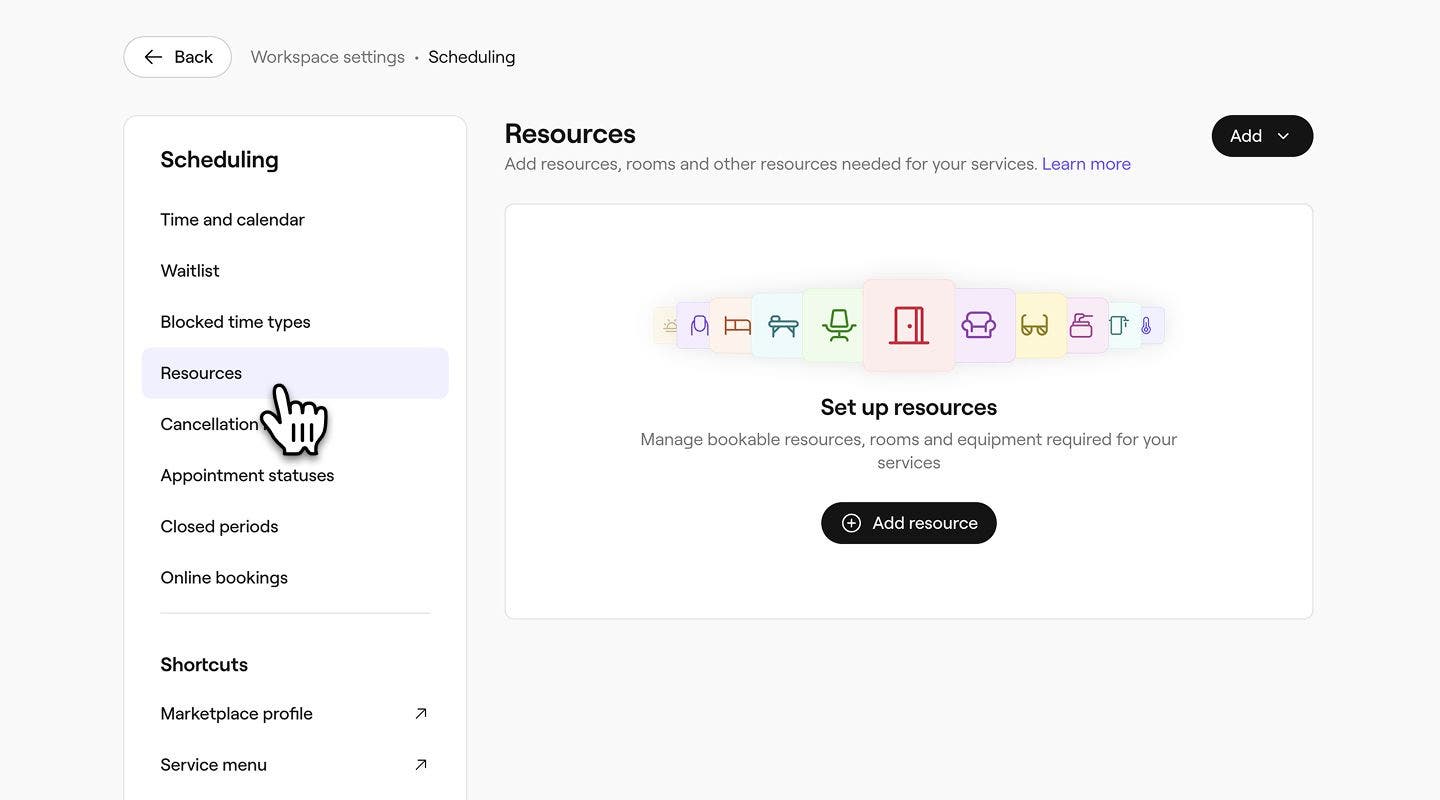
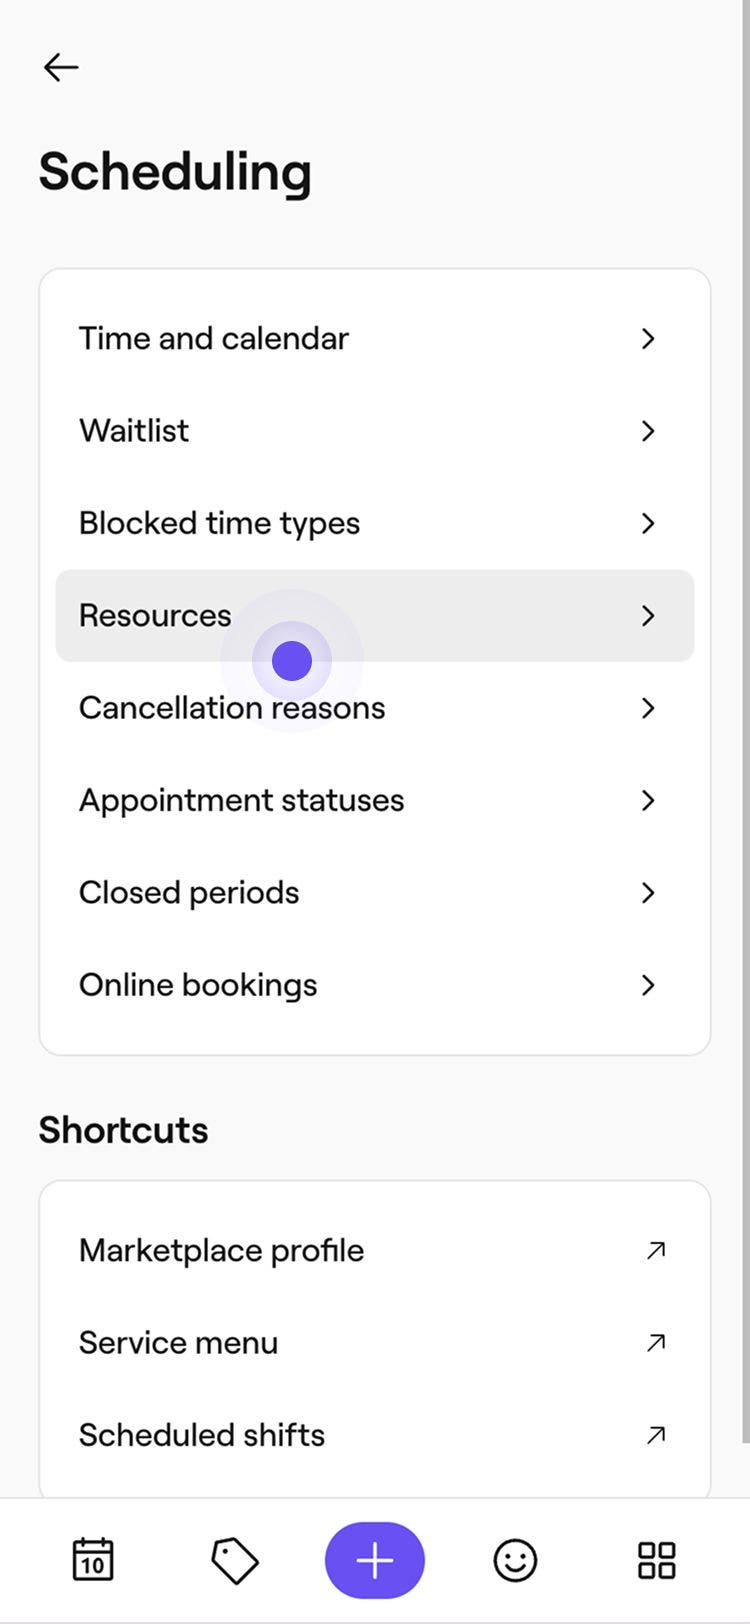
In the left menu panel, select Resources.
-
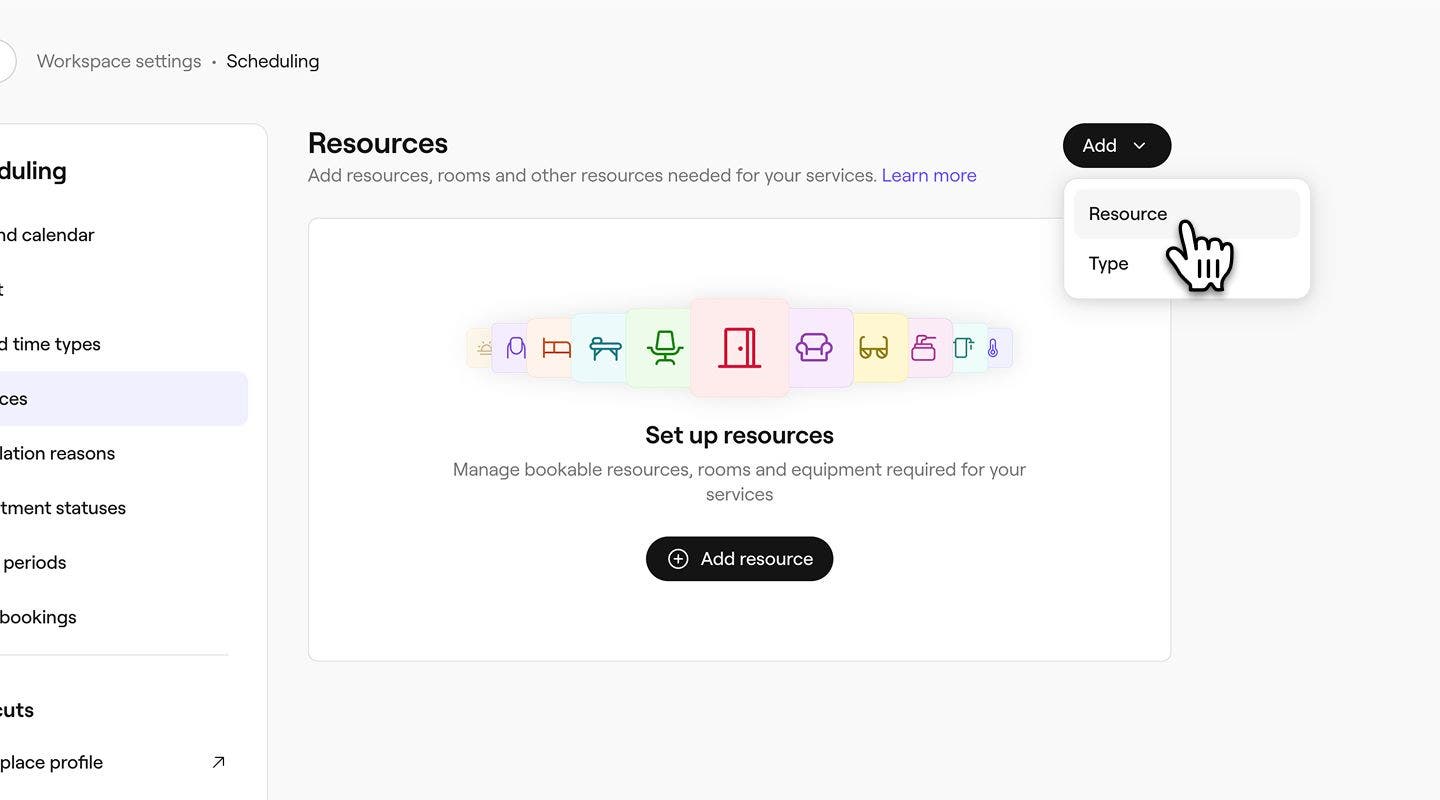
Click the Add button in the top right, then select Resource.
-
Under Basic details, enter the Resource name, select a Resource type, and add an optional Description.

- To create a new resource type while creating a resource, click on the Resource type dropdown and select Add a new type. Enter the type details in the pop-up, then click on Add.

-
Under Capacity limit, choose whether the resource can be used for One appointment at a time or set a Specific number of appointments that can use the resource simultaneously, with a minimum of two appointments.

-
Under Calendar color, choose the color this resource will appear as in your calendar.
-
Optionally, enter a Resource ID for internal record keeping.
-
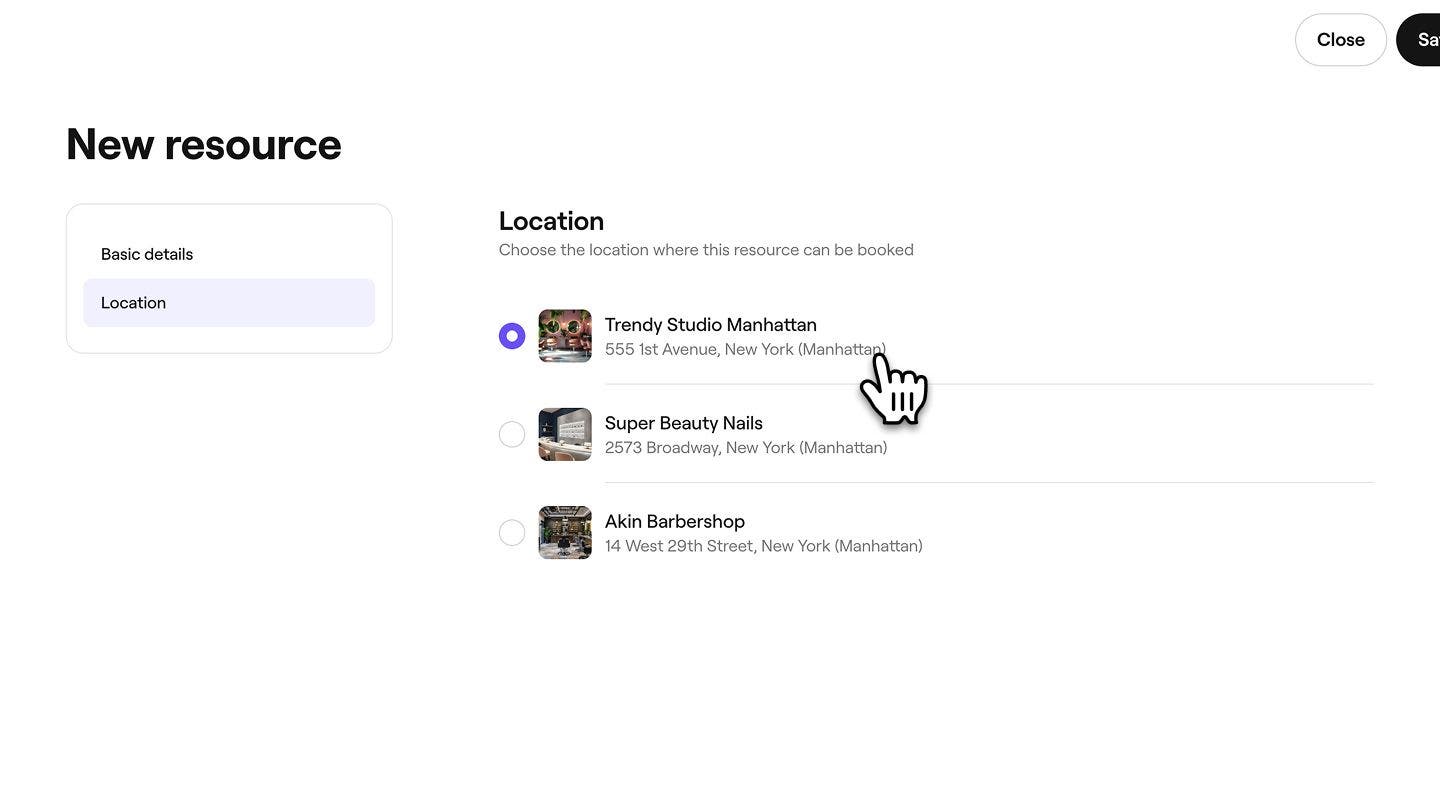
If you have multiple locations, click on Location in the panel on the left and select the location where this resource can be booked.
-
To apply your changes, click on the Save button in the top right corner.
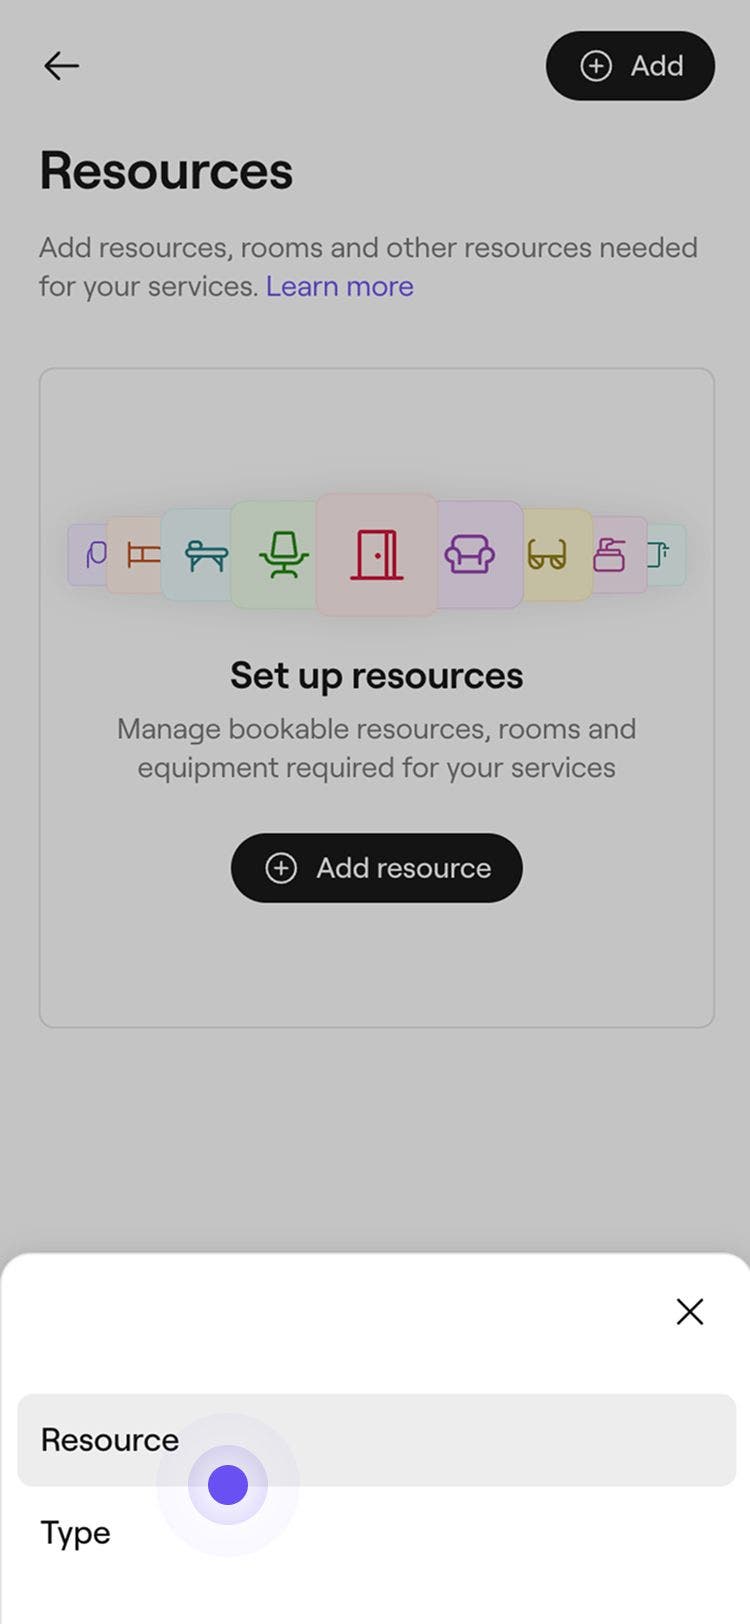
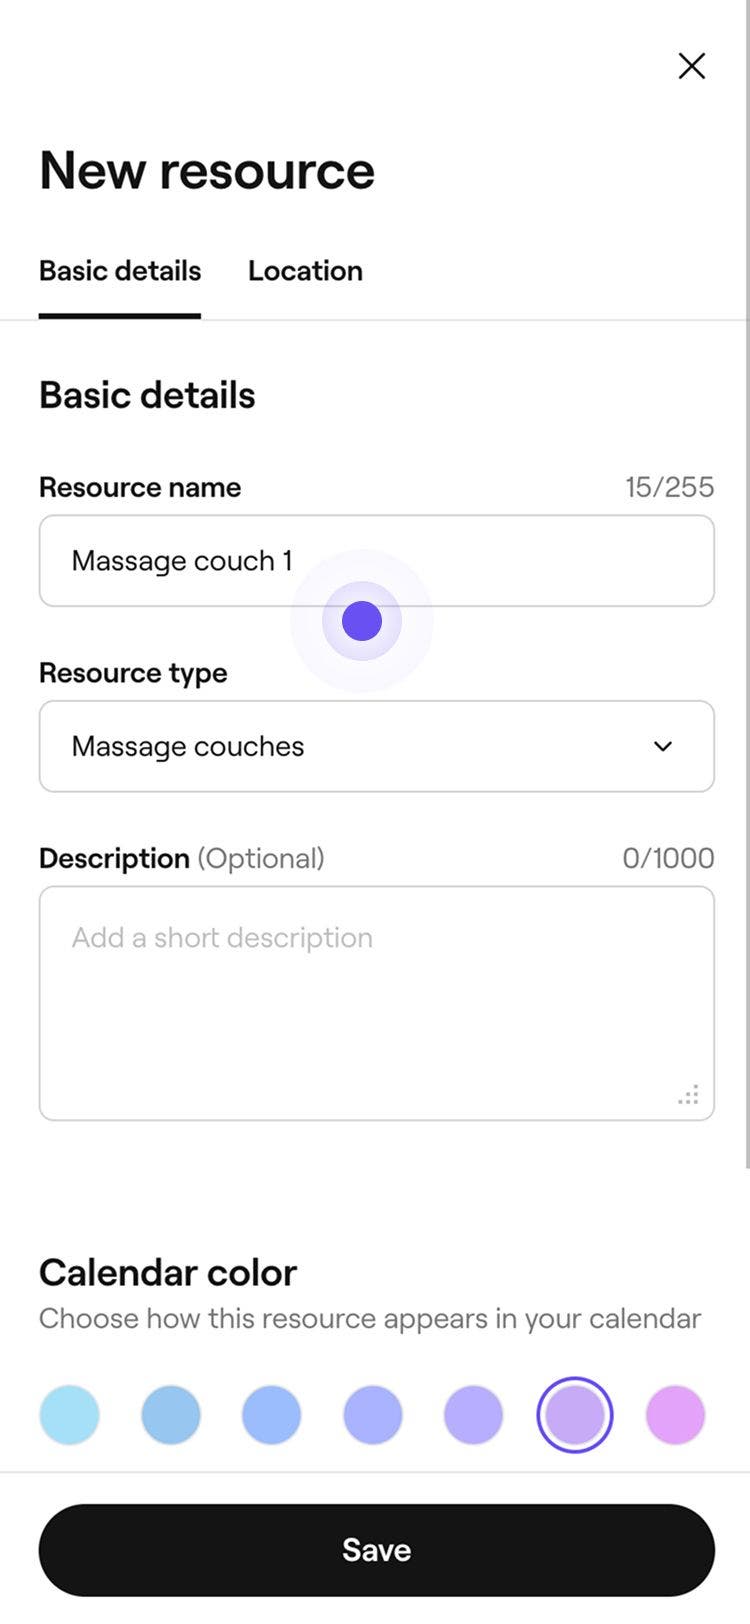

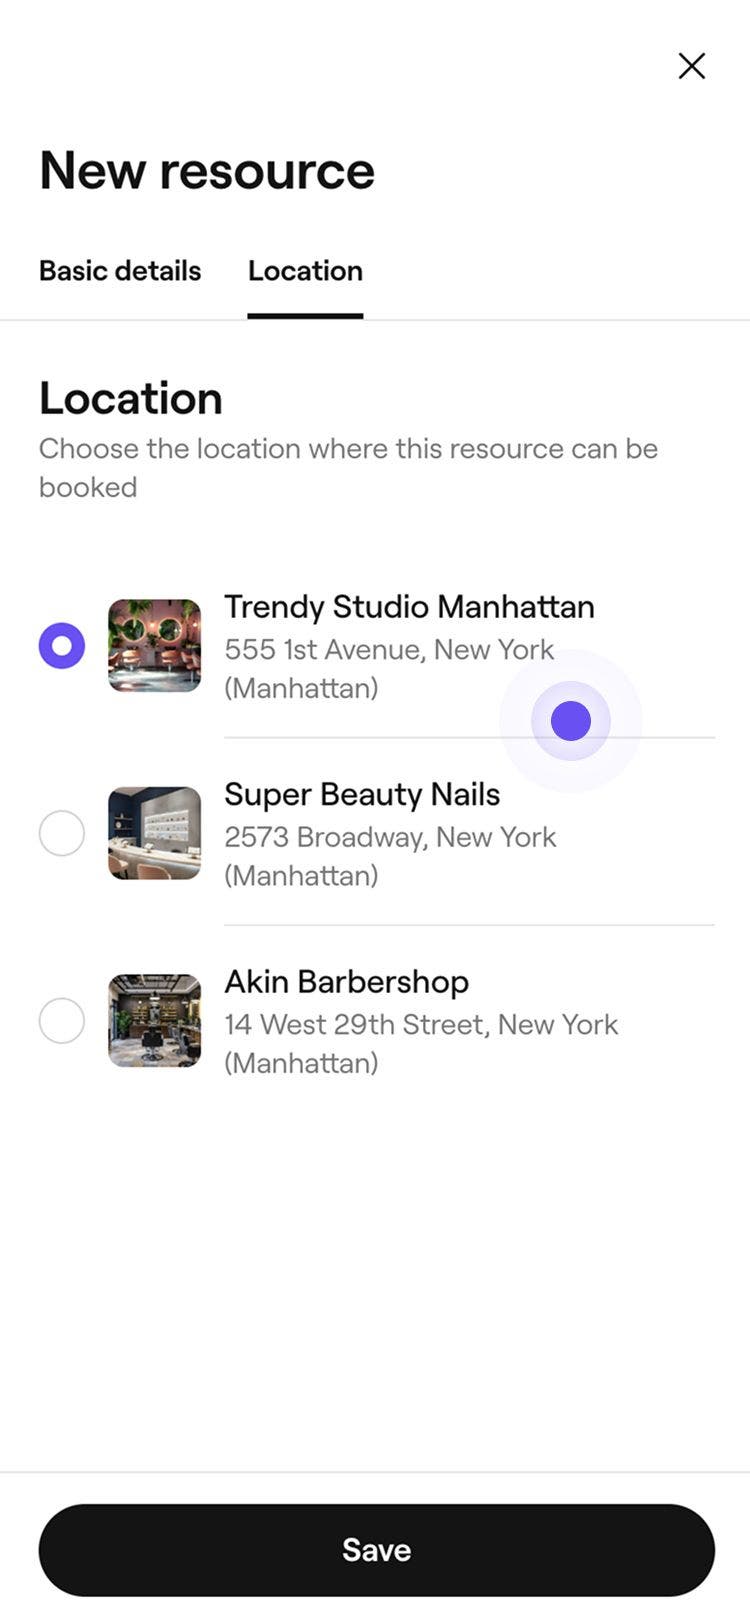
Once you create a resource, it will automatically appear as an available option for all services in your Catalog. You will now need to assign them to services where they are required.
Create a resource type
Organise your resources into resource types. Resource types make it easier to assign resources to services and help automate scheduling services that require rooms, spaces or equipment.
- From the main menu on the left of your screen, go to Settings.
- Select the Settings tab from the top and click on Scheduling.
- In the left menu panel, select Resources.
- Click the Add button in the top right, then select Type.
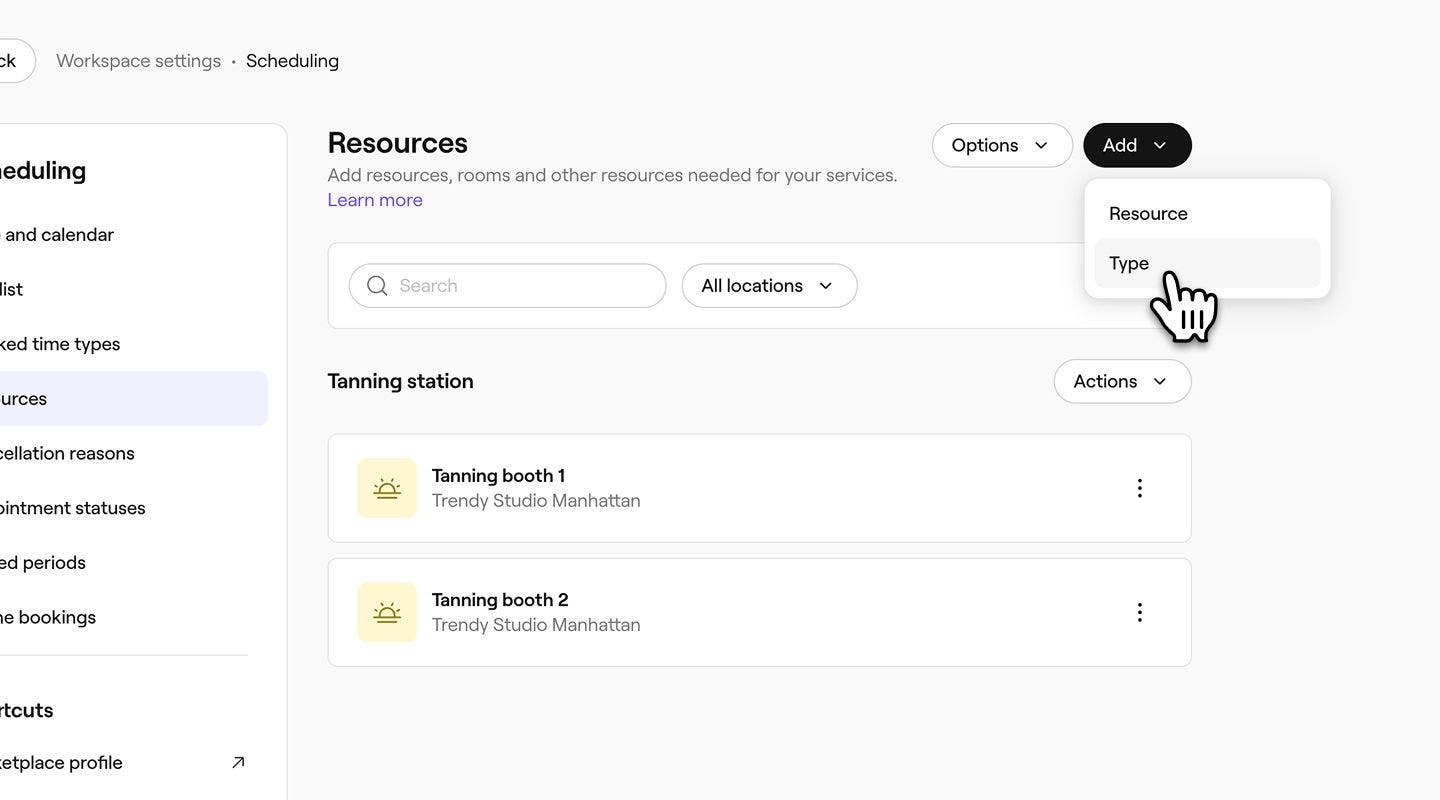
- In the New resource type pop-up, add the following information:
- Icon: Click on the image and select a logo to represent this resource type in your calendar.
- Name: Choose what you want to call your resource type.
- Description: Enter an optional description for this resource type. This will only display internally.
- Click on the Add button at the bottom of the pop-up to save the resource type.
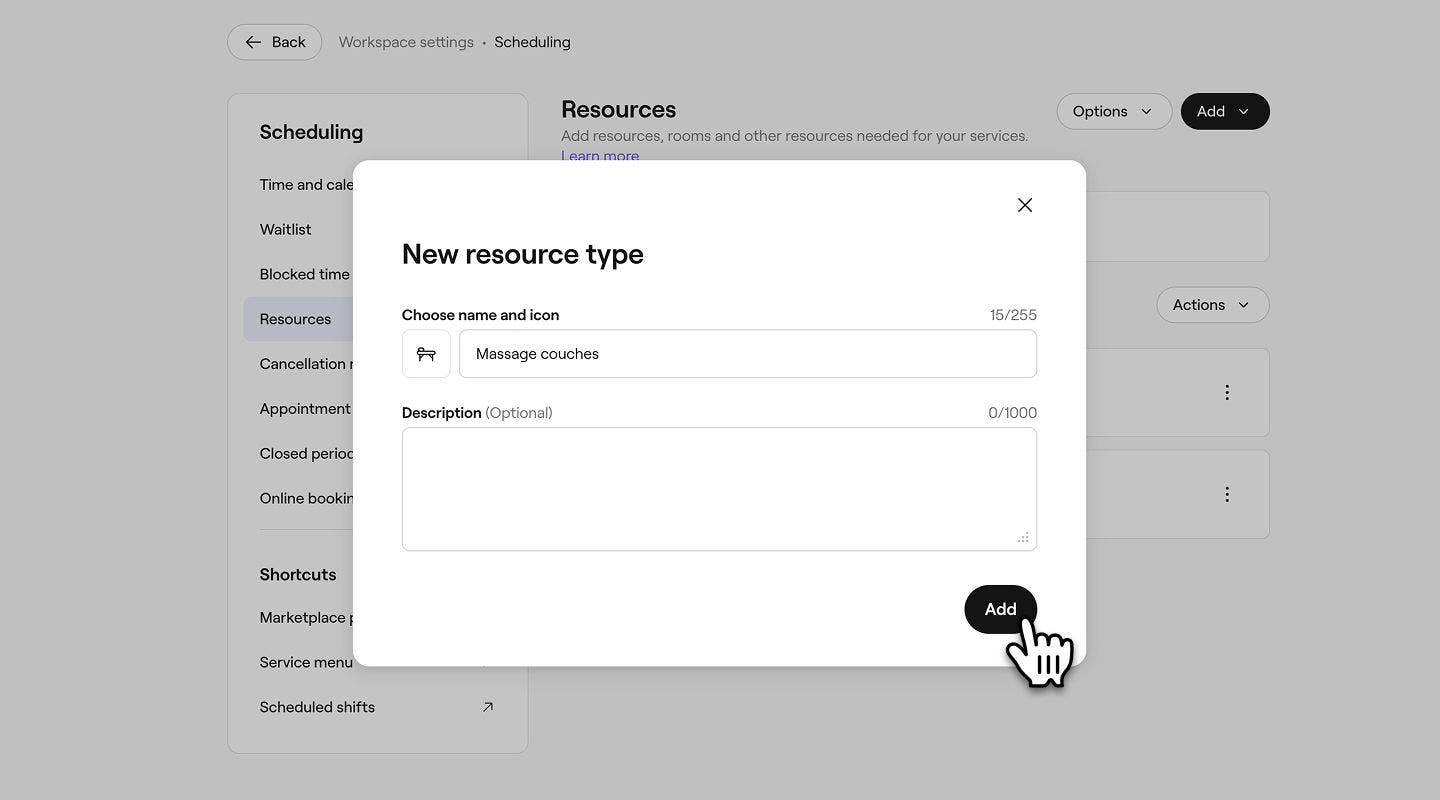


Once you’ve created your resource type, it’ll automatically appear in your Resources list.
Set a resource availability limit
Resource availability limits allow you to control when a resource can be booked online, helping you manage scheduling for specific times, days, or events.
-
From the main menu on the left of your screen, go to Settings.
-
Click on the Scheduling category to manage your resources.
-
In the left menu panel, select Resources, then click on the Resource you’d like to edit.

-
Select Availability from the left menu panel.

-
Under Availability, choose when the resource is available to be booked:
- Always available: Ideal for services that require both a team member and a resource.
- Only available on specific days and times: Limit availability by selecting the days and times when the resource can be booked. Ideal for resource-only services such as sun beds or saunas. To apply the same time set to all selected days, click on the Copy button.

-
Under Limit service availability, tick the checkbox next to specific dates to set when a resource starts or stops being available to book with a service:
-
Available to book from: Select the start date for when the resource can begin being used for services. For example, if you’re introducing a new resource in the New Year, set the start date to 1 January so it can be used for services from that date.
-
Available to book until: Select the end date for when the resource will stop being used for services. For example, if you’re offering a seasonal resource that ends before the new year, set the end date to 31 December so it will no longer be used for services after that day. If no end date is set, the resource will continue to be available for services indefinitely.

-
-
Click on the Save button in the top right to save the resource availability limit.
Once saved, the resource will be available to book during the dates and times you’ve set.
Link related resources
Link resources together to manage their availability as a pair. When one is booked, the other automatically becomes unavailable.
- Open the Scheduling category from Settings.
- In the left menu panel, select Resources, then click on the Resource you’d like to edit.
- Select Availability from the left menu panel.
- Under Limit service availability, tick the checkbox next to Link related resources, then click on the Link resources button.
- In the pop-up, tick the checkbox next to each resource you'd like to link, then click on the Save button to confirm your selection.
- Click on the Save button in the top right to update the resource.
Once saved, linked resources will automatically become unavailable when an assigned service is booked. To unlink a resource, click the Trash icon next to it.
Allocate resources to services
Link resources to the services that require them. When you do this, the appropriate resource will be automatically assigned to each appointment, preventing online bookings when no resources are available.
- From the main menu on the left of your screen, go to Catalog.
- Select Service menu from the left menu panel.

- Click on a service from the Service menu to update.

- In the Edit service view, select Resources from the left menu panel.

- Click on the Actions button next to the location where this service requires a resource and select Add.

- If you have multiple locations, you can choose to add the resources individually or select Copy to locations to assign the same resources in bulk.
- On the Add resource requirement view, select a Resource type from the dropdown, then select one of the following options:
- Use any resource of this type: Any resource within the selected resource type can be used to fulfil this requirement. If you choose this option, any resources added to this resource type in the future will also be available for the service.
- Choose specific resources: Select the specific resource(s) that can be used to fulfil this requirement. If multiple resources are selected, any one of them can be assigned when the service is booked.

- Click on the Add button in the top right.
- Review your resource requirements, then click on Save in the top right to save your changes.


When an appointment is booked, an available resource will automatically be assigned to each service based on the order they’re listed in under your Resource settings. If a suitable resource is available, it’s reserved for the appointment. If no resources are available, the service can’t be booked online by clients. You can still schedule appointments in-store, however a notification will appear to inform you that the resource is not available.
For services that use a resource without a team member, such as a sauna or tanning bed, you can remove team members. Open the service and turn off Team members required under Team members. When disabled, the service can be booked 24/7 unless you create a schedule in your Online booking settings or limit resource availability.
Edit and delete resources
- Open your Resources from Schedule settings.
- Next to the resource you want to edit or delete, and click Actions and then choose one of the following options from the drop-down menu:
- Edit: To update the resource, select Edit. From the Edit resource view, update the resource details as needed. Click on the Save button in the top right to save your changes.

- Delete: To delete the resource, select Permanently delete. Click on the Delete button again to confirm your changes.

- Edit: To update the resource, select Edit. From the Edit resource view, update the resource details as needed. Click on the Save button in the top right to save your changes.


When a resource is deleted or moved to a different resource type, it is automatically removed from any services it was assigned to. If a resource type assigned to a service has no resources, the resource requirement is ignored and clients can still book the service online. Review and update your service settings after making changes to resources to avoid unexpected bookings.
View resources availability
You can check availability and view upcoming appointments for all or a specific resource through your calendar.
- From the main menu on the left of your screen, go to Calendar.
- In the calendar toolbar, click on the Team and resource selector.

- From the panel dropdown, locate the Resources list and and click on the resource(s) you would like to see appointments for.

- Click on the Date selector in the calendar toolbar, then select the date you want to view or use the shortcuts to jump ahead by 1–12 weeks.
- You can check the availability of your resources and make sure nothing has been double-booked.


FAQs
Yes, resources can be viewed by Day, 3 Days, Week or Month. To change your calendar view, open the Calendar and click on the Calendar view selector in the calendar toolbar. Choose from any of the views and the calendar will update automatically.
You can add blocked time for resources in your calendar. When this is added, the slot will no longer be available for clients for clients to book online.
Clients booking online will never be able to double book a resource. However, in-store, you can choose to double-book a resource if needed. A notification will appear, giving you the option to proceed or cancel the overlapping booking.
If you’ve added resources after starting to take bookings, you’ll need to manually assign the appropriate resource to each upcoming appointment. Once assigned, Fresha will manage availability and prevent conflicts going forward.
Yes, you can assign multiple resources to a single service through the service settings. When the service is booked, Fresha will automatically reserve the selected resources for that appointment.
