Create and manage group appointments
In this guide, you’ll learn how to schedule and manage group appointments, allowing multiple clients to book and attend together.
In this article
Create a new group appointment
-
From the main menu on the left of your screen, go to Calendar.
-
Click on the Add button in the calendar toolbar and select Group appointment from the panel.
-
Click on the Create new appointment option and select a time slot from the calendar to open the appointment view.
-
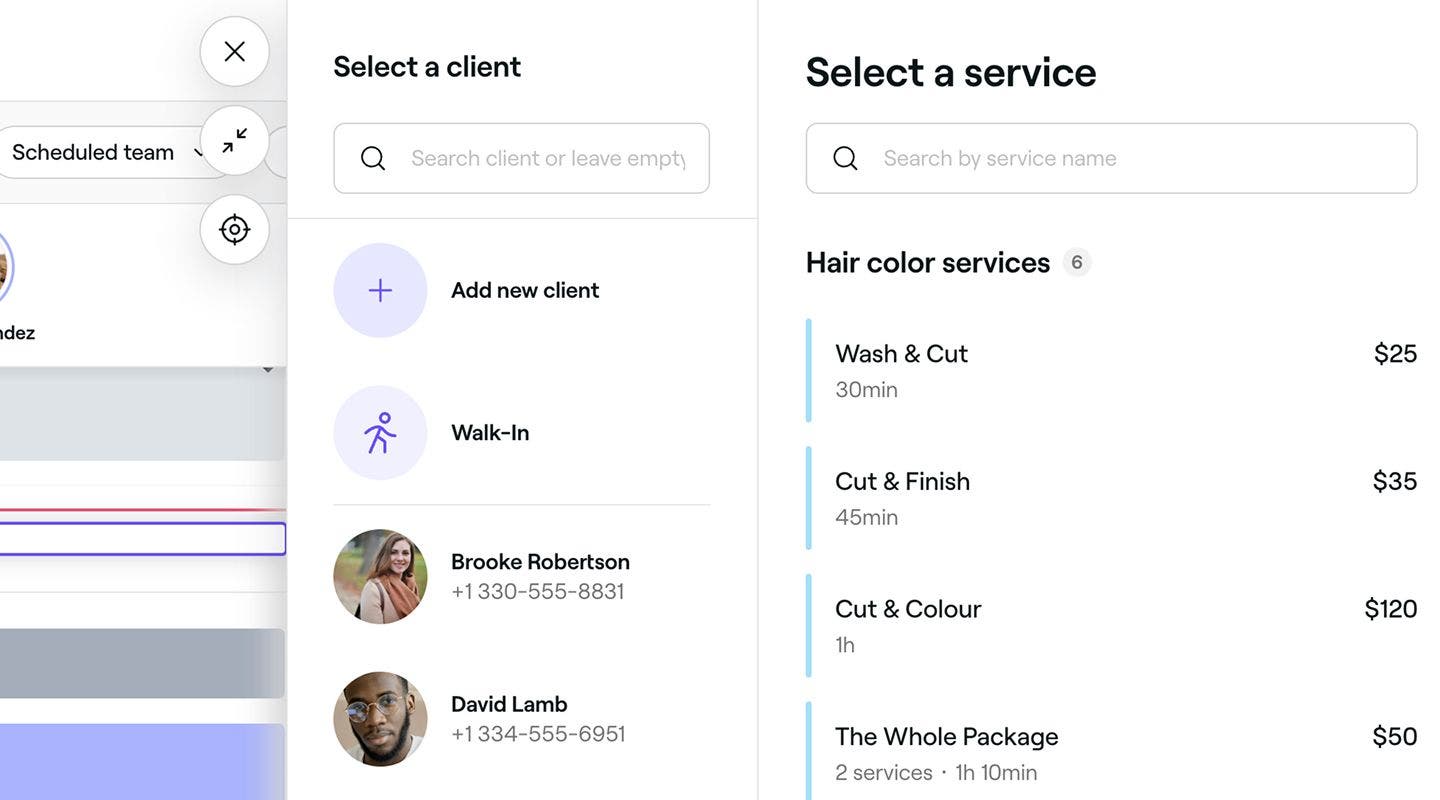
In the left panel of the appointment, click Add client to select an Existing client, create a New client, or leave the appointment as a Walk-in.
-
Search for or select a service from the list on the right panel to add it to the appointment.
- To add more services to the appointment, click the Add service button.
- To customize service details, click on the service.
-
Click on the Save button at the bottom of the right panel.
-
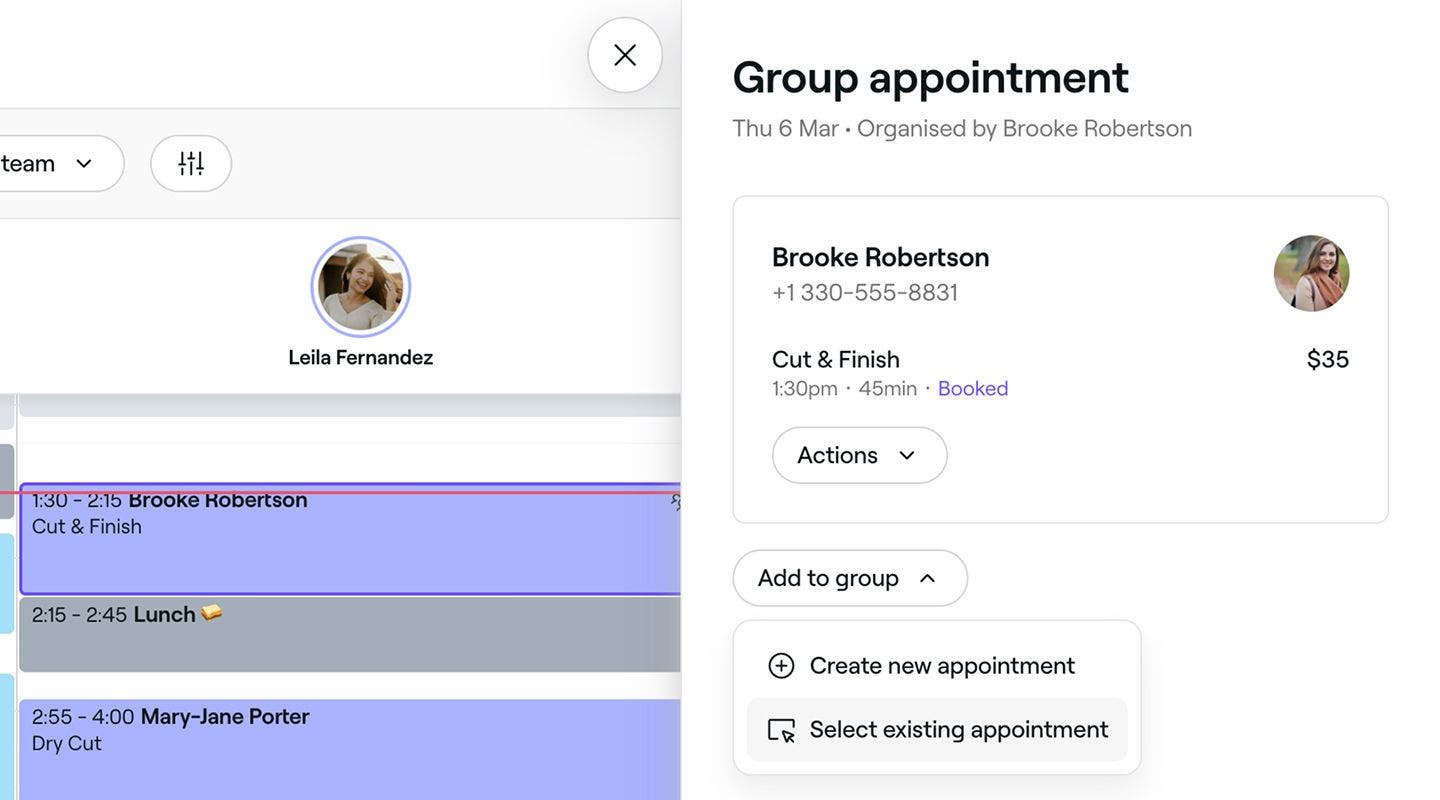
In the group appointment view, click on Add to group to:
- Create a new appointment following the same steps.
- Select an existing appointment from your calendar.
-
Once all appointments are added, click on the X button at the top left of the group appointment view.
The first client booked in the group automatically becomes the group organizer.
Group appointments can also be created by clicking on a time slot directly in the calendar and selecting Group appointment.
Create a group from existing appointments
-
From the main menu on the left of your screen, go to Calendar.
-
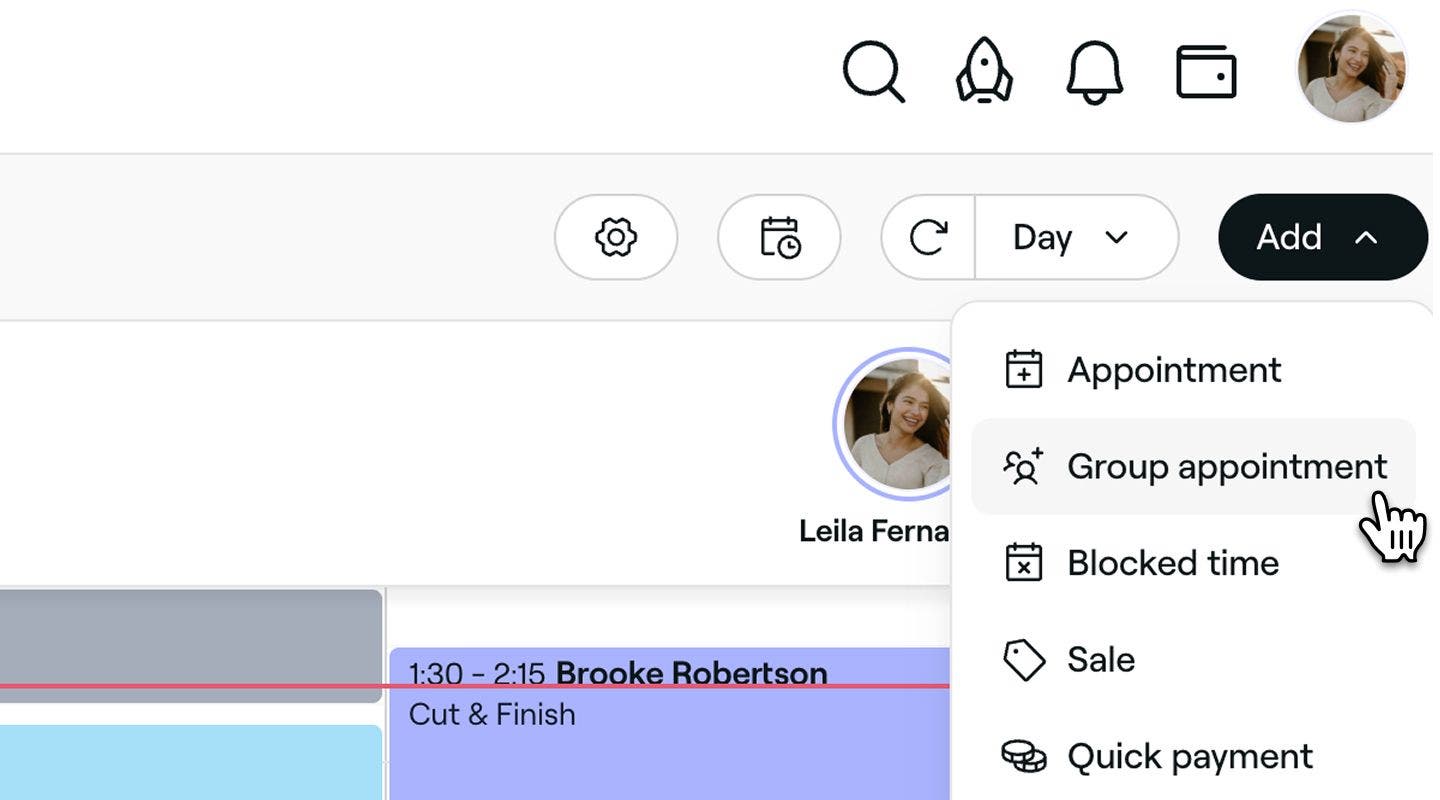
Click on the Add button in the calendar toolbar and select Group appointment from the panel.
-
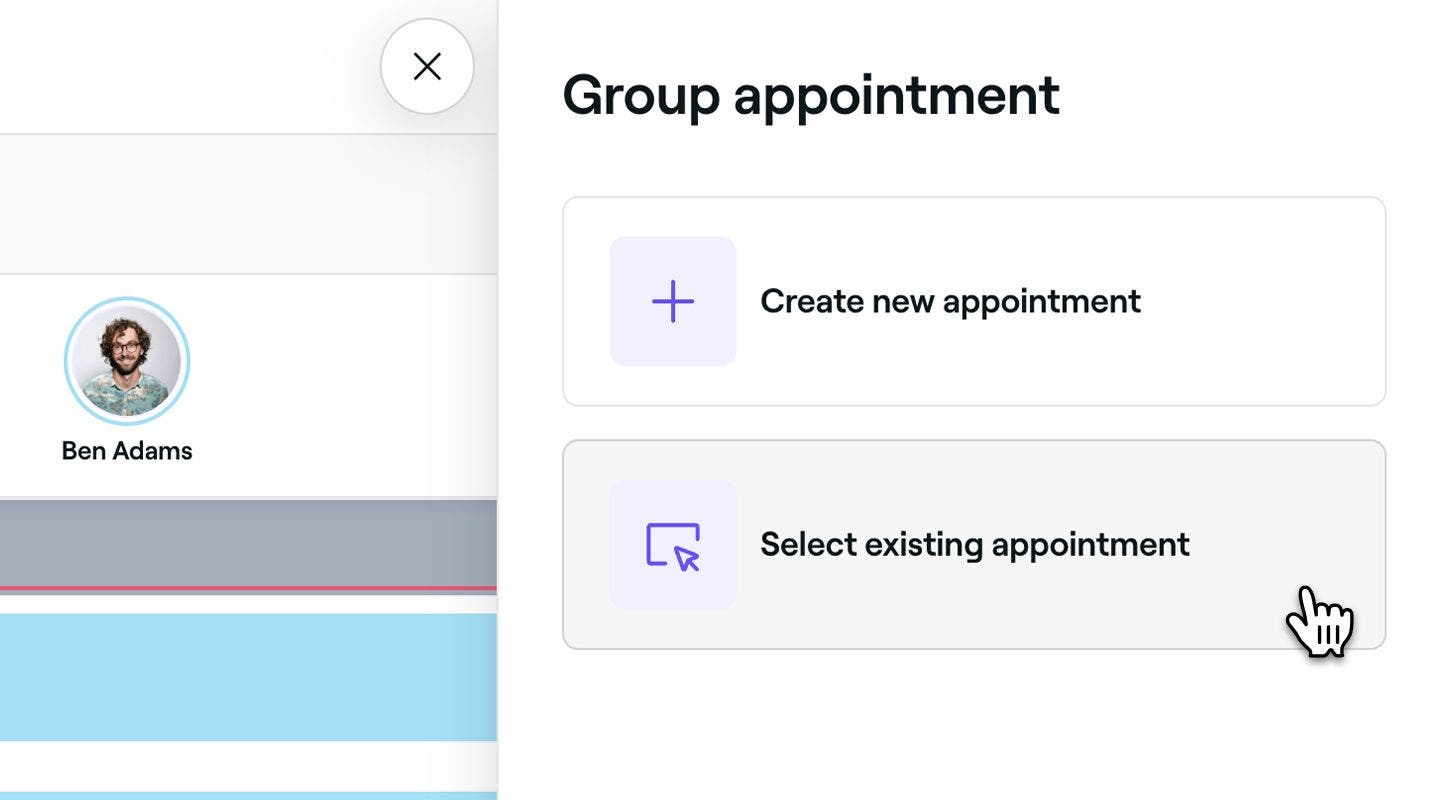
Click on the Select existing appointment option.
-
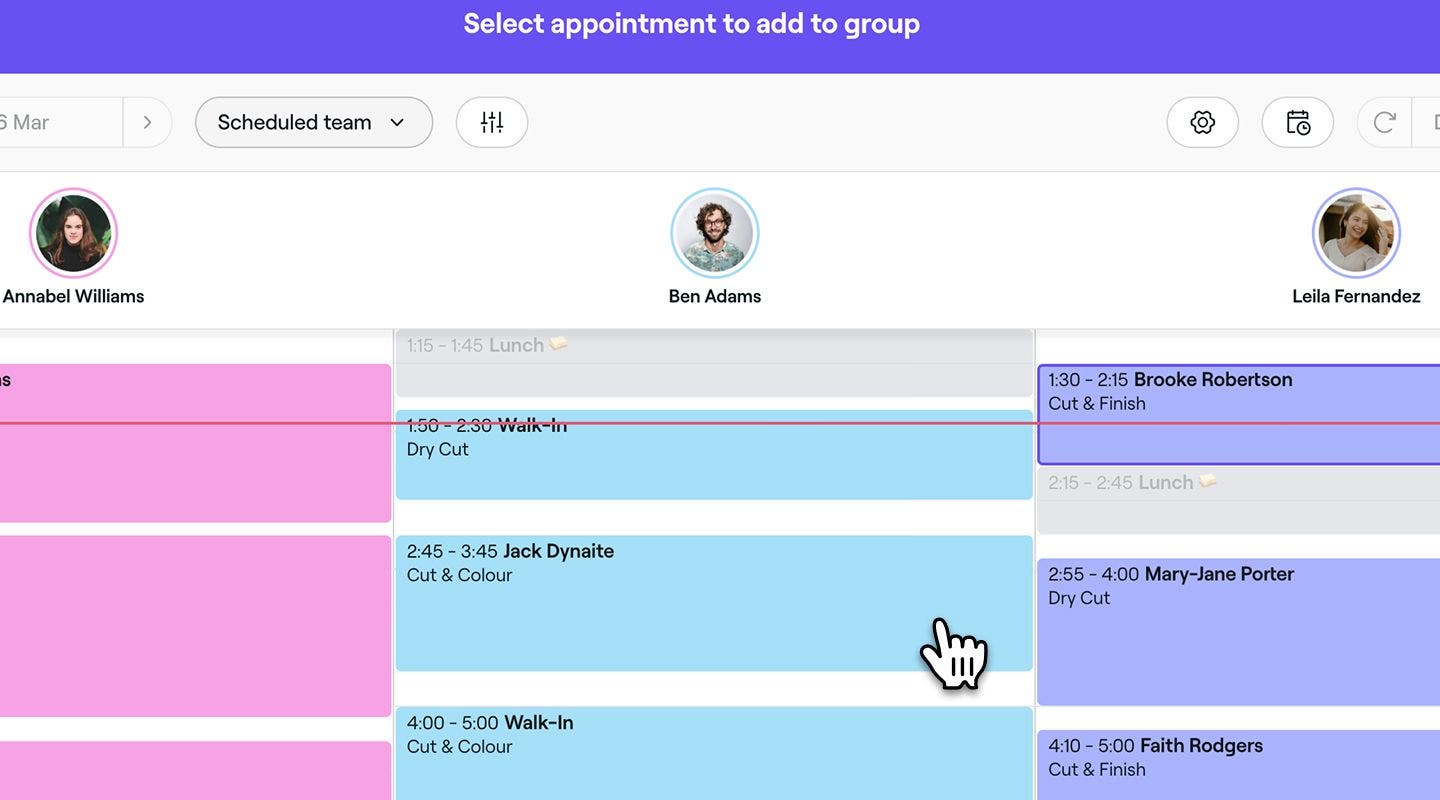
From the calendar view, select an appointment to add to the group.
-
Repeat the above steps to add more appointments to the group. You can also create new appointments.
-
Once all appointments are added, click on the X button at the top left of the group appointment view.
Remove an appointment from a group
-
Open an existing group appointment.
-
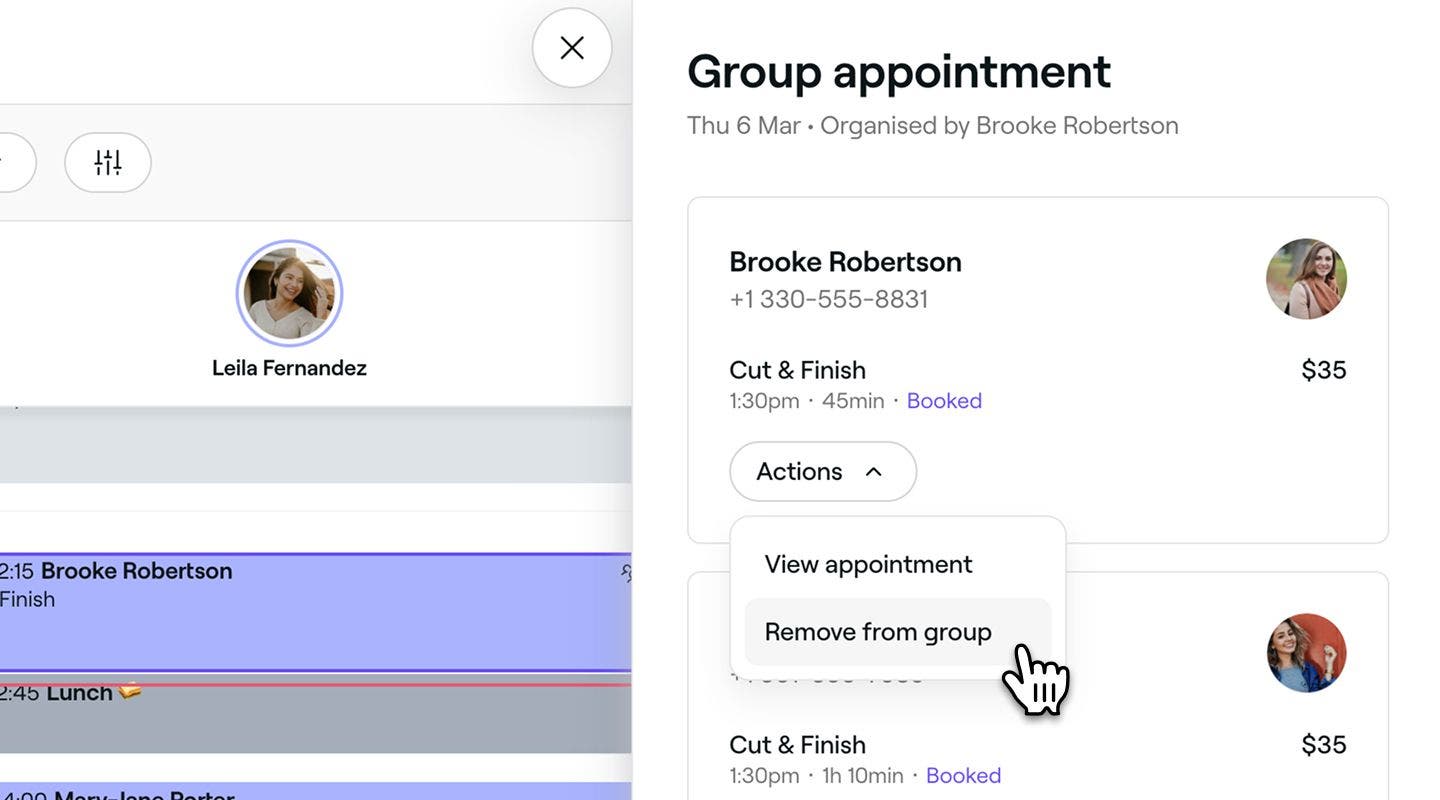
From the group appointment view, click on Actions on an individual appointment and select Remove from group.
-
A confirmation window will appear, asking you to confirm the removal.
The appointment will be removed from the group but will remain confirmed in your calendar. If it's no longer needed, you can choose to cancel it.
Edit an individual appointment in a group
-
Open an existing group appointment.
-
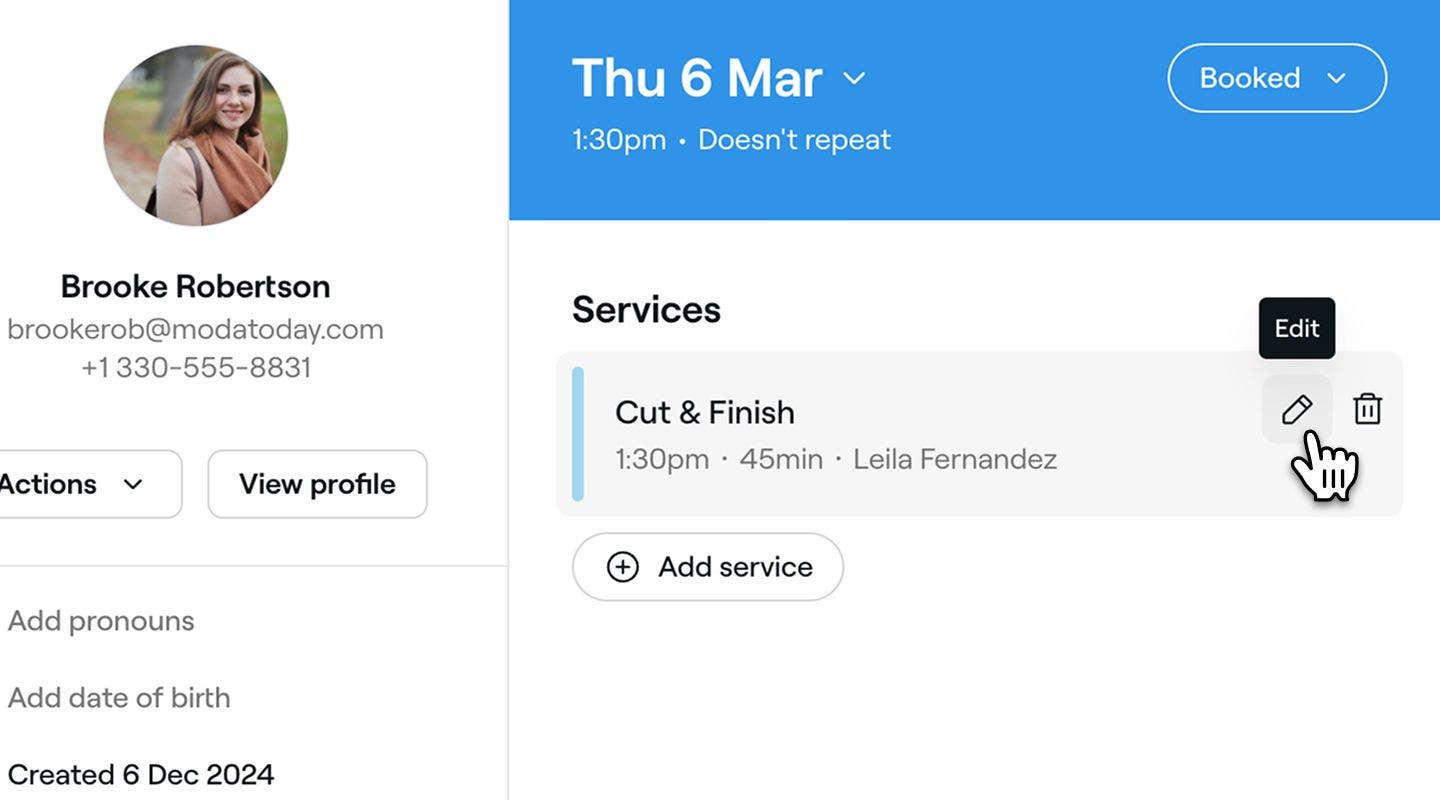
In the group appointment view, click directly on the individual appointment to open its full details.
-
Update the appointment details as needed and click on the Save button at the bottom of the left panel.
To reschedule the entire group, you must update each appointment separately.
Removing a group appointment
-
Open an existing group appointment.
-
Click on Actions (three dots) at the bottom of the group appointment view and select one of the following options from the panel:
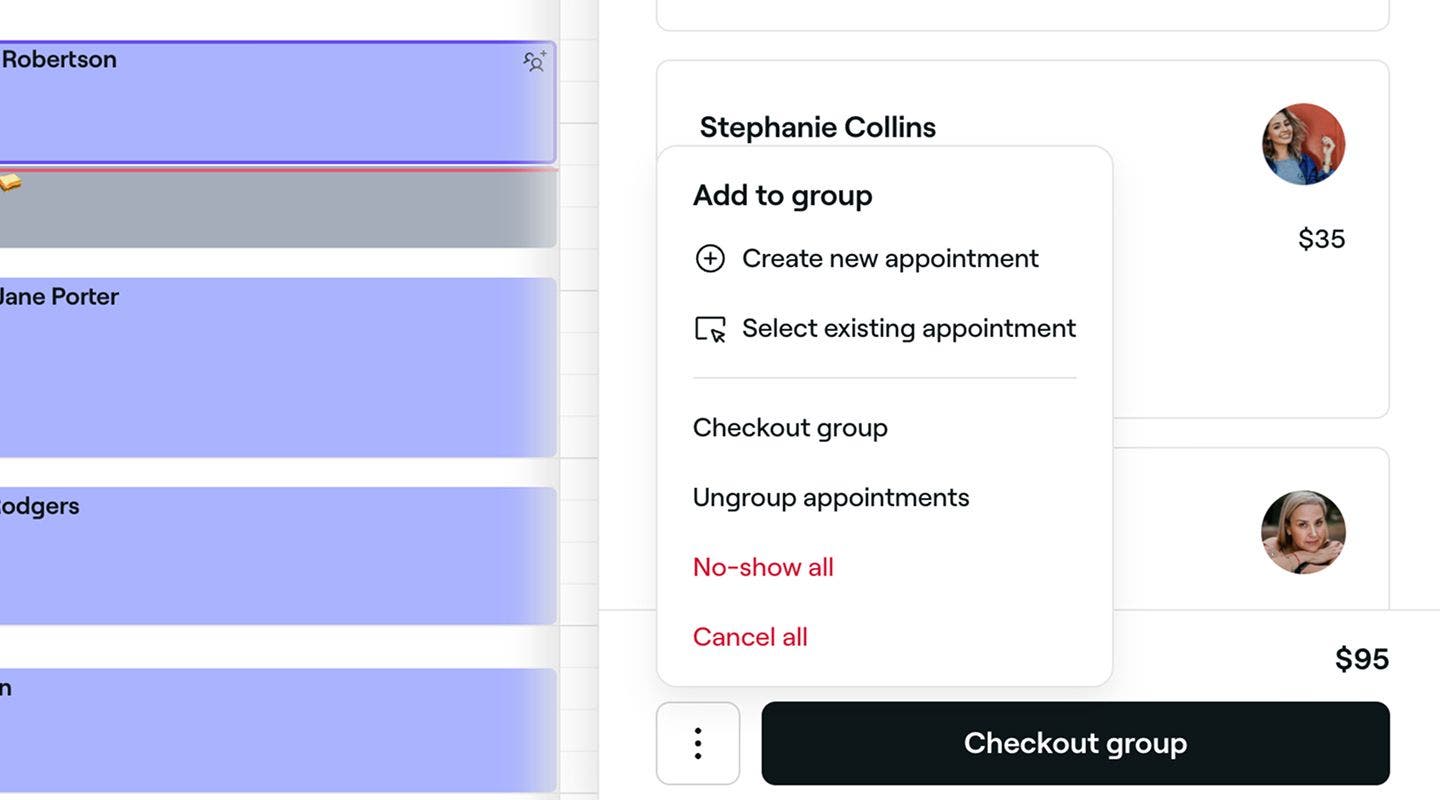
- Cancel all: A confirmation window will appear, where you can select a cancellation reason, manage any payment policies applied, and notify the client for each appointment in the group. Click on the Cancel appointment button to proceed.
- No-show all: A confirmation window will appear, where you can manage any payment policies applied and notify the client for each appointment in the group. Click on the Set as no-show button to proceed.
- Ungroup appointments: Selecting this will remove all of the appointments from the group. Each appointment will still remain confirmed in your calendar.
Each appointment in the group follows its own no-show and cancellation policy. Any applicable fees will be charged to the client who originally confirmed the booking.
Check out group appointments
When checking out a group appointment, the group organizer is responsible for payment by default. You can change the payee as needed.
- Open an existing group appointment.
- At the bottom of the group appointment view, select Checkout group to open the cart.
- In the cart, all appointments in the group will be preselected.
- To customize service details, click on each service.
- Click on the Continue to payment button at the bottom of the right panel.
- Select a payment method from the left panel.
- Click on the Pay now button at the bottom of the right panel to complete the transaction.
The appointments will be marked as complete in the calendar and a group invoice will be sent to the group organizer.
FAQs
- Group appointments booked manually:
There is no maximum limit to the number of appointments that can be added to a group when booked manually through the calendar by you or your team members. - Group appointments booked online by clients:
Clients who book group appointments online can book up to a maximum of 6 people, and may also be limited based on the number of team members available for online booking. - A brand new client books through the Fresha marketplace and is the attendee.
- A brand new client books through the Fresha marketplace and the attendee is a non-specified guest.
- An existing or brand new client books through the Fresha marketplace and the attendee is an existing client with an outstanding Marketplace New Client Fee. This is when the client discovered and booked with you via the marketplace and is yet to have an appointment checked out.
- Create a new appointment: Select a time slot from the calendar and create an appointment.
- Select an existing appointment: Pick an appointment directly from the calendar.
Yes, you can manage the status of individual appointments within a group, including marking them as no-shows or canceled. Open your Calendar and select any appointment within the group. Click on the relevant appointment and use the status tab to mark the appointment as a no-show or canceled. The person who confirmed the appointment will be charged any applicable fees.
Your clients cannot book a group appointment online with the same team member, but you can manually schedule multiple appointments at the same time with the same team member on your calendar.
The maximum number of appointments within a group appointment varies depending on whether the appointment is booked in-store by you and your team or online by clients.
No, any changes including date and time must be made individually to each appointment within the group. Clients cannot reschedule group appointments online.
Individual appointments receive separate notifications. The group organizer receives one notification for the entire group, including confirmations, cancellations or no-shows. Clients will only receive notifications about their own appointments.
The Marketplace New Client Fee will be applied to each eligible appointment in the group. The appointment is eligible when:
Yes, you can allow clients to book group appointments online. Just update the your Online availability settings to Allow group appointments. Once enabled, clients will be able to book appointments for multiple people attending as a group. This applies to all services and is not limited to specific ones.
Yes, you can add more appointments to a group by opening an existing group appointment and clicking on Add to group. You can choose to:
To check out specific appointments from a group, select the individual appointment before proceeding to payment at the point of sale. You can then return to the Calendar to complete checkout for the remaining appointments.
- Group appointments booked manually:
