Send appointment updates
In this guide, you’ll learn how to set up and manage automatic text, WhatsApp and email notifications sent to clients during key stages of their appointment or when changes are made.
In this article
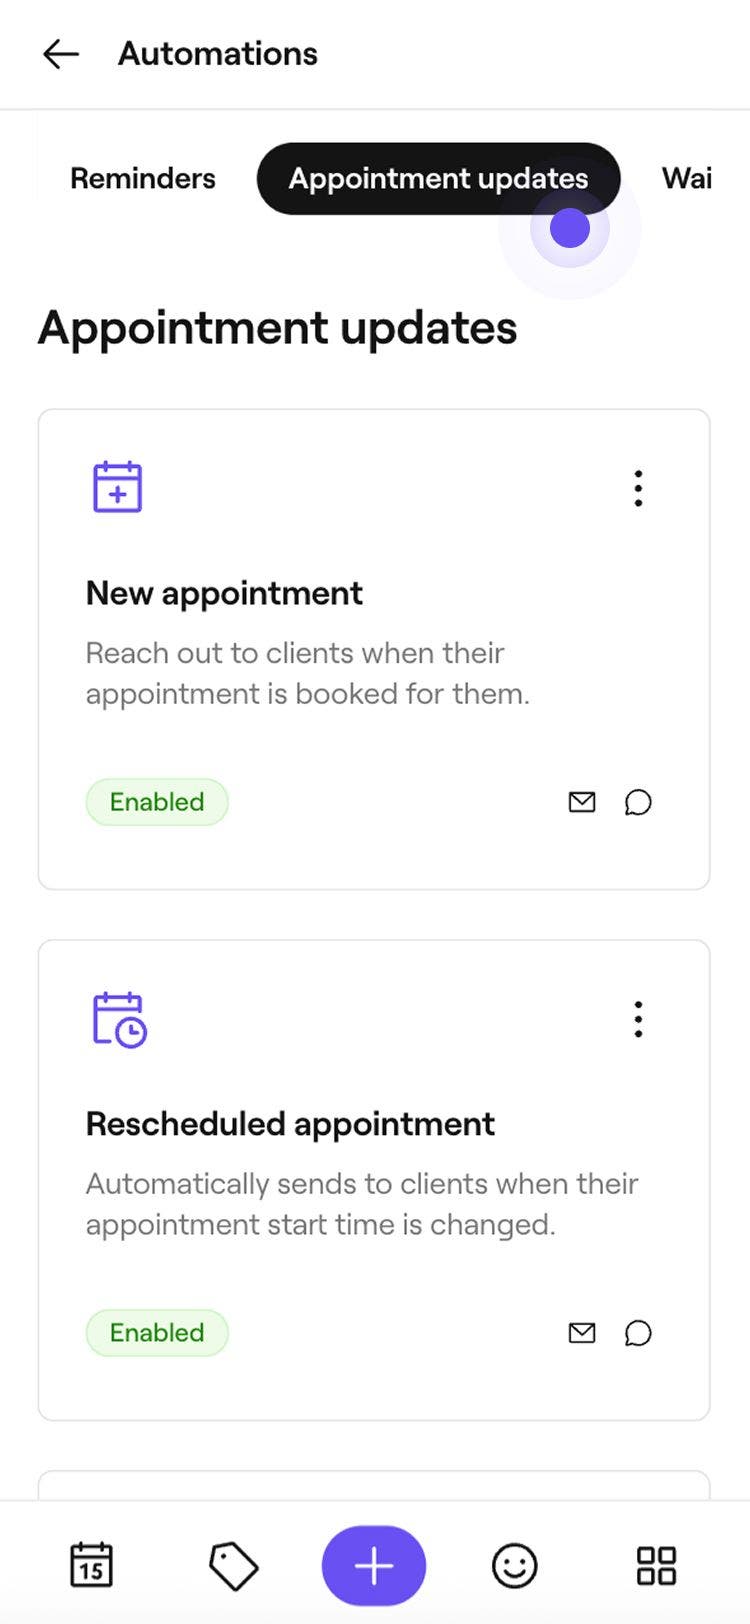
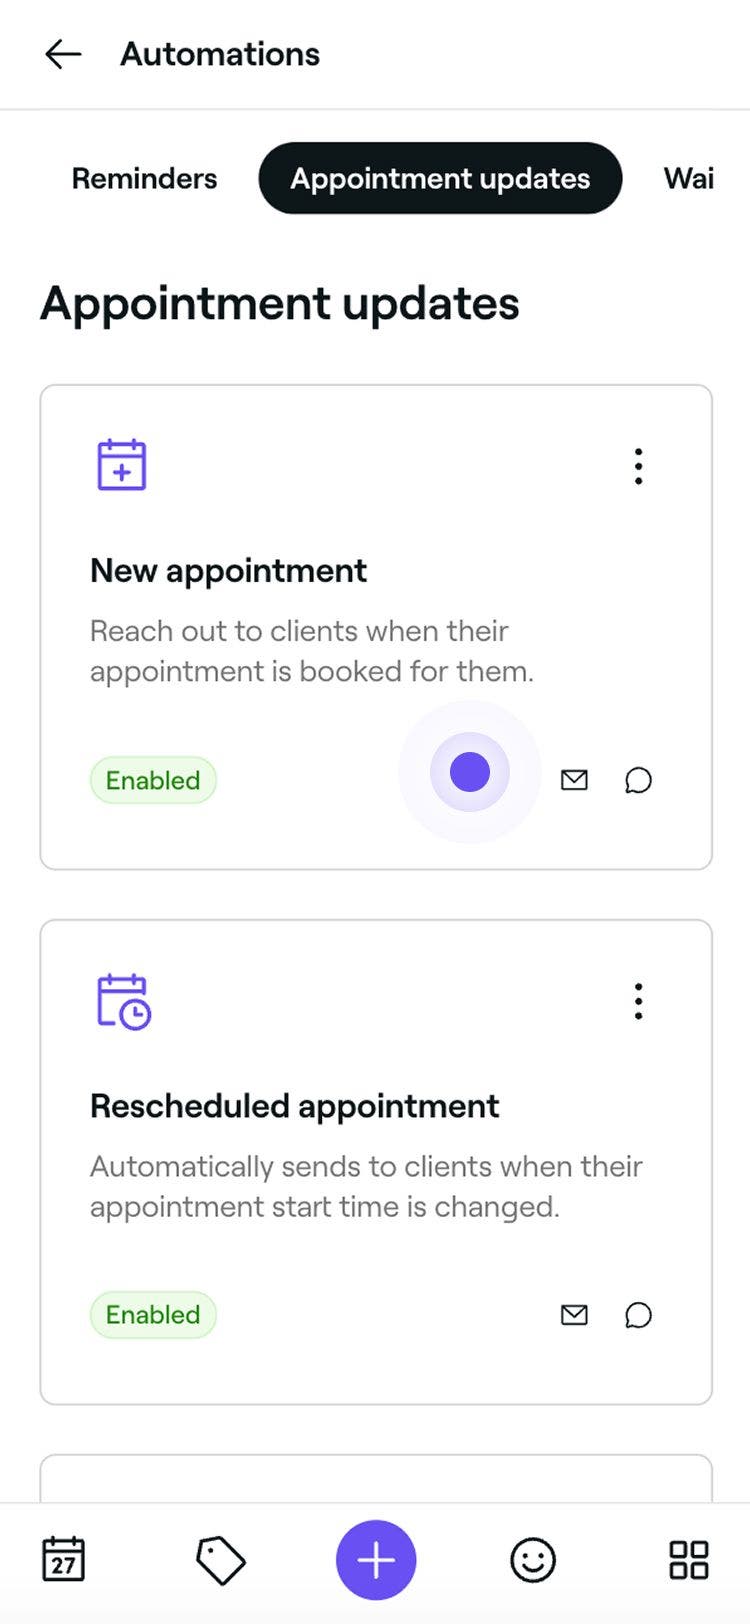
How do appointment updates work
Appointment updates are automatic messages triggered by specific actions related to a client's booking. These include:
- New appointment message: Lets clients know when an appointment has been booked for them.
- Rescheduled appointment message: Tells clients if the time of their appointment has changed.
- Canceled appointment message: Updates clients if their appointment is canceled.
- Did not show up message: Sends a message if a client misses their appointment.
- Thank you for visiting message: Follows up after the appointment with a link to leave a review.
- Thank you for tipping message: Sends a thank-you message when a client leaves a tip.
These work alongside Appointment reminders, which notify clients of their appointments ahead of time.
Edit appointment updates
-
From the main menu on the left of your screen, go to Marketing.
-
In the left menu panel, select Automations.

-
Select the Appointment updates tab at the top to view and manage appointment updates.

-
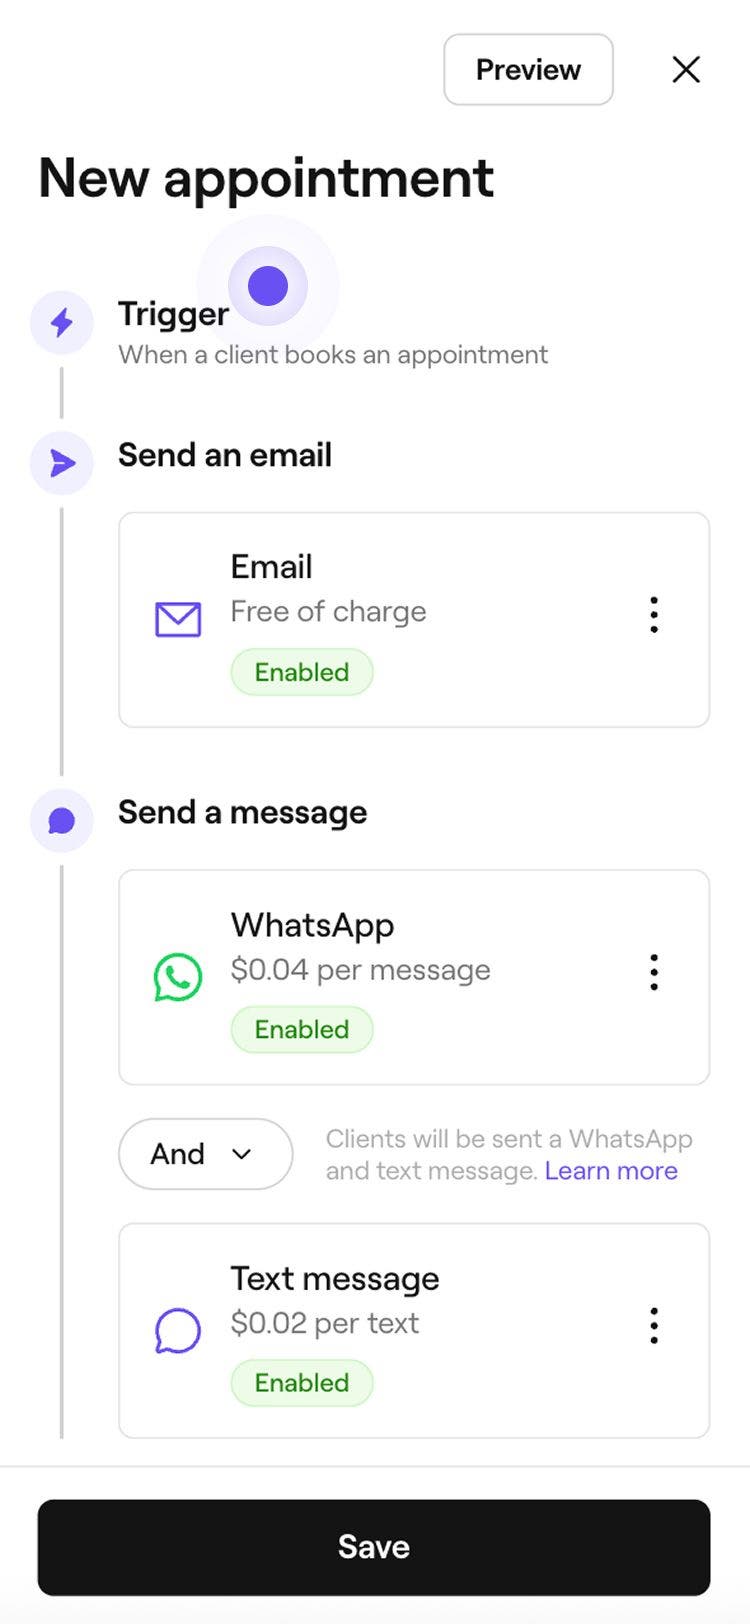
Click on an appointment update automation to open its overview.

-
In the appointment update overview, click on the Options button in the top right and select Edit from the panel.

-
The Trigger for when the appointment update is sent will be preset. For example, a Thank you for visiting update is sent when a client’s appointment is checked out.

-
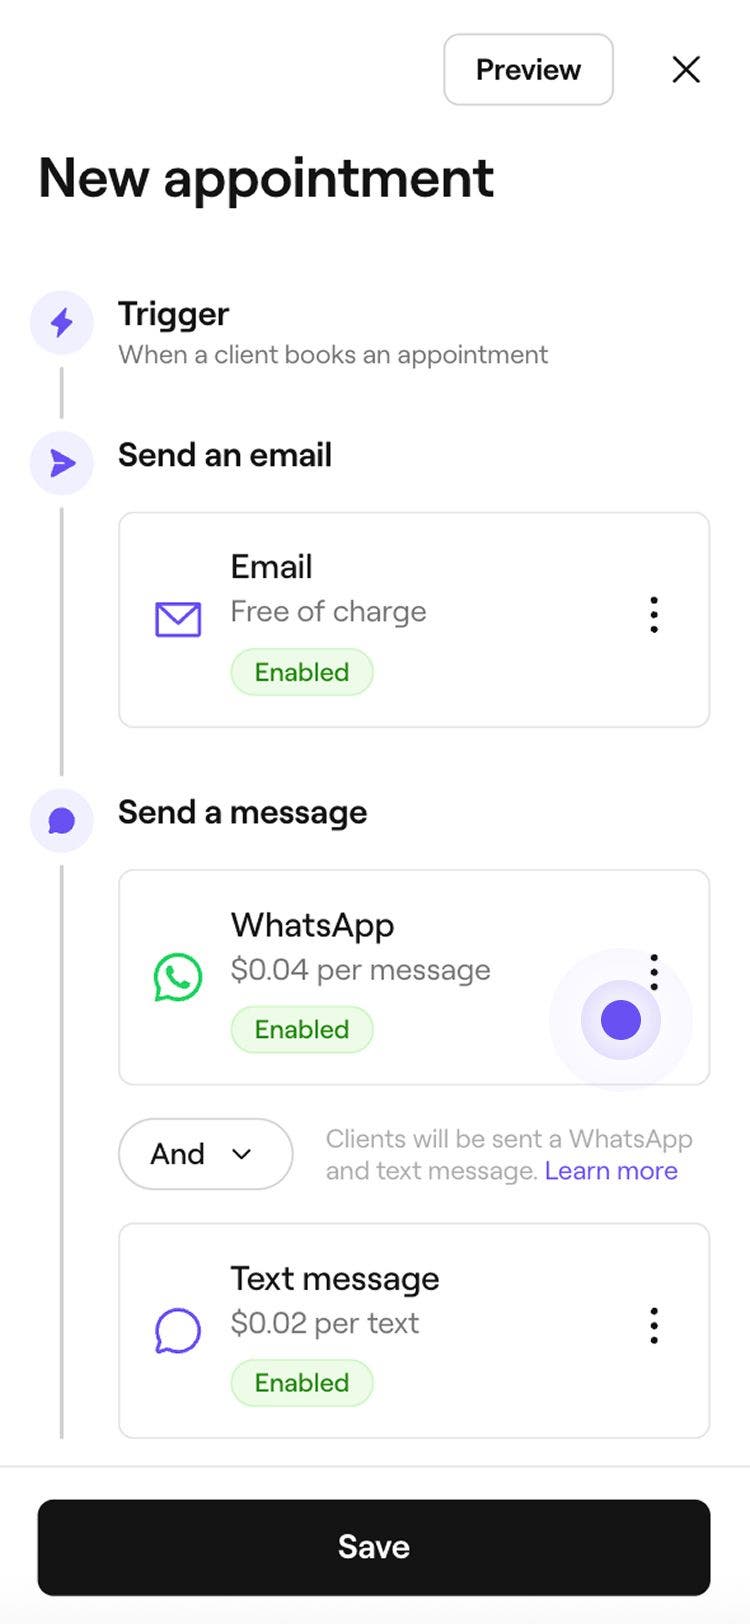
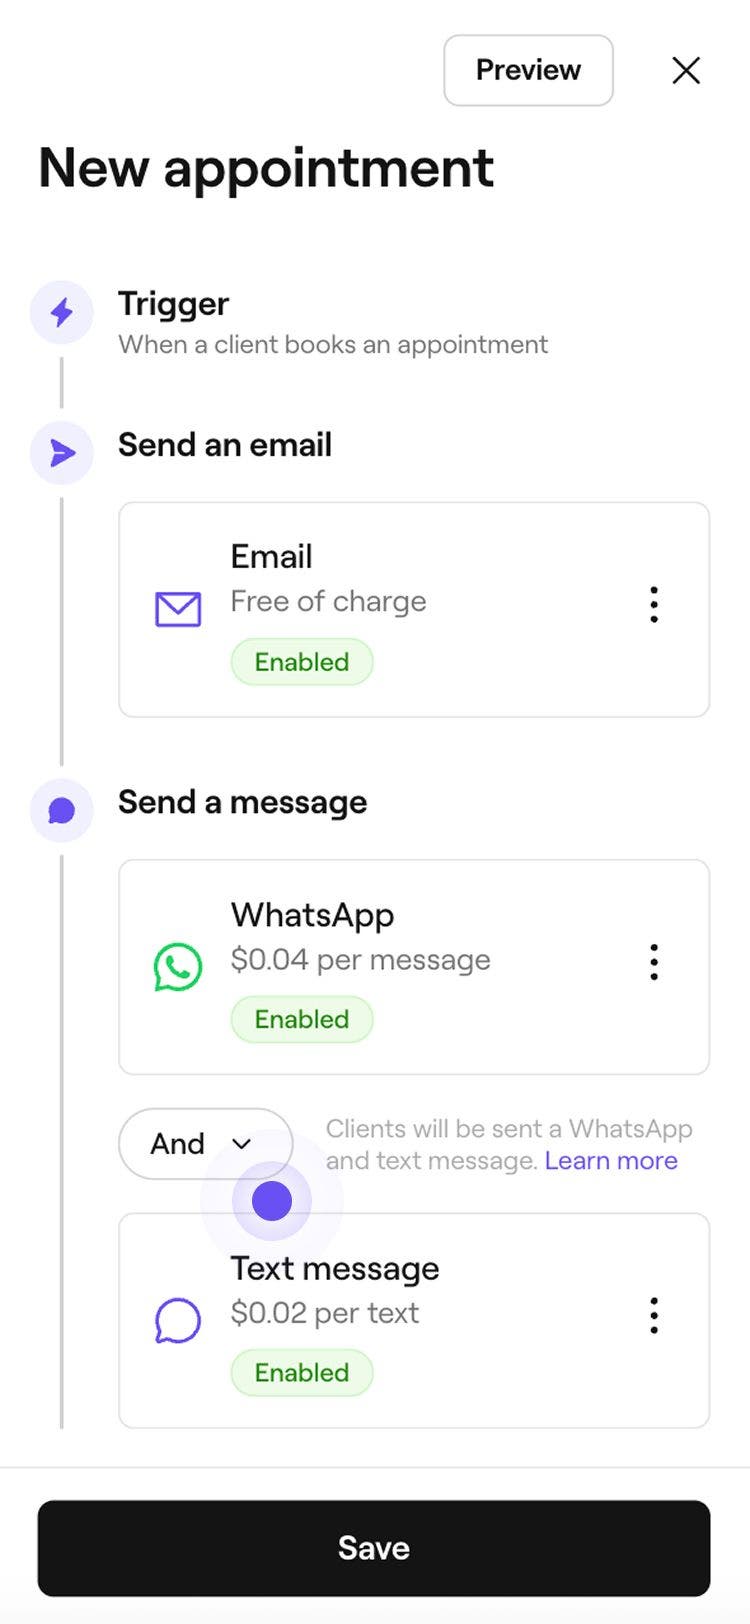
Under Send an email, click the Actions button to manage your email update settings:
- Edit content: Select Edit content to add important information to your update. You can tick the checkbox to Display the service price, and add any extra details in the Important info field. Click Save in the top-right to apply your changes.
- Preview: See what automated email messages your clients will receive by sending yourself a test email.
- Disable: Select Disable if you don’t want this update to be sent via email.

-
Under Send a message, choose to send the update via WhatsApp, text message, or both.
- To manage each channel, click on the Actions button next to WhatsApp or text message to Preview the message or Disable that channel.

- To manage each channel, click on the Actions button next to WhatsApp or text message to Preview the message or Disable that channel.
-
Use the And/Or toggle between WhatsApp and text to control how the message is sent:
- And: The update will be sent via both WhatsApp and text message, ensuring the client receives it through channels.
- Or: The update will first try to send via WhatsApp. If the client doesn’t have WhatsApp or the message cannot be delivered, it will automatically be sent as a text message. You’ll only be charged for the message that’s successfully sent. If the WhatsApp message fails and a text message is sent instead, you’ll only be charged for the text message.

-
Click on the Save button in the top right to create the appointment update.

After editing the automation, the appointment update will be automatically sent to clients based on your updated notification preferences. You can also manage follow-ups for reviews and tips.
Appointment updates are already enabled by default when you first create your workspace, meaning clients will automatically receive appointment confirmations and updates on reschedules, cancellations, and no-shows.
Manage appointment updates
-
Open an existing appointment update from your Automations.

-
In the appointment update overview, click on the Options button in the top right and select one of the following options from the panel:
- Enable: Follow the steps to enable the appointment update, including the channels it is sent through. Click on the Save button at the top to enable the appointment update.
- Disable: Stop the appointment update from being triggered by clicking on the Disable button in the pop-up to confirm.
- Reset: Restore the appointment update to its default settings by click on the Reset button in the pop-up to confirm.

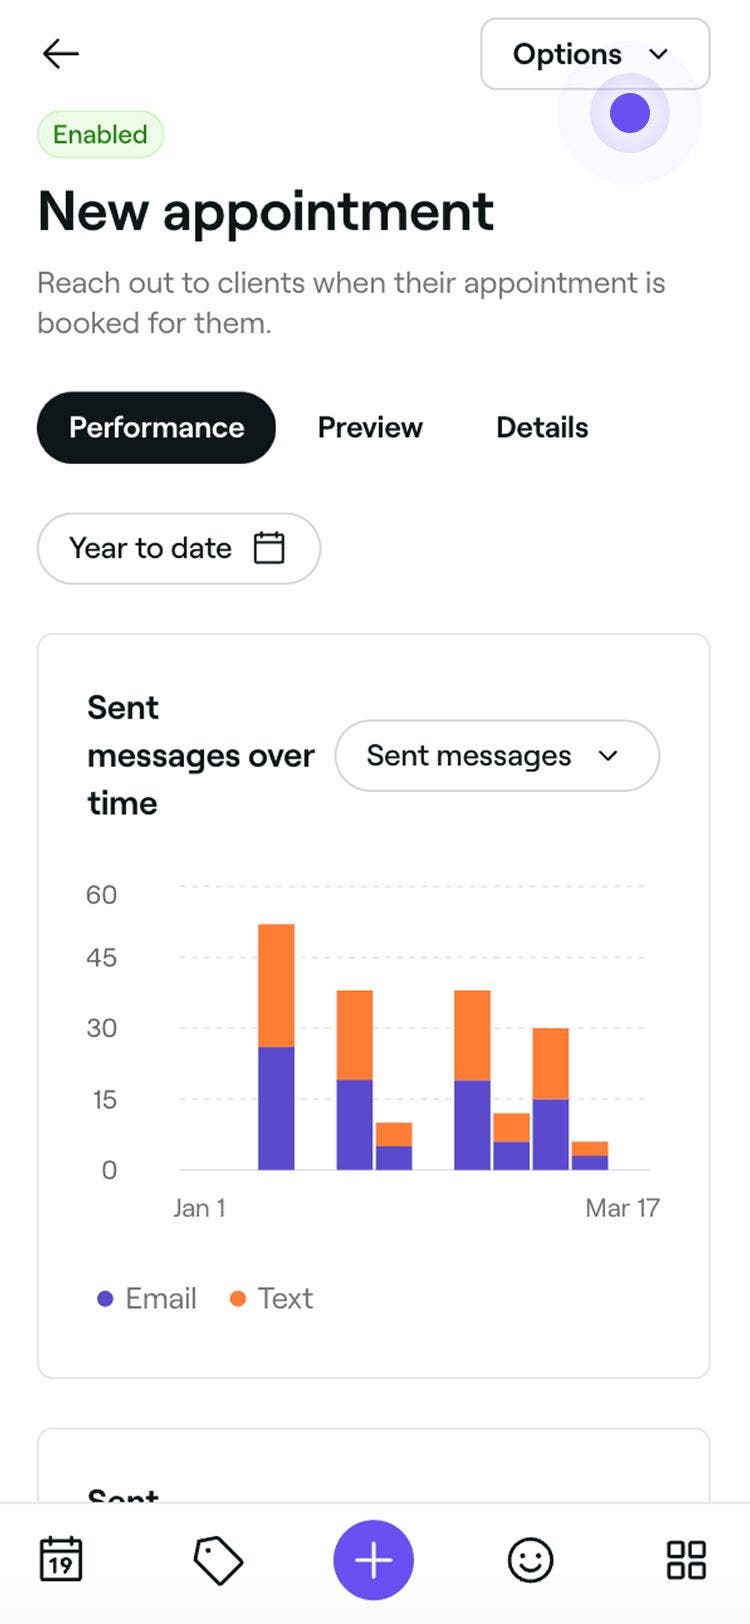
Preview appointment updates
Before sending automated appointment updates, you can preview how each message will appear to your clients.
- Open an existing appointment update from your Automations.
- In the appointment update automation overview, click on the Options button in the top right and select Edit from the panel.
- Click on the Preview button in the top-right.
- In the preview, click on each channel type to check how your message will appear across Email, Text message, and WhatsApp.
- In the top right, click on one of the following options:
- Send test email: In the pop-up, enter an email address and click on Send to see exactly how it will appear to clients before enabling the automation.
- Done: Close the message preview.
FAQs
Automated thank you messages are sent after an appointment is checked out, usually within 24 hours of the appointment time. Clients must have notifications enabled to receive them.
If an appointment is checked out more than 24 hours after its scheduled time, the message will not be sent.
You can personalize appointment updates by adding details such as aftercare instructions, important policies, or follow-up information in the Important Info section. These updates will appear in email appointment updates, but text messages follow a set format and cannot be customized.
If a client has not received an automated update message, check that their contact details are correct in their client profile and they have opted in to receive messages in their notification settings.
Clients with an unpaid or partially paid invoice will still receive a thank you message after checkout. The message is triggered by the checkout process, regardless of whether the invoice has been fully paid.
Thank you for tipping messages are only sent via email, regardless of notification settings. However, automated messages for late cancellations or no-show fees will always be sent, regardless of the business’s communication preferences.
Email appointment updates are always free to send through Fresha. Text message appointment updates, however, are deducted from your text message balance. You can manage your text message balance under billing.
You can view sent messages by going to Marketing and selecting [Messages history](You can view sent messages by going to Marketing and selecting Messages history. This shows a list of all automated messages sent to clients, and you can search by client name, email, or booking reference. To check messages for a specific appointment, open the appointment, click the Actions (three dots) at the bottom of the screen, and select View appointment activity. This will show a timeline of messages related to that booking.). This shows a list of all automated messages sent to clients, and you can search by client name, email, or booking reference.
To check messages for a specific appointment, open the appointment, click the Actions (three dots) at the bottom of the appointment view, and select View appointment activity. This will show a timeline of messages related to that booking.
WhatsApp charges businesses like Fresha for access to its WhatsApp Business API, which is not a free service. We’ve integrated with WhatsApp to make it easier for you to connect with clients, but any usage costs are determined by WhatsApp’s own pricing for business communication, you can find these in our Pricing page.
To send an email test for an automated message, first select the message you want to check (for example, New appointment automation) to open the details. Click on Options from the top-right and select Edit. Then, under the Send an email section, click on Actions and choose Preview. This opens an email preview window where you can review the automated message. If you’d like to see how it appears in your inbox, click Send test email in the top-right. In the pop-up, update the email address if needed and select Send.
The test email is only sent to the specified email address and won’t reach your clients.