Update client details
In this guide, you’ll learn how to manage a client’s profile and track all their information in one place.
In this article
Add a client's personal information to their profile
You can update client details while scheduling an appointment, creating a sale, or through your client list.
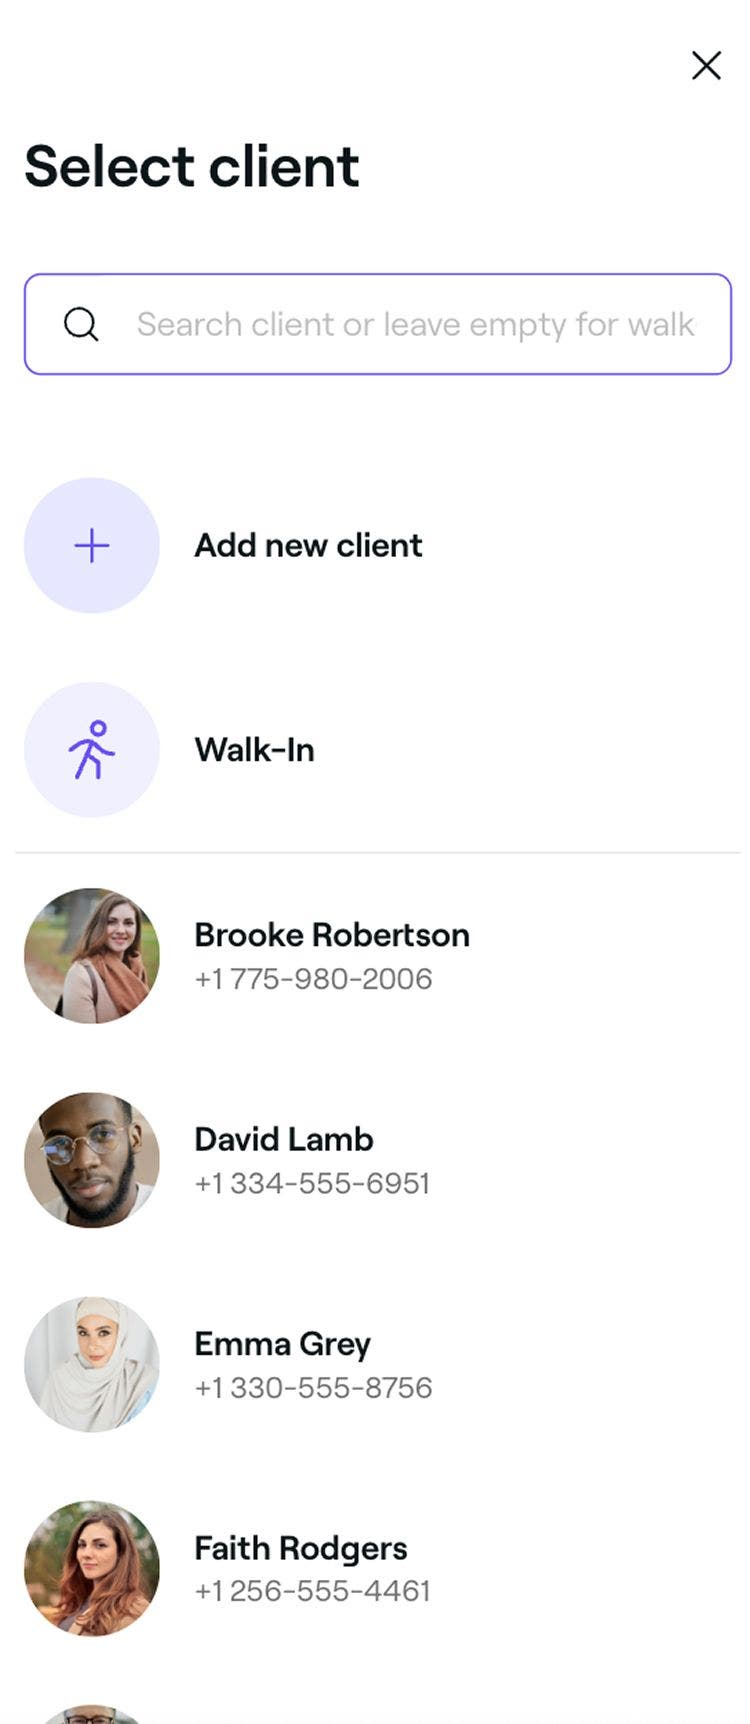
- When scheduling an appointment, select an existing client from the left panel of the appointment view.

- Click on the Actions button, then choose Edit client details to update the client's profile.

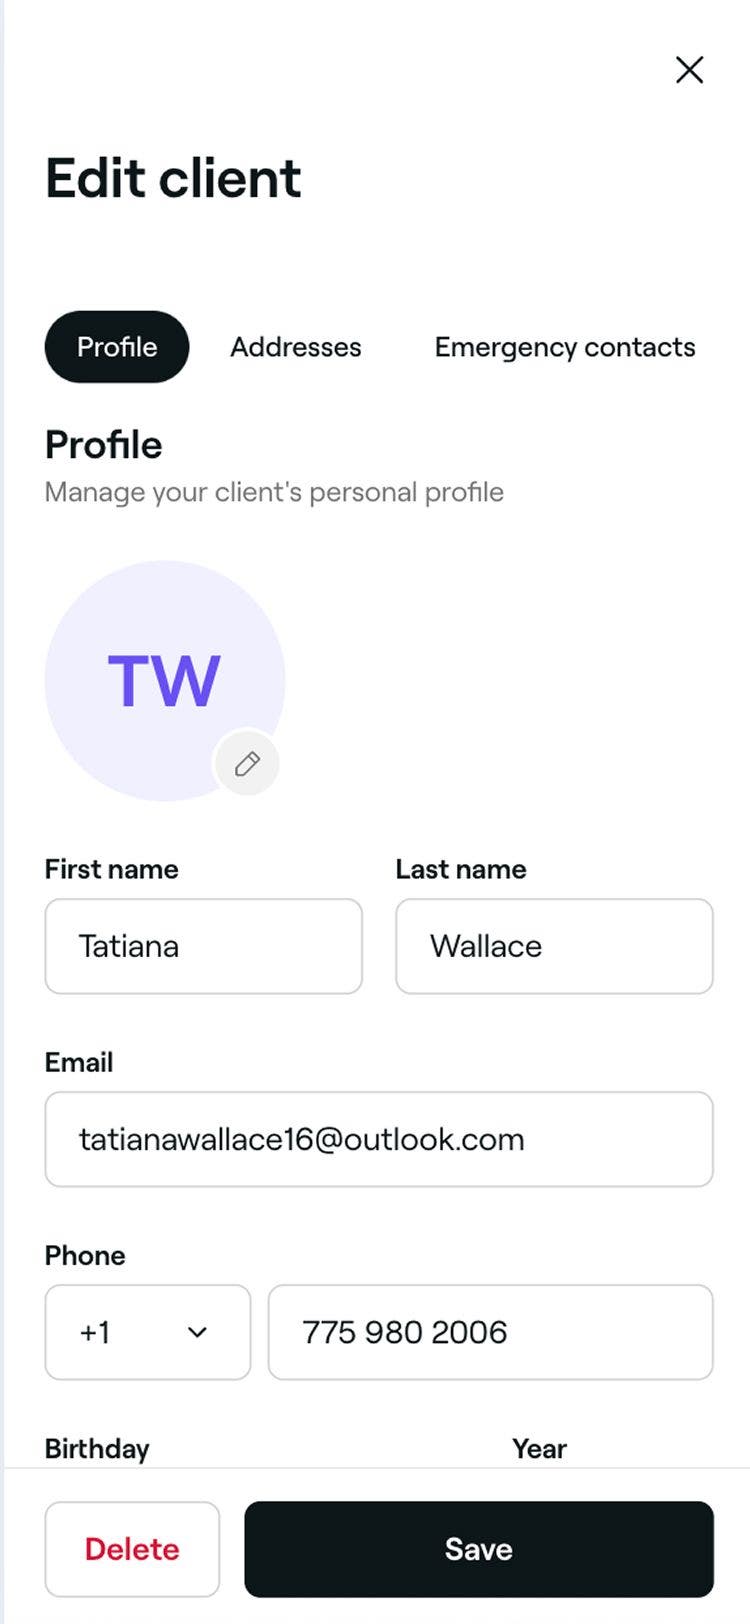
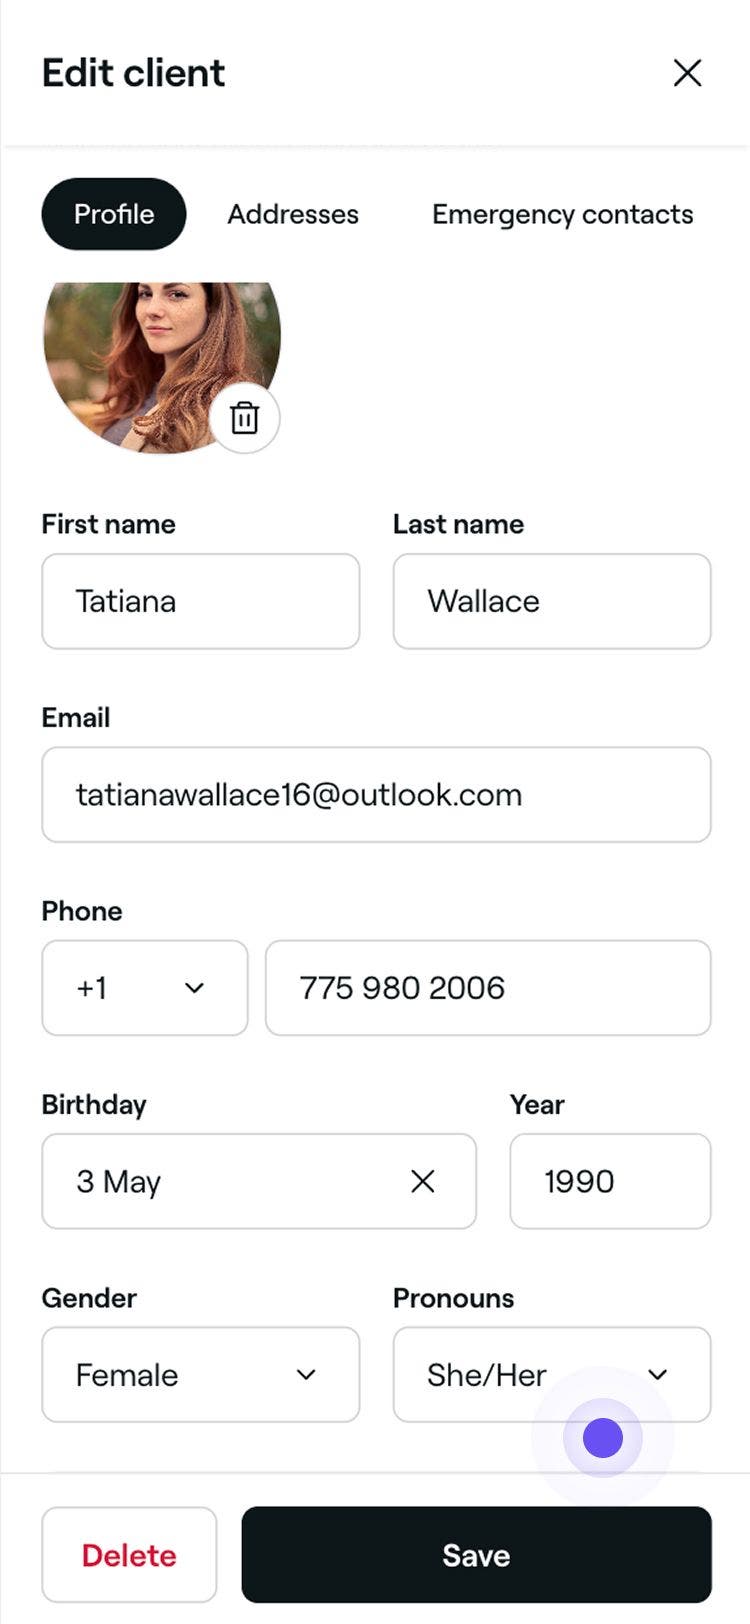
- In the Edit client view, click on the Edit icon on the profile photo to upload a new photo for the client.

- Under Profile, add the client's Date of birth, Gender, and Pronouns.

- Under Additional info, provide the following details:
- Preferred language: Select the language the client prefers to receive automated messages in.
- Client source: Choose how the client discovered your business. You can create new options in your Client source settings.
- Occupation, Nationality, and any additional contact details.

- Click on the Save button in the top right to update the client's profile details.


After you save the changes, the client’s profile will show their updated photo, personal details, and contact information.
Clients with a Fresha account can update their own details, and those changes will appear automatically in their profile. If you update their details yourself, your version will only be visible in your workspace and won’t update their marketplace profile.
Add a client's address to their profile
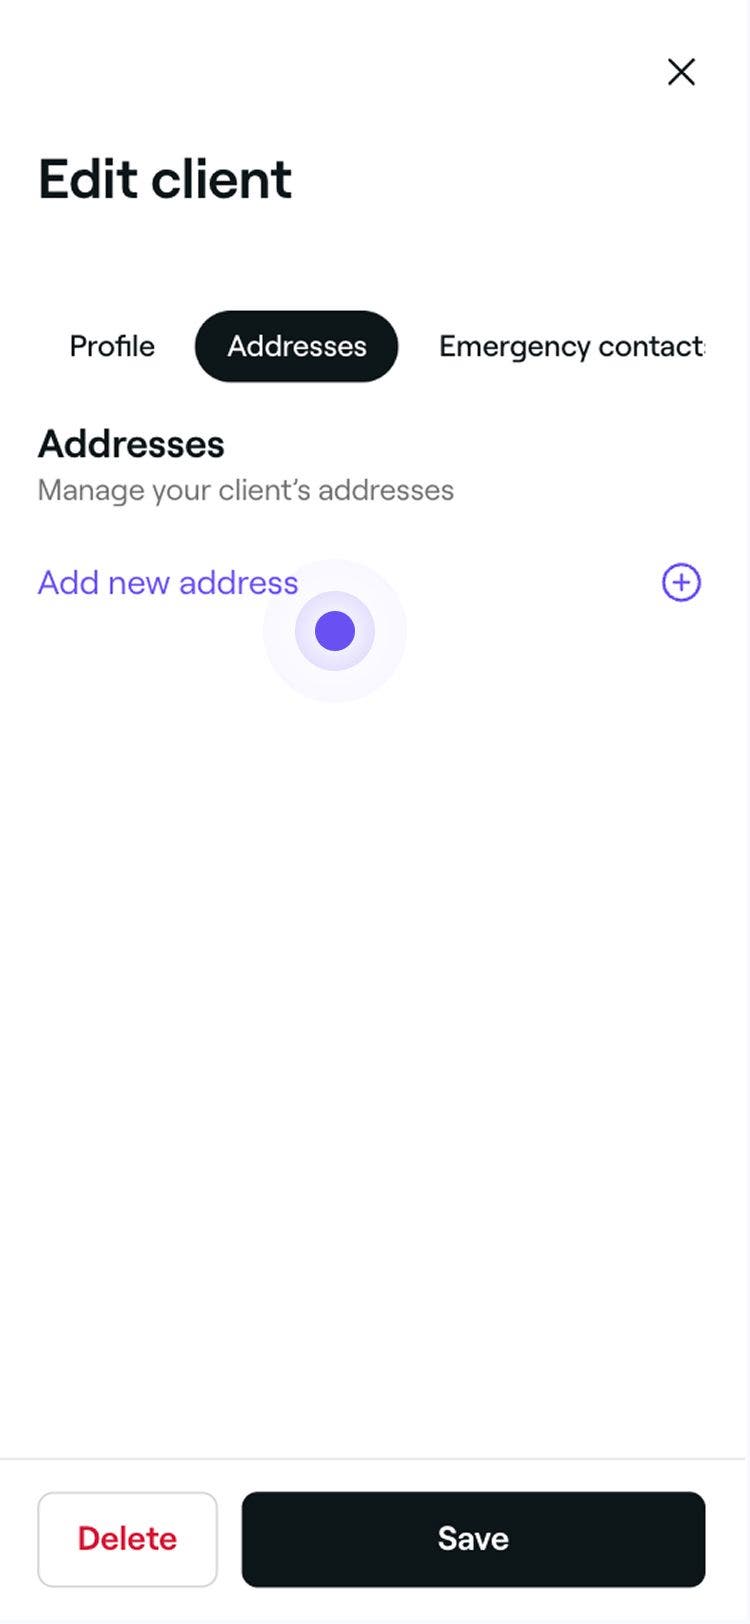
- In the Edit client view, select Addresses from the left menu panel and click on Add new address.

- Select an address type in the pop-up, enter the address name, and under Address, start typing the address and select from the suggested options. Once selected, click on the Continue button.

- Click on the Save button in the top right to update the client's profile details.

After saving, the client’s profile will be updated with the new address.
You can edit or remove the address at any time by following the same steps.
Add emergency contacts for clients
- In the Edit client view, select Emergency contacts from the left menu panel.

- Under Emergency contacts, provide the following details for the Primary and Secondary contact:
- Full name: The contact’s first and last name.
- Relationship: How they are connected to the client, for example partner, parent, friend.
- Email: A valid email address
- Phone: A contact number

- Click on the Save button in the top right to update the client's profile details.

Once saved, the emergency contact will be added to the client's profile. You can update it at any time by following the same steps.
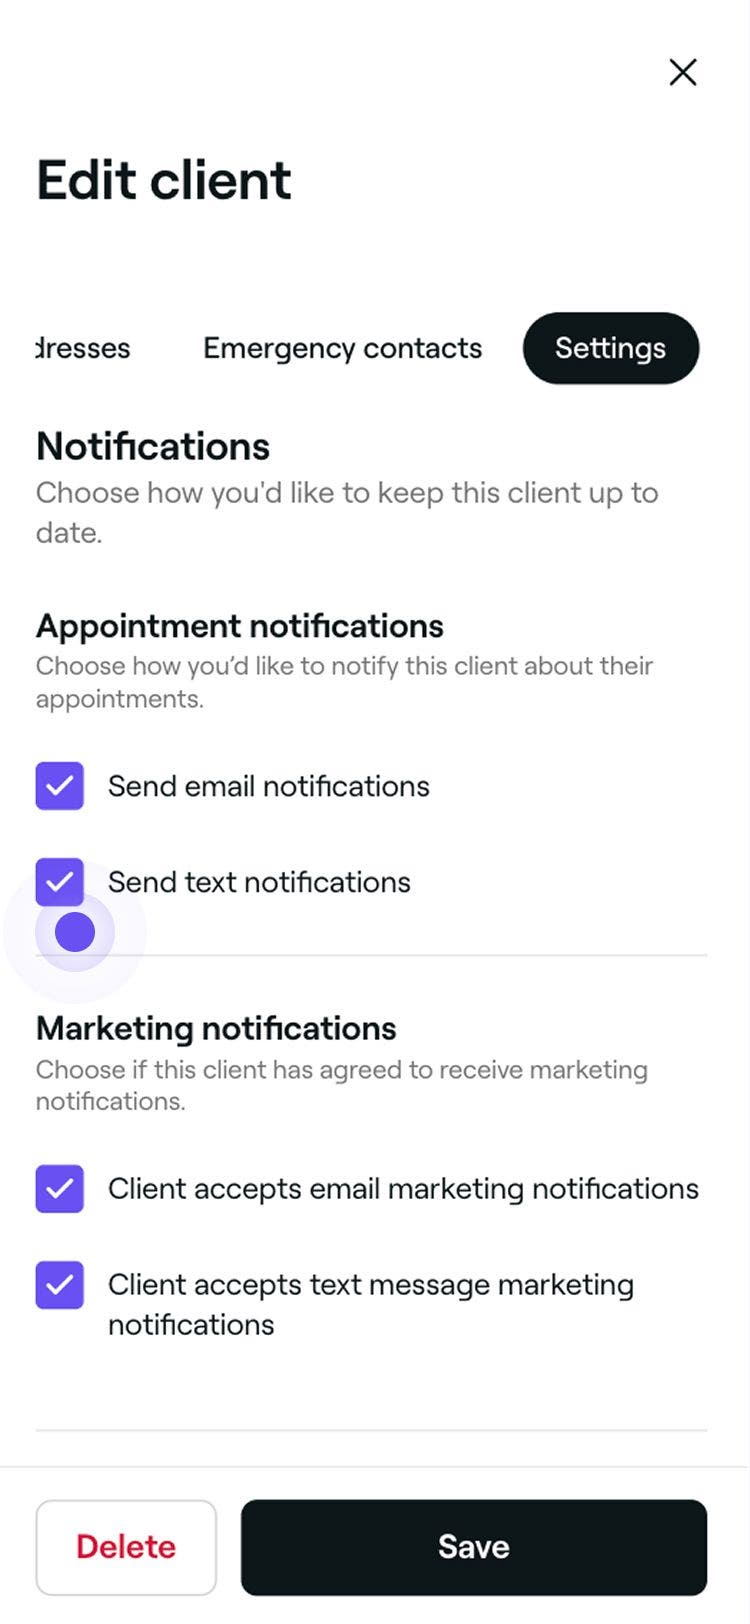
Update a client's settings
You can manage a client’s settings for appointment updates, marketing messages, and upfront payment requirements directly from their profile.
- In the Edit client view, select Settings from the left menu panel.
- Under Appointment notifications and Marketing notifications, tick the checkboxes to choose whether the client receives updates by email, text message, or both.

- If payment processing is enabled, use the toggle under Upfront payments and card capture to require the client to pay in advance or confirm the booking with a card.

- Click on the Save button in the top right to update the client's profile details.
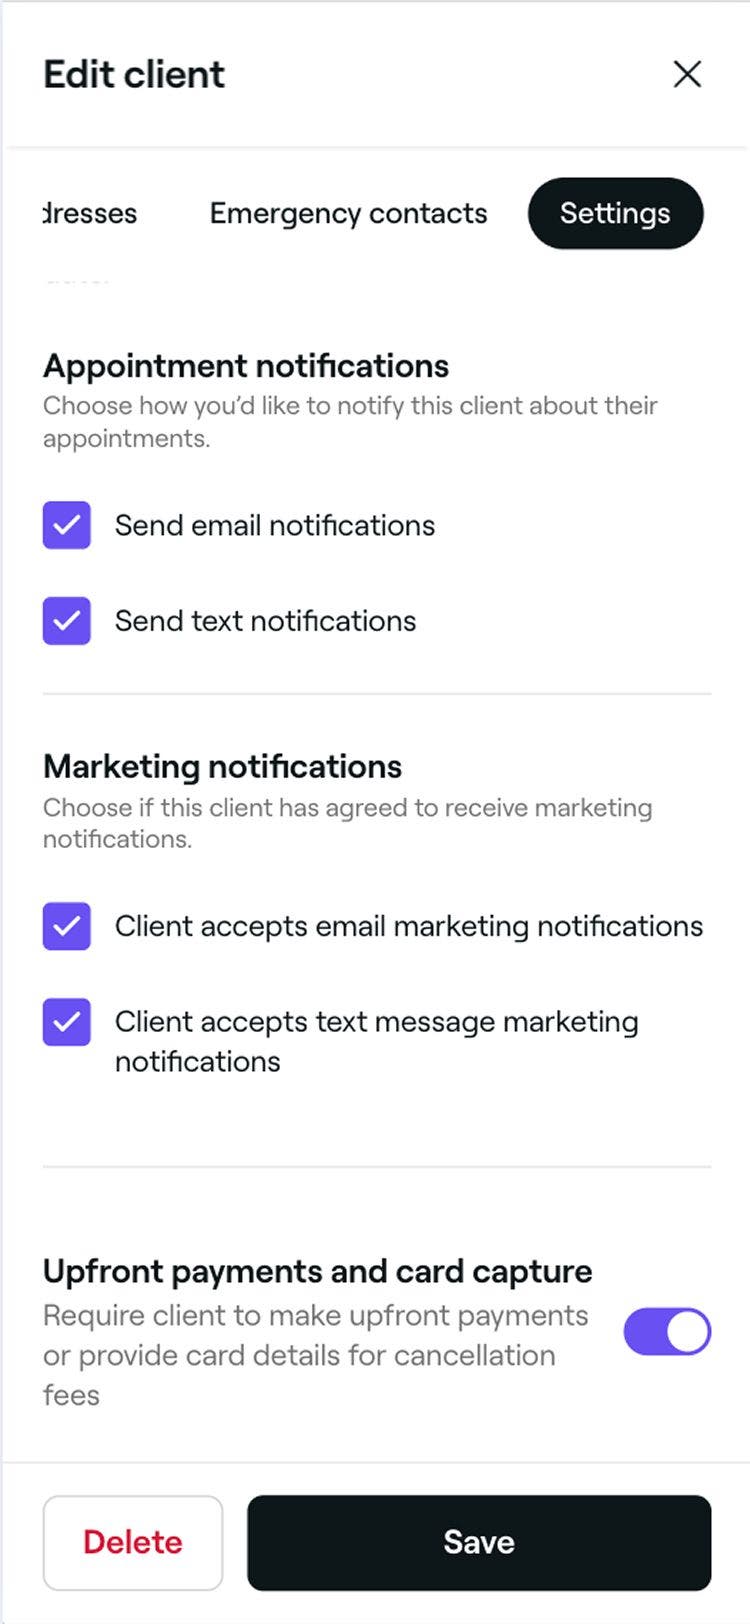
Saving the changes updates the client’s notification and payment settings for future appointments.
FAQs
Yes, if you created the client profile manually and have their consent, you can update their preferences.
An asterisk (*) next to a client’s contact details means the information was manually updated and may differ from their Fresha marketplace profile. You can restore the original details by selecting Restore original details in the client’s profile.
Check past appointments, as the client profile might have been deleted by a team member or by the client. Also, check your Profile settings to make sure you’re logged into the correct Fresha account with the right email.
