Set up and manage Client loyalty points
In this guide, you’ll learn how to set up a point-based loyalty program that allows clients to earn and spend points measured by their engagement with your business.
In this article
How Loyalty points work
Loyalty points to reward clients for their engagement with your business. Clients earn points for various interactions and can exchange them for rewards that you create, such as discounts and free items.
Once Client loyalty is enabled, ways to earn points are automatically set up by default and can be edited to fit your needs.
Enable loyalty points
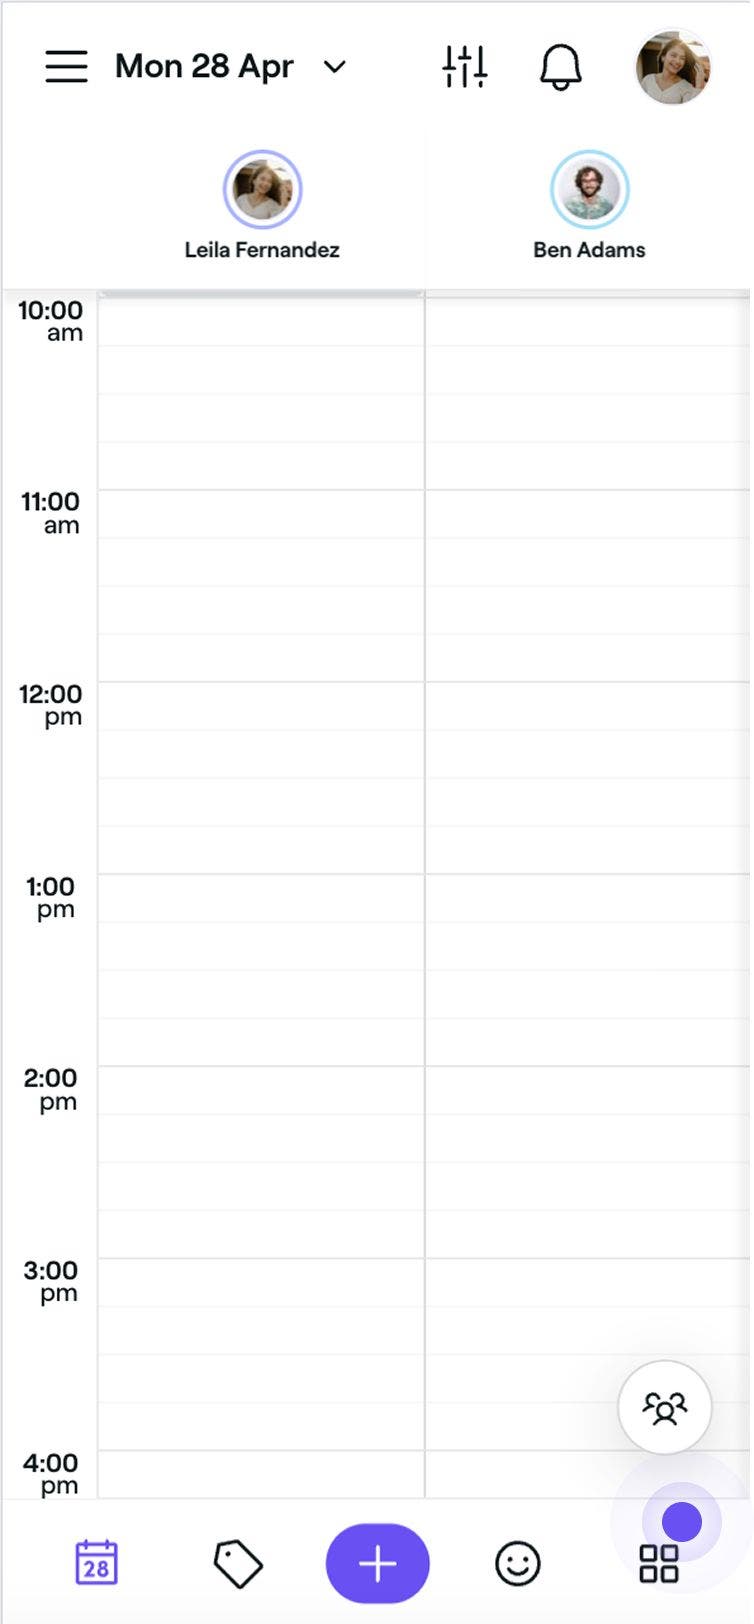
- From the main menu on the left of your screen, go to Clients.
- In the left menu panel, select Client loyalty to view and manage your points settings.
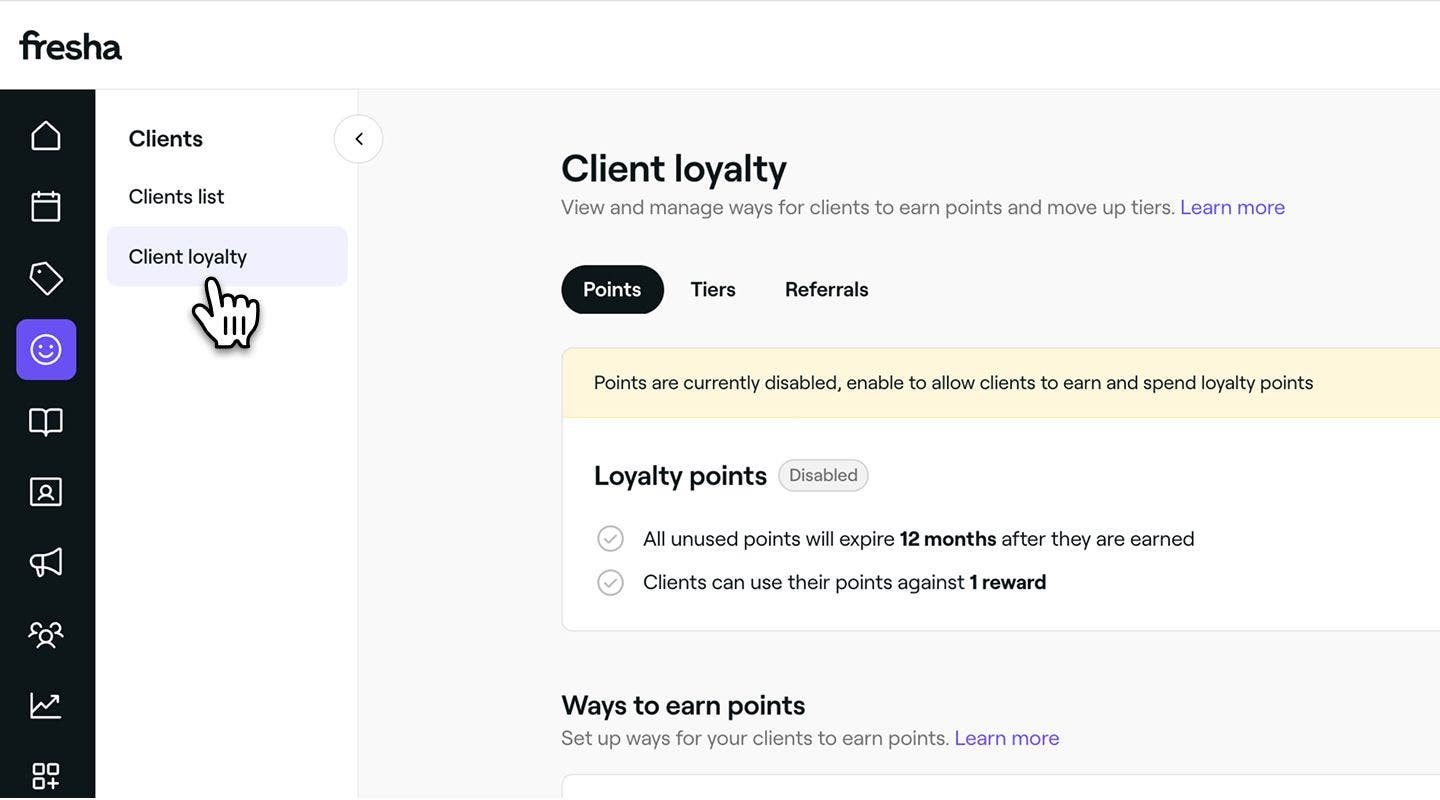
- Next to Loyalty points, click on the Enable buttom to allow clients to earn and spend points.
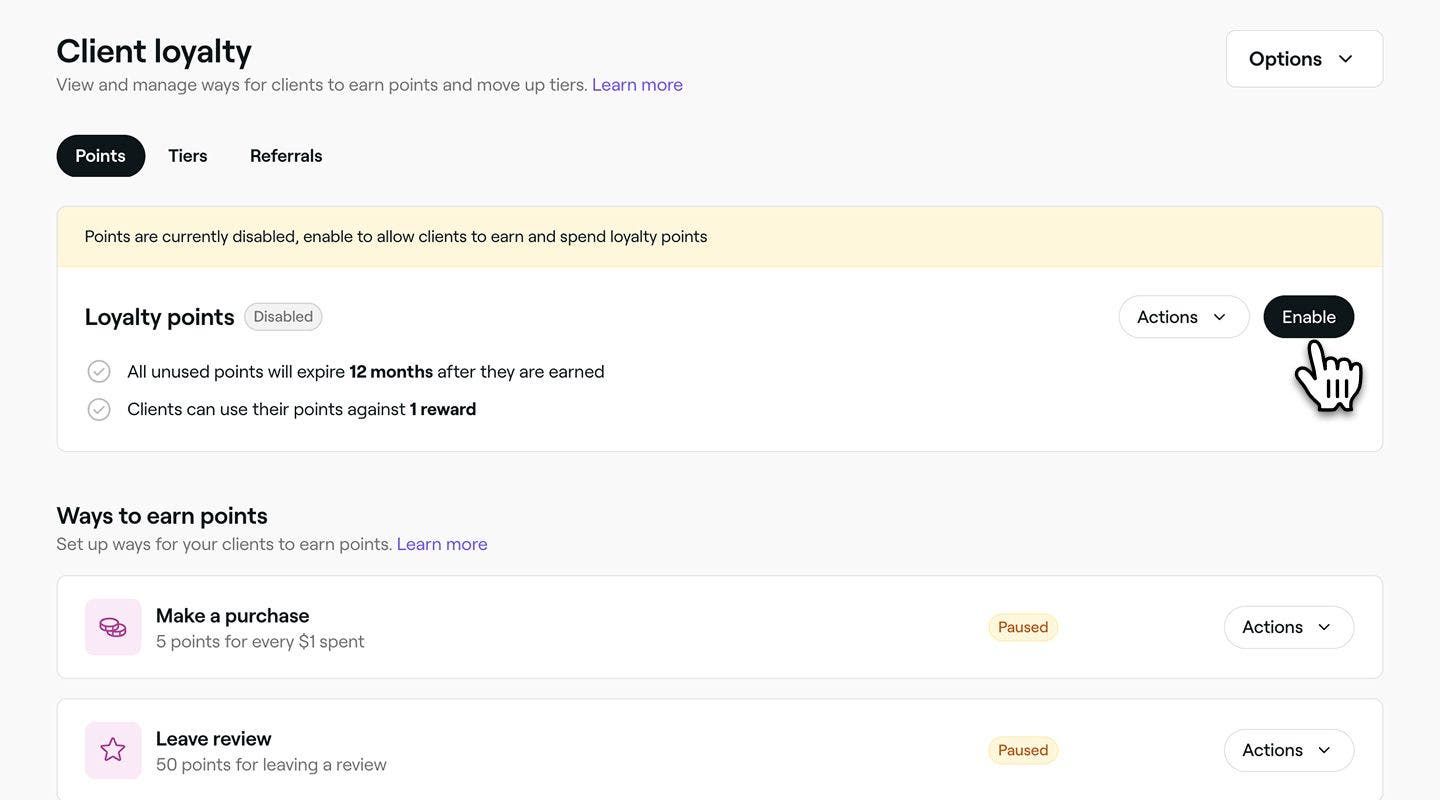
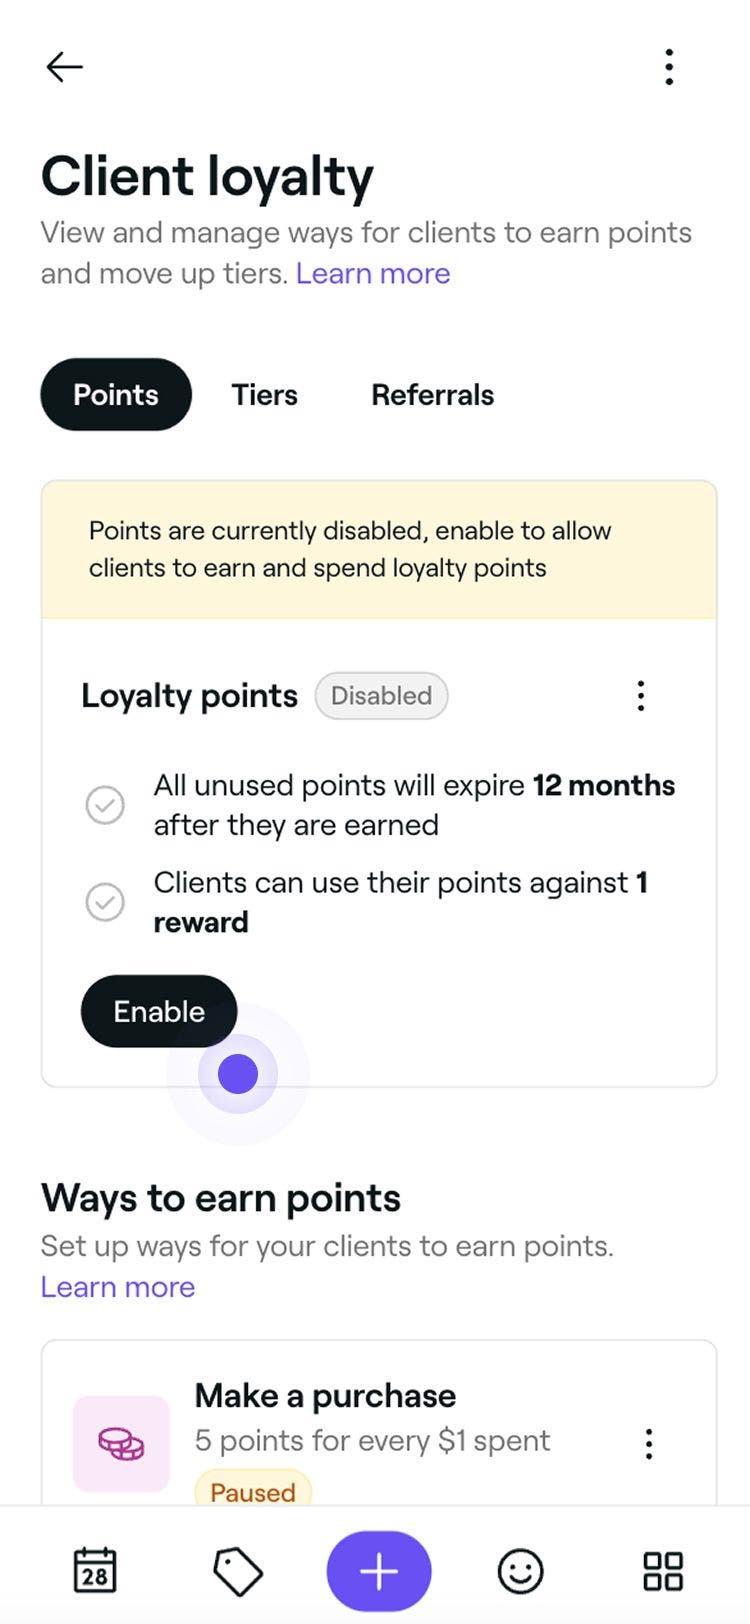
Once enabled, clients will start earning points based on your master point settings and preset ways to earn points.
Edit ways to earn points
You can set up various ways for clients to earn points based on their actions. Points can be earned when clients:
- Make a purchase: Clients earn points based on how much they spend
- Leave a review: Earn points for leaving a review after the appointment.
- Book online: Clients receive points for completing appointments booked online.
- Complete appointments: Points are given for reaching a set number of completed appointments.
Make a purchase
- Open Points from Client loyalty.
- Under Ways to earn points, click on Actions next to Make a purchase, and select Edit from the panel.
- In the Edit points earned view, under Earning type, choose whether clients earn points based on the amount spent (Incremental) or a set number of points per purchase (Fixed).
- Specify the number of points clients will receive for every dollar they spend.
- Under Earning limits, tick the check boxes next to each limit to set a minimum purchase amount or limit the number of times clients can earn points when making a purchase.
- Click on the Save button in the top right to update the way to earn points.
Once updated, clients will earn points when making a purchase based on your new settings. You can update these settings at any time using the same steps.
Leave a review
- Open Points from Client loyalty.
- Under Ways to earn points, click on Actions next Leave a review, and select Edit from the panel.
- In the Edit points earned view, specify the number of points clients will earn for every review they leave.
- Under Earning limits, tick the check box to limit the number of times client can earn points for leaving a review.
- Click on the Save button in the top right to update the way to earn points.
Once updated, clients will earn points when they leave a review based on your new settings. You can update these settings at any time using the same steps.
Book online
- Open Points from Client loyalty.
- Under Ways to earn points, click on Actions next to Book online, and select Edit from the panel.
- In the Edit points earned view, specify the number of points clients will earn for every appointment booked online.
- Under Earning limits, tick the check boxes next to each limit to set a minimum appointment value or limit the number of times clients can earn points when booking online.
- Click on the Save button in the top right to update the way to earn points.
Once updated, clients will earn points when they book online based on your new settings. You can update these settings at any time using the same steps.
Complete appointment
- Open Points from Client loyalty.
- Under Ways to earn points, click on Actions next to Complete appointment, and select Edit from the panel.
- In the Edit points earned view, specify the number of points clients will earn for every appointment completed.
- Under Earning limits, tick the check boxes next to each limit to set a minimum appointment value or limit the number of times clients can earn points for completed appointments.
- Click on the Save button in the top right to update the way to earn points.
Once updated, clients will earn points when they complete an appointment based on your new settings. You can update these settings at any time using the same steps.
Add ways to earn points
- Open Points from Client loyalty.
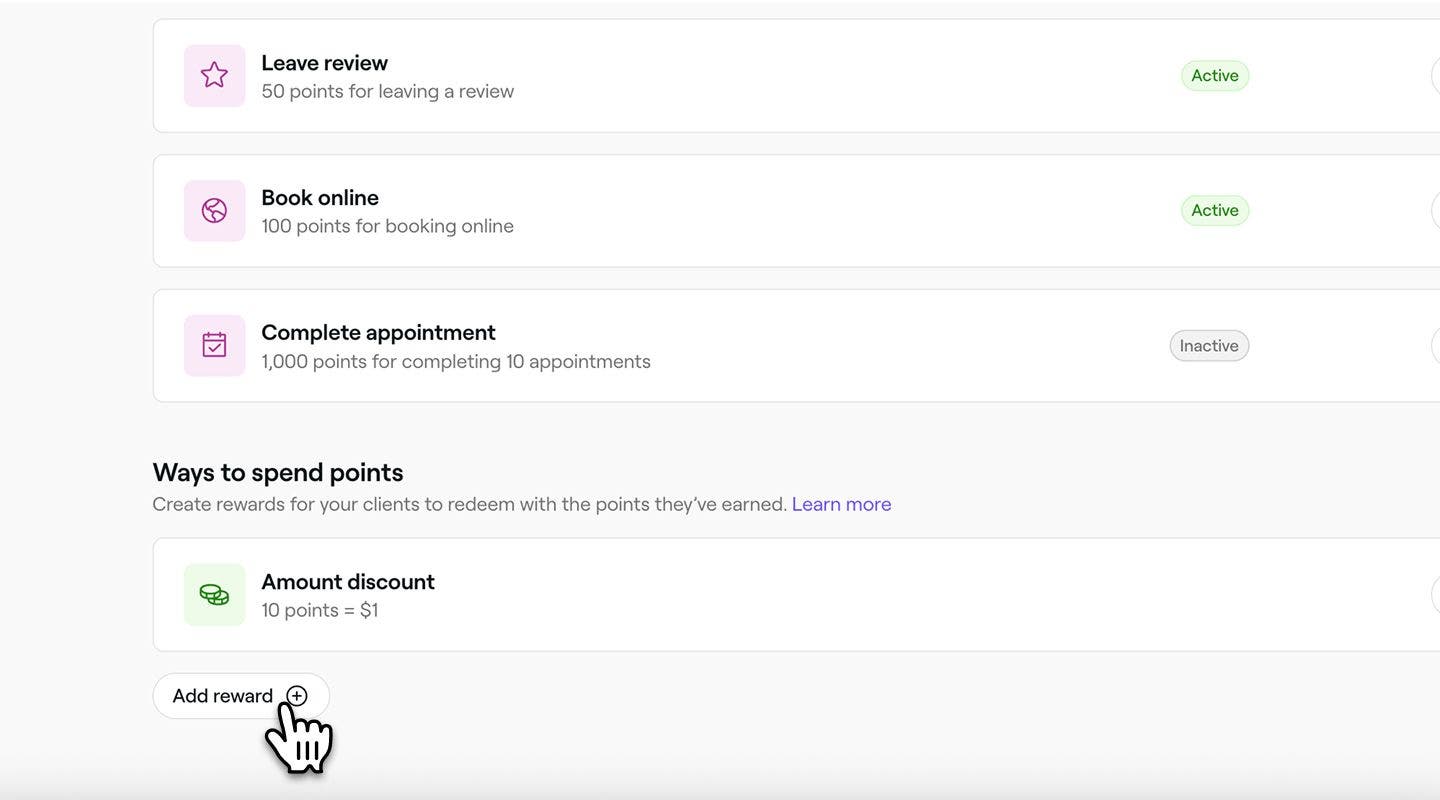
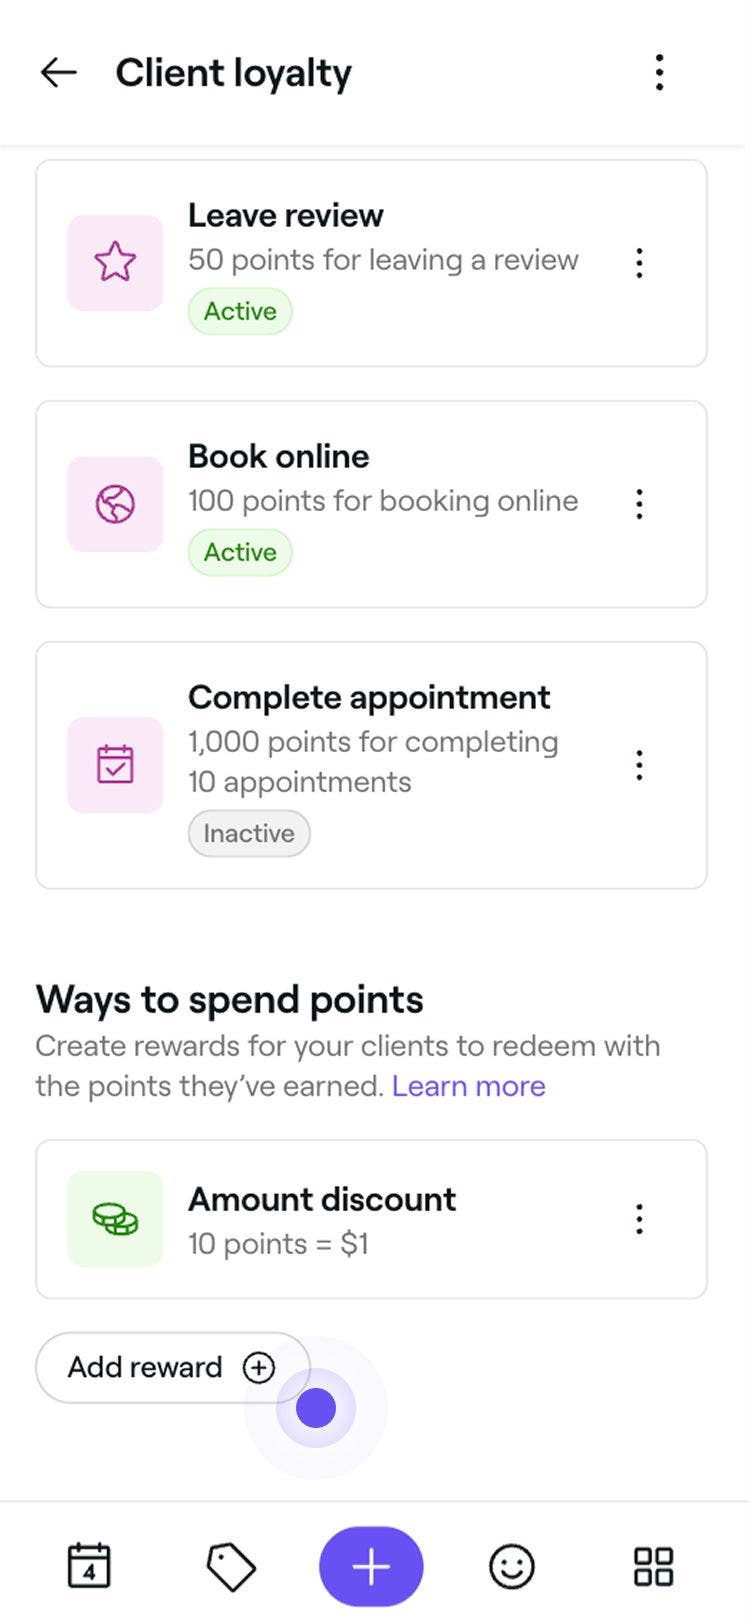
- Under Ways to spend points, click on the Add reward button to create a new way for clients to spend points.
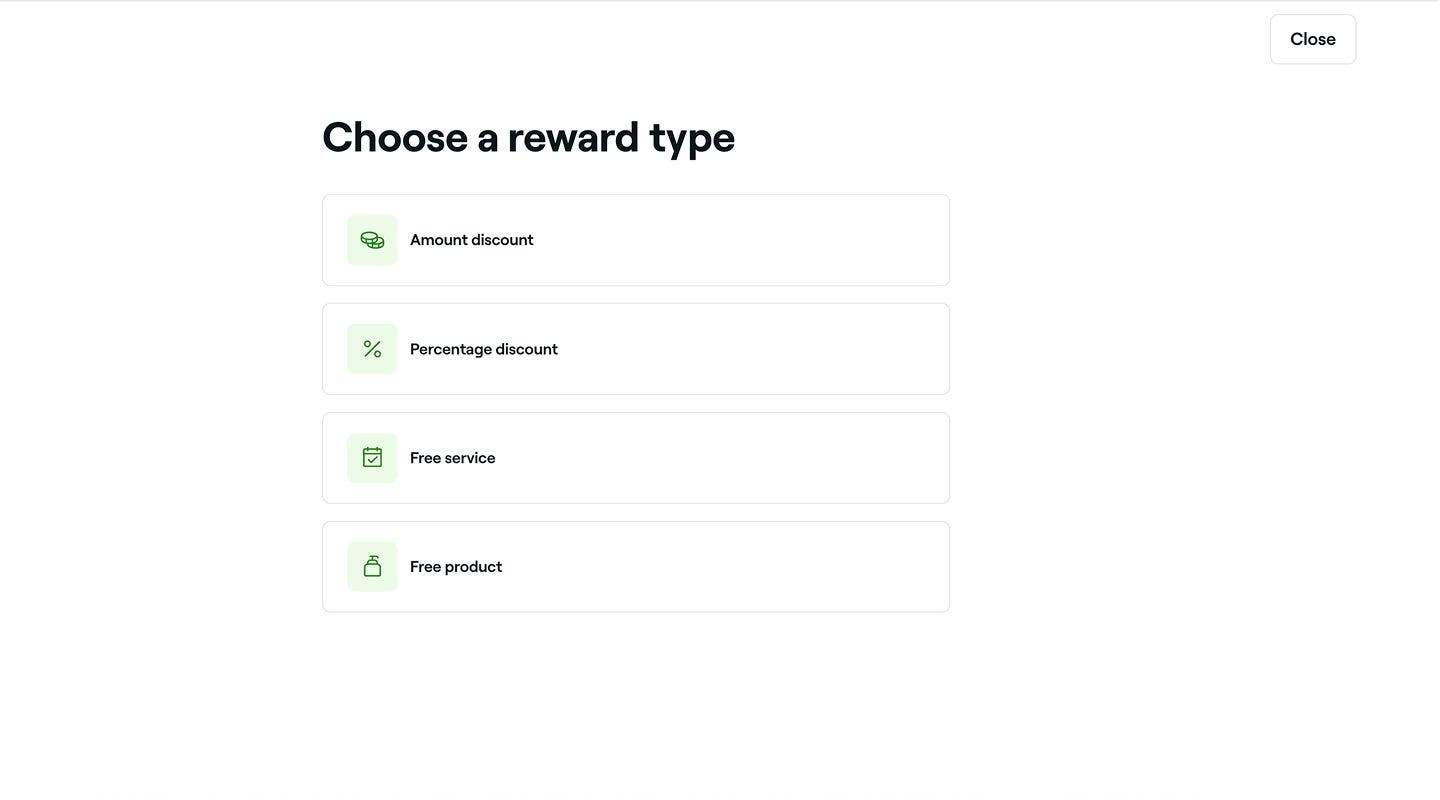
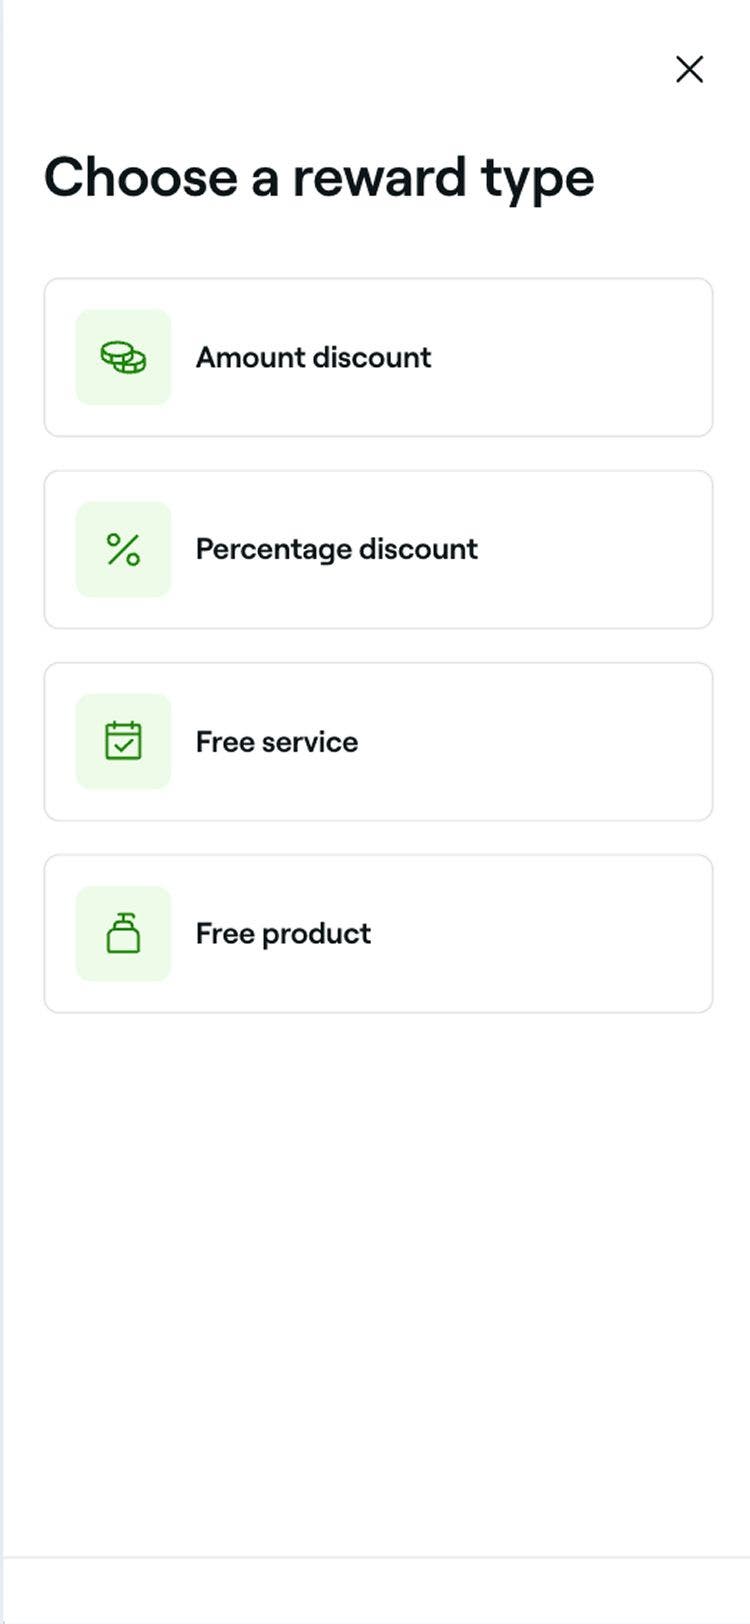
- In the Choose reward type step, select a reward type and follow the next steps to create a new client reward.
The new way to spend points will be immediately available for clients to claim using their points. To update or remove a reward, click Actions next to the item in the Ways to spend points list.
Manage loyalty point settings
- Open Points from Client loyalty.
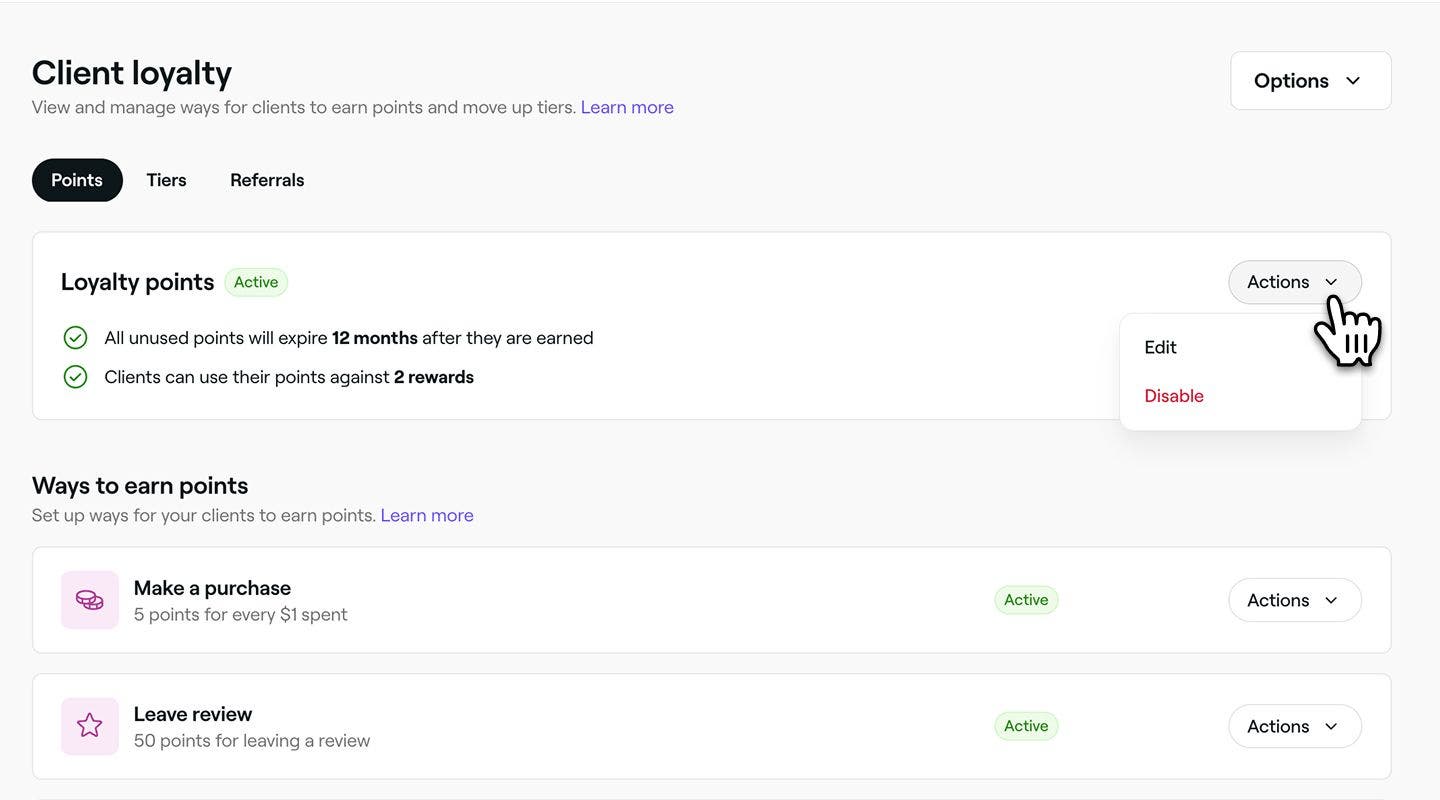
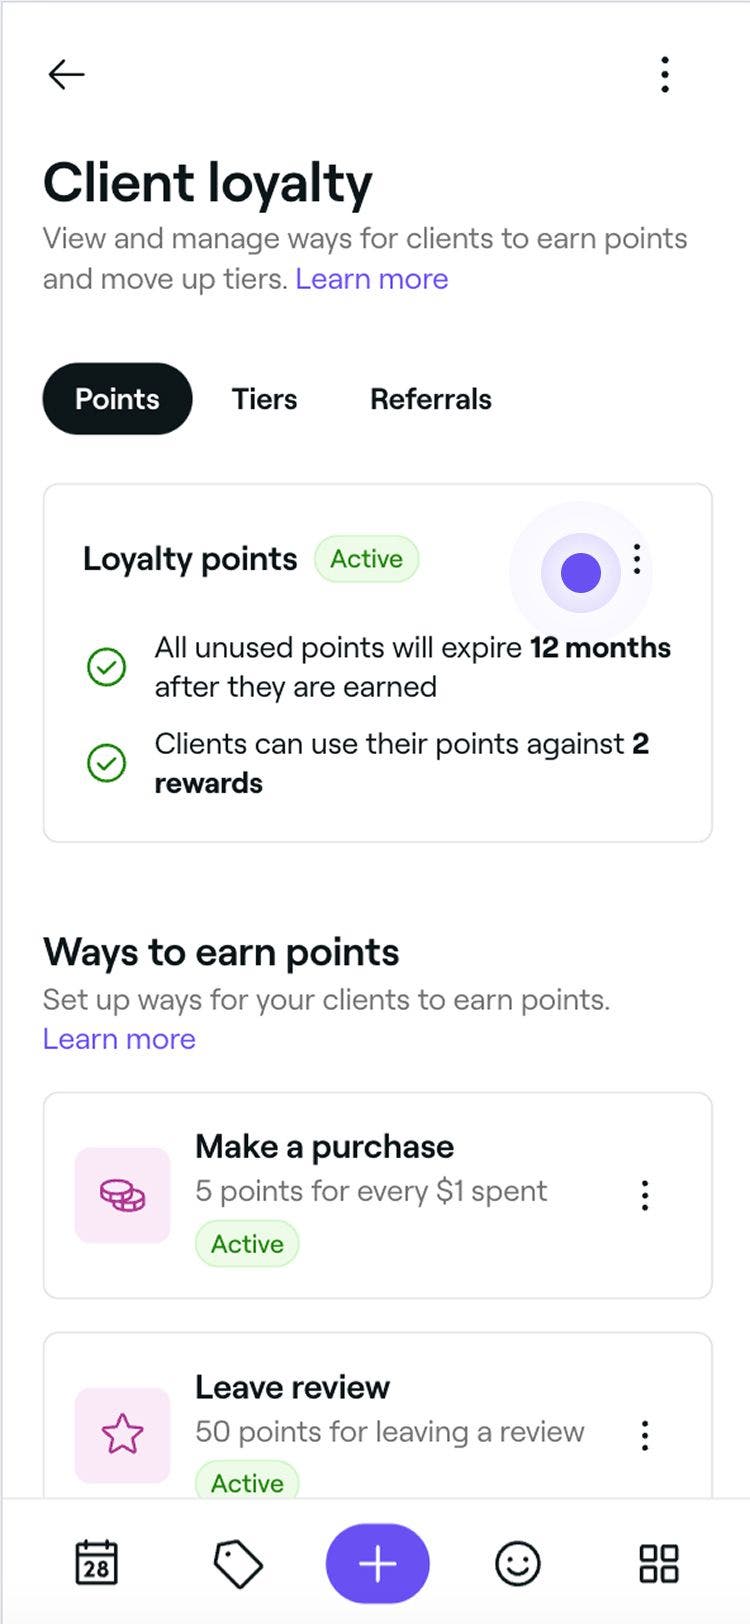
- Next to Loyalty points, click on the Actions button and select one of the following options from the panel:
- Edit: Update the points expiry to either 12 or 24 months. Click on the Save button in the top right to confirm your changes. By default, unused points expire after 12 months.
- Disable: Turn off Loyalty points. Clients will no longer earn or use their points to claim rewards. Click on the Disable button in the pop-up to confirm.
Once you have updated expiry settings for Loyalty points, the changes will only apply to points earned from that date onward. Points earned before the update will still follow the original expiration rules.
If you disable Loyalty points, any existing points will stay in your clients’ accounts but can’t be used until you re-enable it.
FAQs
Yes, you can customize point values for different services by creating multiple, specific rewards. When setting up Loyalty points, you'll choose which services, products, memberships, or gift cards are eligible for redemption. To apply different point values to different services, you’ll need to create separate rewards for each one, assigning unique points requirements for redemption of each reward.
Yes, clients automatically receive a summary email with their earned points, balance, and upcoming expiries. When clients reach a new tier, they receive an immediate notification about the rewards they've unlocked. These notifications are enabled by default, but you can customize them anytime in your Automated messages settings.
Clients can view their points balance and progress in their Fresha Wallet, under the Loyalty rewards section of their account. Learn more about how clients keep up with their loyalty progress and rewards.
Point expiry settings apply to all clients equally, including the expiry date.
Once points have expired, you cannot manually reinstate them. However, you can manually add new Loyalty points through the client’s profile.