HomeKnowledge baseFresha academy
Enable Client Loyalty
Back
  1. Knowledge base•
  2. Clients•
  3. Enable Client Loyalty

Enable Client Loyalty

In this guide, you’ll learn how to enable the Client Loyalty add-on and set up your master settings, including choosing a theme and defining which items count toward points and tiers.

In this article

  • Choose which items count toward points and tiers
  • Set the color theme for your Client loyalty program
  • Add terms and conditions for your Client loyalty program
  • Disable Client Loyalty
  1. From the main menu on the left of your screen, go to Add ons.

  2. Select the View button under Client Loyalty to open the add-ons summary view.
    Enable_client_loyalty_web_2.jpg

  3. Click on the Continue button to review the monthly add-on cost.

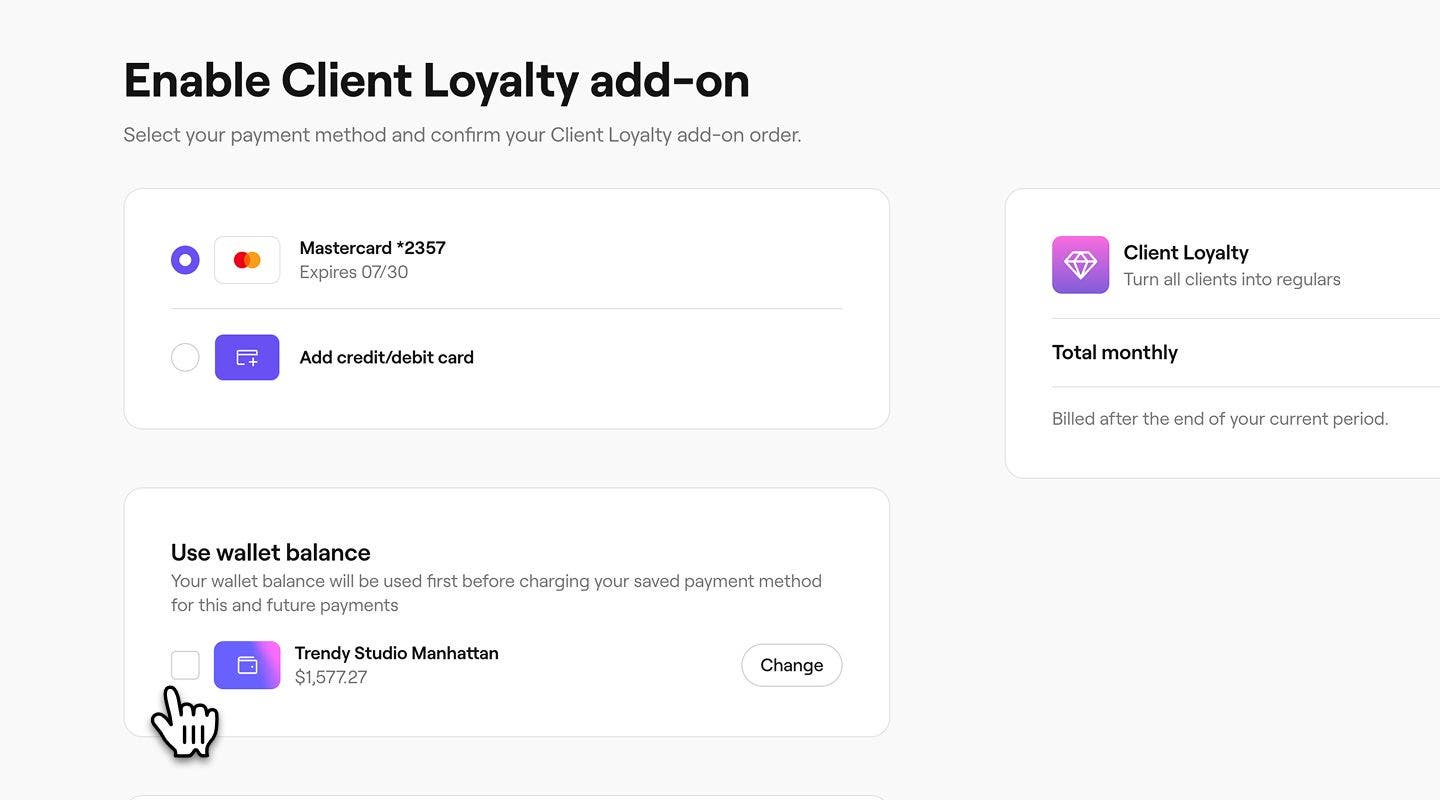
  4. In the next step, review your payment method options, including the following:

    1. Select an existing payment method, or add a new credit/debit card.

    2. Select the Use wallet balance to have the monthly fee deducted from your wallet balance first before charging your saved payment method. If you have multiple locations, click Change to choose which location’s Wallet balance you want to use by default.
      Group 30642.jpg

  5. Click on the Enable button in the top right to activate Client Loyalty.
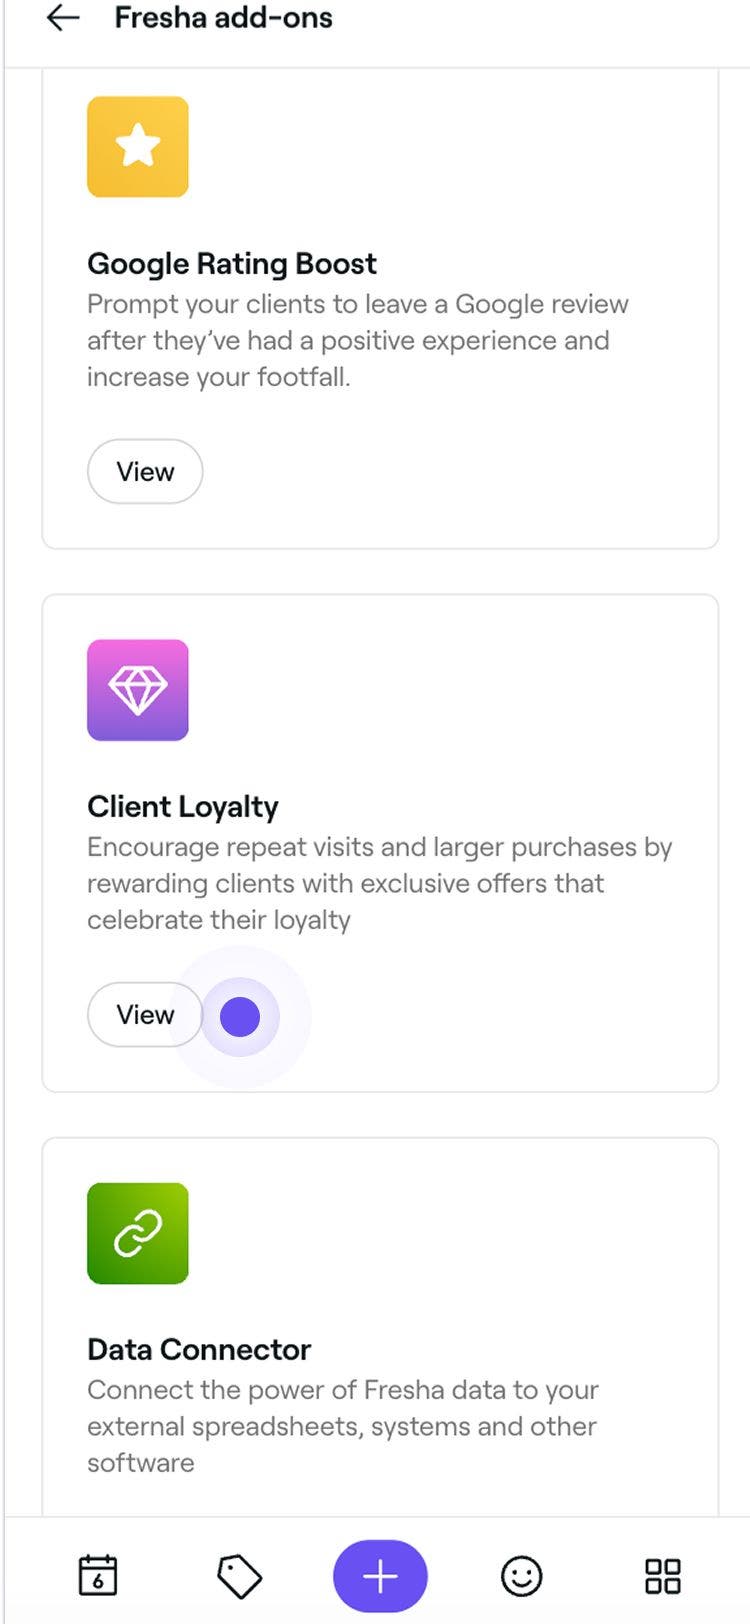
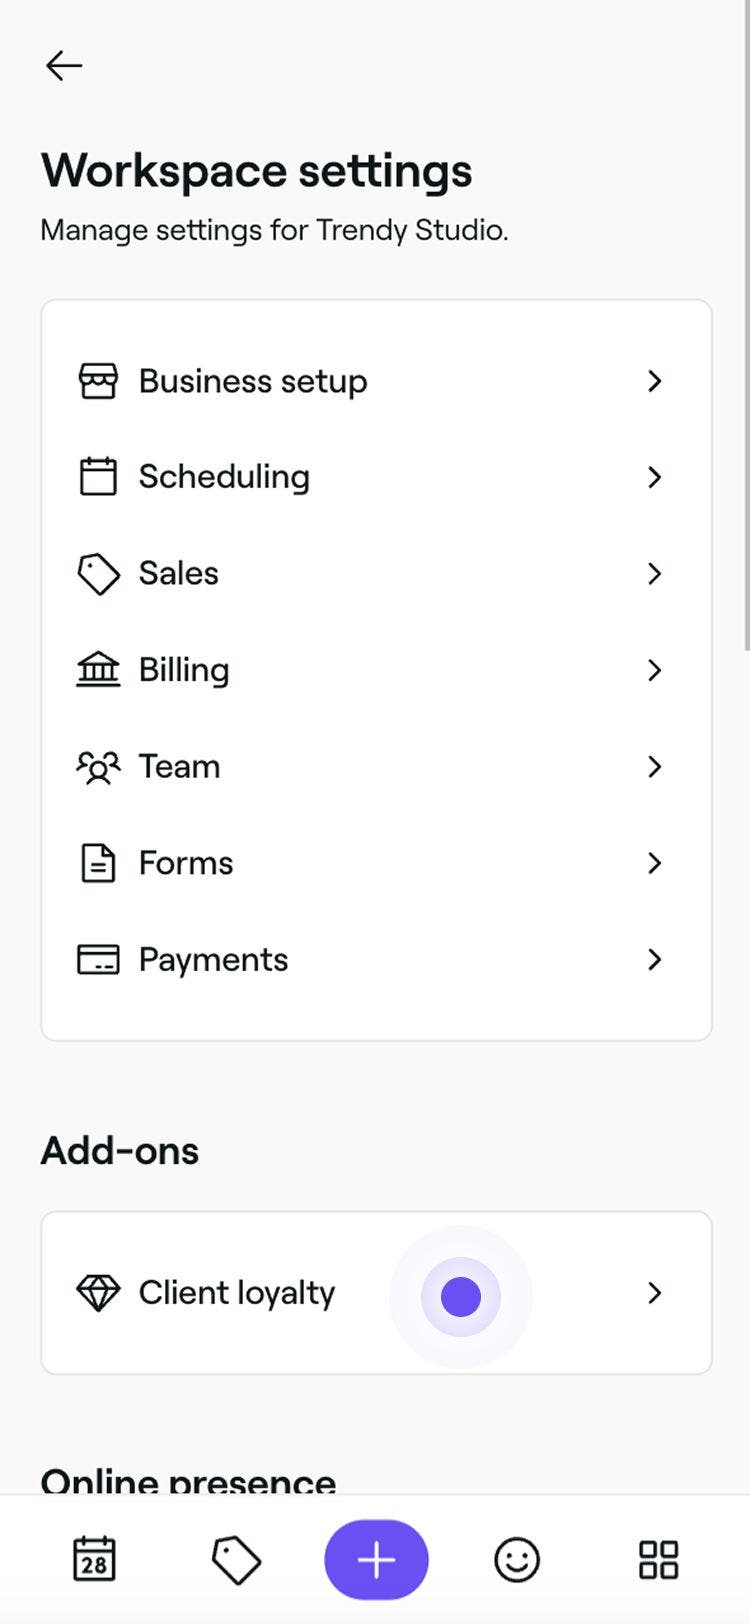
  1. From the main menu at the bottom of your screen, tap on More (grid icon) and open Add ons.

  2. Select the View button under Client Loyalty to open the add-ons summary view.
    Enable_client_loyalty_mob_2.jpg

  3. Tap on the Continue button to review your billing details.

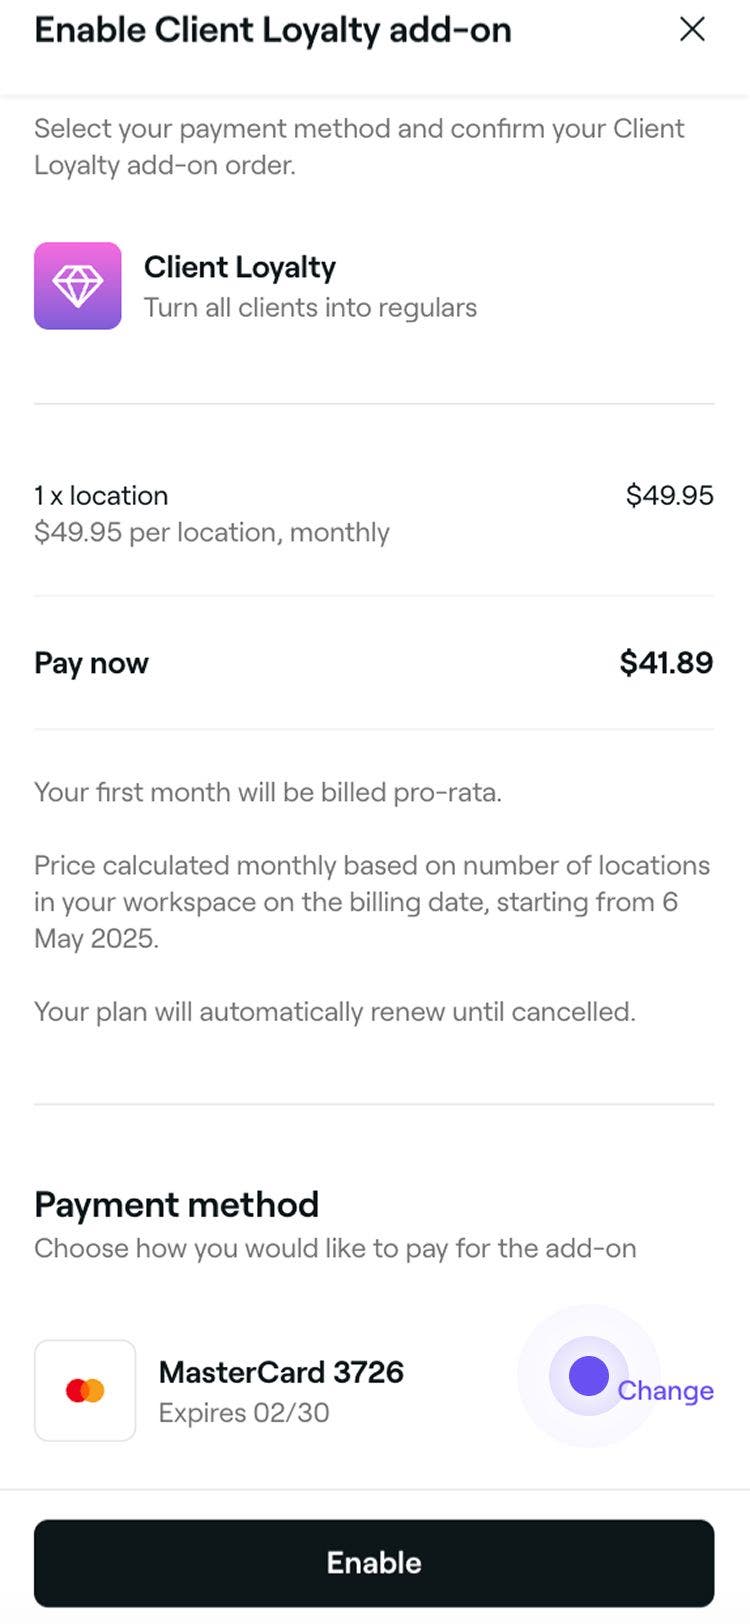
  4. On the Enable Client Loyalty add-on view, review your payment method.

    1. Tap on Change to update your payment method.

    Enable_client_loyalty_mob_4.jpg

  5. Tap on the Enable button at the bottom to activate Client Loyalty.

Once enabled, you can begin customizing your loyalty program in detail, whether by offering a points-based system, tiered progression, or a combination of both to reward your clients.

Choose which items count toward points and tiers

  1. From the main menu on the left of your screen, go to Settings. 

  2. Click on the Client loyalty category to manage the master settings. 
    Select_which_items_can_earn_clients_points_and_tiers_web_2.jpg

  3. Next to Eligible sale items, click on the Edit button to view item options. 
    Select_which_items_can_earn_clients_points_and_tiers_web_3.jpg

  4. In the Edit eligible sales item view, update the following details:

    1. Items included in a sale: Click on Edit next to Services, Products, or Memberships, tick the items to include, then click Apply. Tick the box next to Gift cards to include them.
    2. Include parts of a sale: Tick the boxes next to any additional sale elements, like taxes or service charges, to include them.

    Select_which_items_can_earn_clients_points_and_tiers_web_4.jpg

  5. Click on the Save button in the top right to update the settings.

  1. From the main menu at the bottom of your screen, tap on More (grid icon) and open Settings.
    Select_which_items_can_earn_clients_points_and_tiers_mob_1.jpg

  2. Tap on Client loyalty to view and manage your Loyalty setup. 
    Select_which_items_can_earn_clients_points_and_tiers_mob_2.jpg

  3. Next to Eligible sale items, tap on the Edit button to view item options. 
    Select_which_items_can_earn_clients_points_and_tiers_mob_3.jpg

  4. On the Edit eligible sales item view, update the following details:

    1. Include the following items in a sale: Next to Services, Products, and Memberships, tap on Edit to open each item view. To include the items in the point and tier calculations, tick the box and then tap Apply. To include Gift Cards, tick the box.
    2. Include the following parts of a sale: If any other parts of a sale, such as taxes or service charges, should be included, tick the boxes beside them.

    Select_which_items_can_earn_clients_points_and_tiers_mob_4.jpg

  5. Tap on the Save button at the bottom to apply your updates.

Your selected items and sale components will now count towards Loyalty points and tier advancement. The Subtotal is always included in the calculation of points earned and a client's tier progress.

Set the color theme for your Client loyalty program

  1. From the main menu on the left of your screen, go to Settings. 
  2. Click on the Client loyalty category to view and manage your Loyalty settings. 
    Set_the_color_theme_web_2.jpg
  3. Next to Loyalty theme design, click on the Edit button to view the theme options. 
    Set_the_color_theme_web_3.jpg
  4. In the Edit theme view, preview and choose a theme by selecting a color option on the left.
    Set_the_color_theme_web_4.jpg
  5. Click on the Save button in the top right to update the Client loyalty theme.
  1. From the main menu at the bottom of your screen, tap on More (grid icon) and open Settings.
    Set_the_color_theme_mob_1.png

  2. Tap on Client loyalty to view and manage your Loyalty setup. 
    Set_the_color_theme_mob_2.jpg

  3. Next to Loyalty theme design, tap on the Edit button to view the theme options. 
    Set_the_color_theme_mob_3.jpg

  4. On the Edit theme view, preview and choose a theme by selecting a color option.

    Set_the_color_theme_mob_4.jpg

  5. Tap on the Save button at the bottom to apply your updates.

The color theme you set appears to clients when they view their loyalty progress in their Fresha account. Any changes update immediately for all clients.

Add terms and conditions for your Client loyalty program

  1. From the main menu on the left of your screen, go to Settings. 
  2. Click on the Client loyalty category to view and manage your Loyalty settings. 
    Add_terms_and_conditions_web_2.jpg
  3. Next to Terms and conditions, click on the Add button to include additional information about your program.
    Add_terms_and_conditions_web_3.jpg
  4. In the Edit terms and conditions view, enter a description that will be shown to clients as the terms and conditions for your Loyalty program.
    Add_terms_and_conditions_web_4.jpg
  5. Click the Save button in the top right to update the terms and conditions.
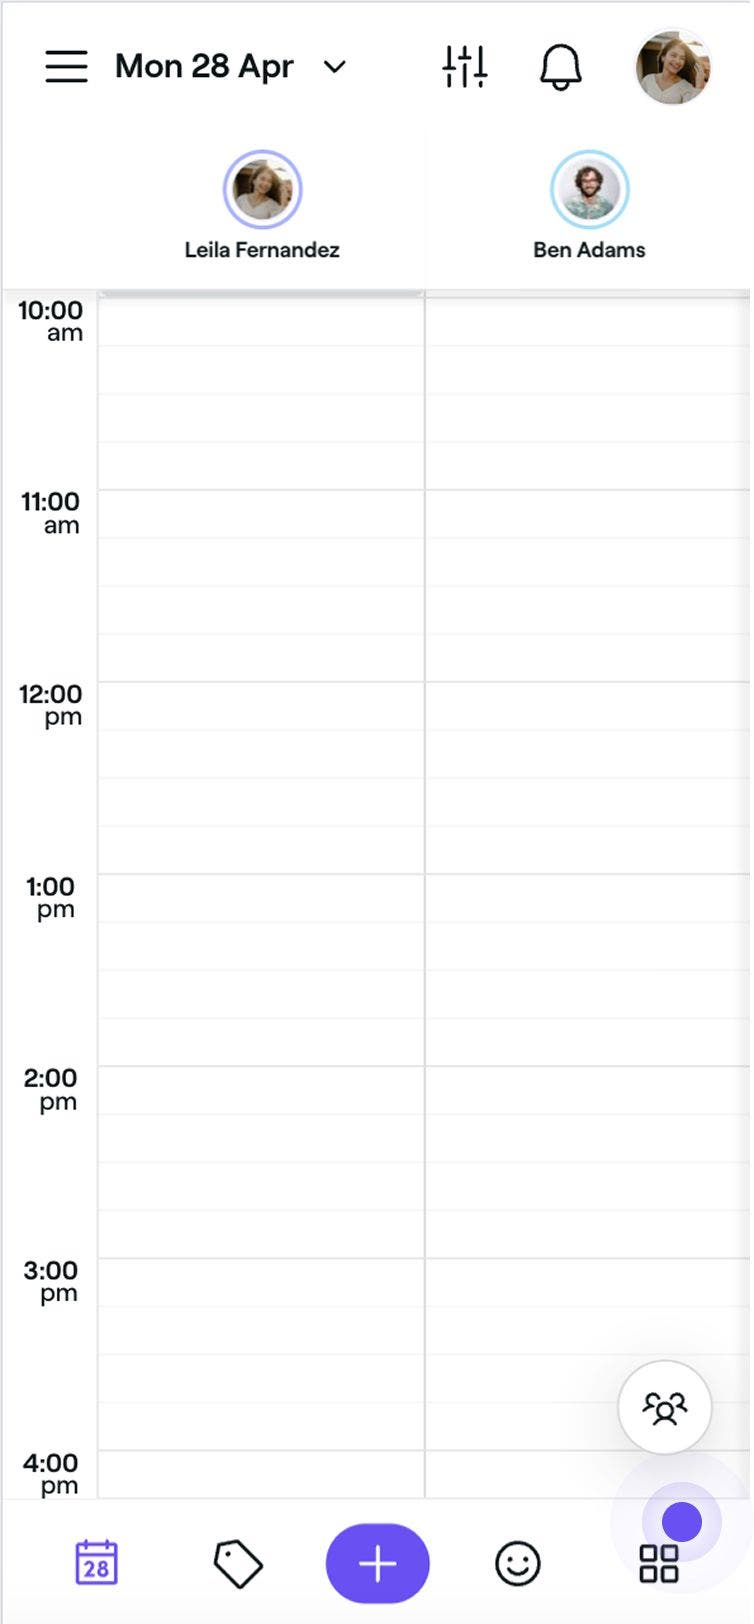
  1. From the main menu at the bottom of your screen, tap on More (grid icon) and open Settings.
    Add_terms_and_conditions_mob_1.jpg
  2. Tap on Client loyalty to view and manage your Loyalty settings. 
    Add_terms_and_conditions_mob_2.jpg
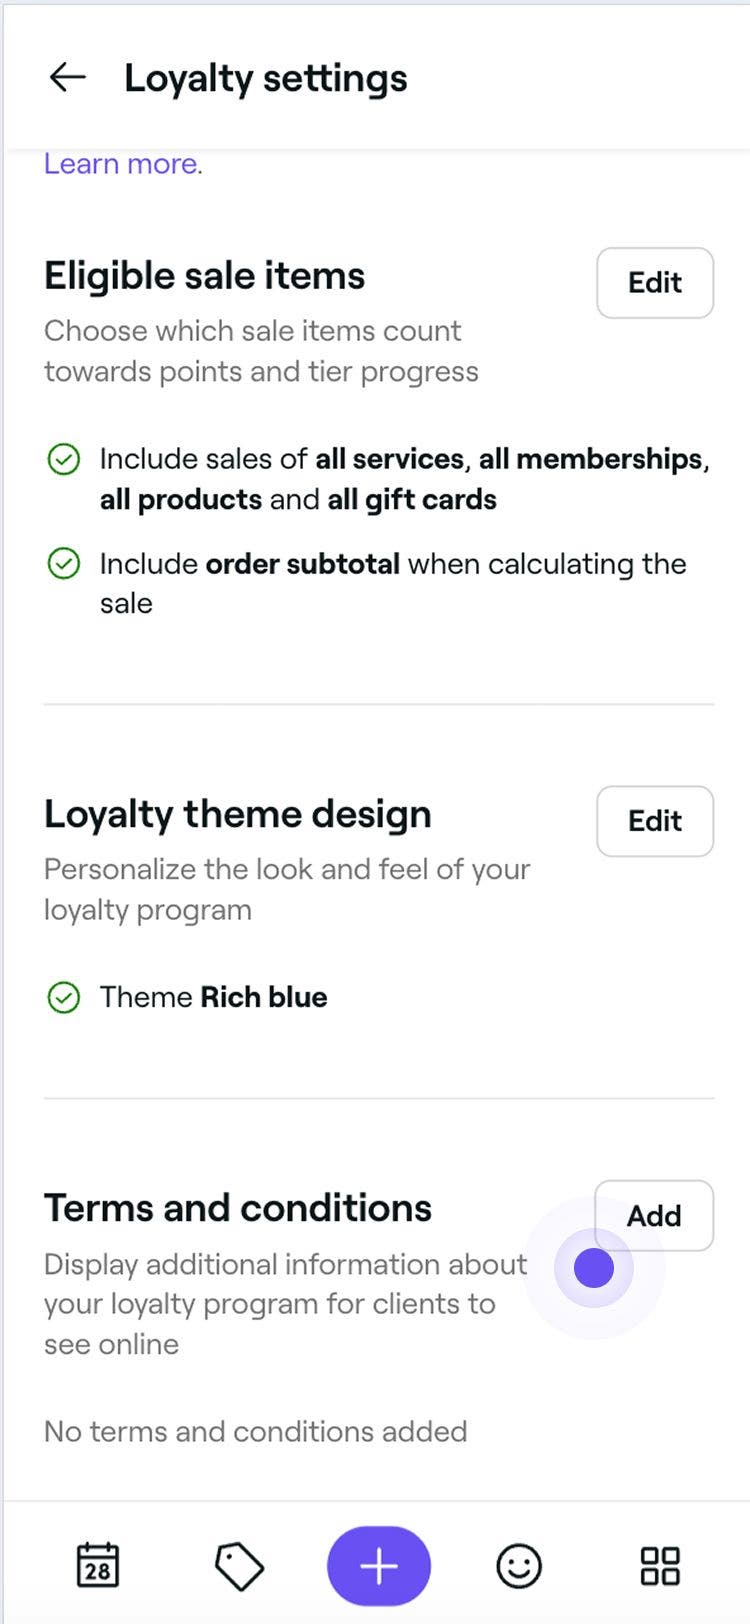
  3. Next to Terms and Conditions, tap on the Add button to include additional information about your program.
    Add_terms_and_conditions_mob_3.jpg
  4. In the Edit terms and conditions view, use the description box to enter any terms and conditions relevant to your Loyalty program.
    Add_terms_and_conditions_mob_4.jpg
  5. Tap the Save button at the bottom to update the terms and conditions.
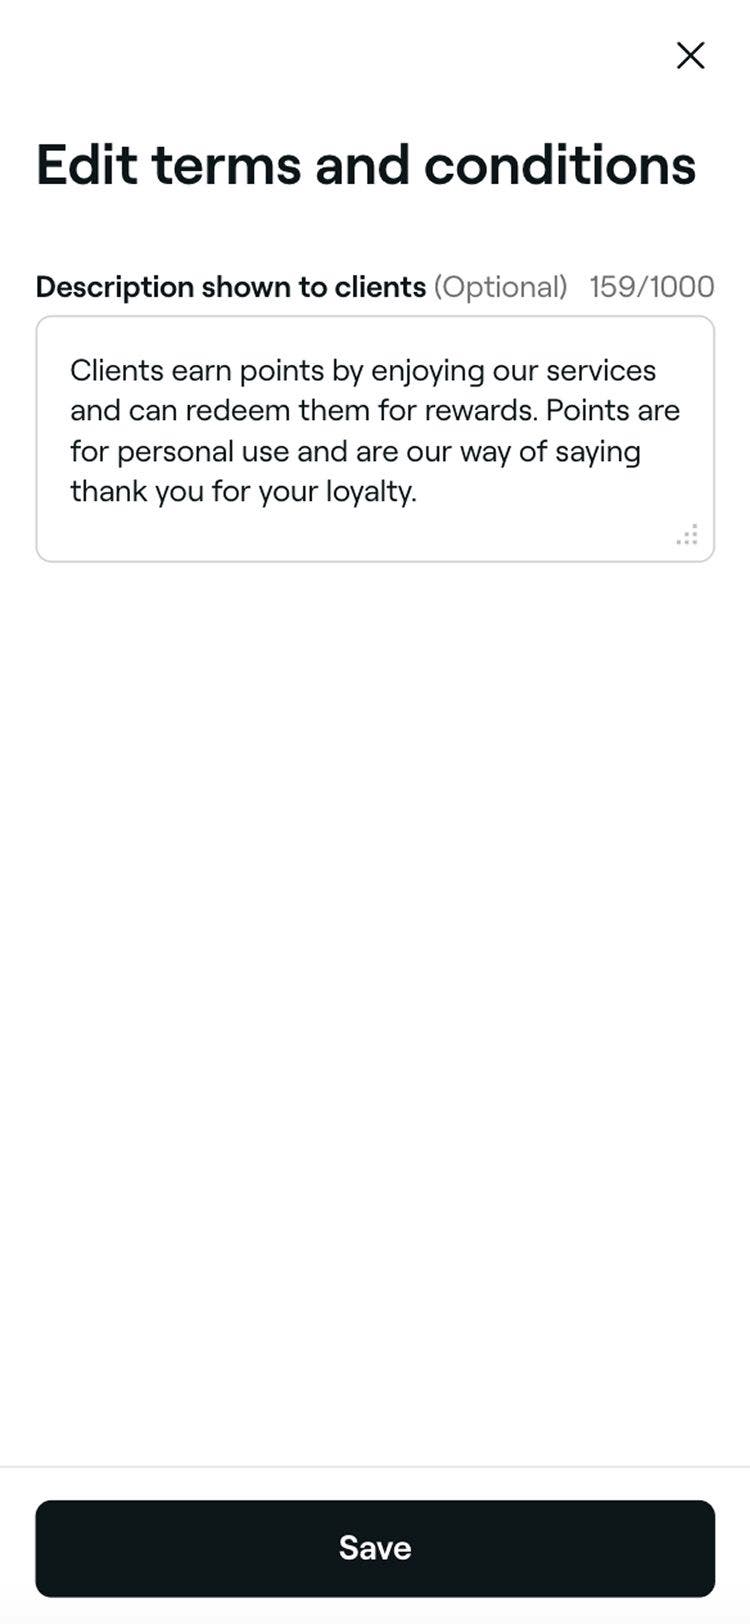
Any changes made to your terms and conditions will immediately be updated, and clients can access this through their Fresha account.

Disable Client Loyalty

  1. Open the Client Loyalty add-on from Add ons. 
  2. Click on the Options button in the top right and select Disable add-on from the panel.
    Disable_Client_Loyalty_web_2.jpg
  3. Review the conditions of disabling Client Loyalty and select a reason. 
    Disable_Client_Loyalty_web_3.jpg
  4. Click on the Disable now button to confirm.
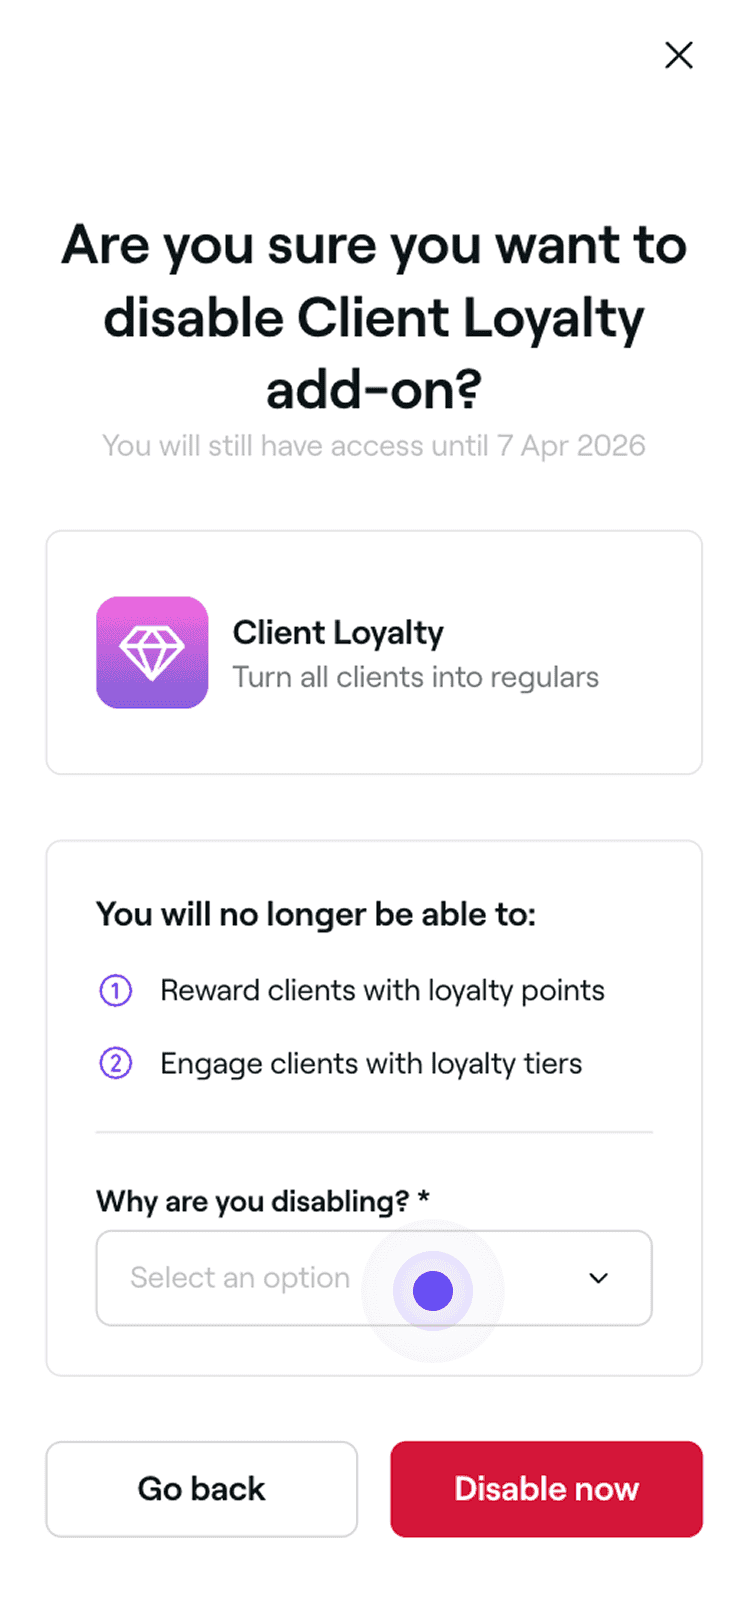
  1. Open the Client Loyalty add-on from Add ons. 
  2. Tap on Options (three dots) in the top right and select Disable add-on.
  3. Review the conditions of disabling Client Loyalty and select a reason. 
    Disable_Client_Loyalty_mob_3.png
  4. Tap on the Disable now button to confirm.

Once disabled, clients will stop earning points and lose access to their tiers. While existing points will be preserved, tiers and their associated rewards will not. If you choose to reactivate Client Loyalty, tiers will be recalculated based on your settings.

FAQs

    • Yes, if taxes are included, taxes paid on sale items that are eligible for earnings are included. For example, if a client purchases a $100 haircut with a tax rate of 10% and earns 1 point per $1 spent, they will earn 110 points in total.

      Pricing details for all Fresha add-ons, including Client Loyalty, are available on our pricing page. The price is determined by the total count of locations within your workspace. When you add new locations, they will be included in the upcoming billing cycle.

      Cancelled or missed appointments, including any associated fees, aren’t counted toward earning points or progressing through tiers, helping ensure points and tiers are based on completed visits.

      When you edit eligible sale items, clients will earn points and advance through tiers based on your new settings.

      Clients are automatically enrolled when they book an appointment or make a purchase. However, including terms and conditions helps establish clear guidelines for your Loyalty program.

      Refunds are not automatically deducted from earned points. However, you can manually adjust the client's points after processing a refund.

      Your terms and conditions apply to the entire Loyalty program, not individual tiers.

      Yes, clients can check their points balance through their Fresha client account.

      To find your billing date for the Client Loyalty add-on, go to the main menu on the left, click on Add-ons, and select View under Client Loyalty. You'll find information about your billing date under Details.

      Yes, once enabled, Client Loyalty is active across all of your locations, and clients can earn points when booking at any location for your business.


Client loyalty

Fresha academy courses
Course video preview

Reward loyal clients

8 lessons•20 mins

See all courses

Was this guide helpful?

Client loyalty

Client Loyalty overview

Reward clients with points and tiers to encourage repeat bookings and increase loyalty.

Understand how clients engage with your loyalty program

See how clients manage points, tiers, and rewards in their accounts.

Enable Client Loyalty

Select eligible items, apply your theme, and add terms and conditions for clients.

Set up and manage Client loyalty points

Enable points, set earning rules, and create rewards clients can claim with their points.

Set up and manage Client loyalty tiers

Create custom tiers, set goals, and add rewards and perks clients can unlock.

Set up and manage Client loyalty referrals

Grow your client list by rewarding clients for referring friends.

Create client loyalty rewards

Set up rewards that clients can unlock with points or tiers.

Apply rewards at checkout

Use existing rewards or claim new ones with client points at checkout.

Adjust a client’s rewards, points and tiers

Adjust points, change tiers and add or remove rewards from a client’s profile.

Fresha academy courses
Course video preview

Reward loyal clients

8 lessons•20 mins

See all courses
Fresha
Get the app

About Fresha

Careers

Help and support

Blog

Sitemap

For business

For partners

Pricing

Features

Scheduling

Point of sale

Payments

Capital

Marketplace

Support

Status

Legal

Privacy Policy

Terms of service

Terms of use

Find us on social

Facebook
Linkedin
Instagram

© 2026 Fresha.com SV Ltd