Delete your personal account
Learn how to delete your personal Fresha account and securely remove your profile,
In this article
Delete your workspace as an owner
As a workspace owner, you need to complete a few actions before deleting your workspace. Before submitting a workspace deletion request, you must:
- Unlist your marketplace profile to prevent clients from booking with you.
- Cancel all your upcoming appointments.
- Refund any client deposits made for future appointments.
- Refund any active gift cards or memberships.
- Export your client list and the sales log report.
- Settle any negative balance in your business wallet.
Once your Fresha business account is deleted, it cannot be restored.
-
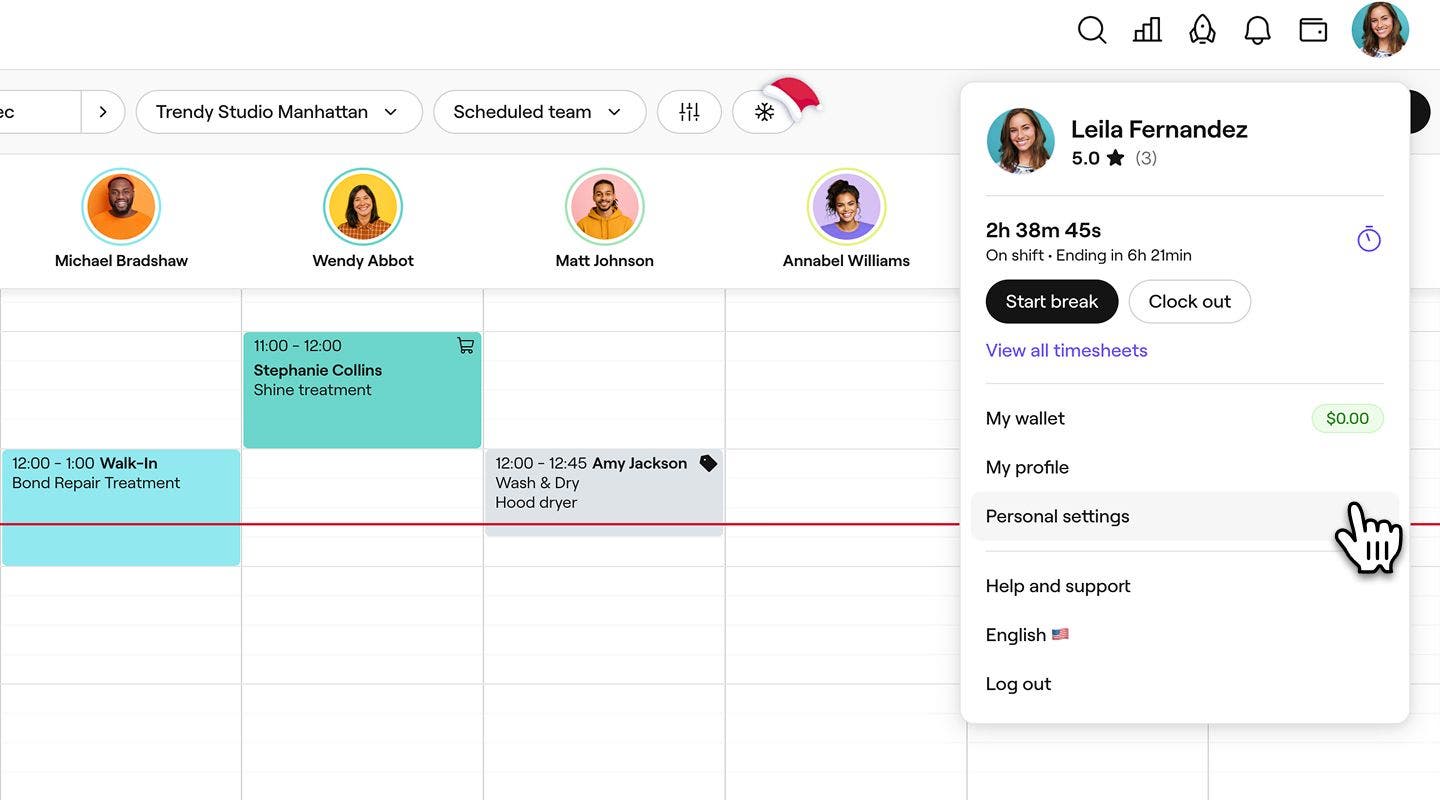
From the toolbar in the top right of your screen, click the Profile icon and select Personal settings.
-
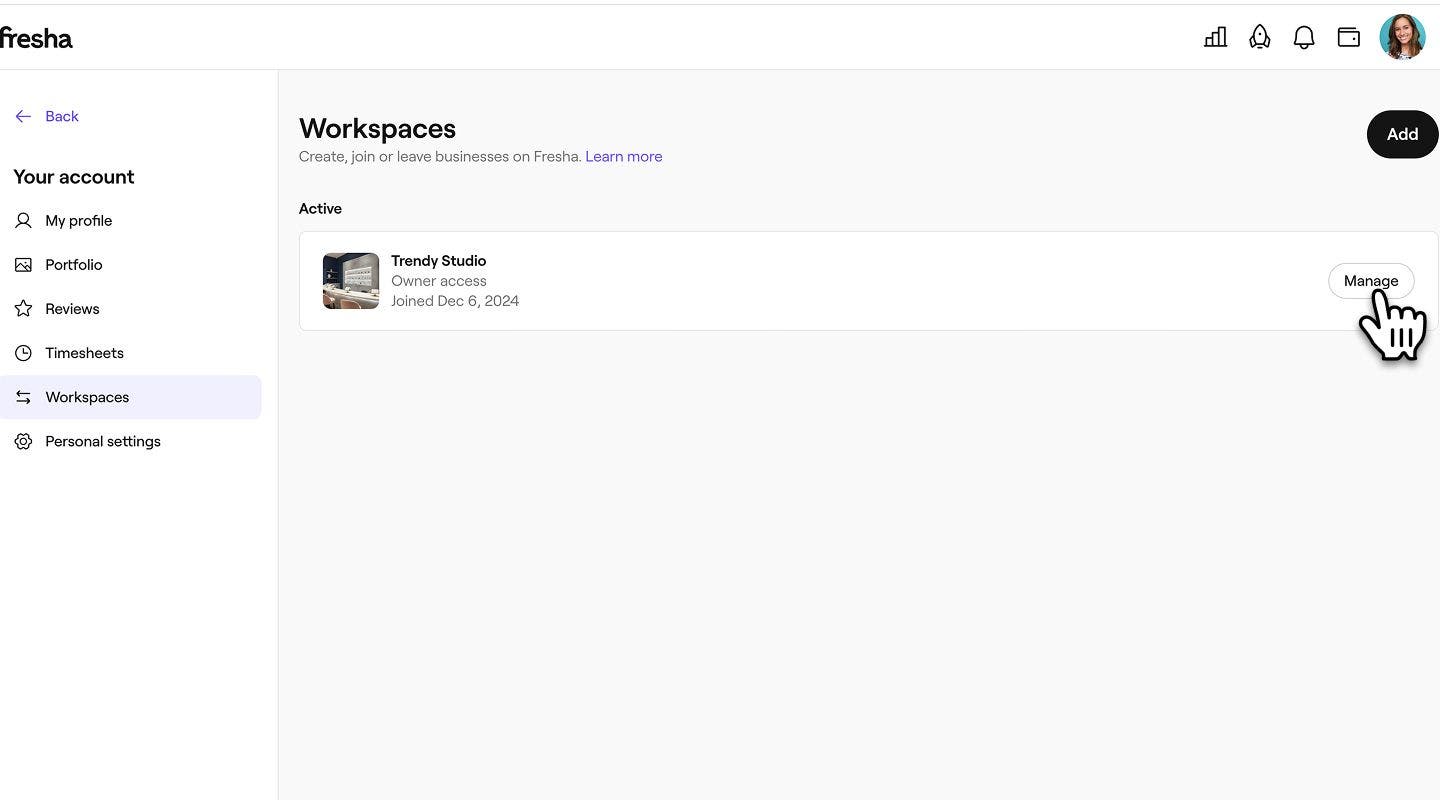
In the left menu panel, click on Workspaces and select Manage next to the workspace you want to delete.
-
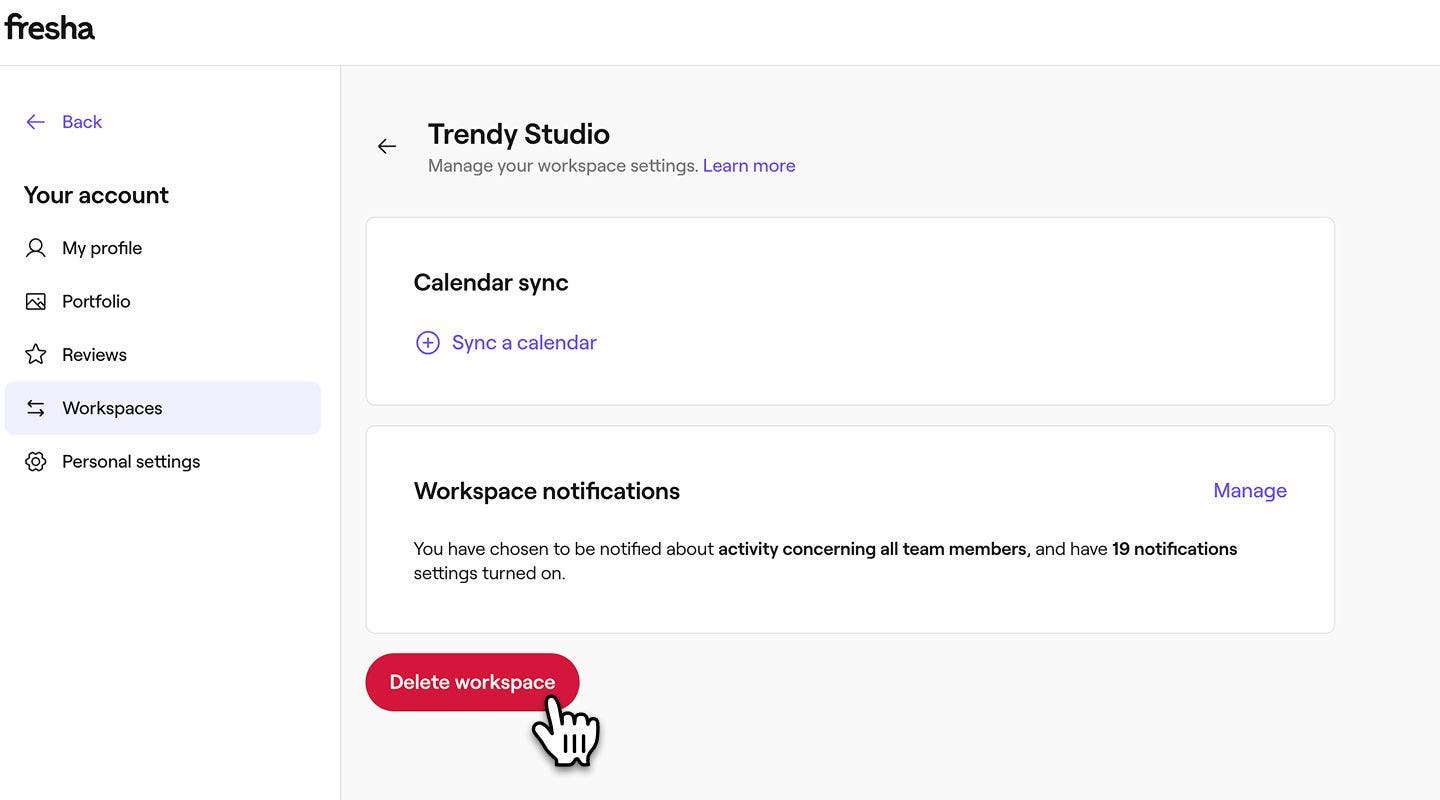
Under Workspace notifications, click on the Delete workspace button.
-
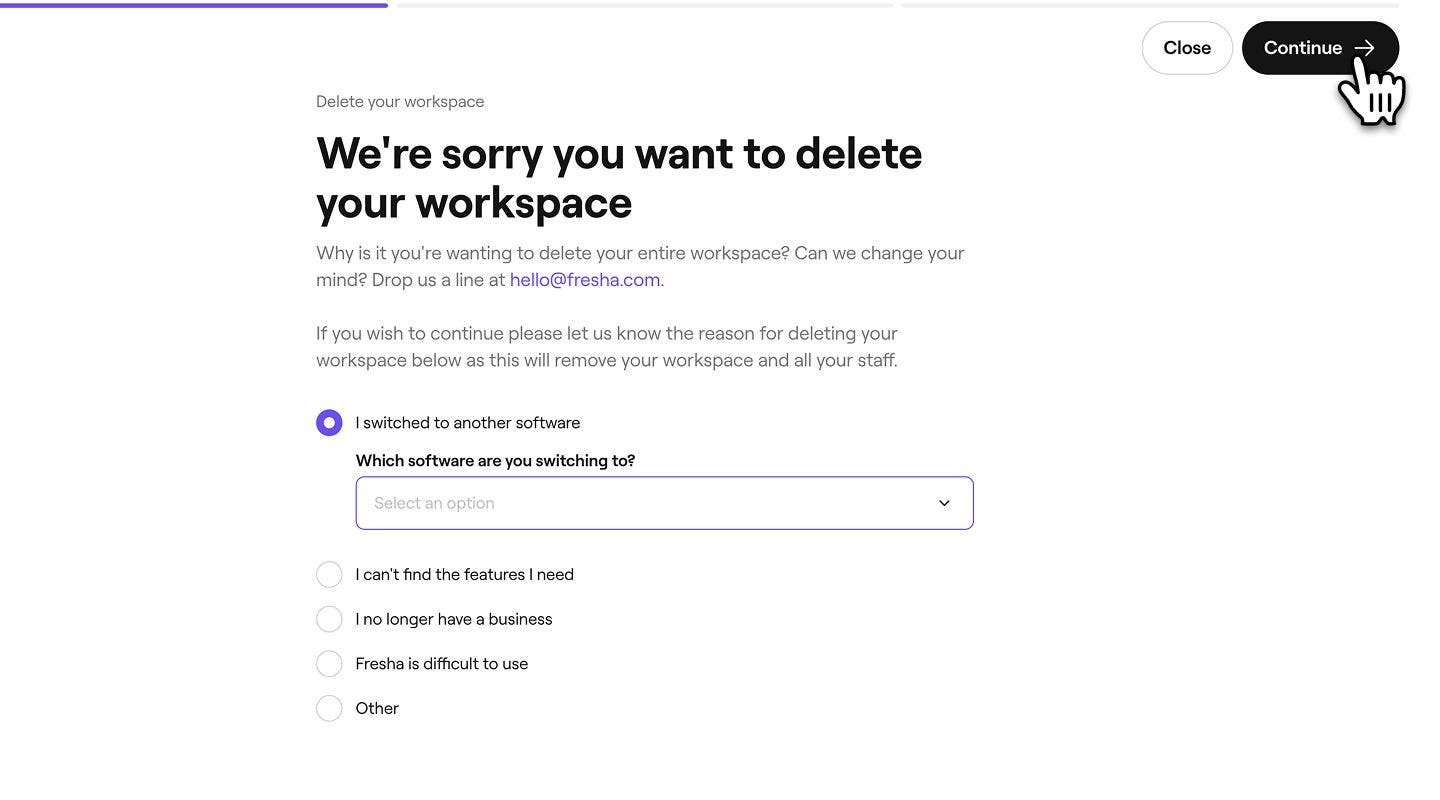
Select the reason for your workspace deletion and click on the Continue button in the top right to proceed.
-
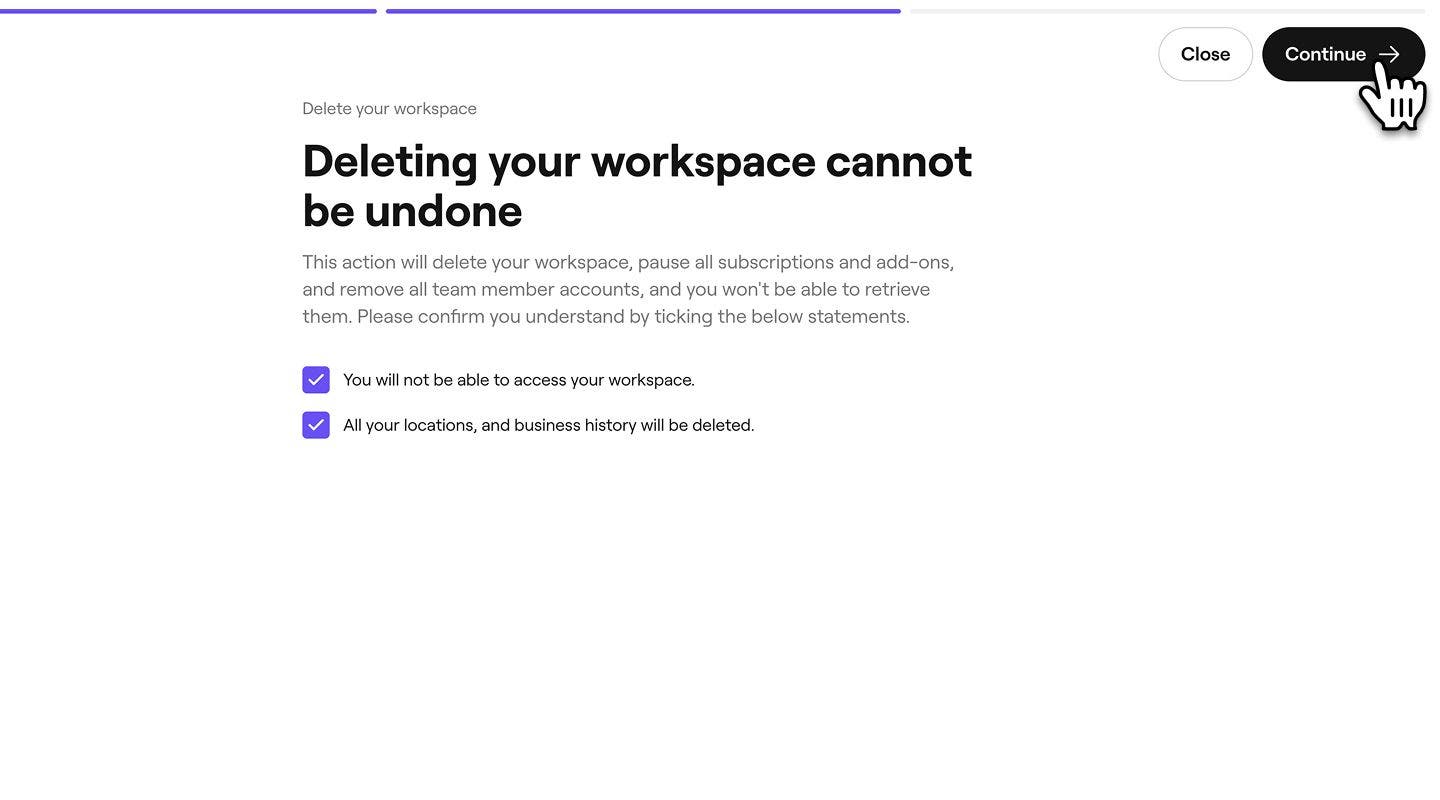
Next, tick each checkbox to confirm that you will lose access to your workspace permanently, and click on the Continue button in the top right to proceed.
-
A verification code is sent to you via SMS. Enter the 4-digit code into the boxes provided.
-
Click on the Delete workspace button to confirm.
-
Once deleted, you will be redirected back to your Fresha business account. Your workspace will show as deleted, with a timestamp of the time and date of deletion.
Leave a workspace as a team member
If you have joined an existing workspace as a team member, you need to leave the workspace. Before doing so, you must:
- Cancel/re-assign all your upcoming appointments under your name.
- Requested any remaining payouts owed are paid by the workspace owner.
- From the toolbar in the top right of your screen, click the Profile icon and select Personal settings.
- In the left menu panel, click on Workspaces and select Manage next to the workspace you want to leave.
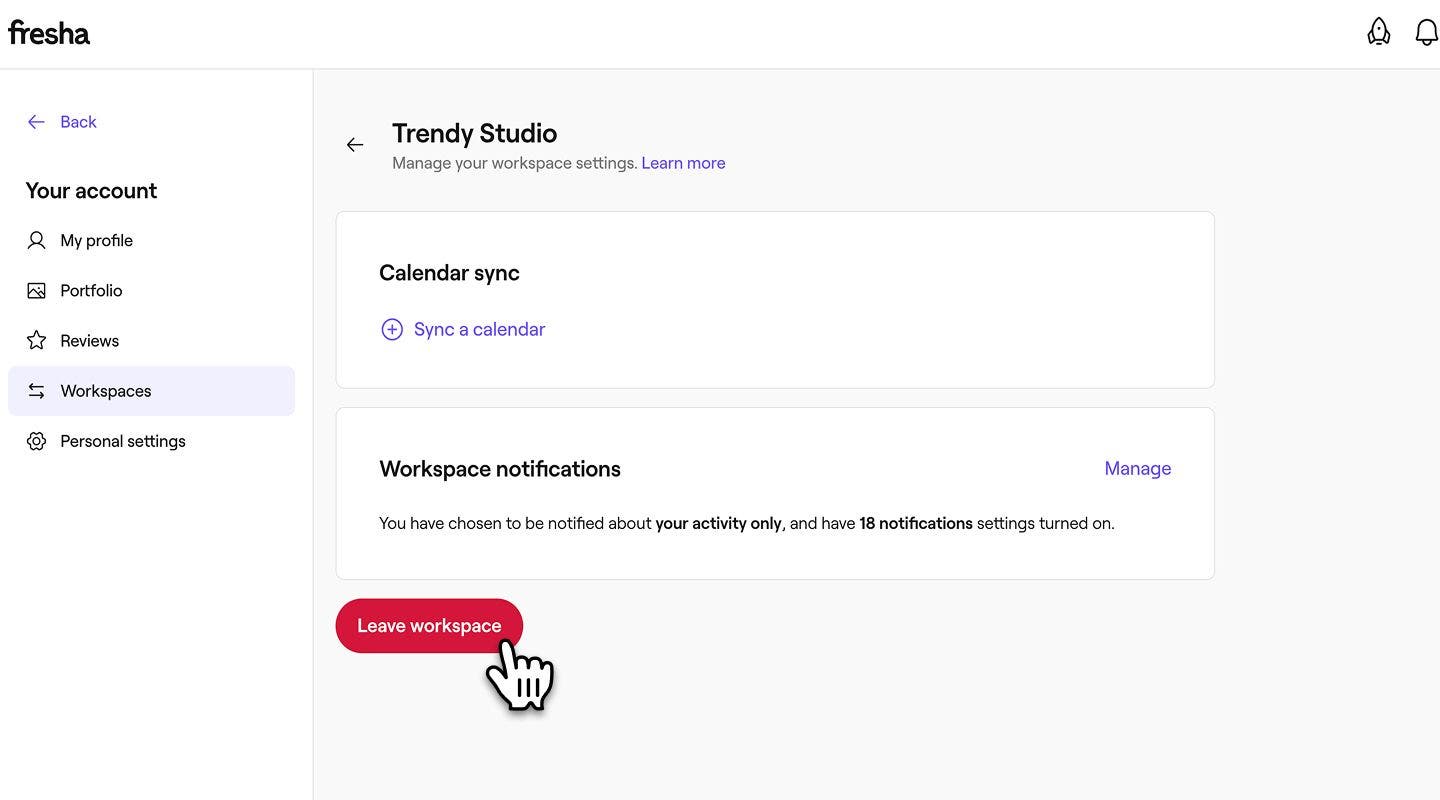
- Under Workspace notifications, click Leave workspace.
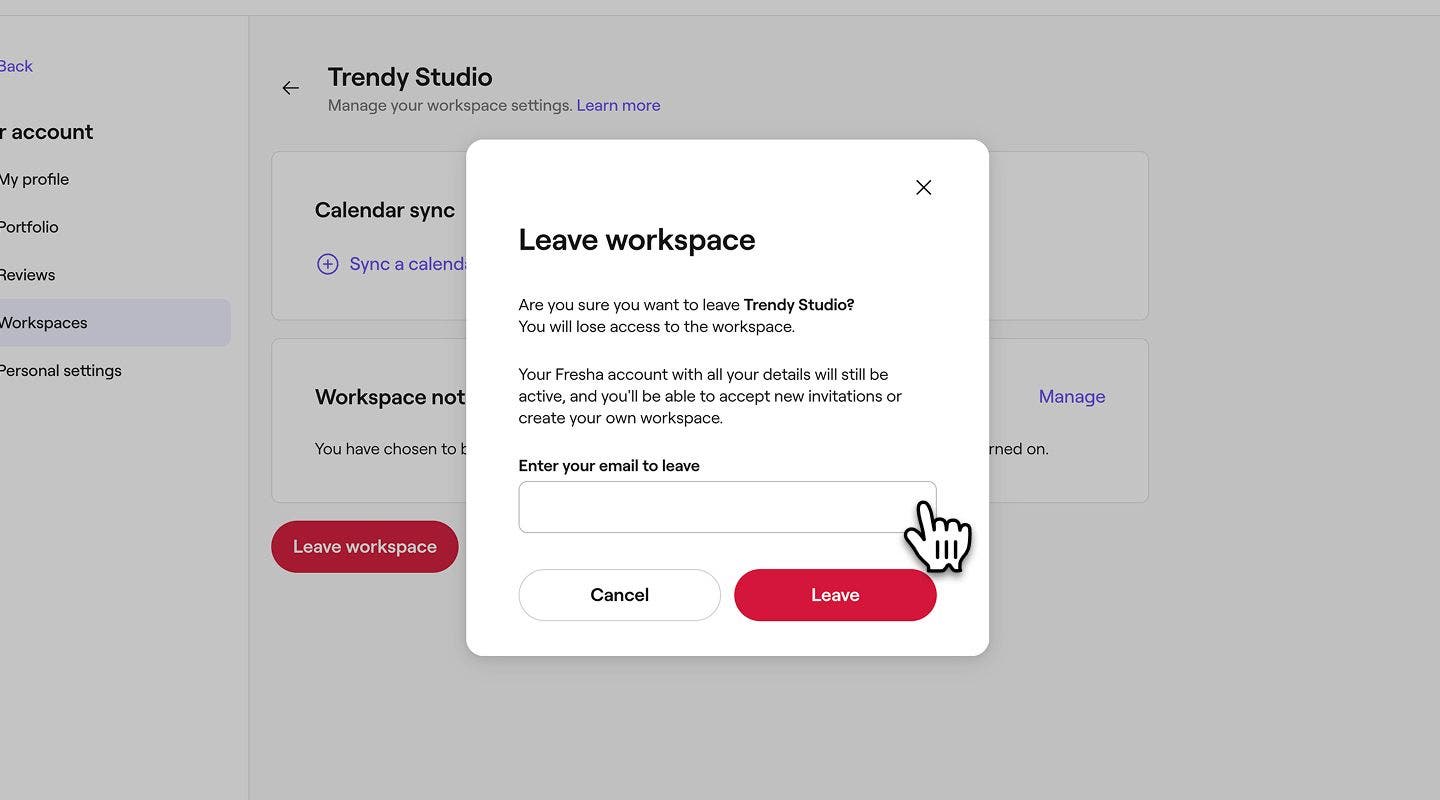
- In the pop-up, enter your Fresha registered email address, and then click on the Leave button to confirm.
Once you have left the workspace, an on-screen message will appear to confirm you’ve left the workspace. This will also be recorded under your previous workspaces along with your departure date.
Delete your personal account
Once you’ve successfully deleted or left the workspace associated with your account, you can go ahead and delete your personal account.
- From your Personal settings, select Login & security to access your account details.
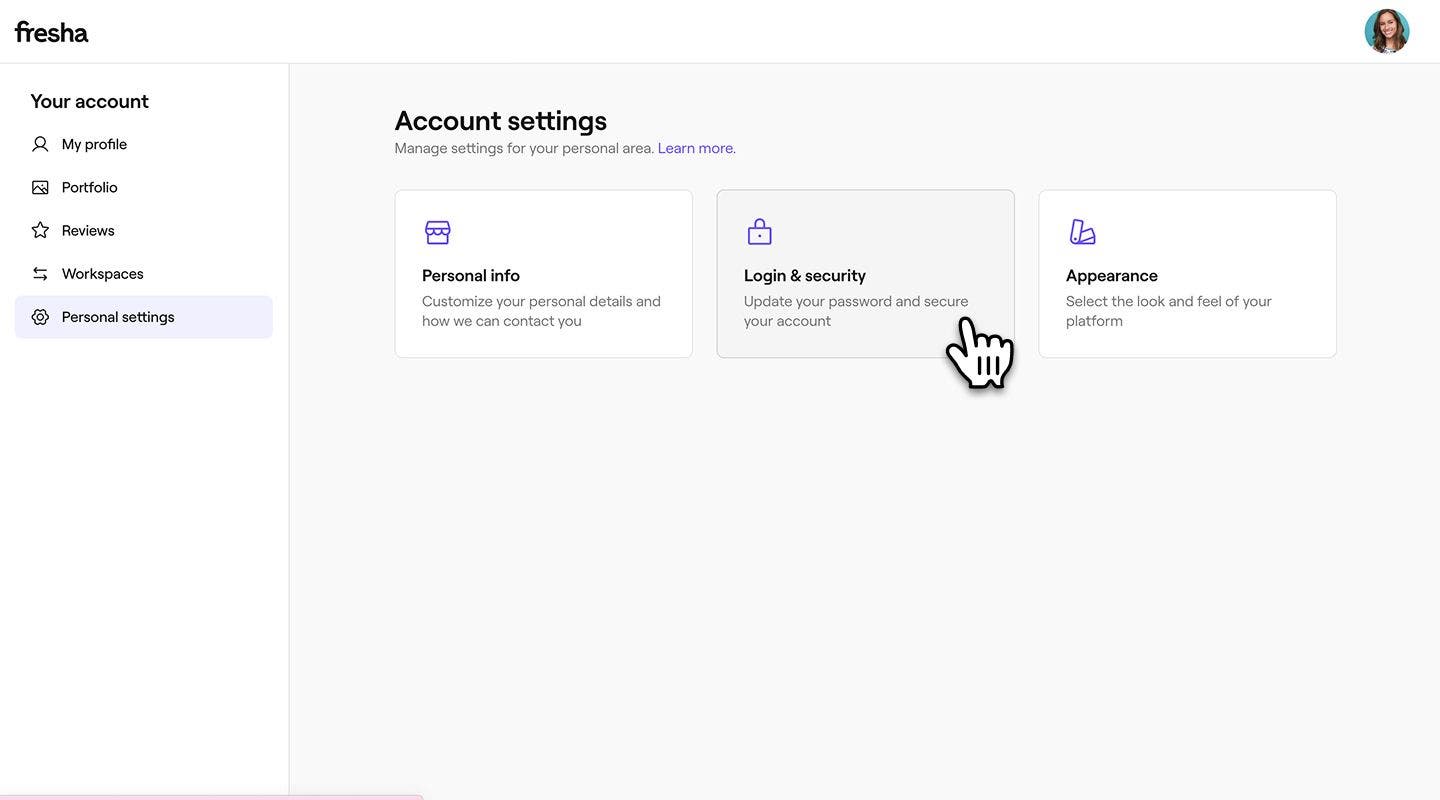
- Under the Delete account section, click on the Delete account button.
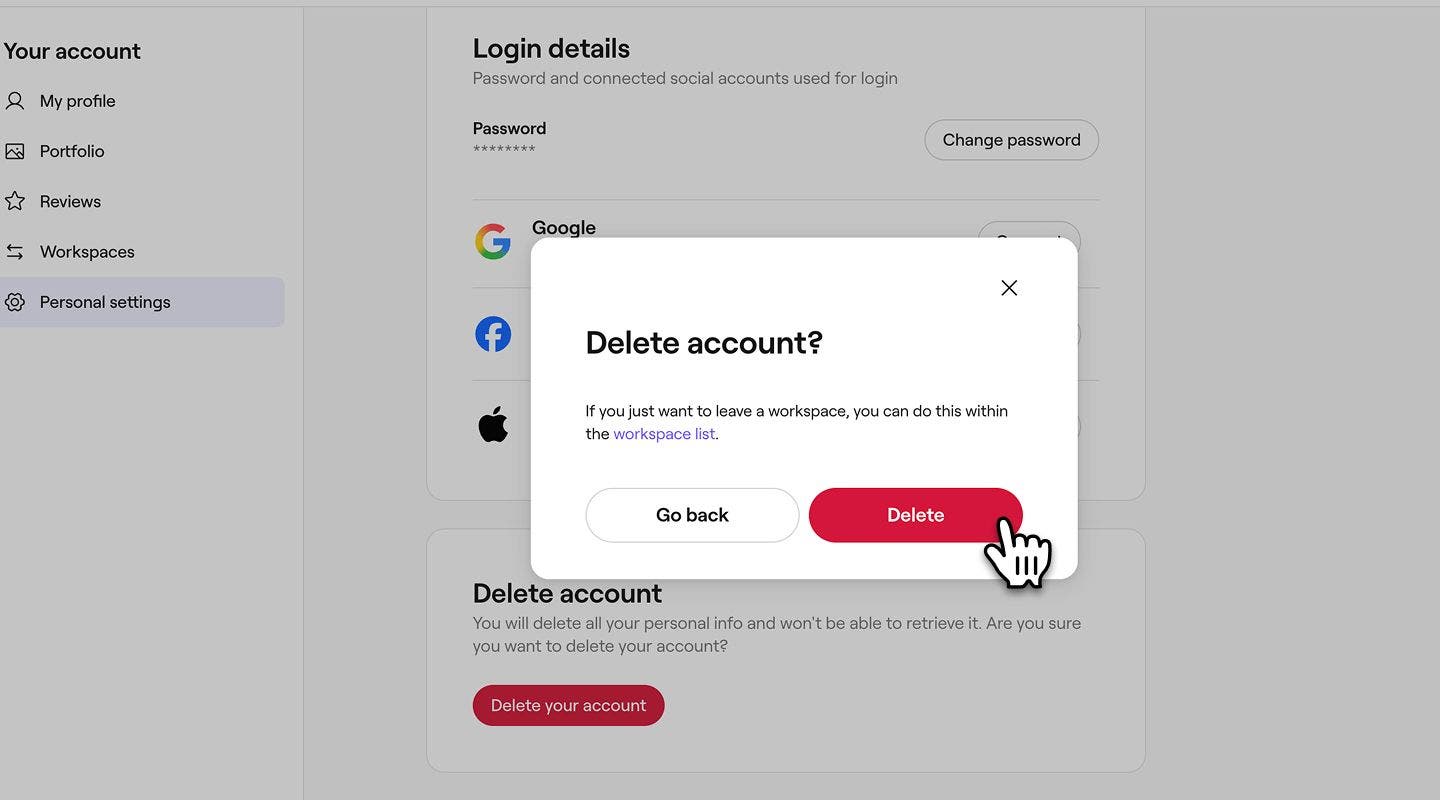
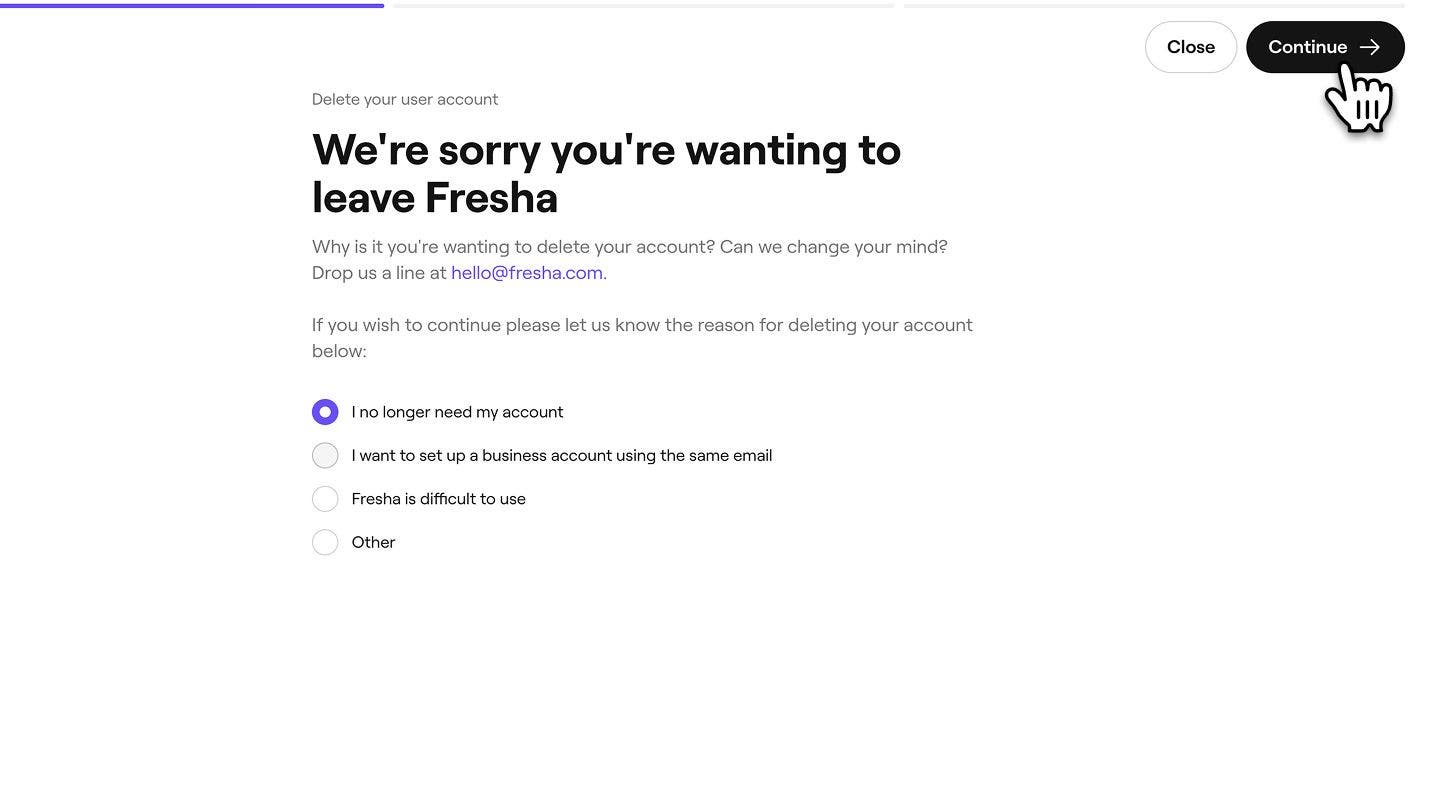
- To complete your account deletion, select the reason for your account deletion and click on the Continue button in the top right to proceed.
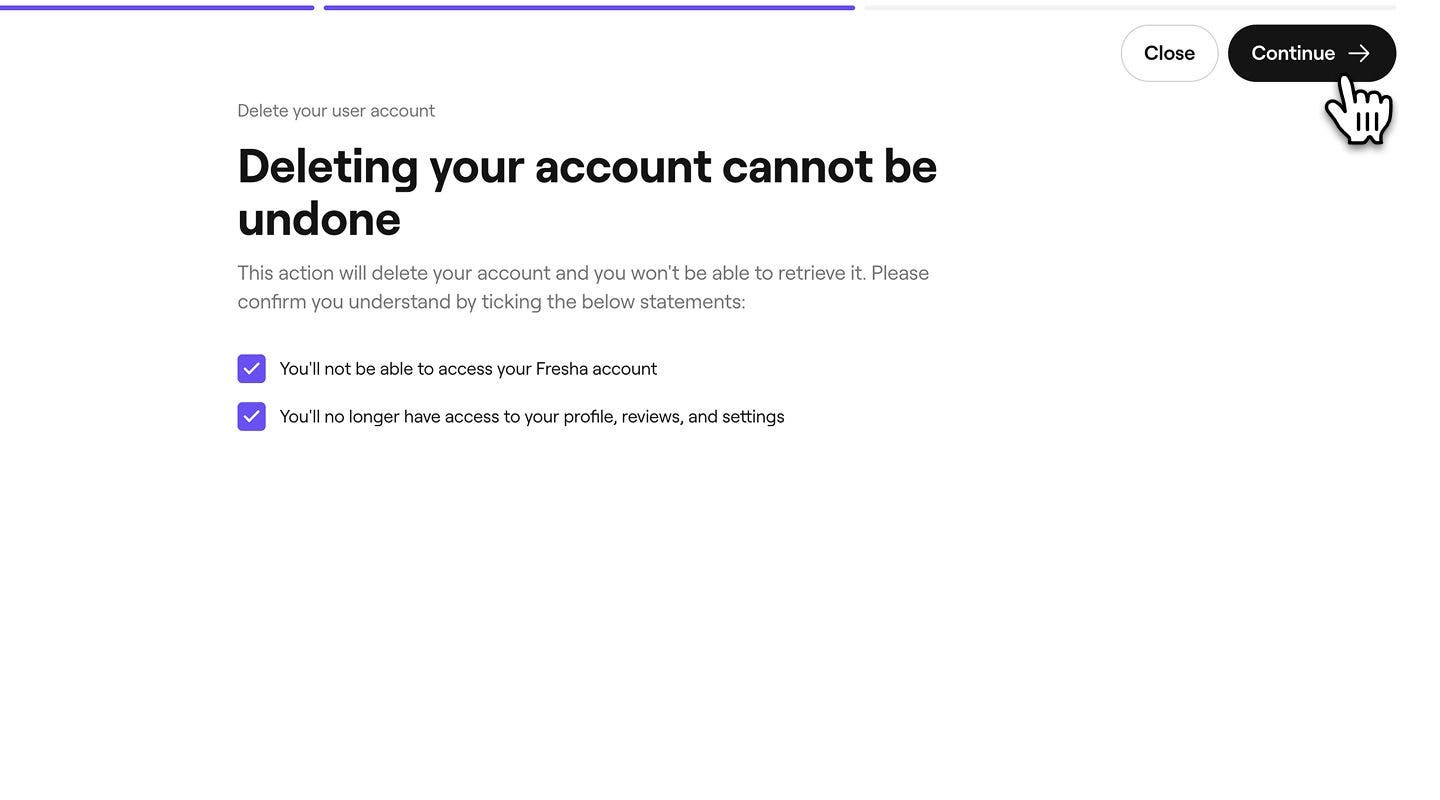
- Next, tick each checkbox to confirm that you will lose access to your account permanently, and click on the Continue button in the top right to proceed.
- A verification code is sent to you via SMS. Enter the 4-digit code into the boxes provided and click on Delete account to confirm.
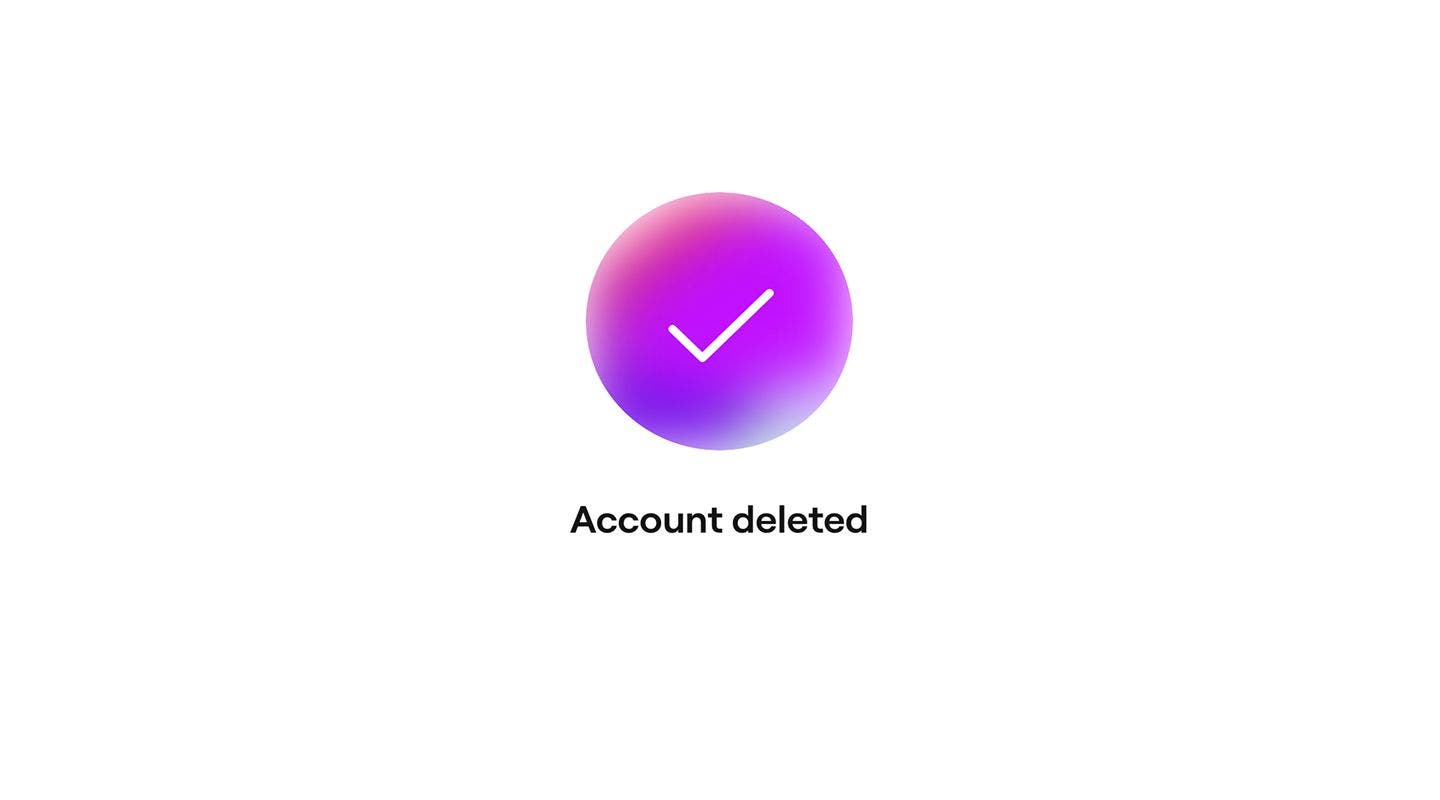
- A confirmation message appears, confirming that your account has been deleted.
FAQs
You receive an email confirming the deletion of your account, usually on the same day.
SMS verification codes are sent to the phone number linked to your Fresha account. If the code hasn't arrived within a few minutes, confirm that your phone number is correct in Personal settings, check that your phone has a mobile signal and can receive SMS messages, then request a new code.