Manage your personal account
Learn how to manage your personal account settings, including language, notifications and appearance so your account works best for you.
In this article
What are personal notifications?
Personal notifications are business-related updates delivered through the bell icon in your workspace. You can customize these alerts to stay focused on what matters most to your business.
By downloading the Fresha mobile app and enabling notifications for Fresha Business, you can also receive these updates directly on your phone.
Manage your personal notifications
- From the toolbar in the top right of your screen, click the Profile icon and select My profile.

- In the left menu panel, click on Workspaces and select Manage next to the workspace you want to view notification settings for.
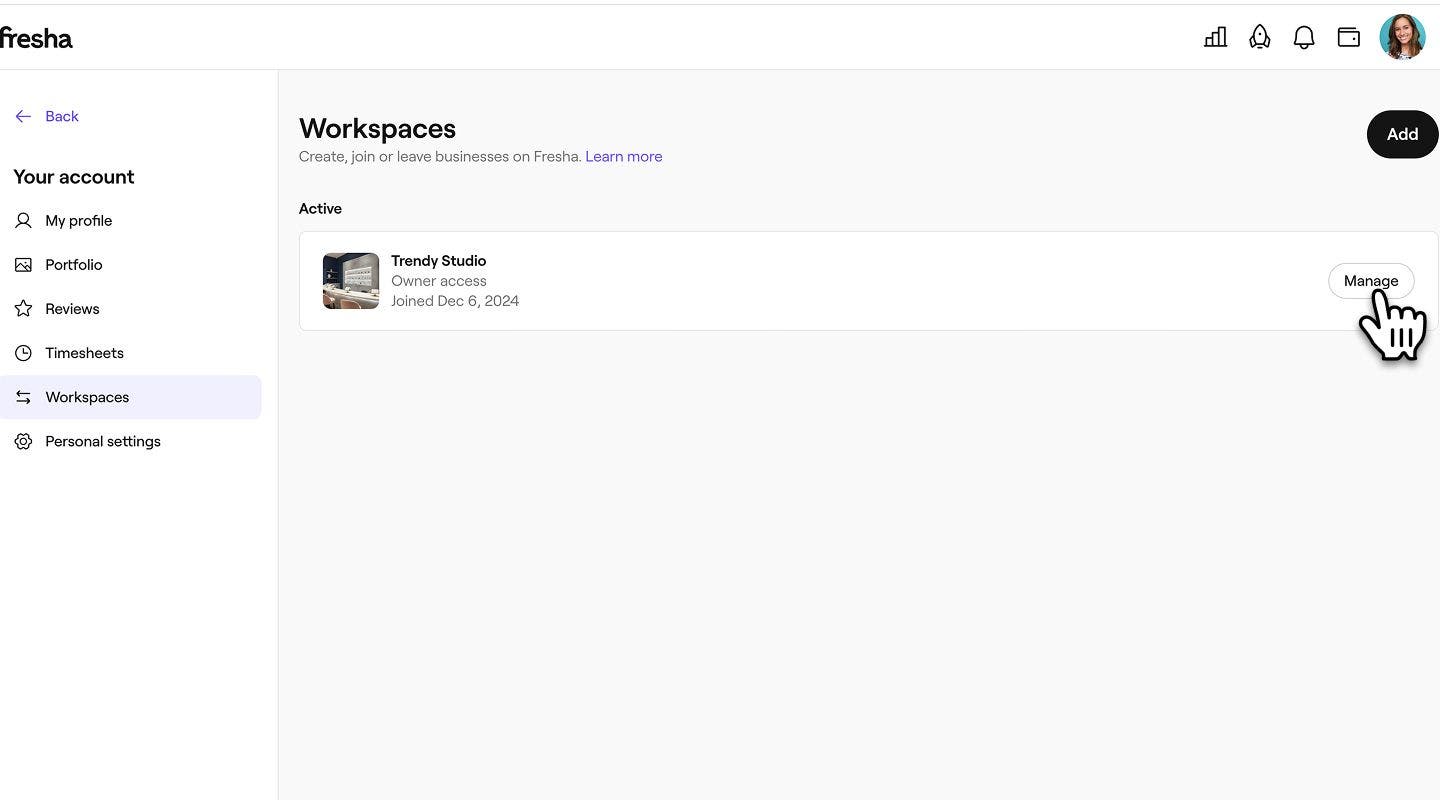
- Under Activity and locations, use the dropdown menu to select which updates you would like to be notified about:

- My activity only: Only get notified about events that directly involve you.
- Activity concerning all team members: Get notified about all events involving team members in your workspace.
- If you have multiple locations, you can choose which ones you want notifications for by selecting Change.
- Under Appointments, tick the checkbox next to each appointment activity you want to be notified about:

- New appointments & marketplace sales
- Confirmations
- Reschedules
- No-shows
- Cancellations
- Custom status updates (including Booked, Arrived and Confirmed appointments)
- New waitlist entries
- Tick tick the checkbox under Online sales to be notified about Product orders (whenever a client purchases products online).

- Under Insights tick the checkbox next to each business performance summary you'd like to receive:

- Daily summary email
- Weekly summary email
- Monthly summary email
- Tick the checkbox the box under Online tips to be notified when clients leave tips online.

- Under Product stock tick the checkbox to next to each stock otification type you want to be notified about:

1. Low stock alerts: Notifies you when a product reaches a low stock level.
2. Low stock summary: Opt into daily, weekly or monthly emails about products low in stock. - As a workspace owner, you’ll also have the option to adjust marketing notifications for your workspace under Marketing:

1. Blast campaign resending:
Tick the checkbox to receive reminders to resend campaigns to clients who haven't opened them. - Once completed, click Save in the top right to update your personal notifications.
You can also quickly manage your notifications by clicking the bell icon, choosing an option from the side menu, and selecting the three dots.
Choose a personal language
Choose the language you want to see in your account without changing your workspace's default language. Changing the language in your profile will only affect how you see your account and the workspace you belong to.
- From the toolbar in the top right of your screen, click on your Profile icon.
- Select the language option displayed at the bottom of the menu.
- In the pop-up, click on your preferred language.
Your account will immediately update to display in the language selected. Notifications and emails you receive from Fresha will also be displayed in your chosen language.
Manage your workspace appearance
Customize your workspace appearance by choosing a light, dark, or system theme to give your day-to-day operations a fresh, sleek look.
- From the toolbar in the top right of your screen, click the Profile icon and select Personal settings.

- Under Account settings, click on Appearance to update your workspace theme.

- Choose from three appearance options:
- Light: The default theme with a white background for full brightness in your workspace.

- Dark: A dark background for a sleek, low-light experience.

- System: Automatically matches your device’s display settings. For example, if your computer is set to dark mode, Fresha will display in dark mode as well.

- Light: The default theme with a white background for full brightness in your workspace.
- Click any option to apply it to your workspace immediately.
You can switch back to the default appearance at any time by selecting Light in the Appearance tab of your Personal settings.
FAQs
No, each team member must manage their own notifications individually through their personal account settings.
Currently, appointment notifications for team members are sent by email only. Text message notifications are designed for clients, such as appointment reminders and updates.
You can manage which team members receive booking notification emails by updating your Online booking settings under Notifications.
Your business summary emails are sent at 8:00 a.m. in your local timezone. This delivery time is set automatically to give you a consistent overview.
Any appearance setting you choose in your Personal settings applies only to your own workspace view. Each team member has full control over their own appearance preferences.