Manage Client Connect settings
Learn how to adjust messaging preferences and choose how your team and clients use Client Connect.
In this article
Update Client Connect message settings
Choose how messaging works for your clients, including whether clients can message you after booking and whether read receipts or typing indicators are shown.
-
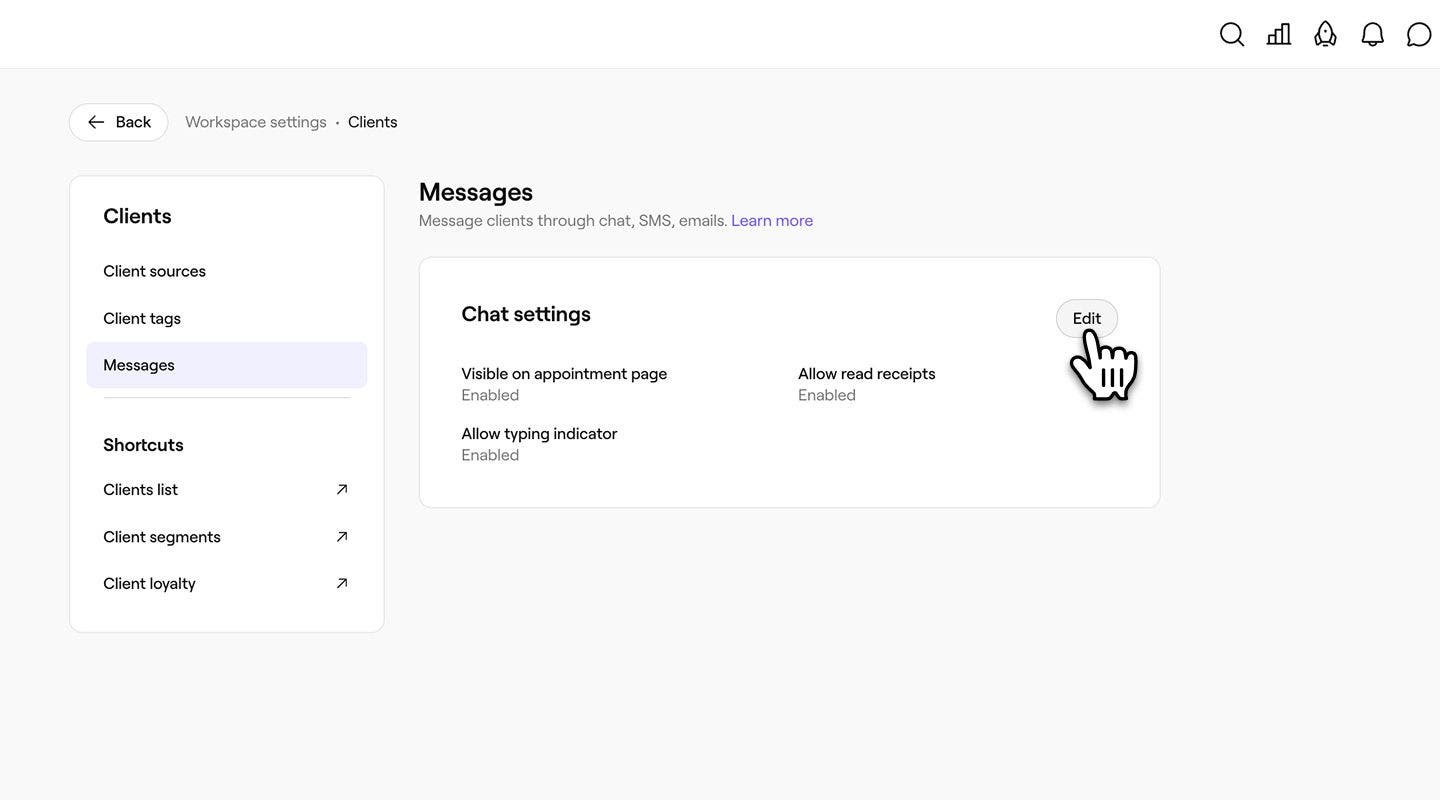
Open Messages from your Client settings.
-
Click on the Edit button next to Chat settings.
-
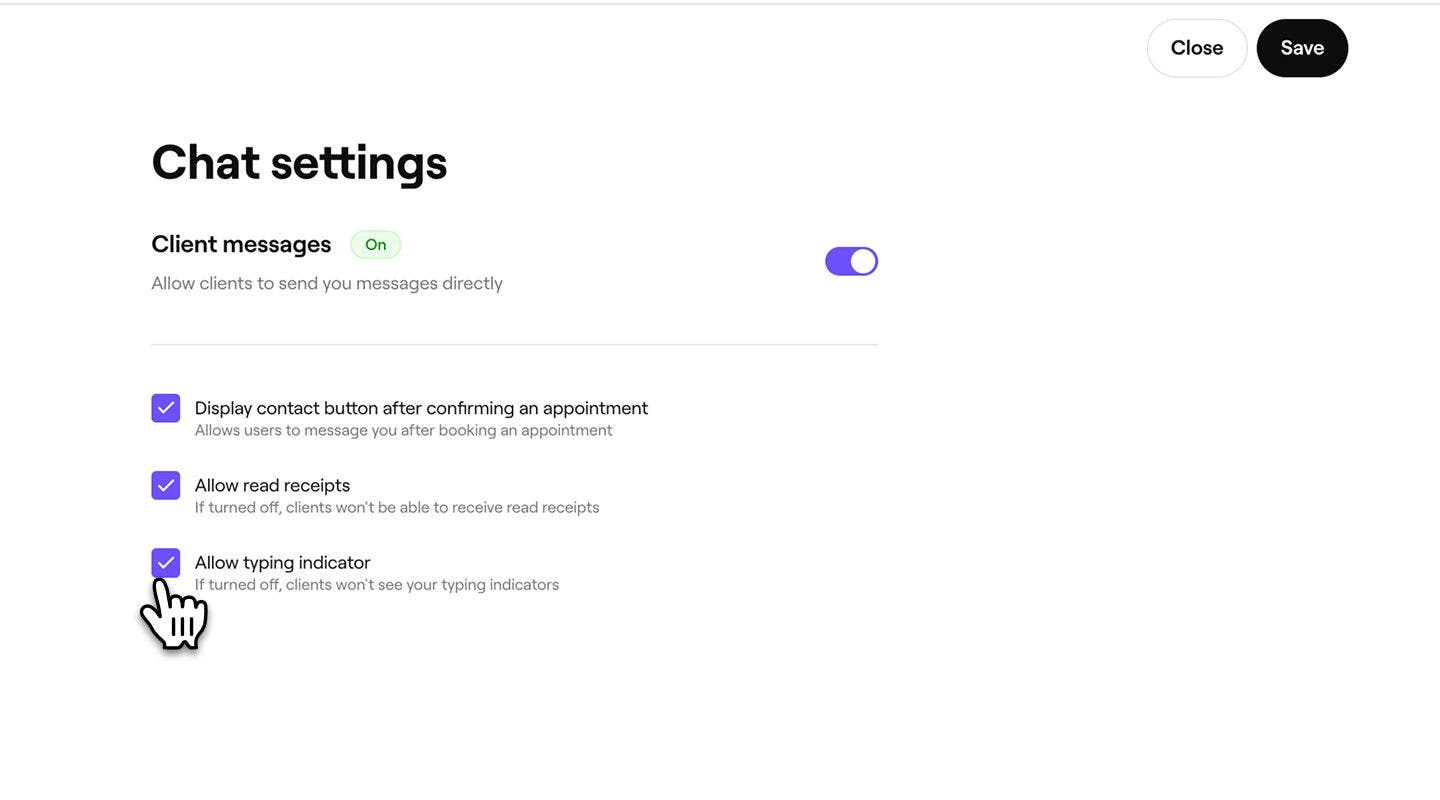
In the Chat settings view, tick or untick the checkboxes to manage how messaging works for your clients:
- Display contact button after confirming an appointment: Allows clients to message you after booking.
- Allow read receipts: Let clients see when you’ve read their messages.
- Allow typing indicator: Shows clients when you’re typing a reply.
-
Click on the Save button in the top right to apply the settings.


Your updated settings apply straight away.
Set up instant replies
Set up a personalized automatic reply so clients get an immediate response the first time they message you, even when your team isn't online.
Once set up, your instant reply will only send the first time a client messages your business. It's a one-time welcome for new conversations. After that first message, the client won't receive it again, even if they start a new conversation later.
-
Open Messages from your Client settings.
-
Click on the Edit button next to Instant replies and turn on the Send instant reply toggle.
-
Write your message in the Instant reply message field (up to 200 characters).
-
Click “@” to insert client-specific details to the text:
- Client details: Each client’s first name, last name, or full name.
- Typical response time: This will include the average response time from the past 7 days.
-
Click on the Save button in the top right to apply the settings.
If you use AI Concierge for Client Connect, it handles your first replies for you, so instant replies are turned off and can't be switched on.
Manage team permissions for client messages
Use permission settings to manage which team members can access and reply to client chats.
There are two permissions available for Client Connect:
- Access client chats: allows team members to view all client chats, message history, and attachments.
- Reply to client chats: allows team members to send messages and start conversations with clients.
- From the main menu on the left of your screen, go to Settings.
- Click on the Team category to access permission settings.

- Select the permission group you want to edit, or click on the Add permission group button to create a new one.

- In the Edit permission role view, select Clients from the left menu panel.

- Under Client messaging, tick the checkbox next to each permission you want to grant.

- Click on the Save button in the top right to update the permission group.


Updated permissions apply the next time team members sign in.
Note: Team members without the Access client chats permission won’t see the Client messages inbox in Fresha Connect.
Manage your Client Connect notifications
You and your team can control how you hear about new Client Connect messages.
-
From the toolbar on the top right of your screen, click Notifications (bell icon) to open your notification centre.
-
Click Actions (three dots) and select Notification settings to open the Notification preferences page.
-
Scroll down to Messaging and use the toggle to turn Client Connect and Team Connect notifications on or off.
-
Under Client Connect, next to New client message, tick or untick Email, Push, and In-app independently, depending on how you want to be notified:
- Email: Sent to your account email address.
- Push: Sent to your phone as a push notification, even when Fresha is closed.
- In-app: Shown as a pop-up within Fresha
-
Click Save.
Once saved, you’ll start receiving Client Connect message notifications through only the channels you've enabled.
Turn Client Connect off
-
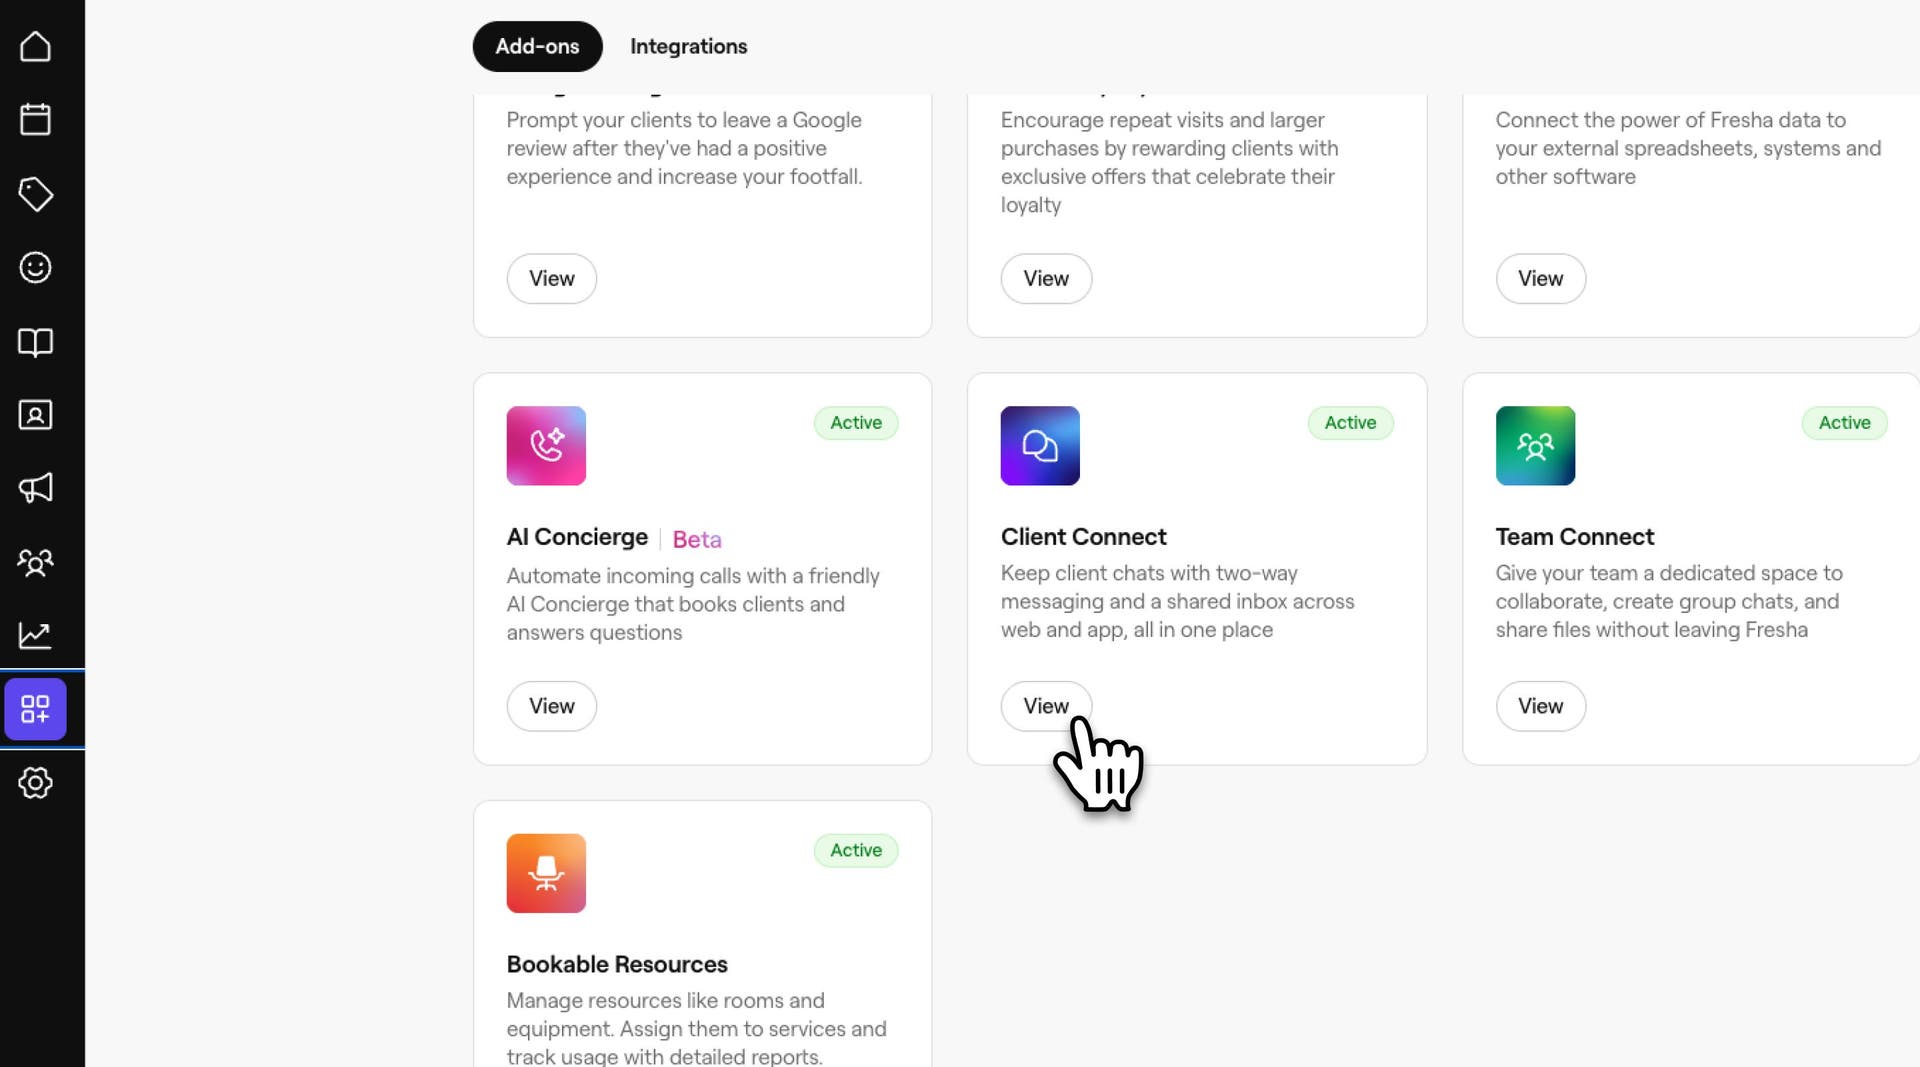
From the main menu on the left of your screen, go to Add ons.
-
Select the View button under Client Connect to open the add-ons summary view.
-
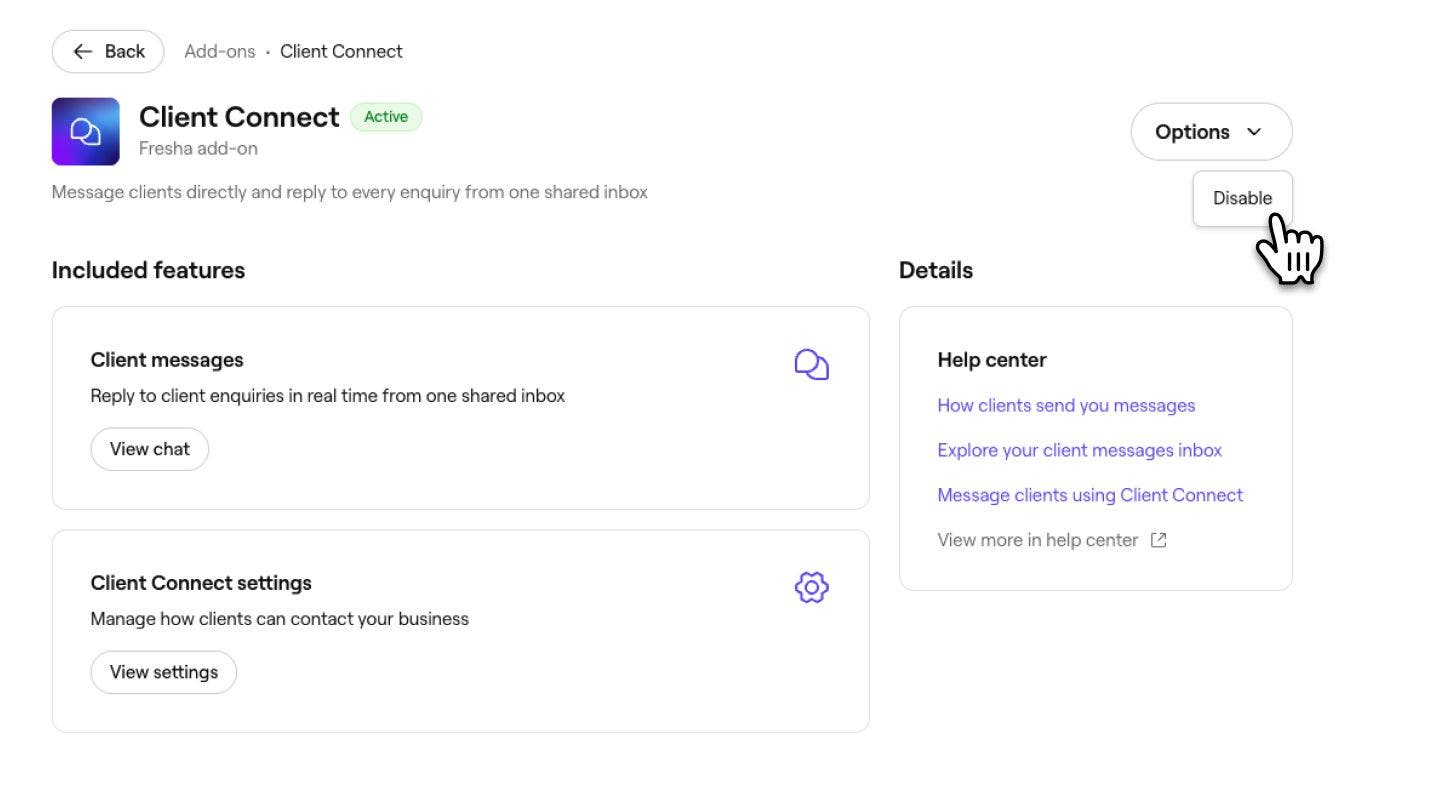
Click on the Options button in the top right and select Disable from the panel.
-
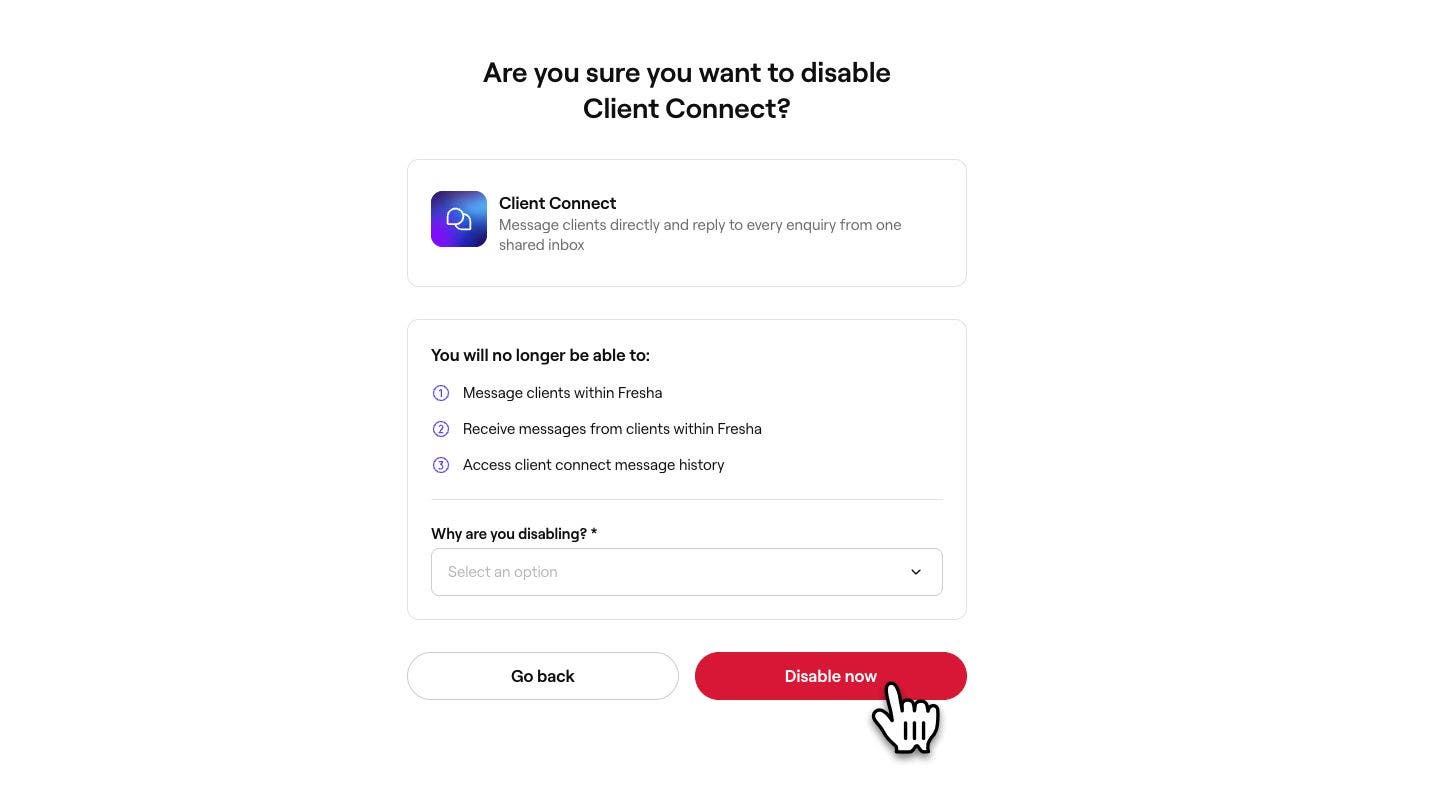
Review the conditions of disabling Client Connect and select a reason.
-
Click on the Disable now button to confirm.
When Client Connect is disabled, clients can’t start new conversations, and your team can’t send or receive messages. Existing conversation history remains saved and becomes available again if you re-enable messaging.
FAQs
Your existing chat history stays saved. While Client Connect is off, clients can't message you and your team can't send or receive new messages. When you turn it back on, your chat history is available again straight away.
Use permission groups to grant Access client chats and Reply to client chats independently. For example, a front-of-house team member might be able to view and reply to chats, while a stylist can view chats but not reply.
If you don't see the Messages icon in your toolbar, you may not have the Access client chats permission. Speak to a workspace owner who can update your permissions.
Clients always receive an in-app notification in the Fresha client app when you send them a message, so they don't miss anything important. They can manage email and text message preferences in their account settings.
Once a team member saves their notification preferences, the same settings apply on every device they sign into.
Client Connect settings apply at the workspace level. Use team permissions to manage which team members at each location can access and reply to chats.
Fresha calculates it for you from your recent replies based on your average reply time over the past 7 days.
It's capped at 6 hours. If your average is higher, clients see "6+ hours" rather than a longer estimate. Your response time will change in real time if it changes.