HomeKnowledge baseFresha academy
Set up your public contact form
Back
  1. Knowledge base•
  2. Messaging•
  3. Set up your public contact form

Set up your public contact form

Learn how to set up a public contact form that captures enquiries from your website and adds them straight to your Client Connect inbox.

In this article

  • About your public contact page
  • Get your contact link and QR code
  • Set your form and redirect preferences

About your public contact page

Your public contact page is available through a single link or QR code that you can add to your website, social profiles or wherever you'd like clients to be able to reach out. When they message, Fresha creates or matches a client record automatically, and the message lands in your Client Connect inbox.

Get your contact link and QR code

  1. From the main menu on the left of your screen, go to Settings and click on the Clients category.

    Set up your public contact form_Step 1_Desktop.jpg

  2. Select Client Connect from the left menu panel.

    Set up your public contact form_Step 2_Desktop.jpg

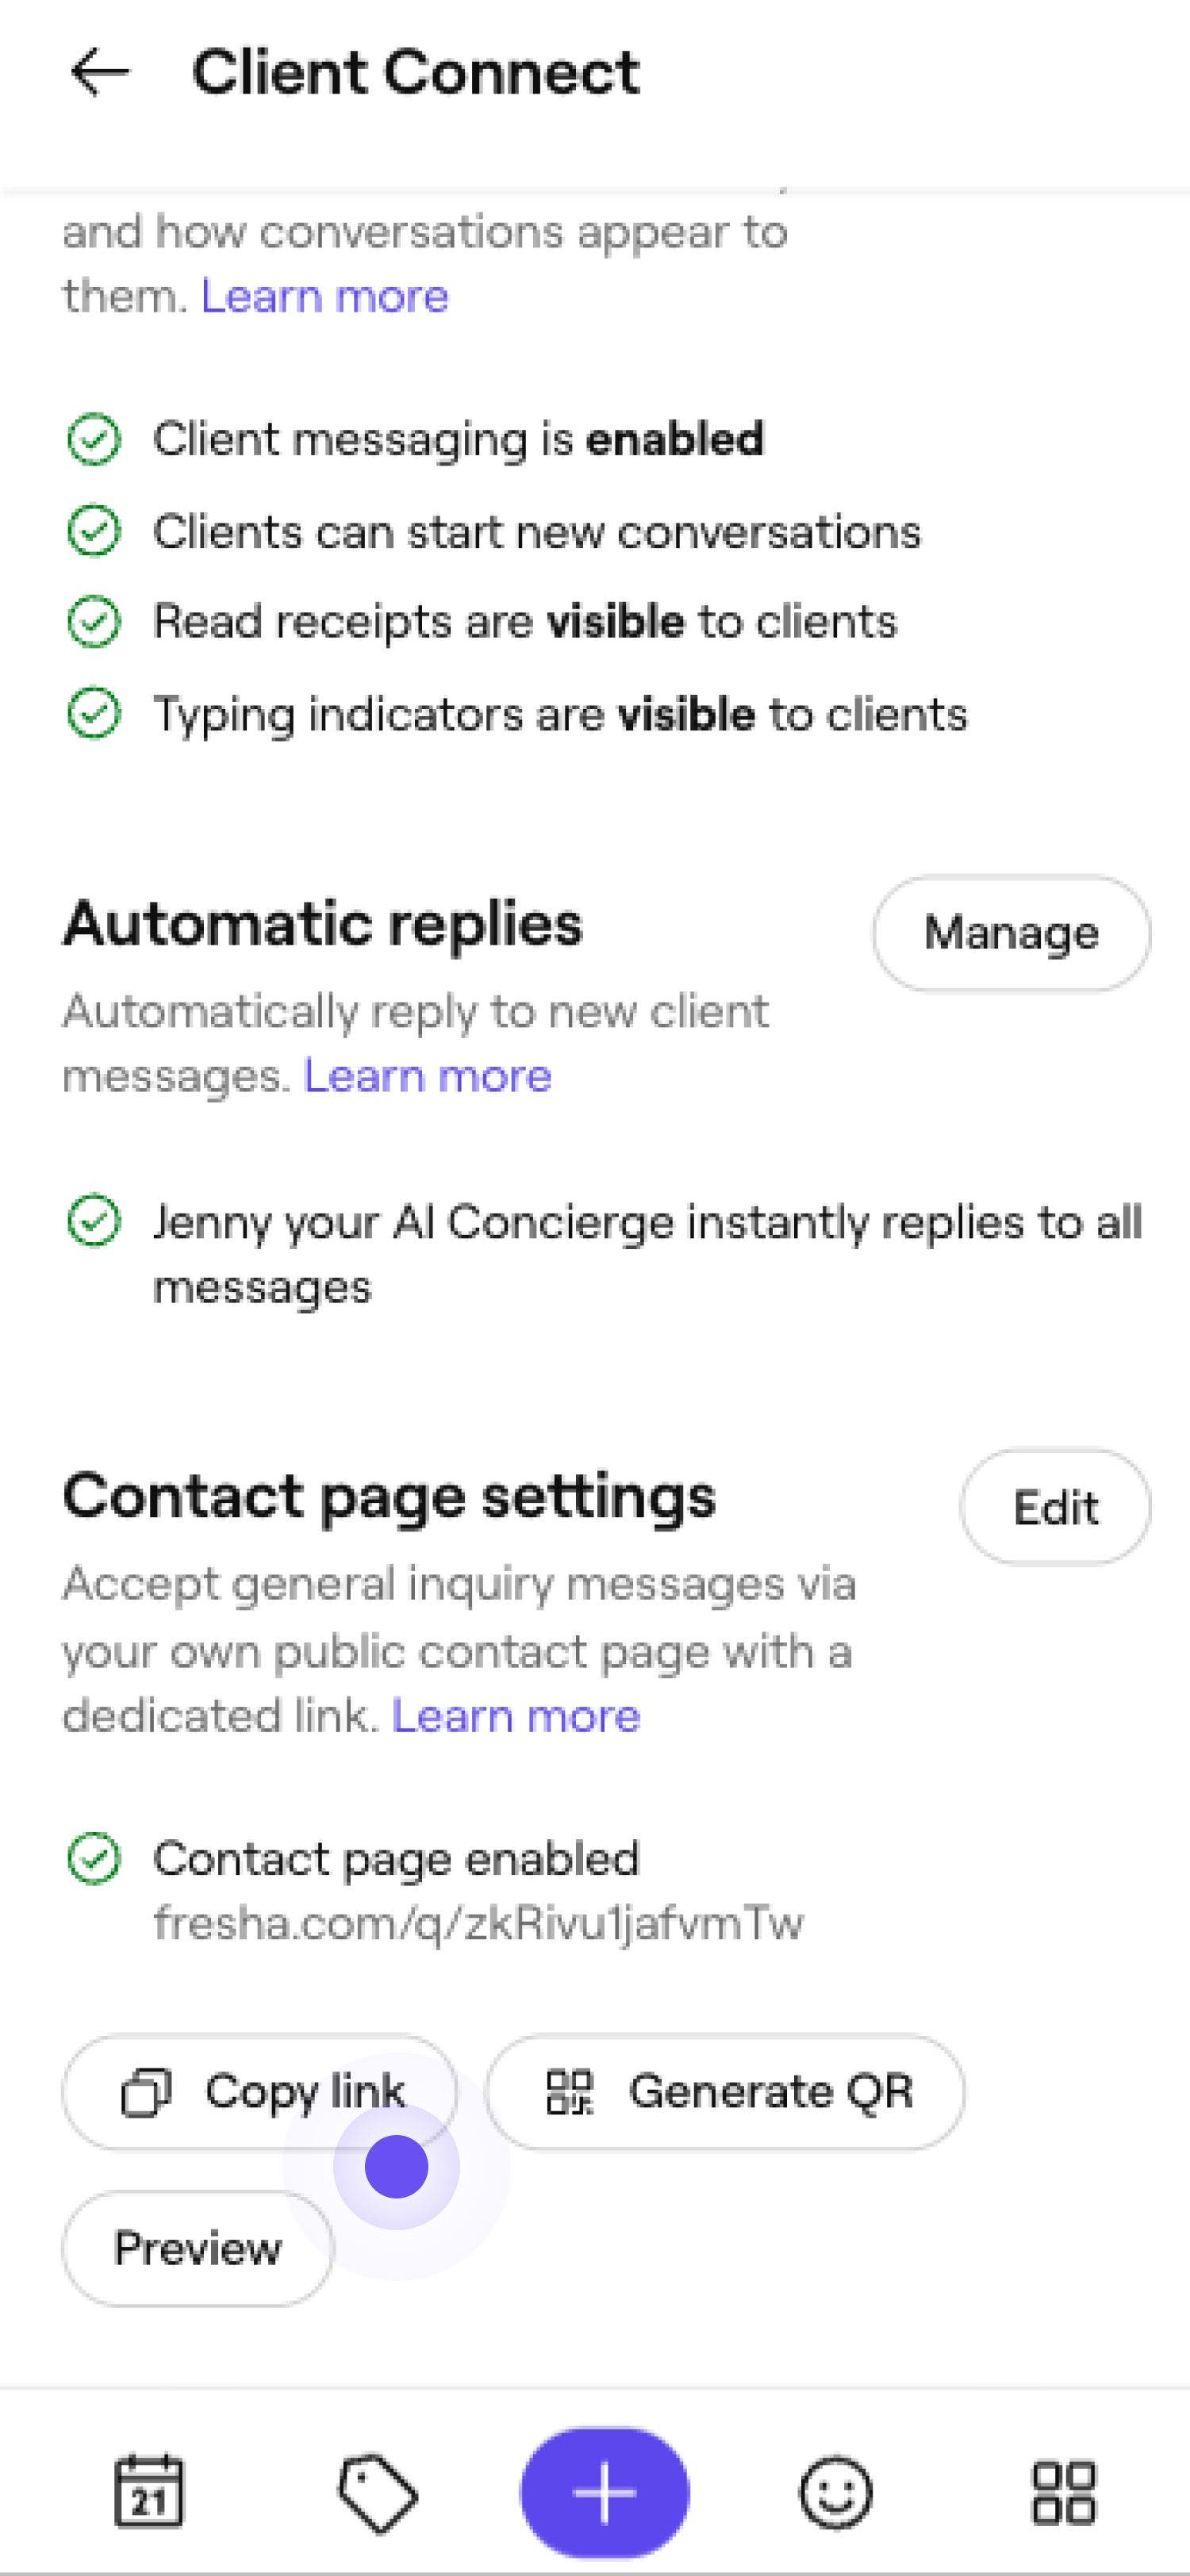
  3. Under Contact page settings, choose one of the following options: 

    1. Copy link: Accept general inquiry messages with a dedicated link.

      Set up your public contact form_Step 3_Desktop.jpg

    2. Generate QR: Switch between light and dark backgrounds, then click Copy to copy the QR code image or Download to save it as a transparent PNG.

      Set up your public contact form_Step 3B_Desktop.jpg

  4. Add your link or QR code to your website, social profiles, or printed materials.

  1. From the main menu at the bottom of your screen, tap on More (grid icon) and open Settings.

    Set up your public contact form_Step 1_Mobile.jpg

  2. Tap on Clients from the list, then tap Client Connect.

    Set up your public contact form_Step 2_Mobile.jpg

  3. Under Contact page settings, choose one of the following options: 

    1. Copy link: Accept general inquiry messages with a dedicated link.

      copy link .jpg

    2. Generate QR: Switch between light and dark backgrounds, then click Copy to copy the QR code image or Download to save it as a transparent PNG.

      Set up your public contact form_Step 3B_Mobile.jpg

  4. Add your link or QR code to your website, social profiles, or printed materials.

Anyone who clicks on the contact link or scans the QR code is directed to message your business directly. They’ll be directed to the contact page where they can fill out the details to start a conversation with you.

Set your form and redirect preferences

  1. Open your Client Connect settings. 

    Set up your public contact form_Step 2_Desktop.jpg

  2. Next to Contact page settings, click on the Edit button to update the preferences.   

    Set up your public contact form_2_Step 2_Desktop.jpg

  3. Under Required contact details, select whether you’d like the recipient to share their Phone, email, or both.

    1. The recipient is always required to provide their name so a record can be kept in your client list. 

      Set up your public contact form_2_Step 3_Desktop.jpg

  4. Choose whether you'd like to 

    1. Allow image attachments: Clients can attach image files to their message.
    2. Show marketing consent checkbox: Clients can choose to receive your marketing notifications.
  5. Under Submitted message page, choose where to direct clients after successfully submitting a message:

    1. Your marketplace profile: this sends them to your marketplace profile after submitting a message.
    2. Custom link: this sends them to a specific link, such as your own website or a social media page.

    Set up your public contact form_2_Step 4_Desktop.jpg

  6. Click Save in the top right to update your contact form settings.

  1. Open your Client Connect settings. 

  2. Next to Contact page settings, tap on the Edit button to update the preferences.   

    Set up your public contact form_2_Step 2_Mobile.jpg

  3. Under Required contact details, select whether you’d like the recipient to share their Phone, email, or both. The recipient is always required to provide their name so a record can be kept in your client list. 

    REquired contact details.jpg

  4. Choose whether you'd like to 

    1. Allow image attachments: Clients can attach image files to their message.
    2. Show marketing consent checkbox: Clients can choose to receive your marketing notifications.
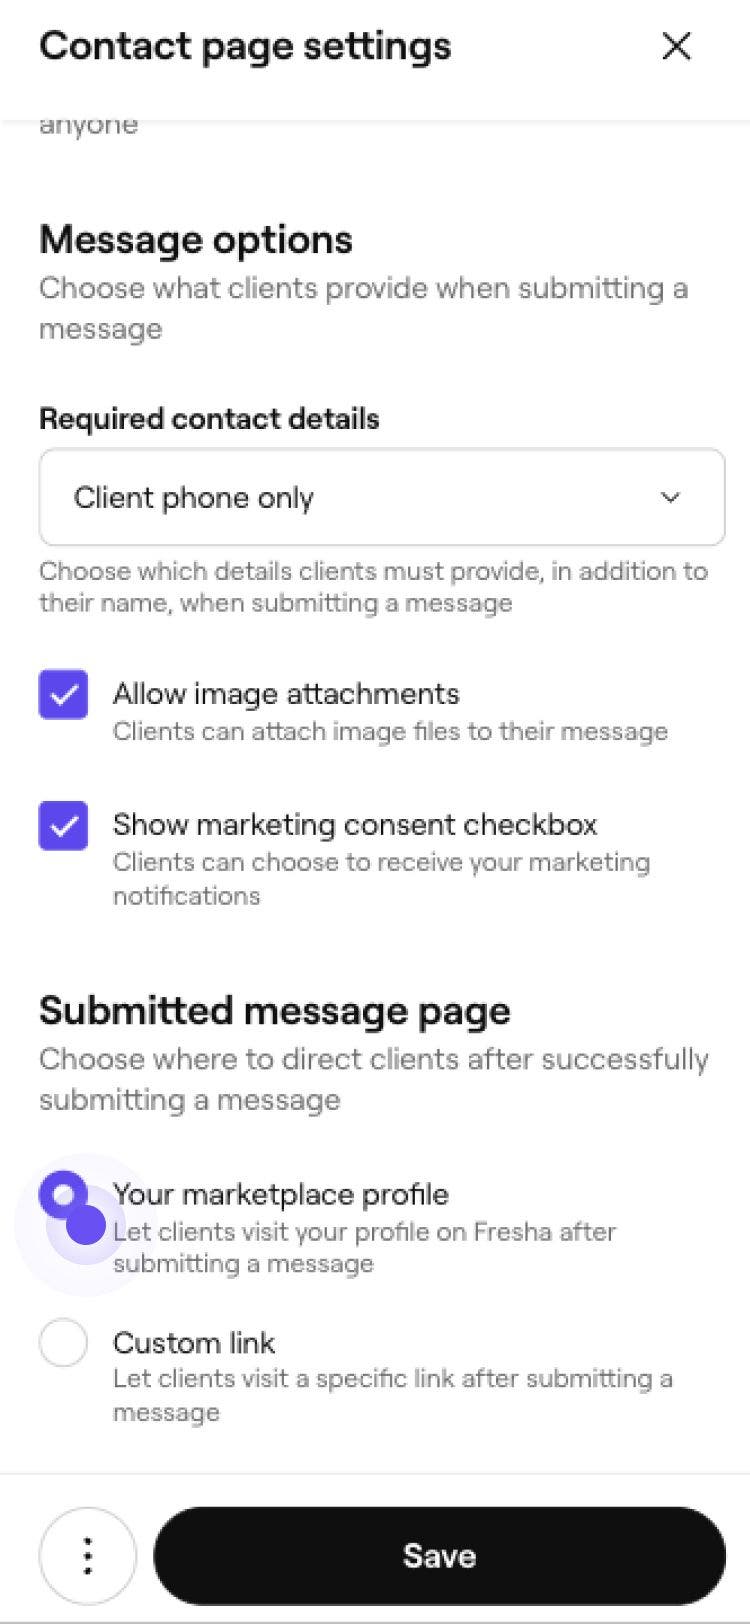
  5. Under Submitted message page, choose where to direct clients after successfully submitting a message:

    1. Your marketplace profile: this sends them to your marketplace profile after submitting a message.

    2. Custom link: this sends them to a specific link, such as your own website or a social media page.

      Submitted message page.jpg

  6. Click Save in the top right to update your contact form settings.

Your contact page is updated immediately to reflect the information you need from the recipient. Once they fill out the required information and send a message, they are directed wherever you choose once .

FAQs

    • Your contact link always opens a hosted form on fresha.com, typically in a new tab, so you can add it as a button, image, or QR code on your site or social profiles rather than an embedded element.

      We match submissions against your existing clients by email and phone only, never by name. If we find a confident match, we add the message to that client's existing conversation instead of creating a new record.


Client Connect


Related articles

Fresha academy courses
Course video preview

Manage your clients

5 lessons•9 mins

See all courses

Was this guide helpful?

Client Connect

How clients send you messages

Discover how clients reach out, respond, and stay connected with your business through Client Connect.

Explore your client messages inbox

Manage your inbox so you can easily find messages from your clients and respond.

Message clients using Client Connect

Chat with clients directly in Fresha. Answer questions, confirm details, and follow up after a visit, all from one inbox.

Manage Client Connect settings

Turn on Client Connect, manage notification preferences and who can access messages.

Set up your public contact form

Capture website enquiries into your Client Connect inbox with a public contact form.

Related articles

Client forms overview

Collect client information before or during appointments using forms.

Fresha academy courses
Course video preview

Manage your clients

5 lessons•9 mins

See all courses
Fresha
Get the app

About Fresha

Careers

Help and support

Blog

Sitemap

For business

For partners

Pricing

Features

Scheduling

Point of sale

Payments

Capital

Marketplace

Support

Status

Legal

Privacy Policy

Terms of service

Terms of use

Find us on social

Facebook
Linkedin
Instagram

© 2026 Fresha.com SV Ltd