Apply rewards at checkout
In this guide, you'll learn how to apply client rewards during checkout and how they appear in the sales cart.
In this article
How applying loyalty rewards at checkout works
Clients can redeem rewards themselves via their Fresha Wallet, or rewards can be applied manually to be used at checkout.
When a client has available rewards, they appear automatically during the checkout process. You can also add rewards directly to a client’s profile, making them available to use at a future visit.
Apply existing rewards at checkout
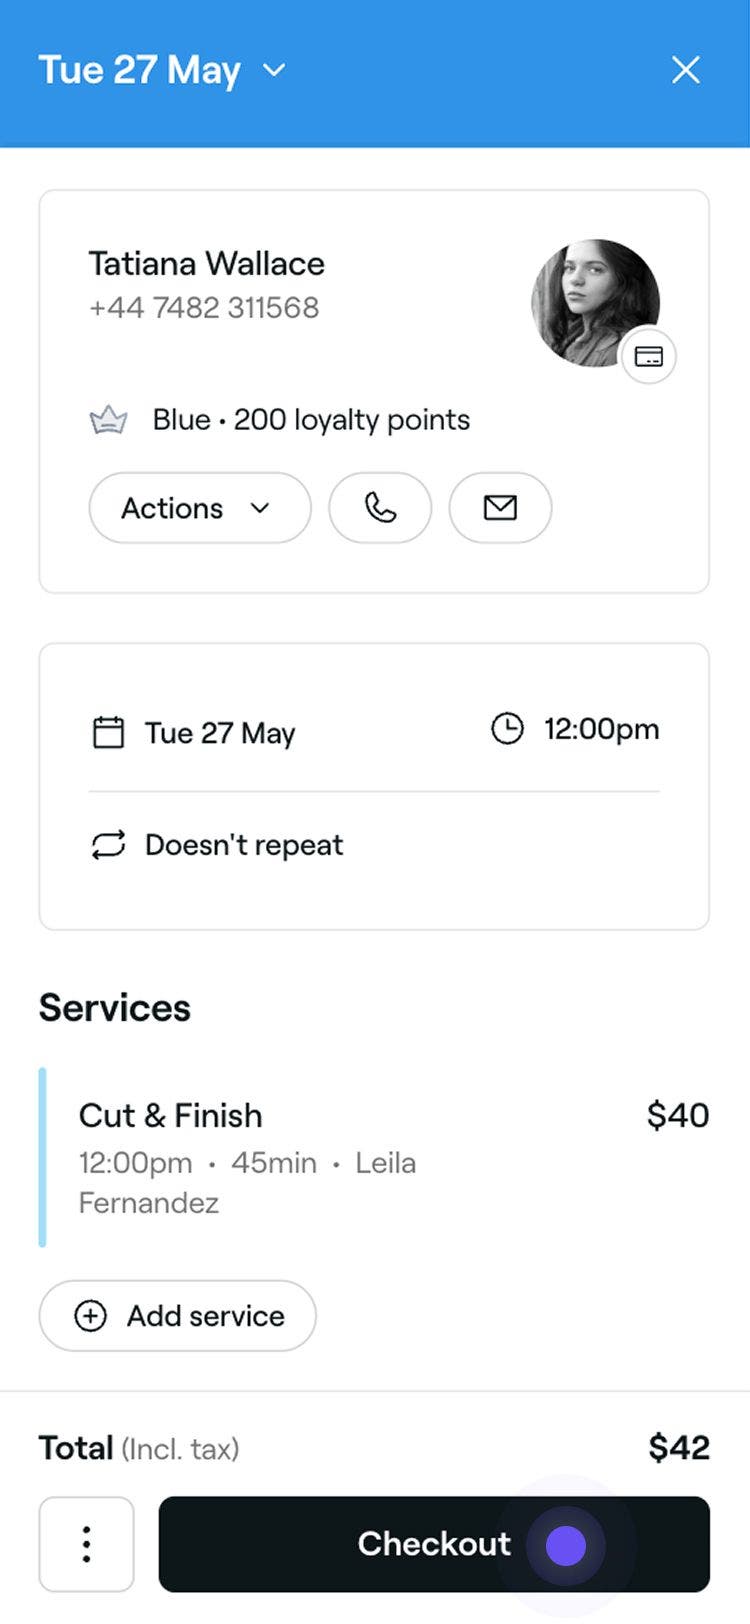
- Open an appointment.
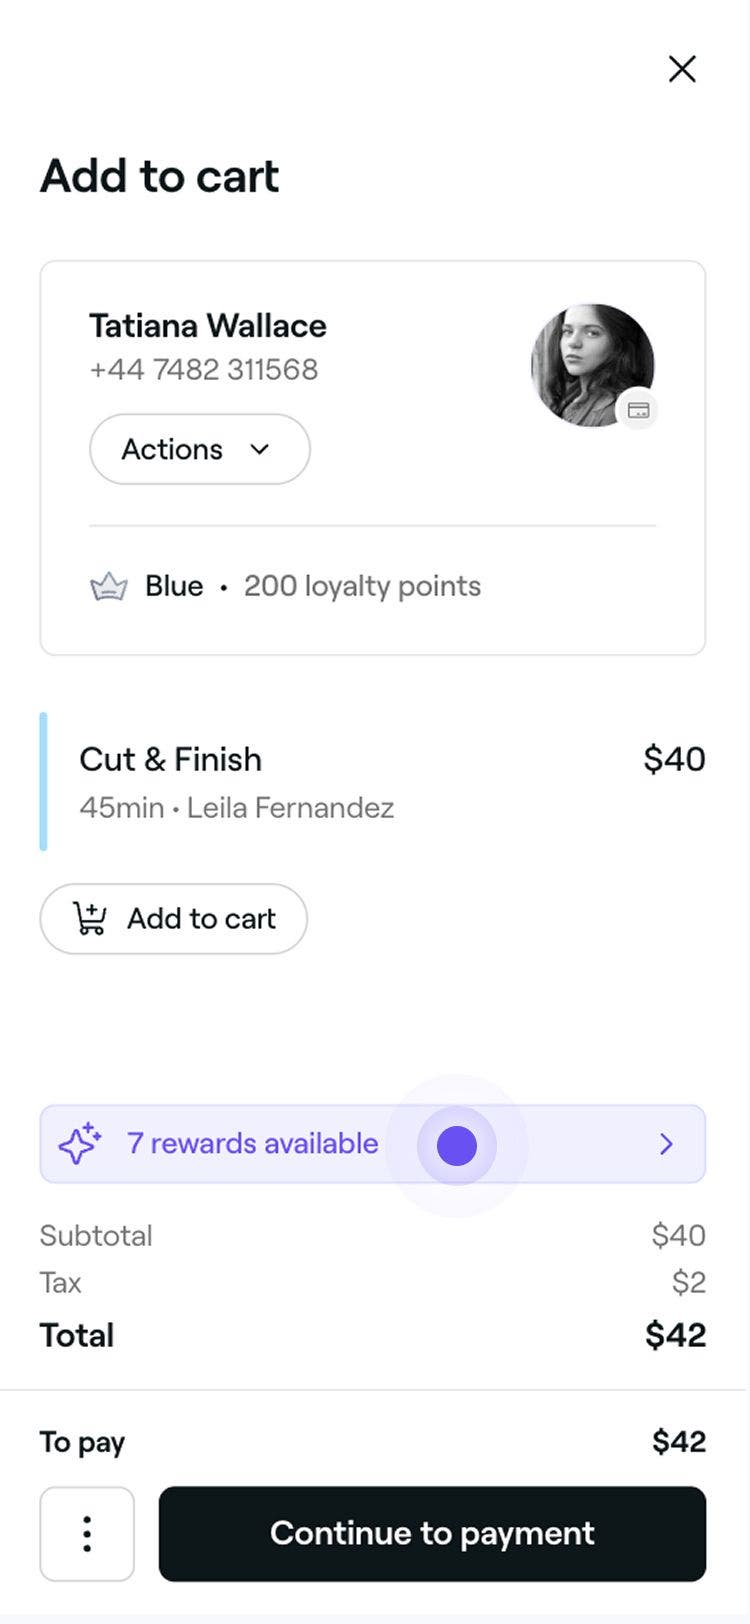
- In the right panel, click on the Checkout button to open the cart view.

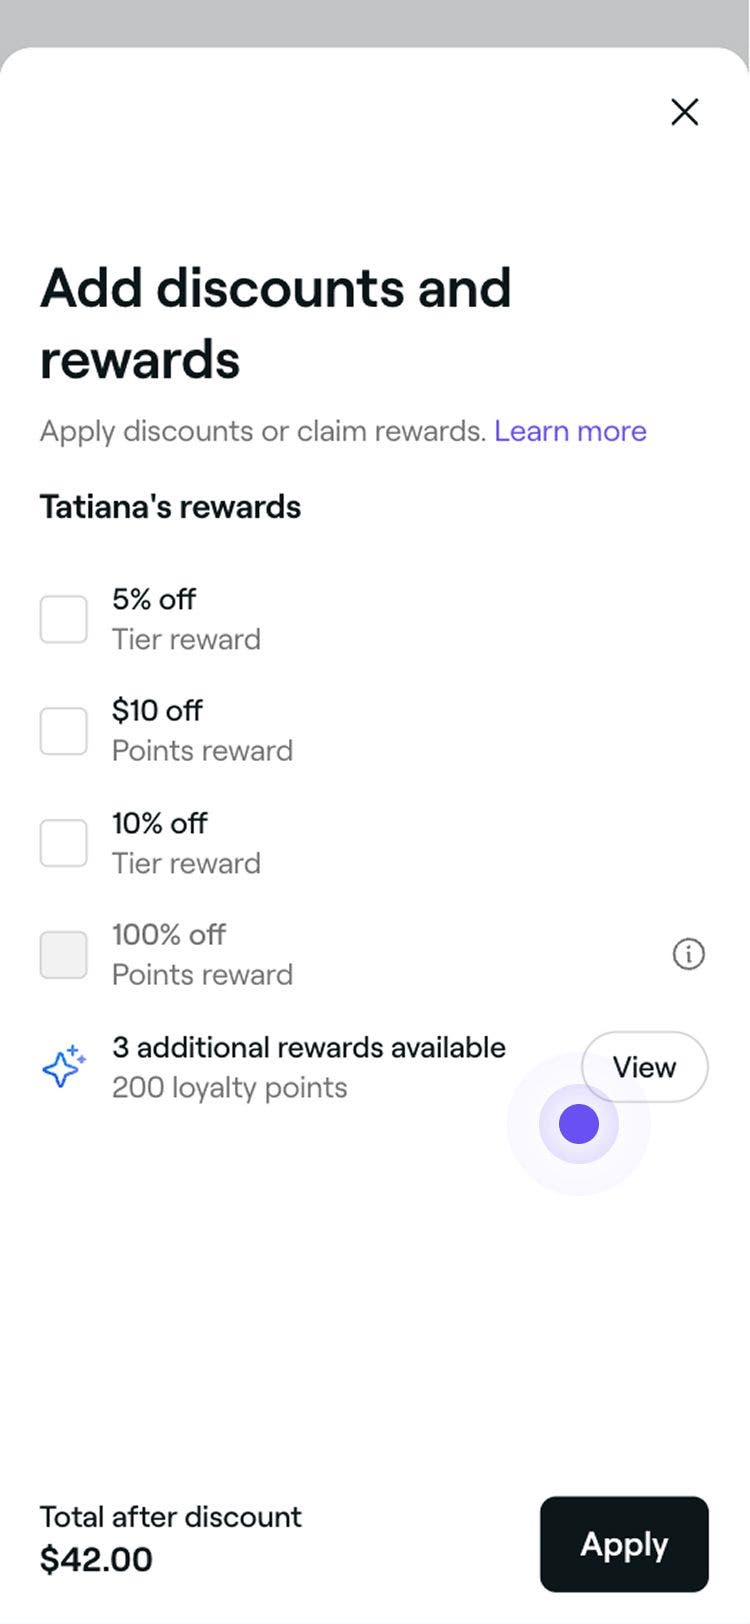
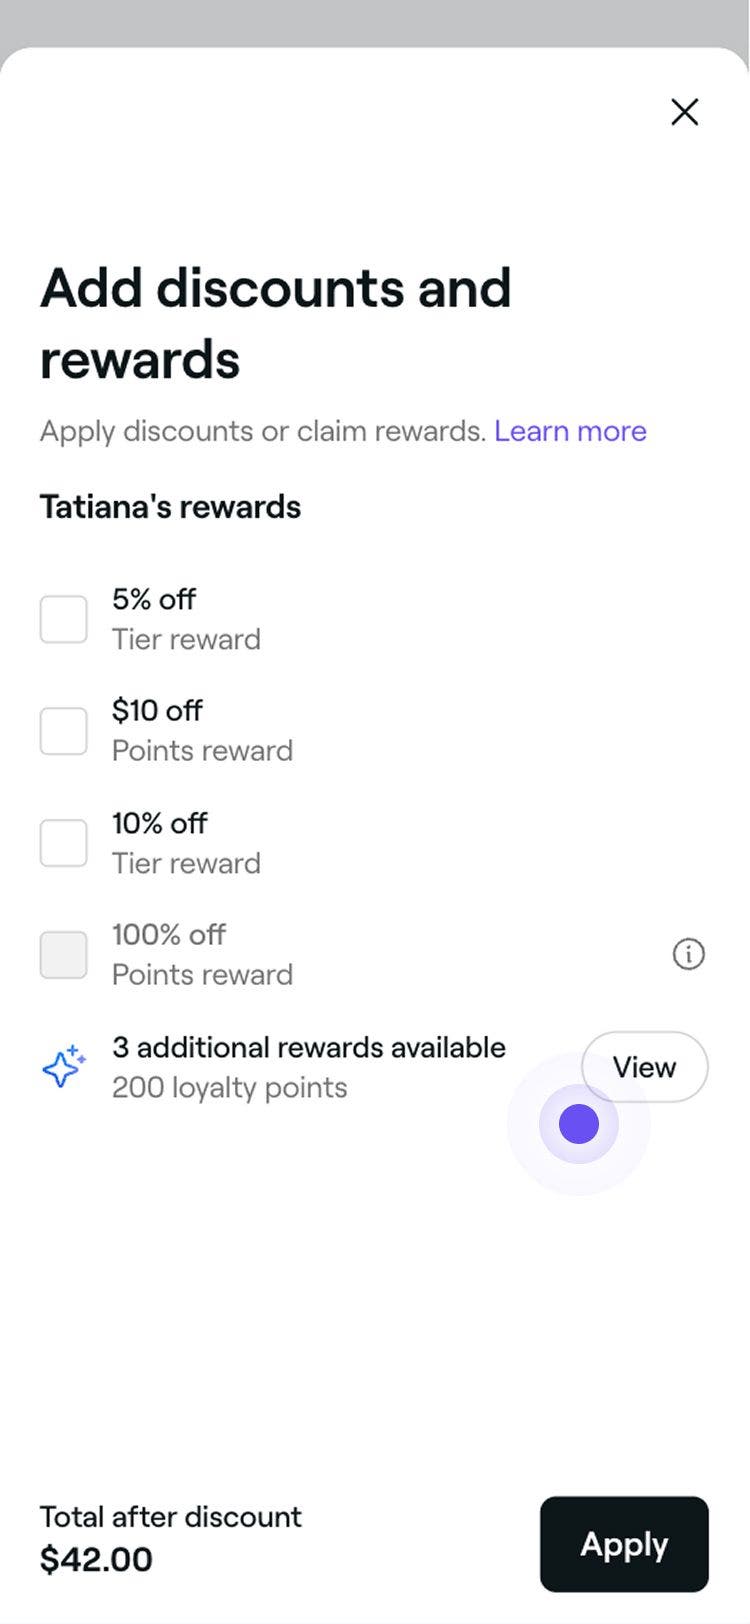
- Click on the rewards banner to view the client's existing rewards.

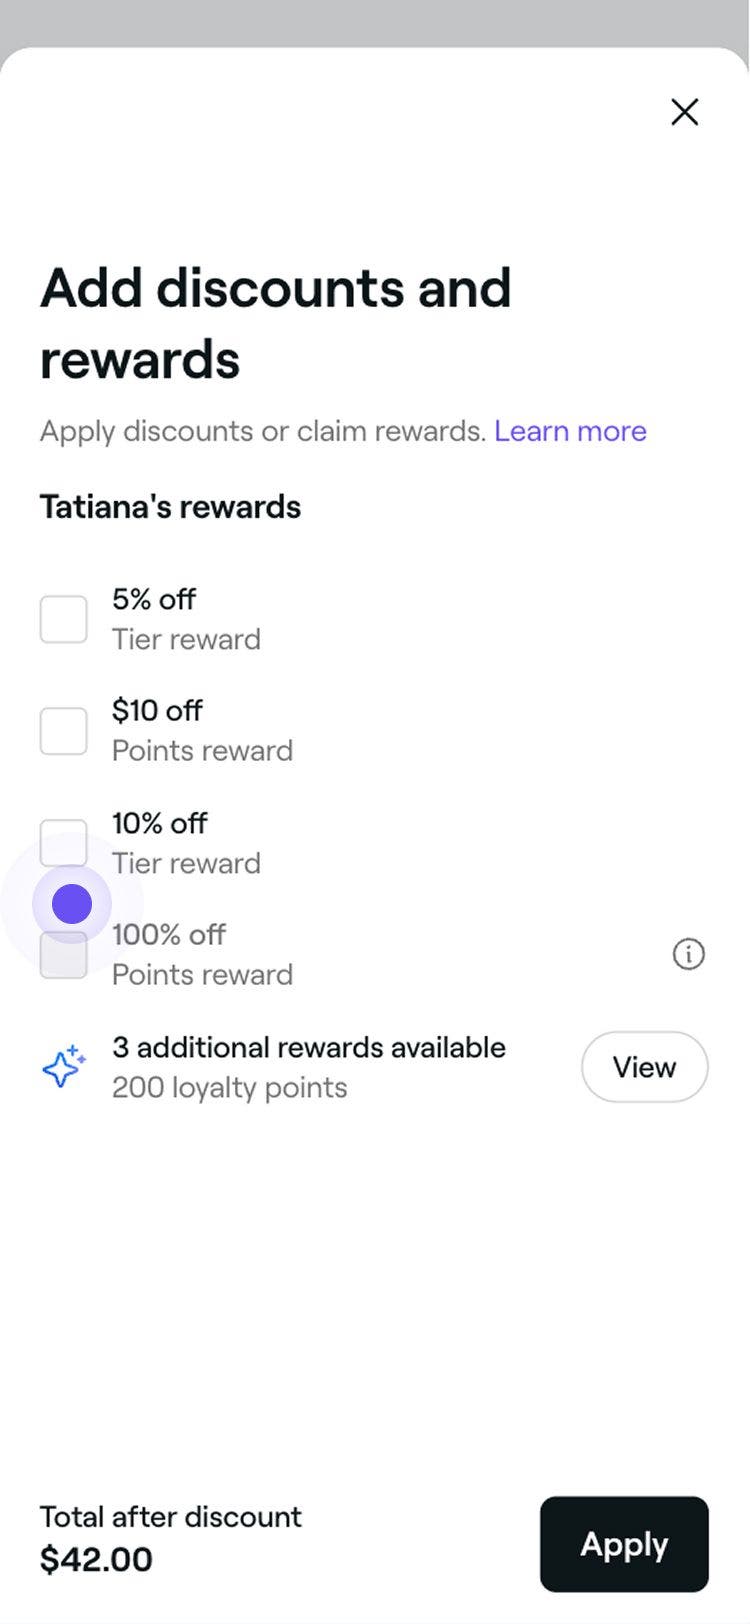
- In the pop-up, tick the checkbox next to the reward and click on the Apply button.

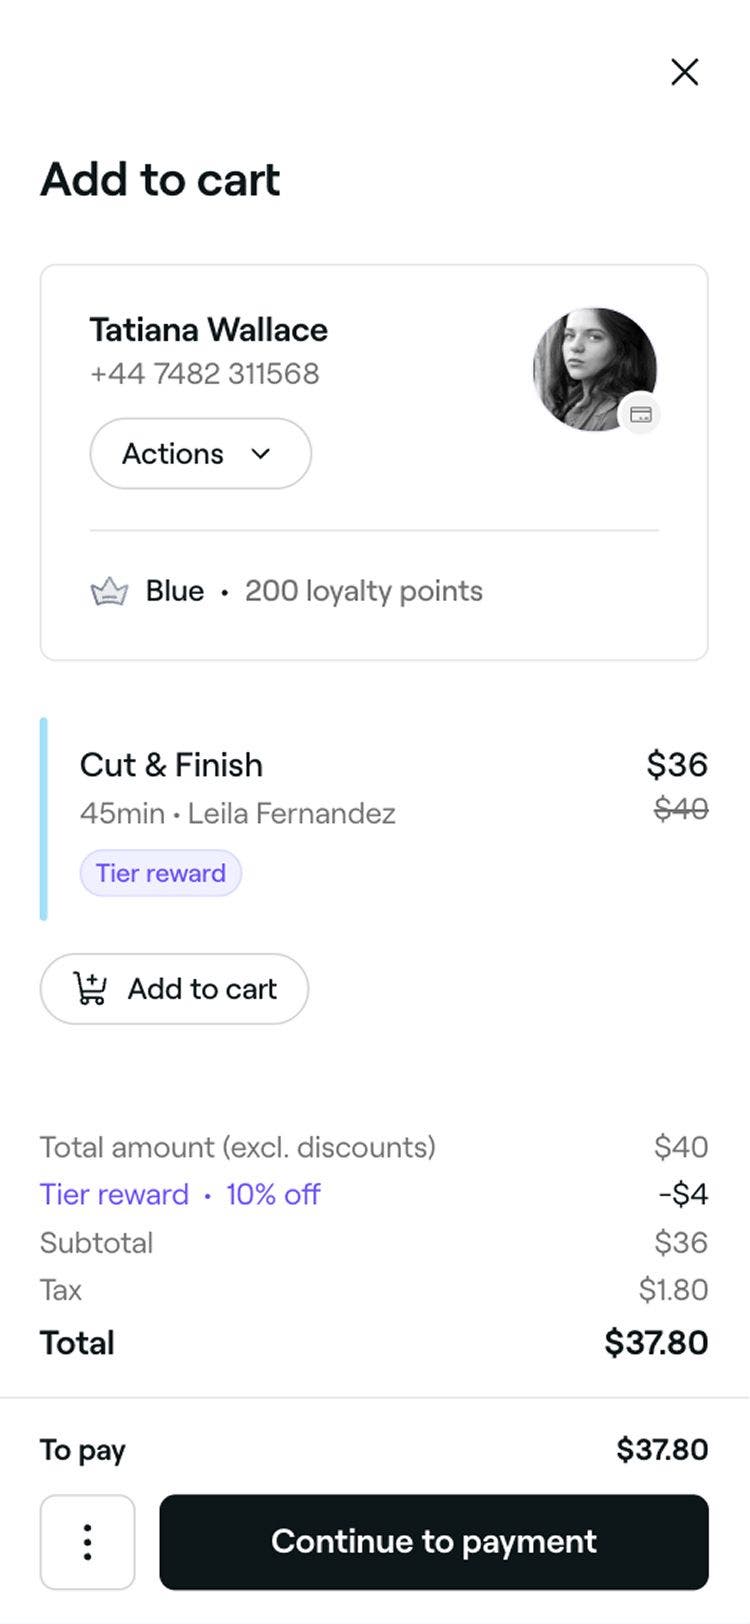
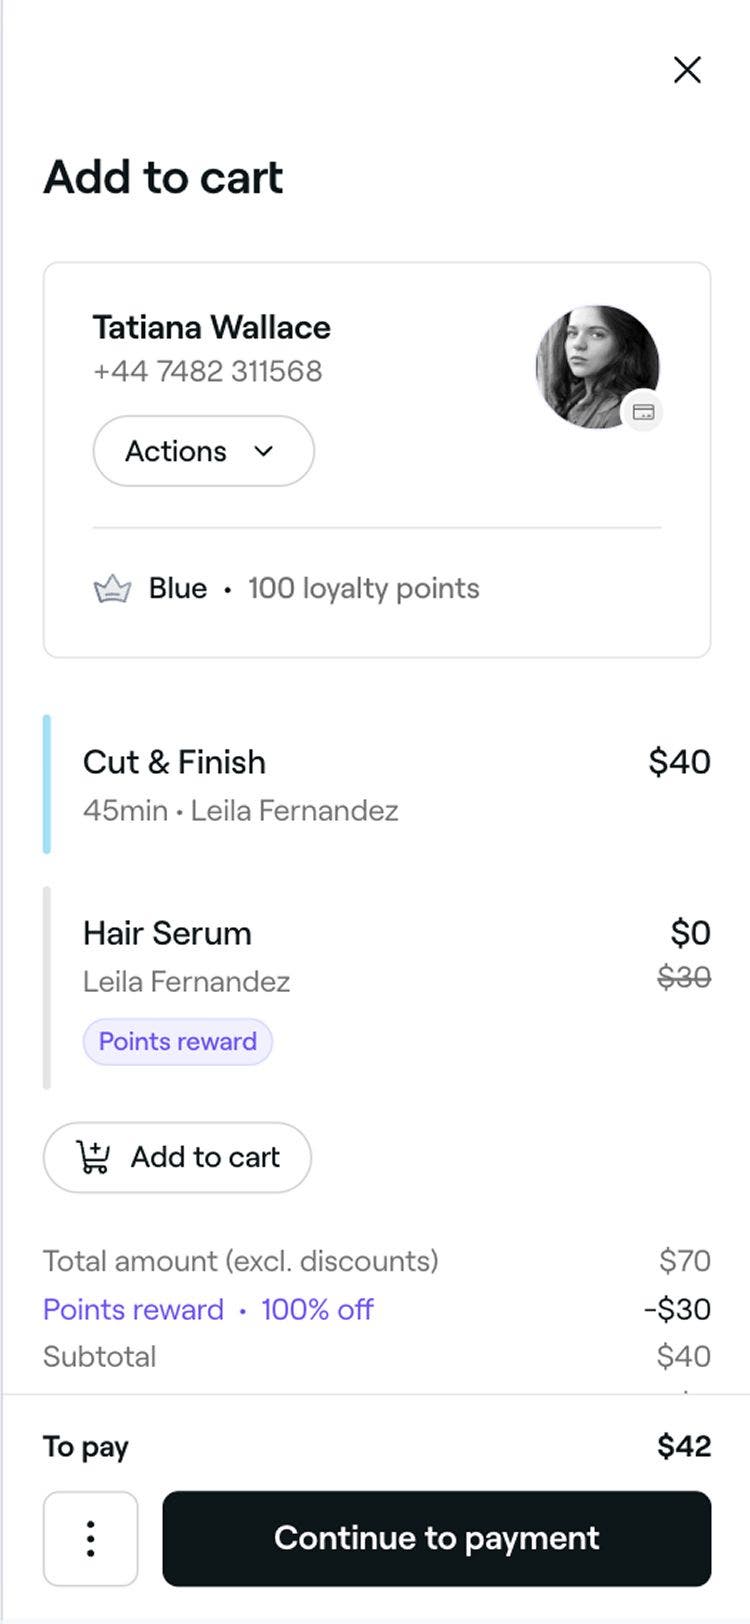
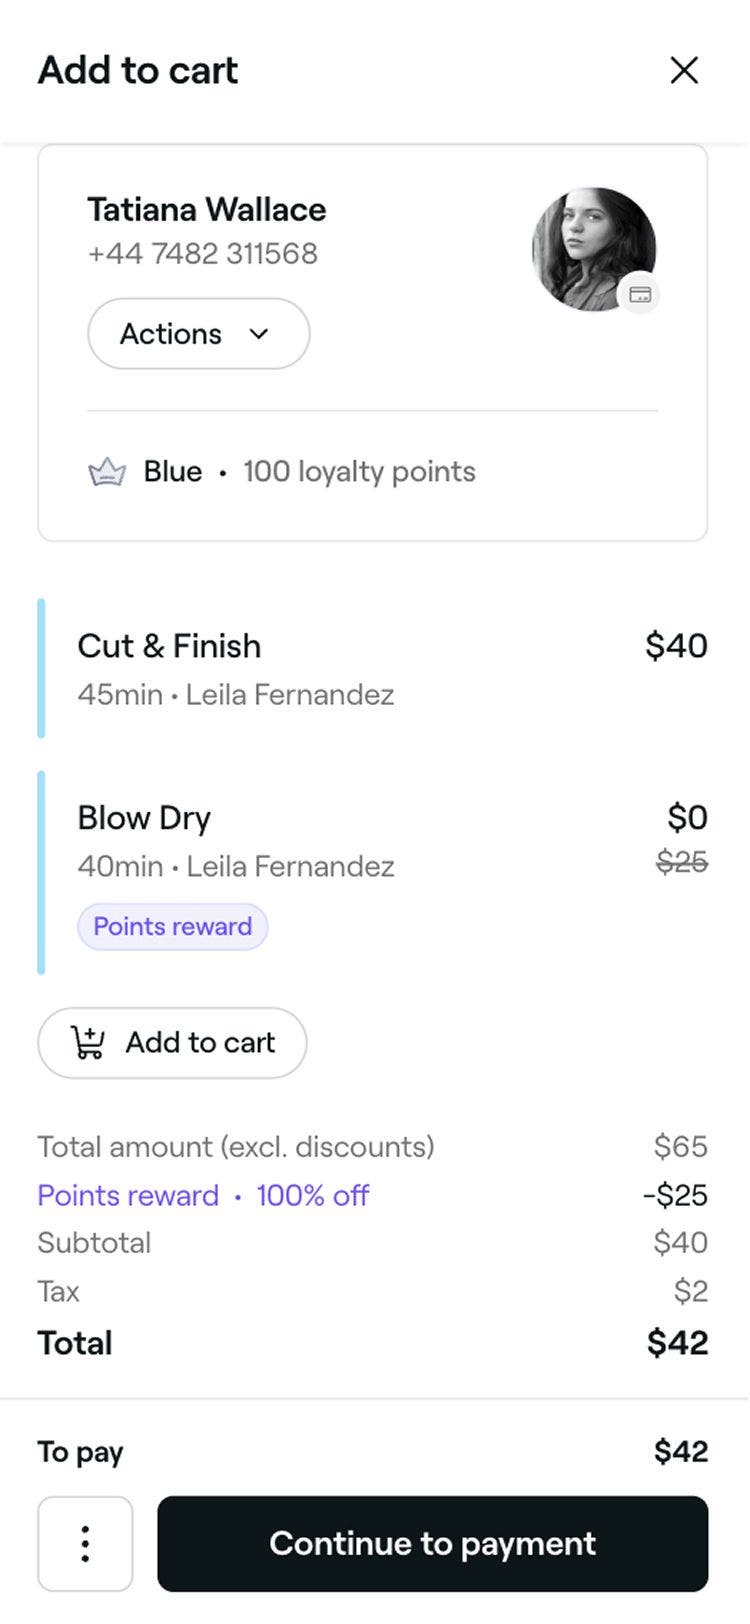
- Once applied, the cart will automatically update to reflect the reward, and you can continue checking out the appointment.

Exchange points for percentage or amount rewards
- Open an appointment.
- In the right panel, click on the Checkout button to open the cart view.

- Click on the rewards banner to view the client's available rewards.

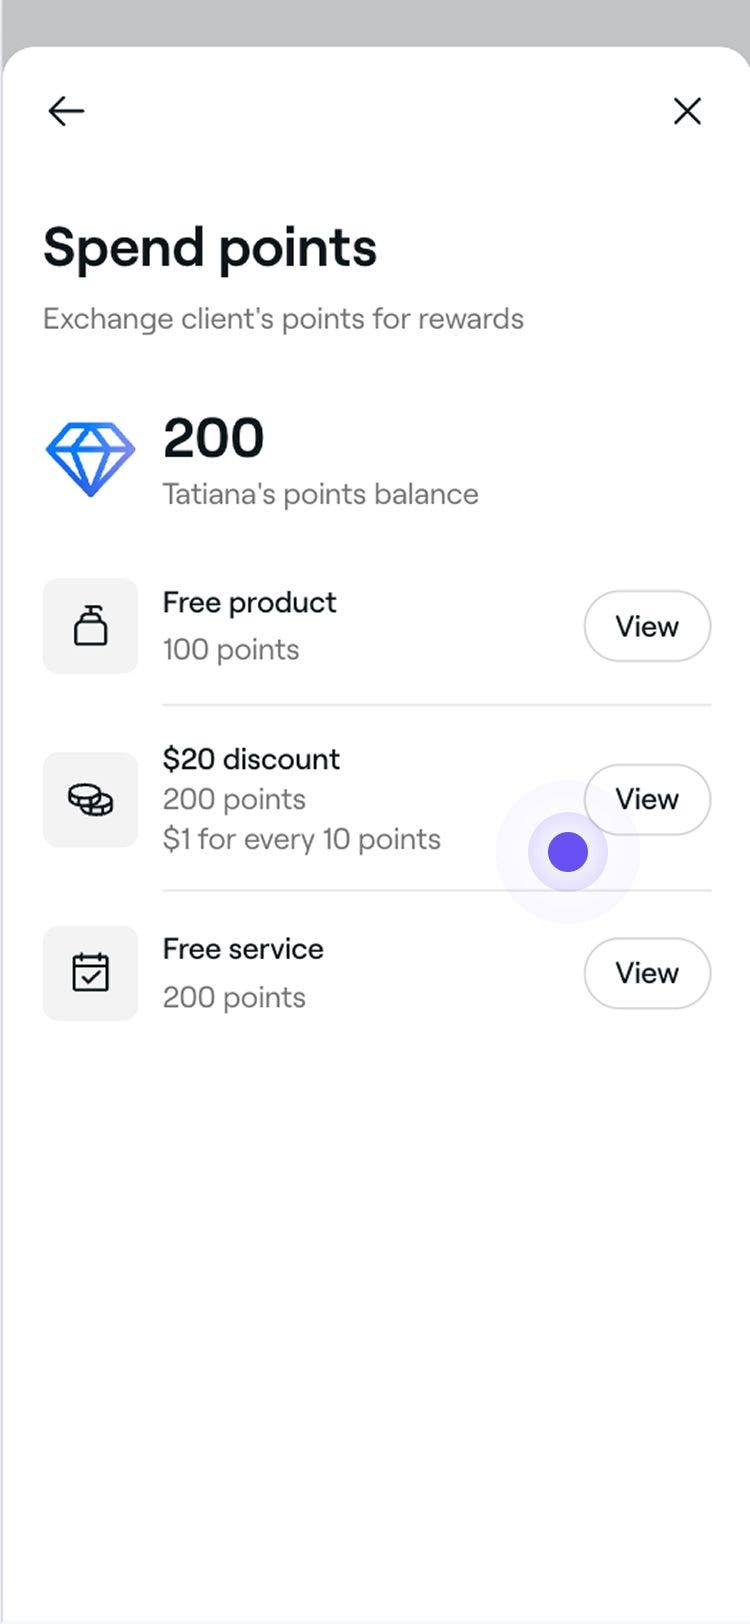
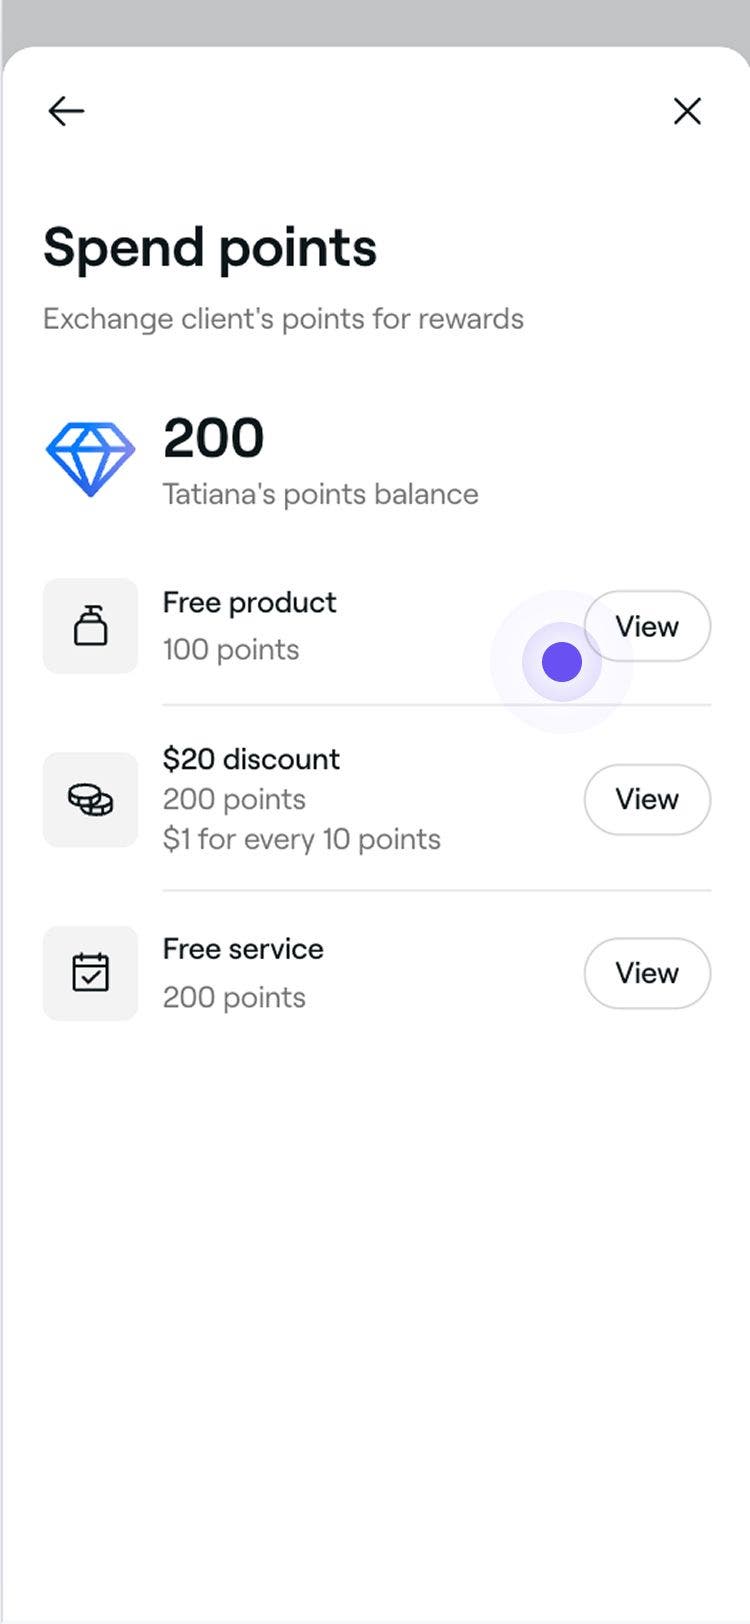
- In the pop-up, click View next to Additional rewards available to view a list of rewards clients can exchange their points for.

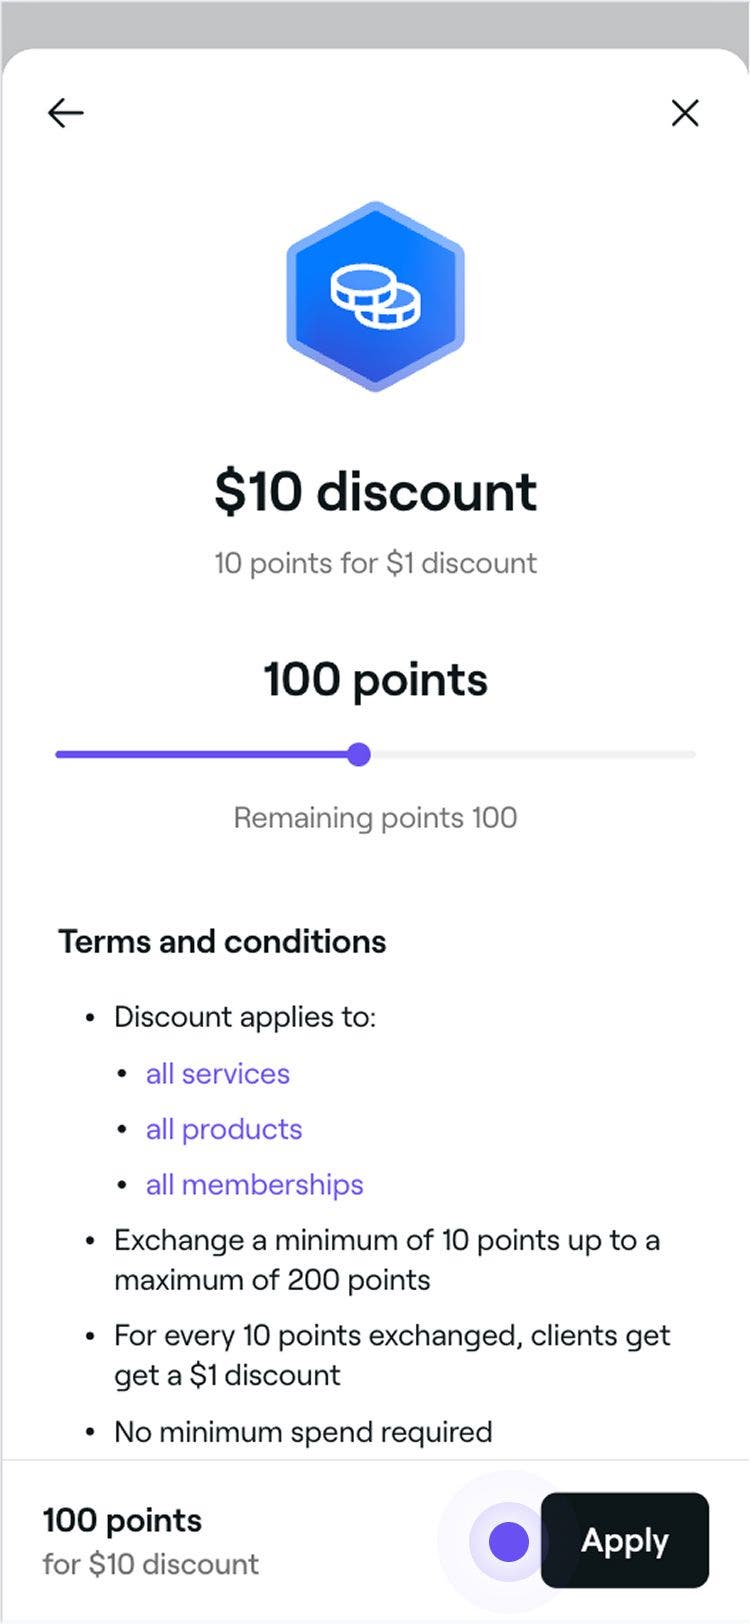
- Select View next to the discount reward to review its terms and conditions.

- Click on the Apply button to redeem the reward using the client's points.

- Once exchanged, the cart will automatically update to reflect it, and you can continue checking out the appointment. The client’s wallet will also update to reflect the redeemed reward.

Exchange points for a free service or product
- Open an appointment.
- In the right panel, click on the Checkout button to open the cart view.

- Click on the rewards banner to view the client's available rewards.

- In the pop-up, click View next to Additional rewards available to view a list of rewards clients can exchange their points for.

- Select View next to the free item reward to review its terms and conditions.

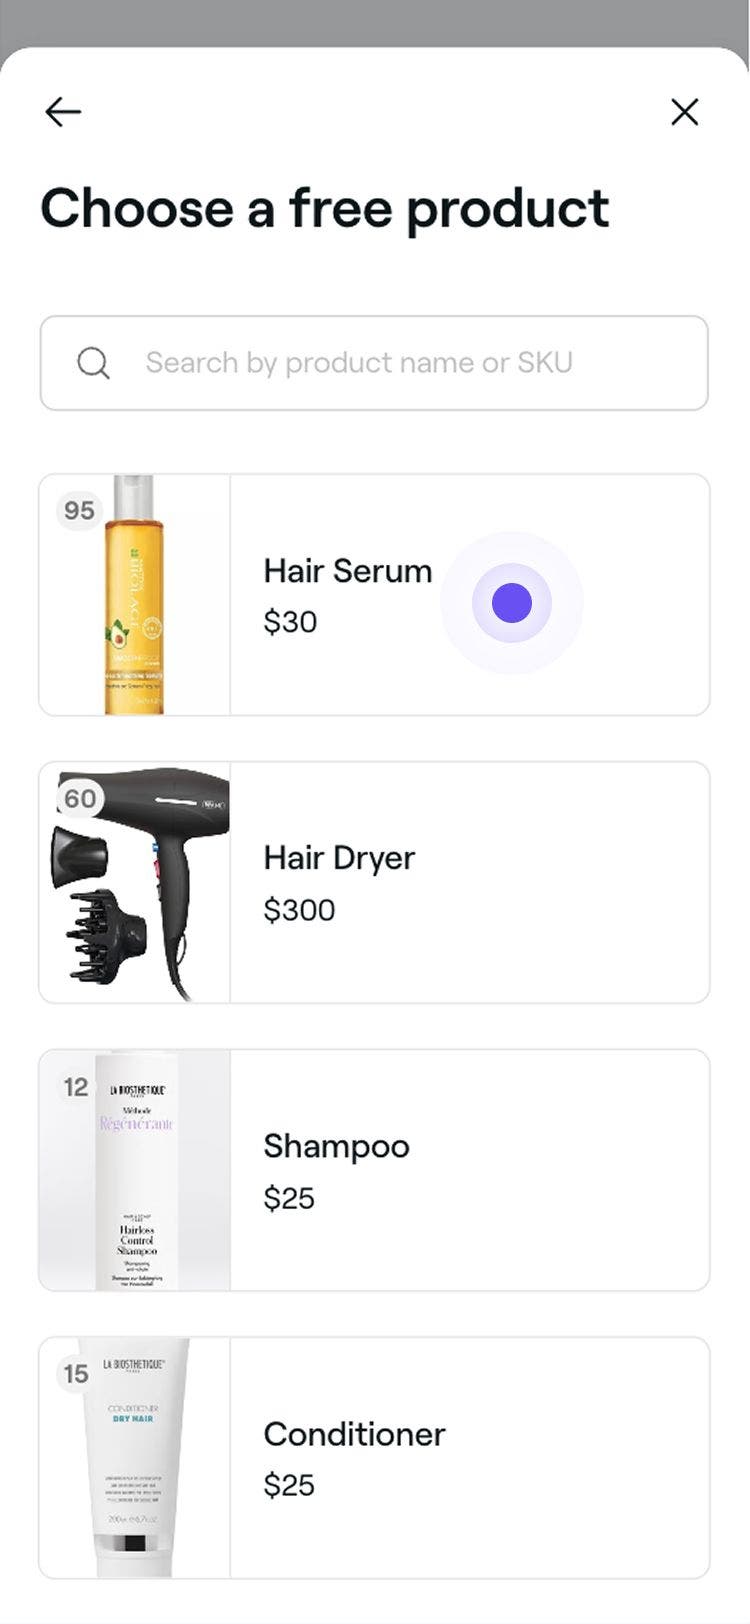
- To select an item from the list of eligible options, click on the Continue button.

- Select an item from the list of eligible options to apply the reward.

- Once exchanged the cart will automatically update to reflect it, and you can continue checking out the appointment. The client’s wallet will also update to reflect the redeemed reward.

FAQs
- Default commission settings for all team members
- Custom commission settings for specific team members
A full list of the client’s existing rewards will show at checkout. If a reward is greyed out, it cannot be applied to the cart because it doesn't meet the reward’s terms and conditions. Click on the info (i) icon next to the reward to see why. For example, the reward may not be valid when another discount is already applied to the cart.
If a client has an available reward, make sure to first add the eligible product or service to the cart. Once it’s in the cart, the reward can be applied, and the item will be discounted accordingly.
If more than one discount reward is used, percentage discount rewards are applied first to individual items that are eligible. Then, amount discount rewards are applied at the cart level to the remaining total.
When a client has enough points to claim a free item reward, you’ll be prompted to choose from the available free products or services. Once you select an item, it will be added to the cart and automatically discounted to $0.
If a client has an available free item reward, make sure to first add the eligible product or service to the cart before applying the reward.
A reward is used as soon as you apply it to an appointment or a purchase, even if the payment hasn’t gone through yet. If a client applies a reward while booking an appointment online, it’s used right away and removed from their wallet, even if they don’t end up using it at checkout. Once a reward is used, it can’t be applied to another appointment or returned to the client's wallet.
Loyalty rewards work just like discounts, meaning commissions are usually calculated from the discounted price unless you’ve set up your commission settings differently. If you'd like team members to earn commission based on the original price instead, you can adjust this in your:
