HomeKnowledge baseFresha academy
Create service add-ons
Back
  1. Knowledge base•
  2. Services•
  3. Create service add-ons

Create service add-ons

Learn how to let clients choose optional extras during booking by adding add-ons to your services.

In this article

  • How service add-ons work
  • Create a service add-on group
  • Edit or remove service add-ons

How service add-ons work

Service add-ons are optional extras linked to specific services that clients can choose when booking, such as a specific conditioner or adding nail art. This gives you a simple way to elevate your client experience and increase earnings without overcomplicating your service menu. 

You can create multiple add-ons for each service and decide whether they have an additional cost or time. Add-ons can also be grouped so they can be used across different services.

Create a service add-on group

  1. From the main menu on the left of your screen, go to Catalog.

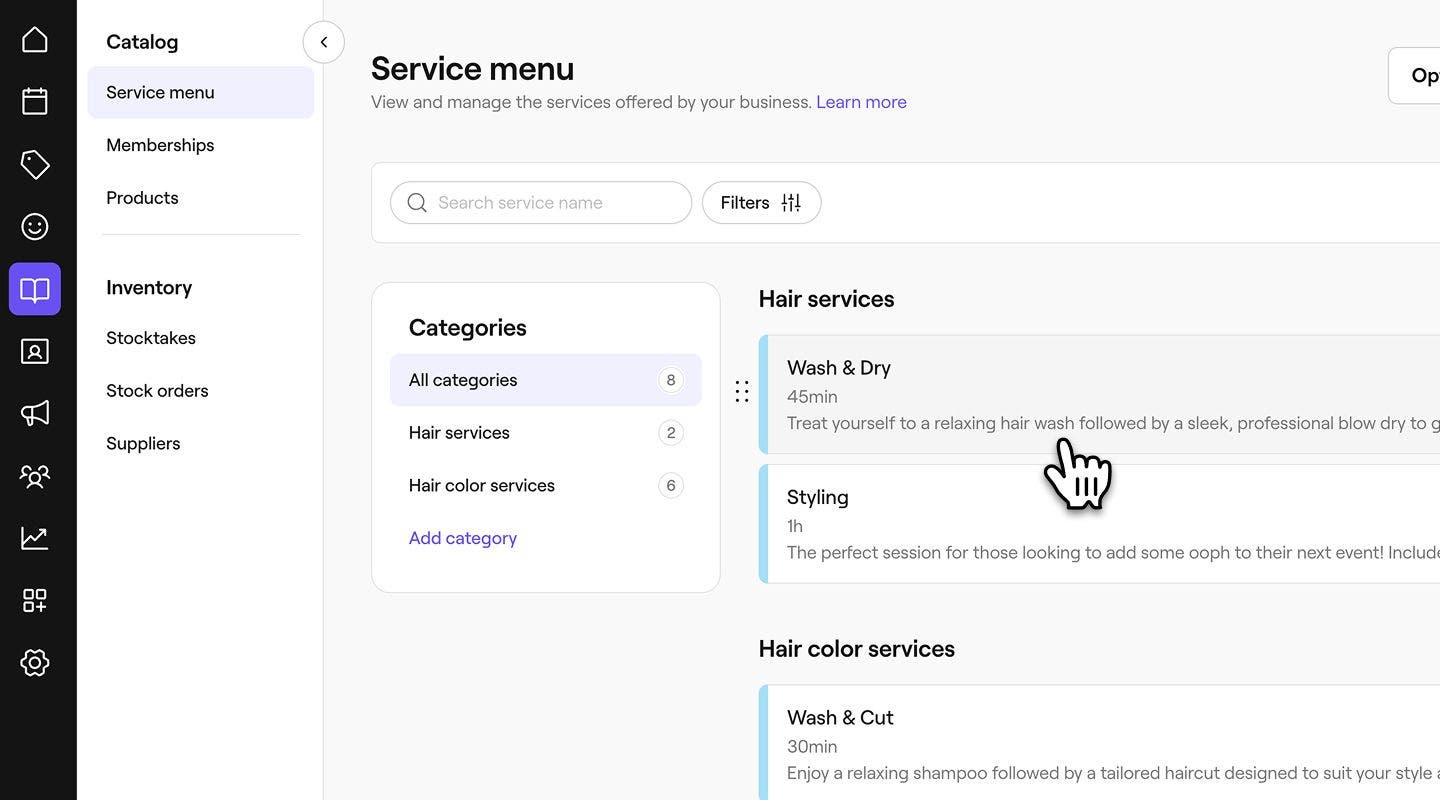
  2. Select Service menu from the left menu panel. 

  3. Select an existing service from your Service menu, or create a new one.Group 491.jpg

  4. In the left menu panel, select Service add-ons and click on the Add group button. Group 492.jpg
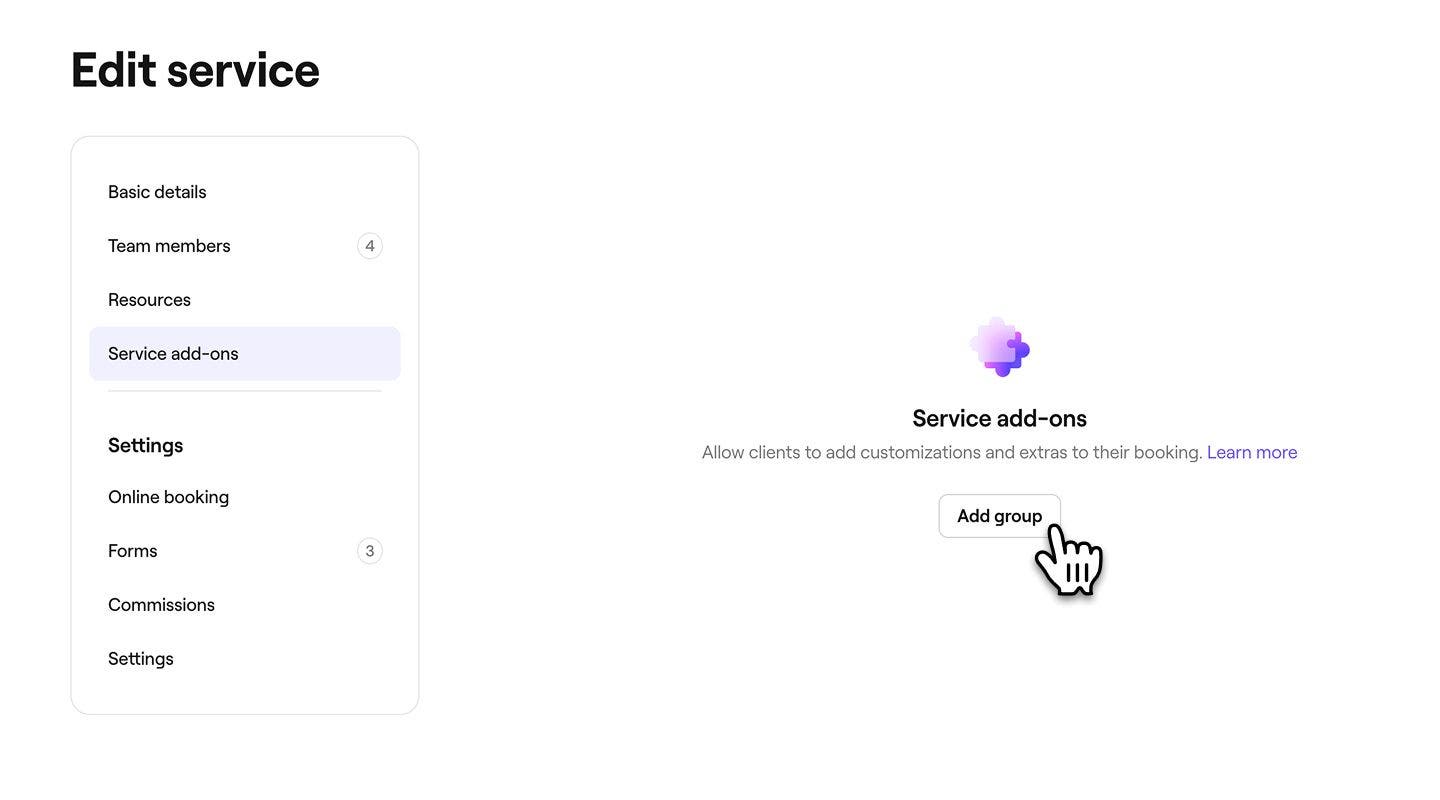
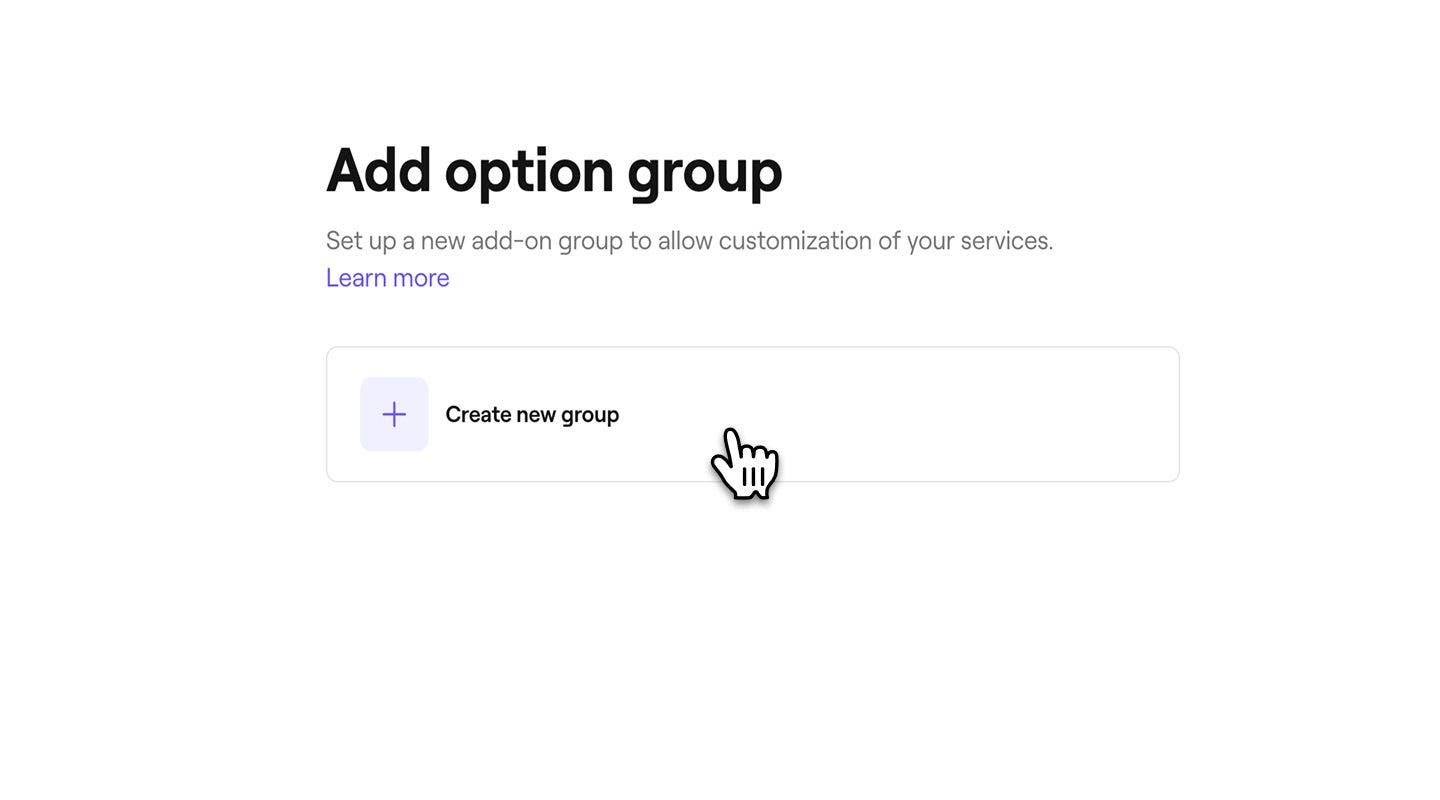
  5. In the Option view, click on Create new group.Group 493.jpg

  6. In the New add-on group view, enter a Group name that is easily recognizable for your team, and a Prompt to clients that will appear during online booking. For example, “Choose your hair conditioner”.
    Set_up_service_ad-on_web_6.jpg

  7. Under the Add-on options, click on the Create option button to create specific add-ons for the group.
    Set_up_service_ad-on_web_7.jpg

  8. In the pop-up, enter the following details, then click on the Add button at the bottom of the pop-up to save the option to the group:

    1. Option name: The name shown to clients, for example, Argan oil conditioner.
    2. Description: A short explanation of the add-on.
    3. Additional pricing: If the add-on has an additional charge, enter the price.
    4. Additional duration: Add extra time to the service.
    5. Advanced settings: Update the default sales tax setting for the add-on and add the cost of the add-on to your business.

    Set_up_service_ad-on_web_8.jpg

    1. You can keep adding more add-on options by selecting the Create option button.
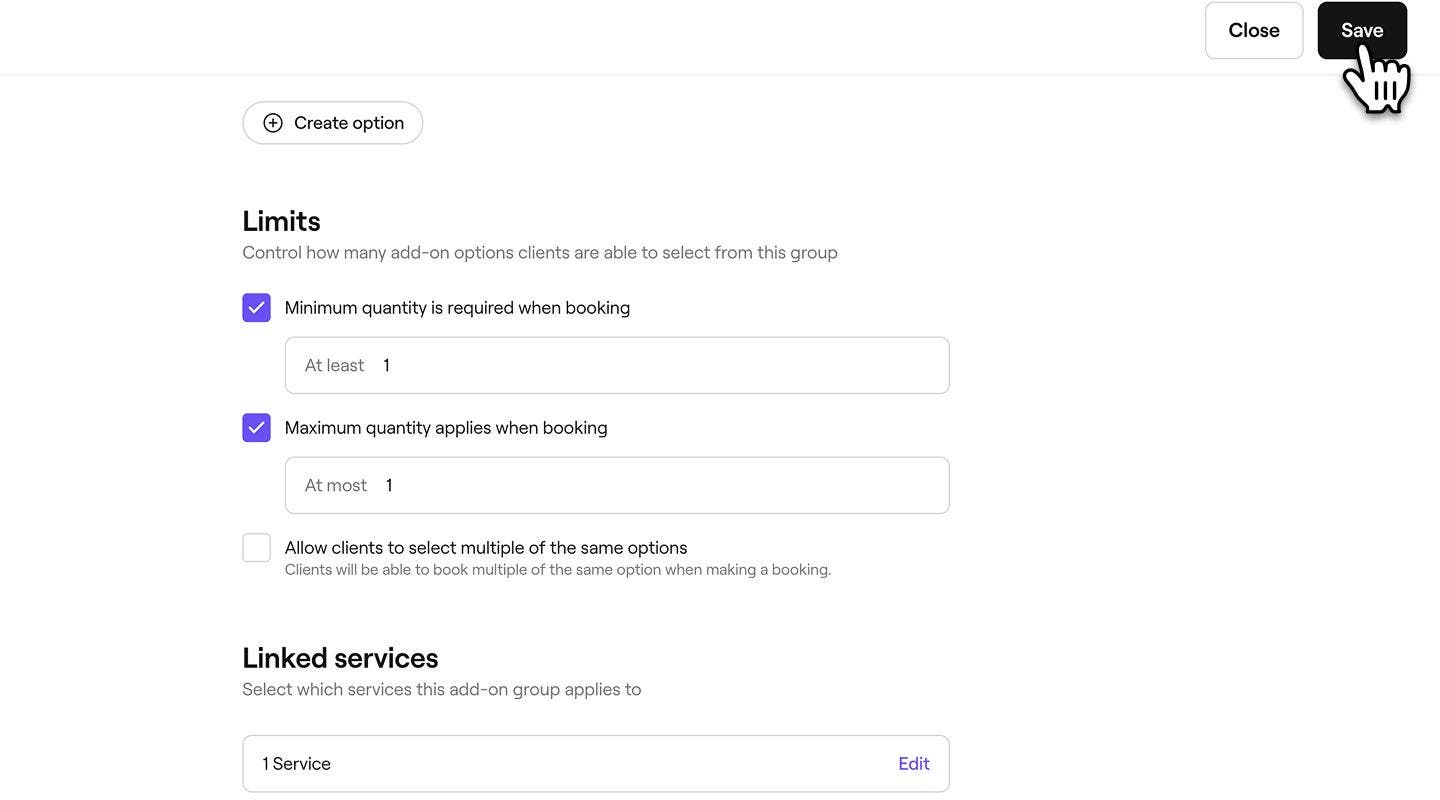
  9. Under Limits, choose whether the add-on group should have minimum, maximum, or quantity restrictions on how many add-ons a client can select from the group. Group 497.jpg
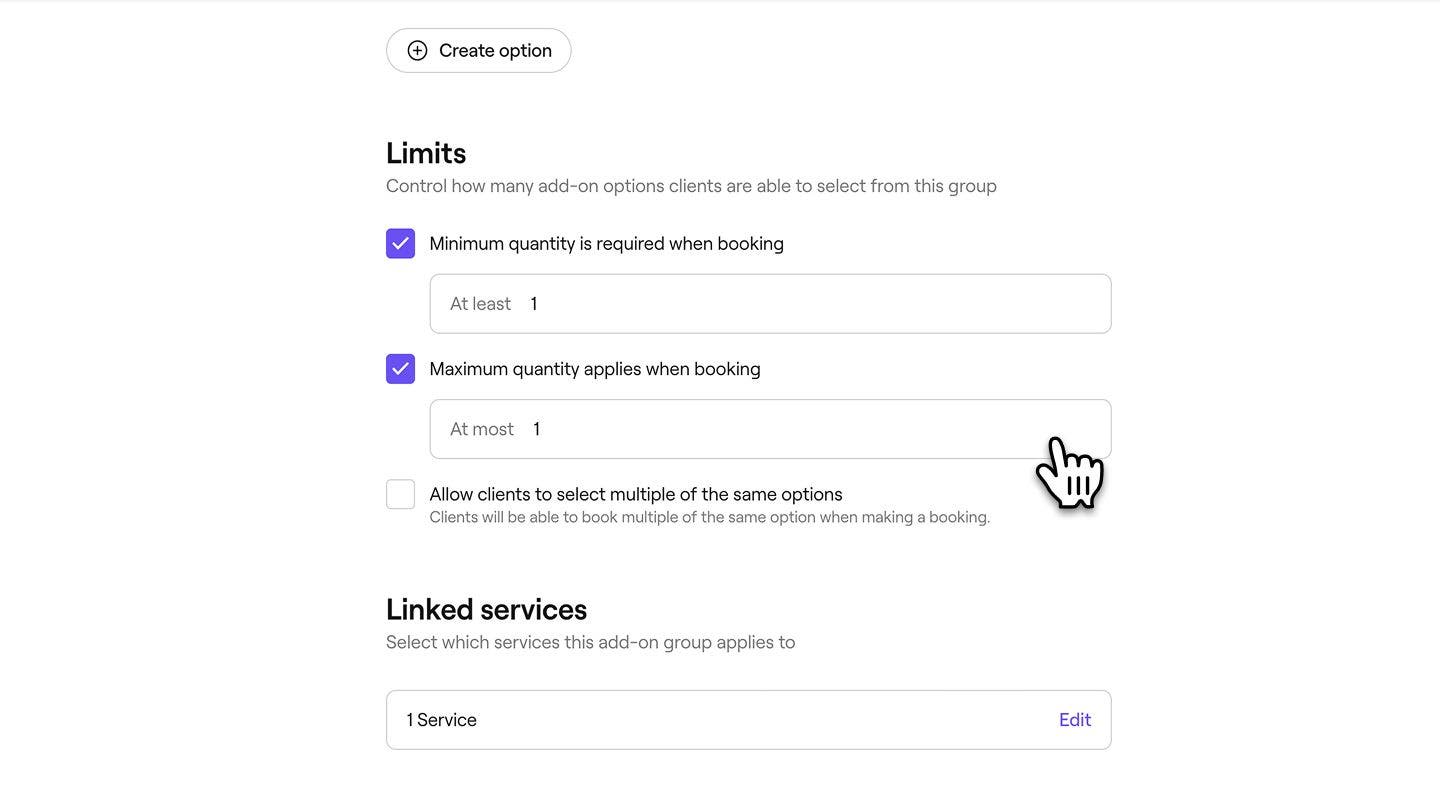
  10. Under Linked services, click on Edit and tick the checkbox next to other services the add-on option applies to.

  11. Select Advanced settings to choose which additional options you want to apply to the service add-on: 

    1. Enable commission for this group: Commissions will be calculated using the rate of the booked service.
    2. Apply discounts to add-ons within this group: When a discount is applied to the booked service, the same discount will automatically apply to any add-ons within this group.
    3. Hide from online booking: Clients will not see this group during booking, but it will appear on confirmation emails and receipts.
  12. Click on the Save button in the top right corner to create the new add-on group.Group 497 (1).jpg

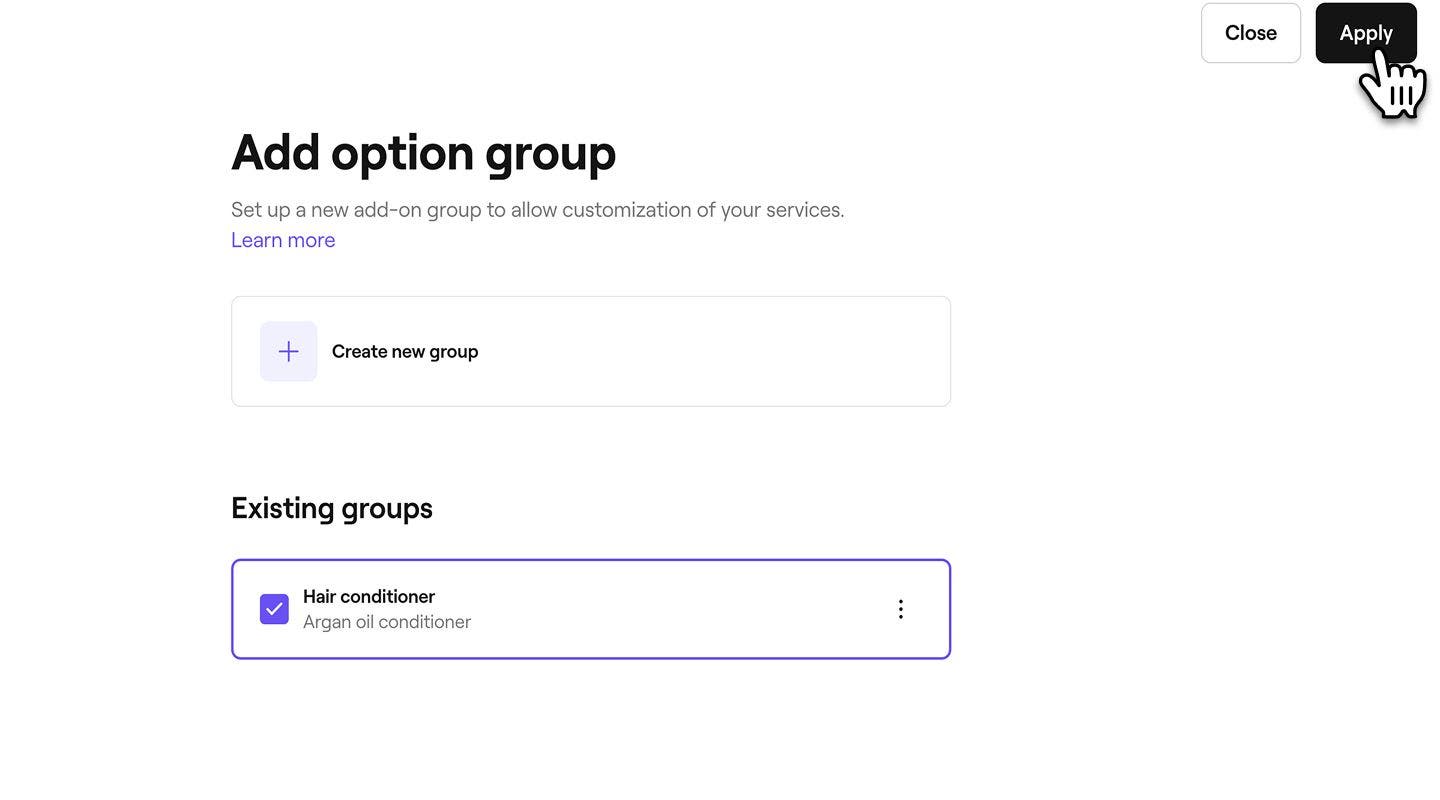
  13. From the Add option group view, click on the Apply button in the top right corner to assign the add-on group to the service.Group 498.jpg

  14. Click Save in the top right of the service to save your changes.
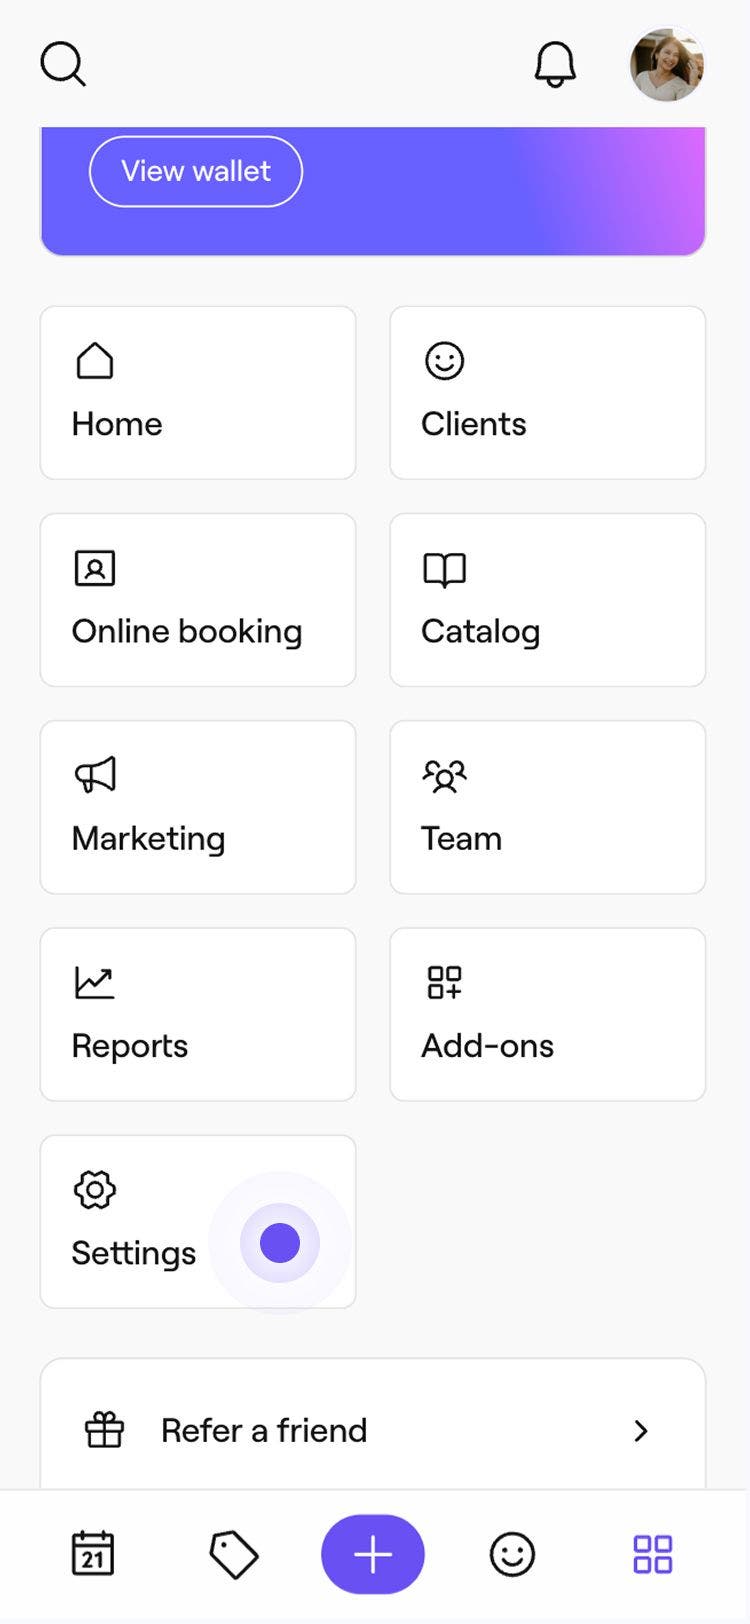
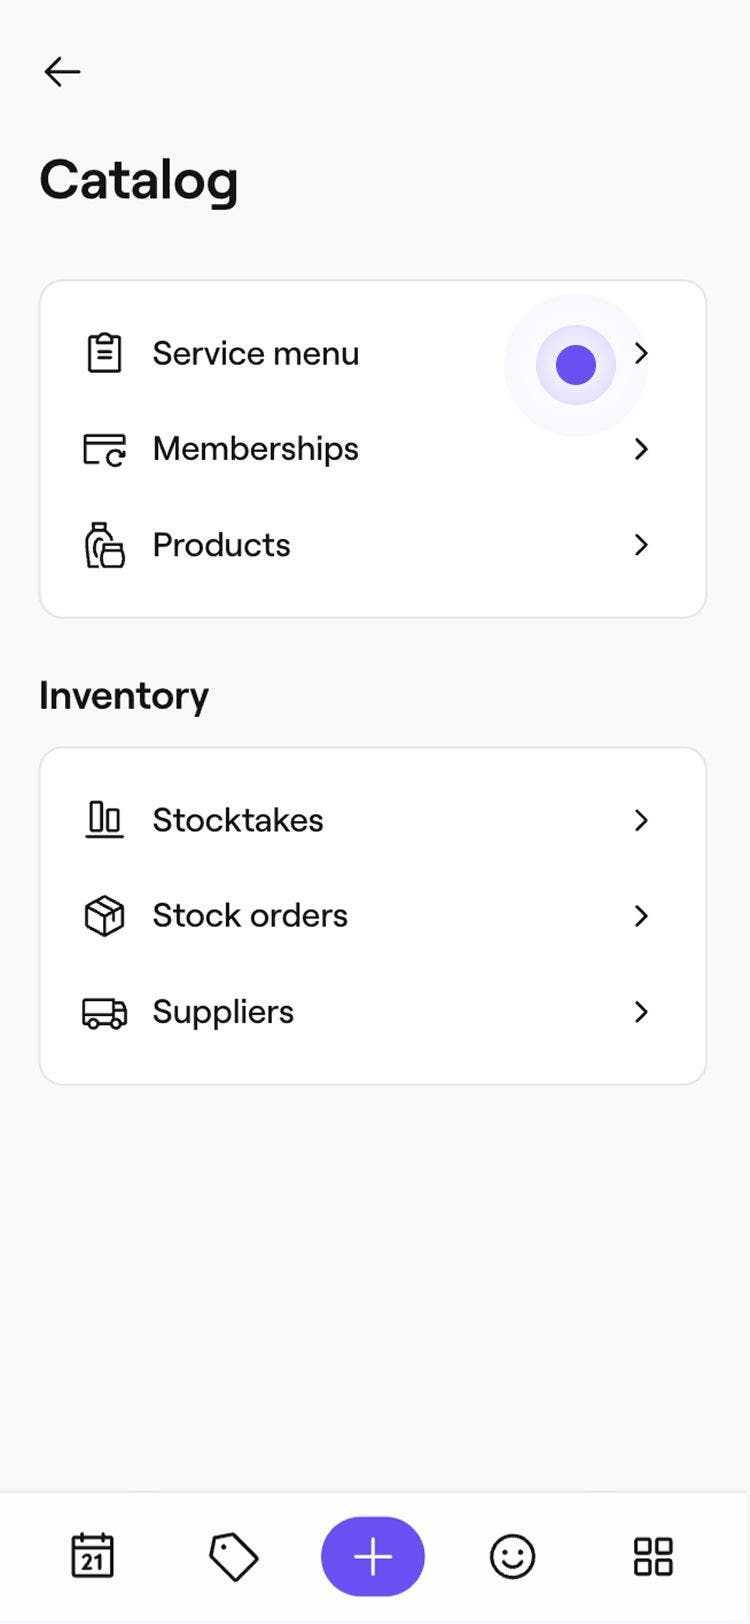
  1. From the main menu at the bottom of your device, tap on More (grid icon) and open Catalog.Group 194.jpg
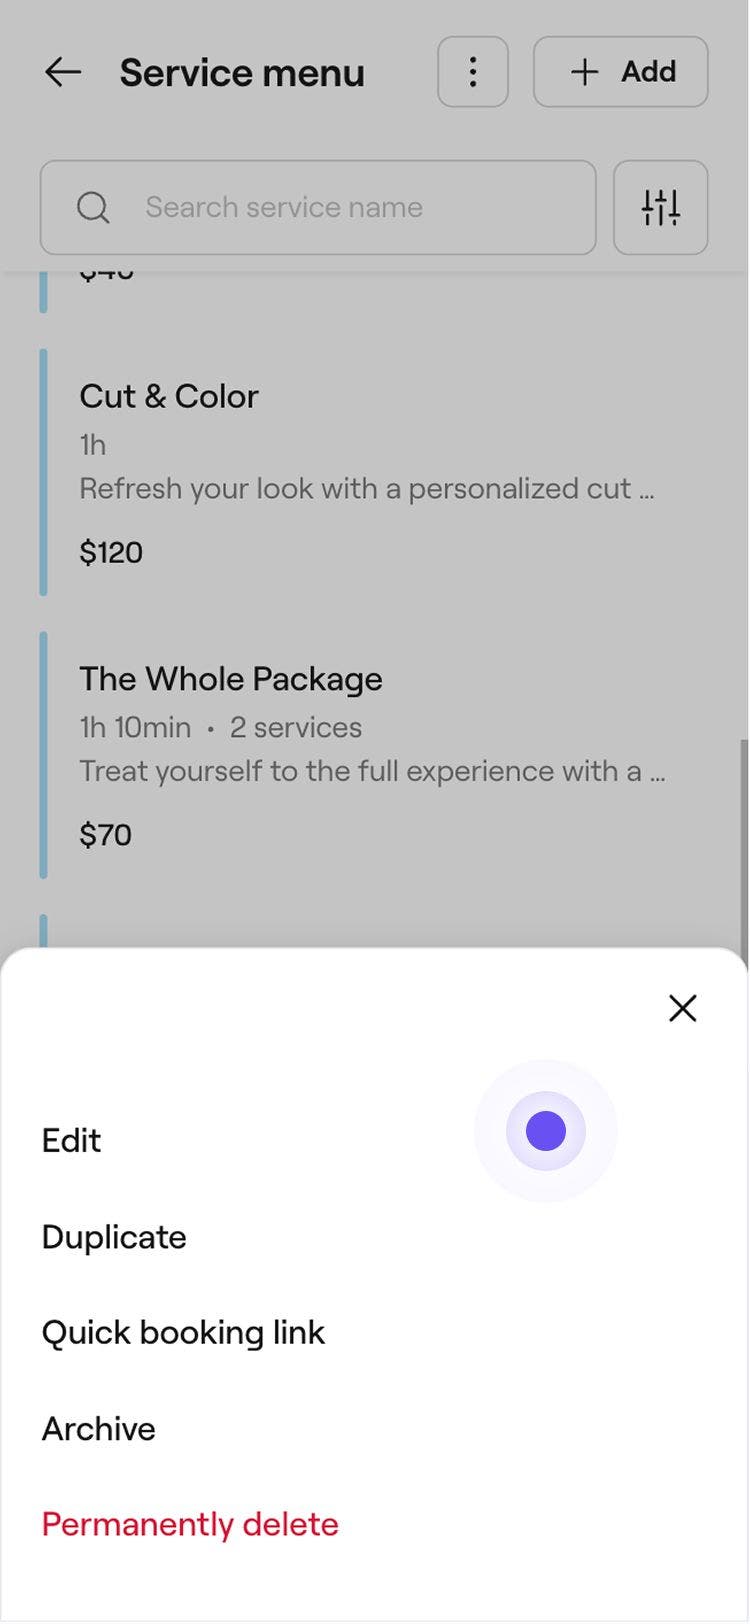
  2. Select Service menu to see your list of treatments.Group 195.jpg
  3. Tap an existing service from your Service menu and select Edit, or create a new one.Group 196.jpg
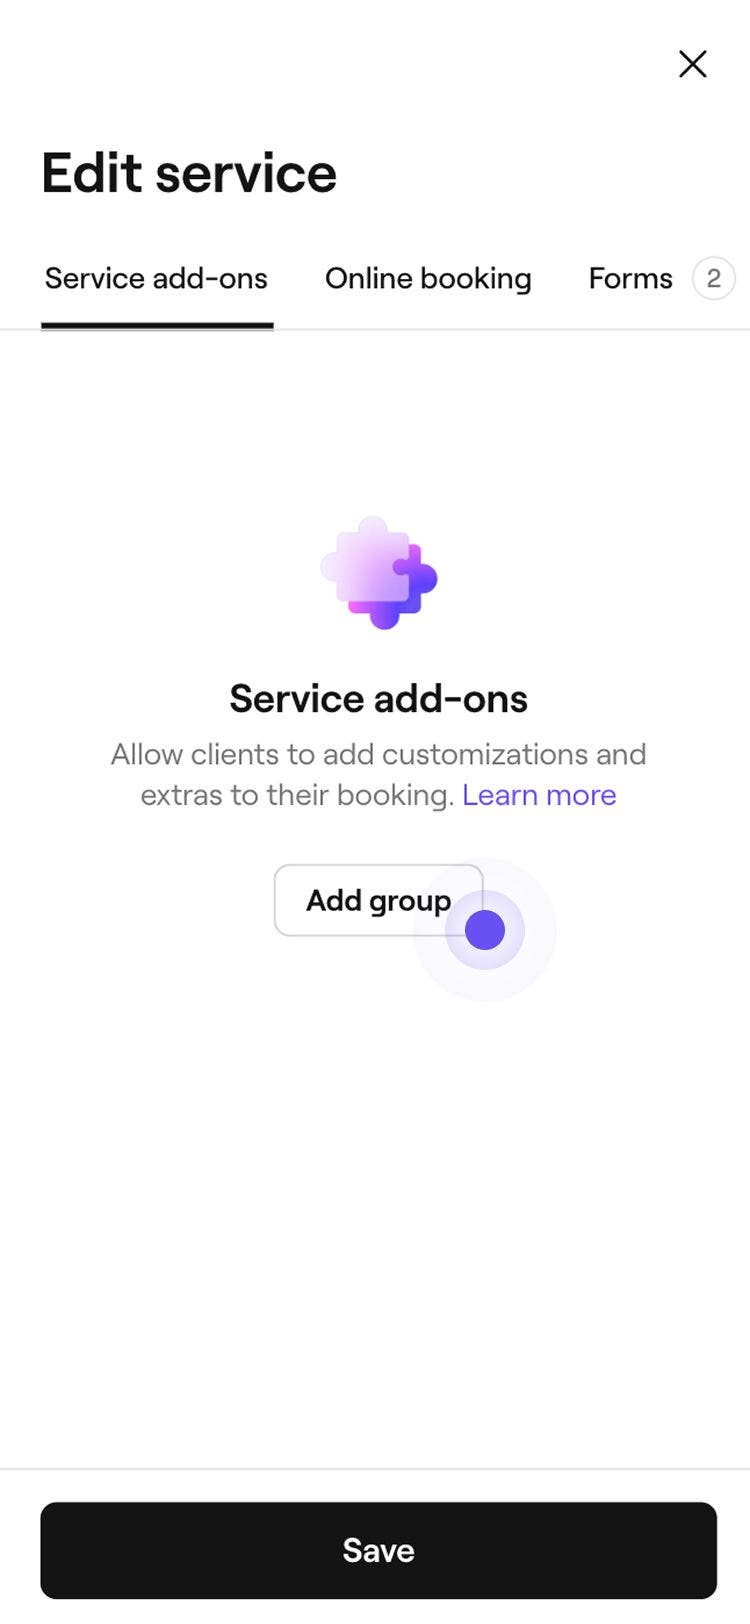
  4. From the Edit service view, select Service add-ons from the menu bar at the top.
  5. Tap on the Add group button.Group 197.jpg
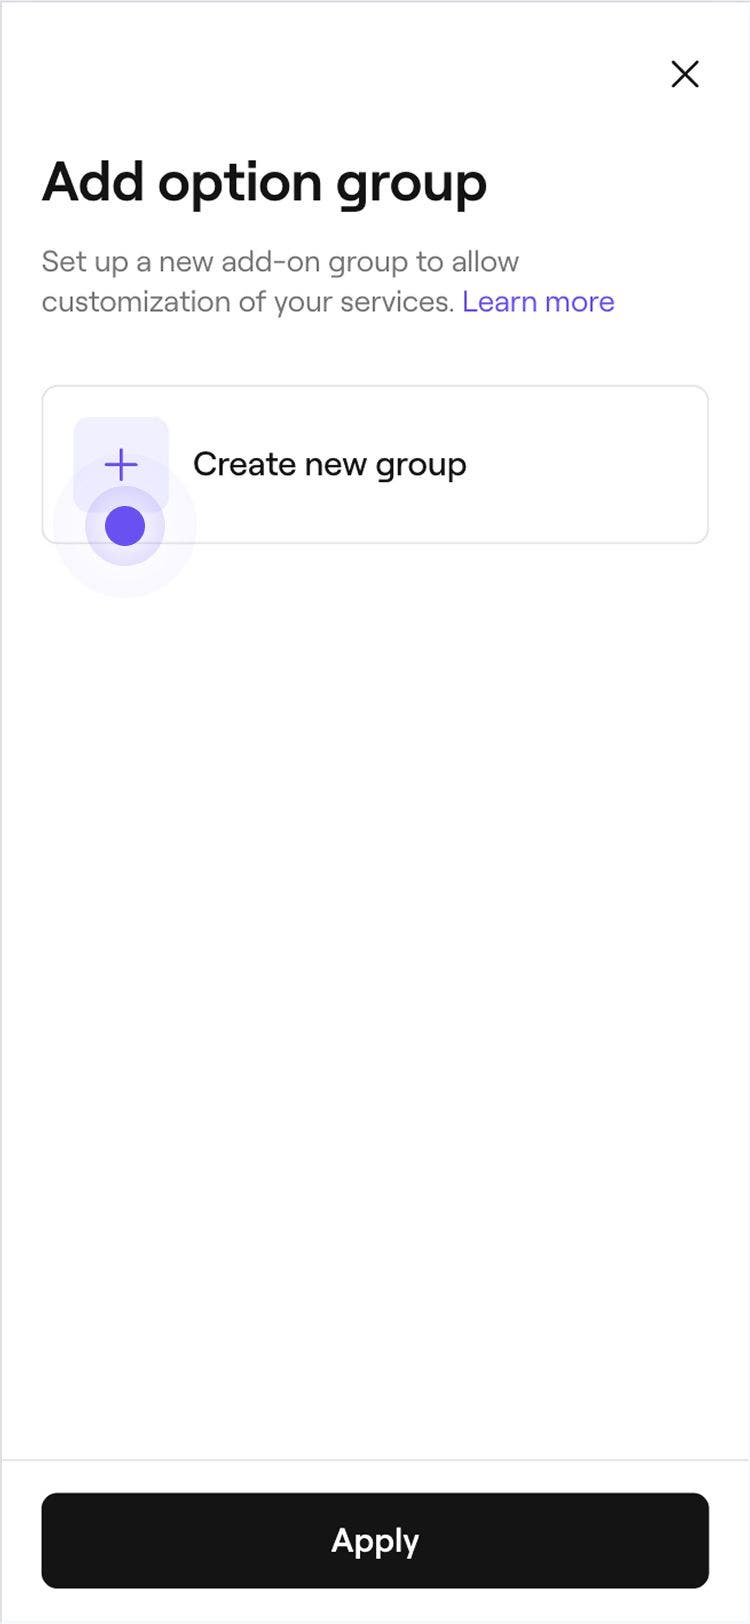
  6. In the next step, tap on the Create new group button.Group 198.jpg
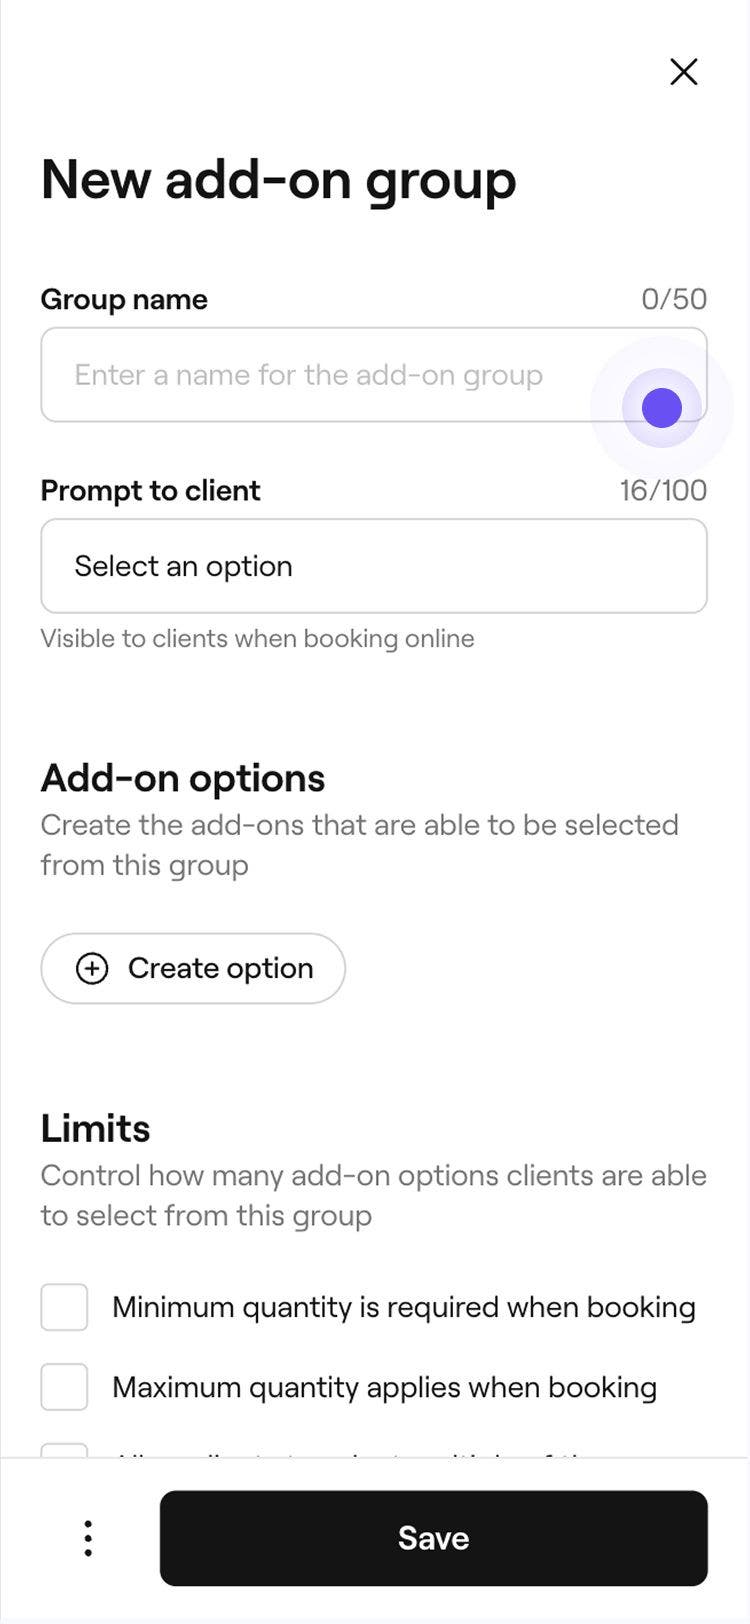
  7. In the New add-on group view, enter a Group name that is easily recognisable for your team, and a Prompt to client that will appear during online booking. For example, Choose your hair conditioner.Group 199.jpg
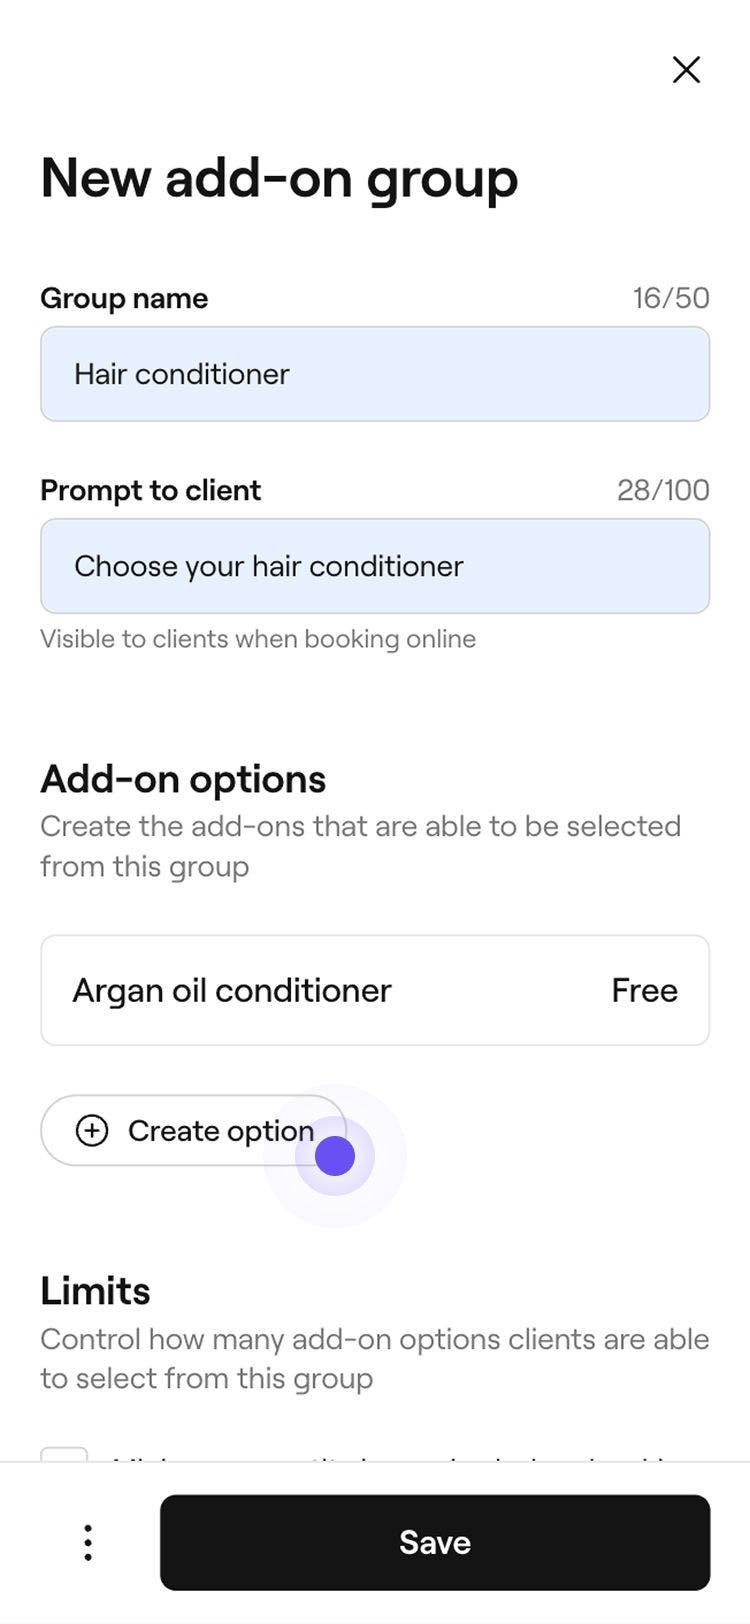
    1. You can keep adding more add-on options by selecting the Create option button.
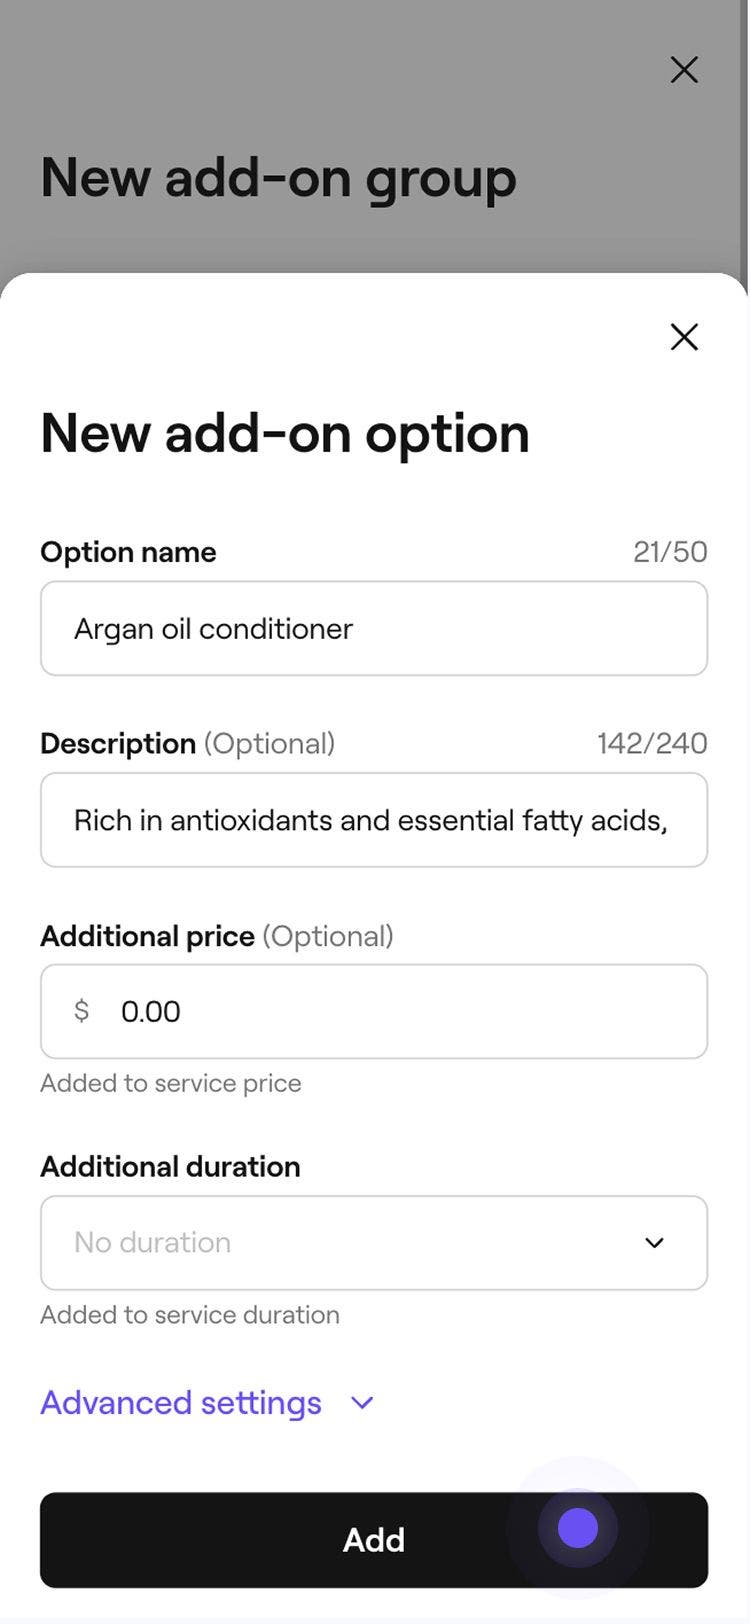
  8. In the pop-up, enter the following add-on details:
    1. Option name: The name shown to clients, for example, Argan oil conditioner.
    2. Description: A short explanation of the add-on.
    3. Additional pricing: If the add-on has an additional charge, enter the price.
    4. Additional duration: Add extra time to the service if needed.
    5. Advanced settings: Update the default sales tax setting for the add-on and add the cost of the add-on to your business.
      Group 201.jpg
  9. Tap on the Add button at the bottom of the pop-up to save the option. To add more options, tap on the Create option button and repeat the same steps.Group 225 (1).jpg
  10. Select Advanced settings to choose which additional options you want to apply to the service add-on: 
    1.  Enable commission for this group: Commissions will be calculated using the rate of the booked service.
    2. Apply discounts to add-ons within this group: When a discount is applied to the booked service, the same discount will automatically apply to any add-ons within this group.
    3. Hide from online booking: Clients will not see this group during booking, but it will appear on confirmation emails and receipts.Group 202.jpg
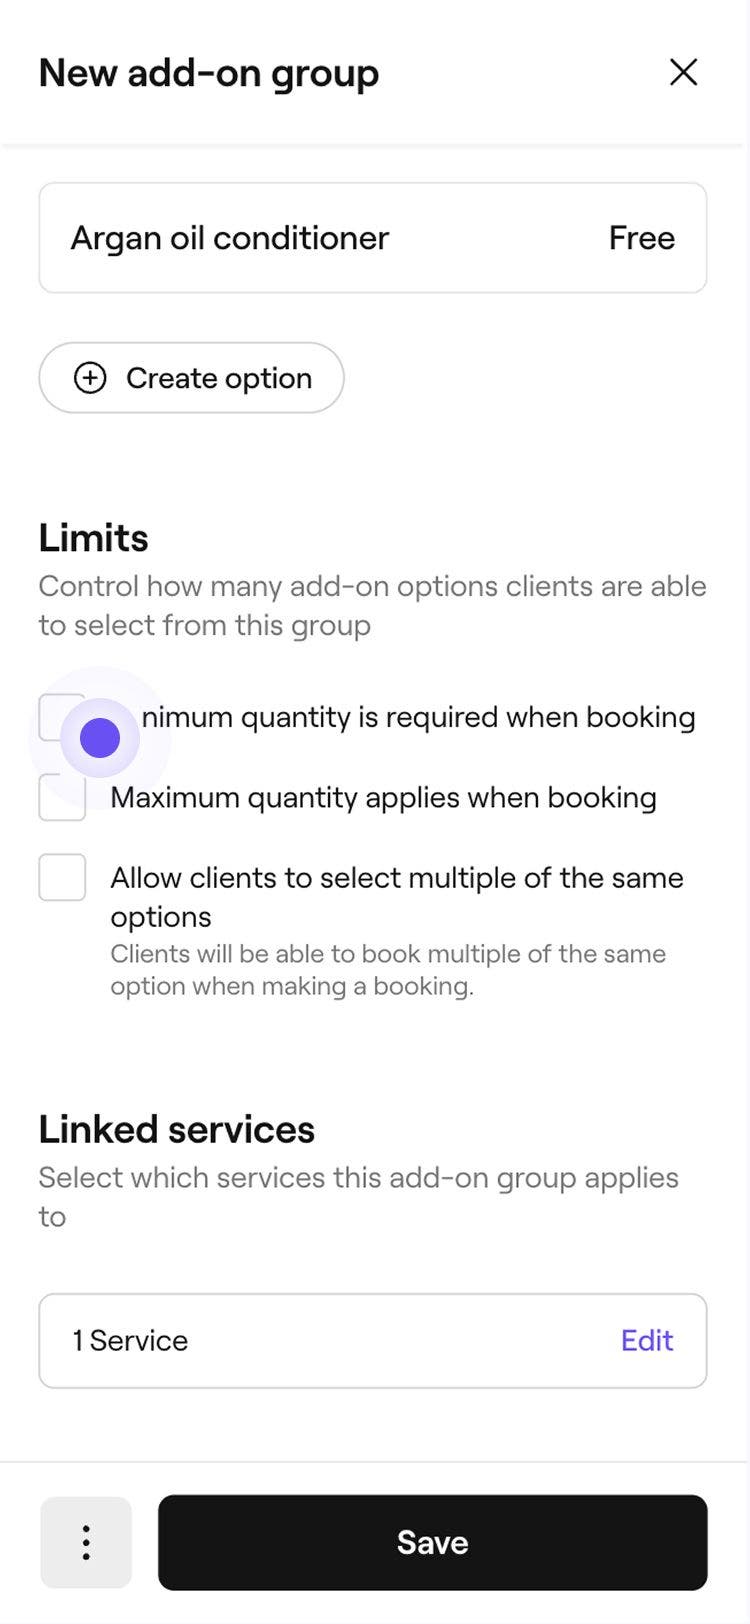
  11. Under Linked services, tap on Edit and tick the checkbox next to other services the add-on option applies to.
  12. Tap the Save button at the bottom of your device to save the add-on group.Group 204.jpg
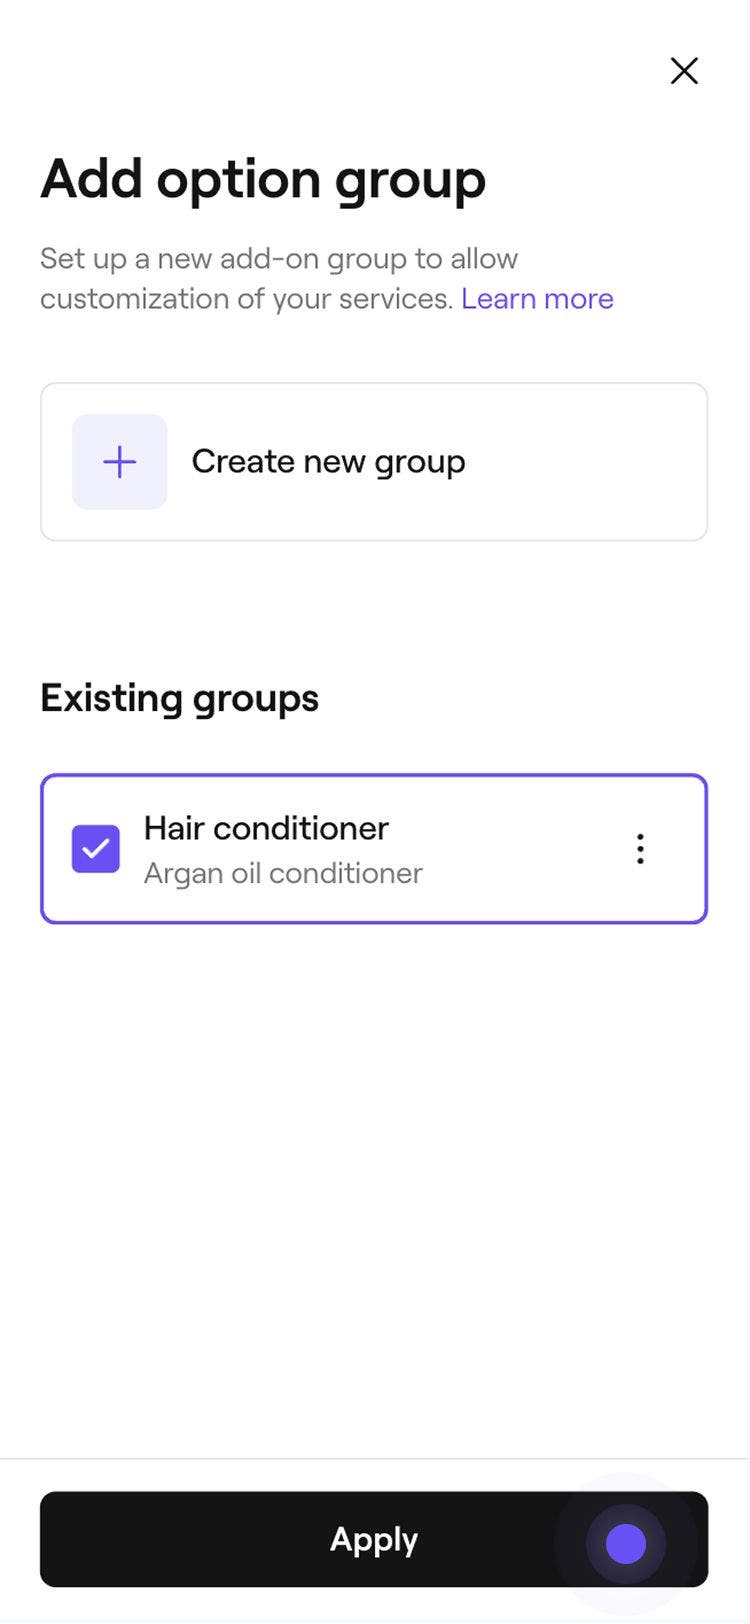
  13. Tap on the Apply button at the bottom of your device to assign the add-on group to the service.Group 205.jpg
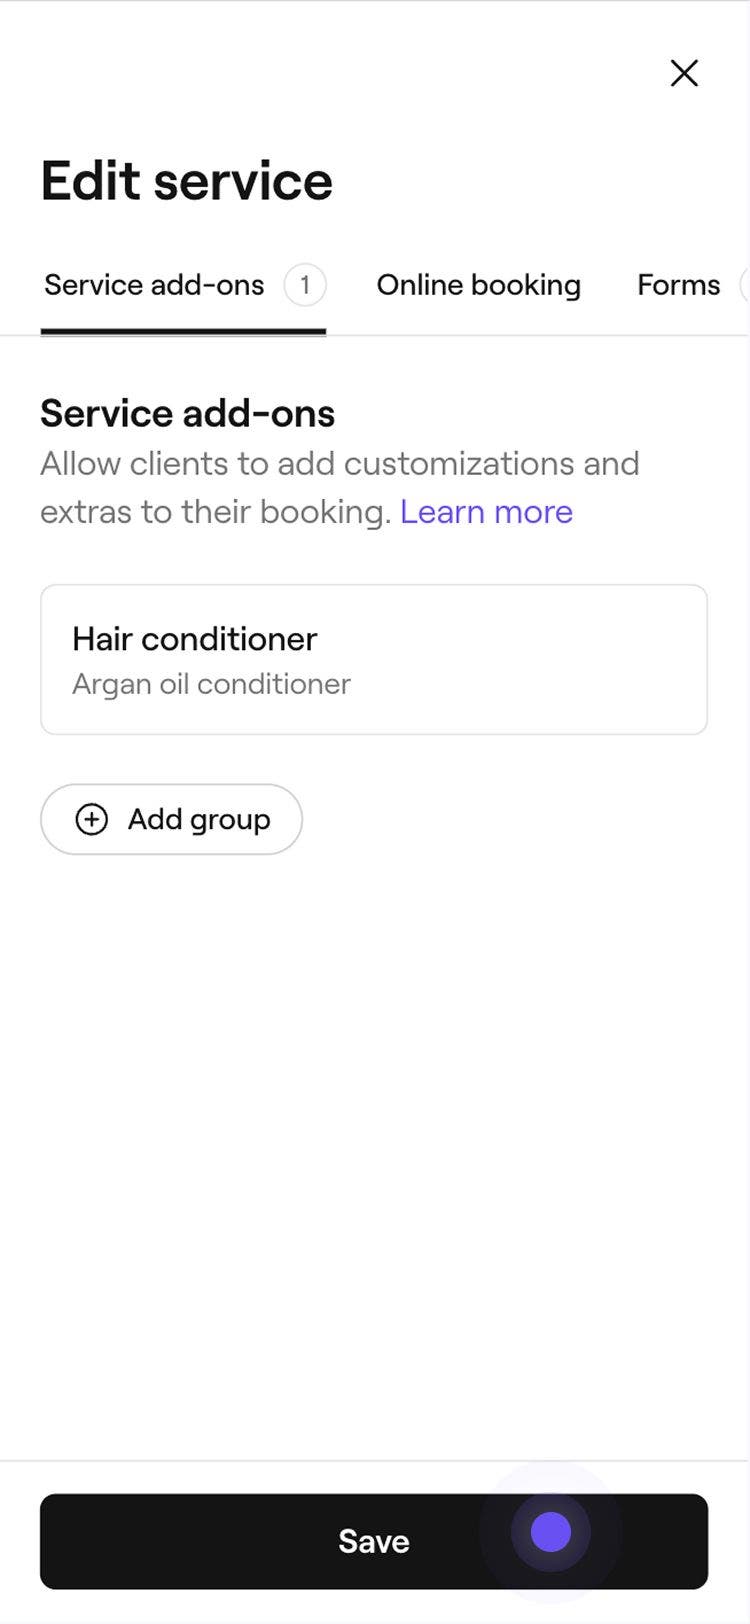
  14. Tap on the Save button at the bottom of your device to save your changes.Group 206 (1).jpg

Once created, the add-on group will automatically apply to the services you have selected. When a client books this service online, or if the appointment is manually added into your calendar, the add-on group will appear as an additional step within the booking flow.

If an appointment includes multiple services with add-ons, all add-ons will appear in the booking flow. For appointments that contain bundles, clients will be shown add-ons for each service within the bundle.

Edit or remove service add-ons

  1. From the main menu on the left of your screen, go to Catalog.
  2. Select Service menu from the left menu panel. 
  3. Click on the service with an add-on you would like to edit or remove. Group 491.jpg
  4. In the left menu panel, select Service add-ons.
  5. Next to an add-on group listed, make the following adjustments.
    1. Remove: To unlink the add-on group from this service, click on Actions next to the add-on group (three dots) and select Remove.
      edit_add_on_web_5_2.jpg
    2. Edit: Select the add-on group to make changes to it, such as updating group details or adding more add-on options.
      edit_add_on_web_5_1.jpg
    3. Permanently delete the add-on group: To remove the add-on group from all linked services, in the Edit view, select the Options button in the top right, then choose Permanently delete.
      edit_add_on_web_5_3.jpg
  1. From the main menu at the bottom of your device, tap on More (grid icon) and open Catalog.Group 194.jpg
  2. Select Service menu to see your list of treatments.Group 195.jpg
  3. Tap on the service with an add-on that you would like to edit or delete and select Edit.Group 208.jpg
  4. In the Edit service view, select Service add-ons from the menu bar at the top.
  5. Select an add-on group and make the following adjustments: 
    1. Edit: Select Edit to update the add-on, such as changing group details or adding more add-on options.
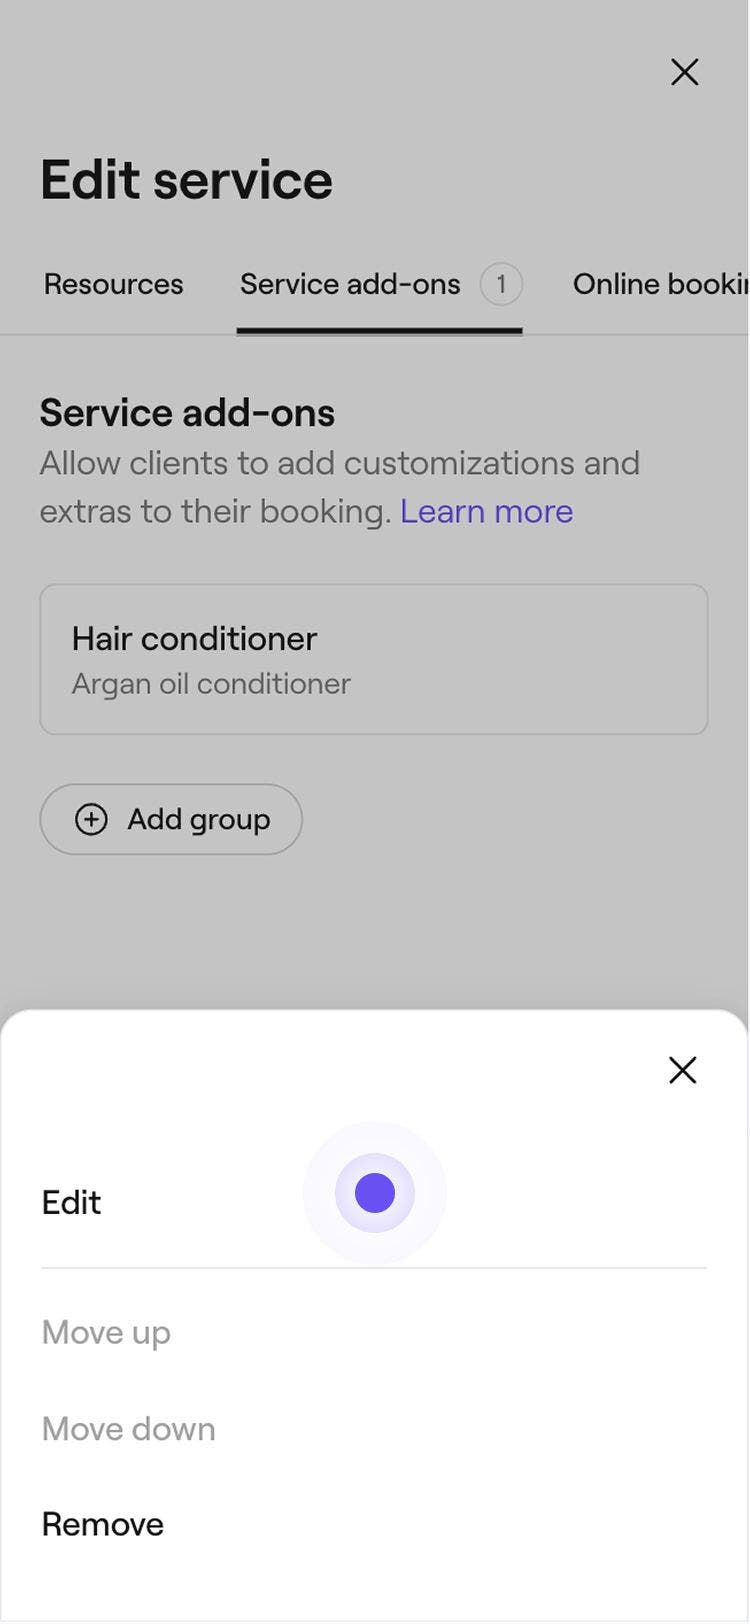
    2. Delete: Select Remove to unlink the add-on group from this service. In the confirmation pop-up, select Save to confirm your changes.
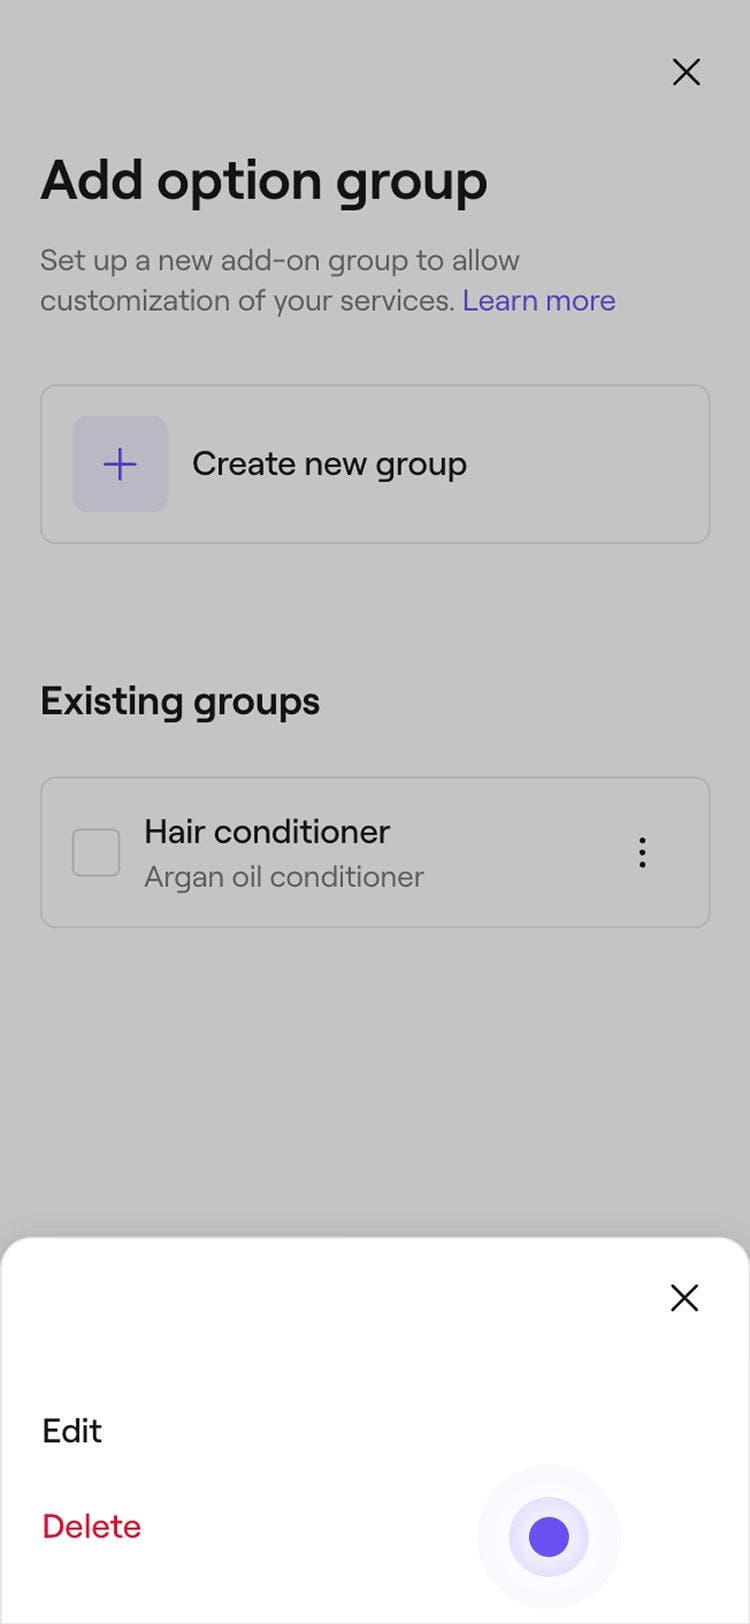
    3. Permanently delete the add-on group: This will remove the add-on group from your service menu and all linked services. Select Edit, then in the Edit view, select the Options (three dots) at the bottom and choose Permanently delete.Group 212 (1).jpg

FAQs

    • You can control the order of your add-ons from the Service add-on settings within a service. Click on an add-on group, select Actions (three dots) next to an option, and choose Move up or Move down. The updated order will automatically appear in the client booking flow.

      Add-ons can be updated in an existing appointment directly from your Calendar. Open the appointment and select the service from the right panel. Click Actions (three dots) next to an add-on and choose Edit or Remove to update it. To add a new add-on, select the Add button, choose an option from your add-on group, and click Apply to save your changes.

      Revenue from service add-ons appears in your Sales summary report and Sales log detail report. Filter the reports by Type to view the total revenue earned from service add-ons within your selected date range.

      Once commission is enabled for a service add-on, commissions is calculated on add-on sales from that point onward. Add-on sales made before the commission setting was enabled remain unchanged.


Services

Fresha academy courses
Course video preview

Get the most from your services

6 lessons•12 mins

See all courses

Was this guide helpful?

Services

Create services

Create and manage your treatment offerings by setting up single services.

Manage service availability

Manage where your services are offered, who can perform them, and which resources they require.

Add images to a service

Inspire bookings by adding service images to your service, so clients can book directly from your service portfolio.

Create service variants

Offer flexible pricing options for your services by creating and managing service variants.

Add extra time to services and appointments

Adjust appointment durations by adding extra time to services, bundles, or individual appointments.

Create service add-ons

Create optional extras linked to specific services that clients can select when booking.

Set advanced pricing and durations

Setting different prices and durations for team members or locations.

Limit online service availability

Control when clients can book your services by setting specific times, days, or dates your services are available.

Bulk edit services

Edit price, duration, and other settings for multiple services at once on Fresha.

Fresha academy courses
Course video preview

Get the most from your services

6 lessons•12 mins

See all courses
Fresha
Get the app

About Fresha

Careers

Help and support

Blog

Sitemap

For business

For partners

Pricing

Features

Scheduling

Point of sale

Payments

Capital

Marketplace

Support

Status

Legal

Privacy Policy

Terms of service

Terms of use

Find us on social

Facebook
Linkedin
Instagram

© 2026 Fresha.com SV Ltd