HomeKnowledge baseFresha academy
Create service bundles
Back
  1. Knowledge base•
  2. Services•
  3. Create service bundles

Create service bundles

Learn how to group multiple services together into bundles for clients to book.

In this article

  • How service bundles work
  • Create a service bundle
  • Add extra time to a bundle

How service bundles work

Bundles group services, so they’re booked together in the same appointment. They’re perfect for common treatment combinations, such as a wash, cut, and blow-dry, and you can set discounted pricing to encourage clients to book more at once.

Bundles use services already in your menu, allowing you to mix and match what you offer and set the order they’re delivered in. They appear like any other service in your menu, with a clear breakdown of what’s included, along with the total price and duration.

If you would like to offer clients multiple services that can be booked independently at different times, set up Memberships.

Create a service bundle

  1. From the main menu on the left of your screen, go to Catalog. 

  2. Select Service menu from the left menu panel.  bundles_web_2.jpg

  3. Click on the Add button in the top right, then select Bundle. bundles_web_3.jpg

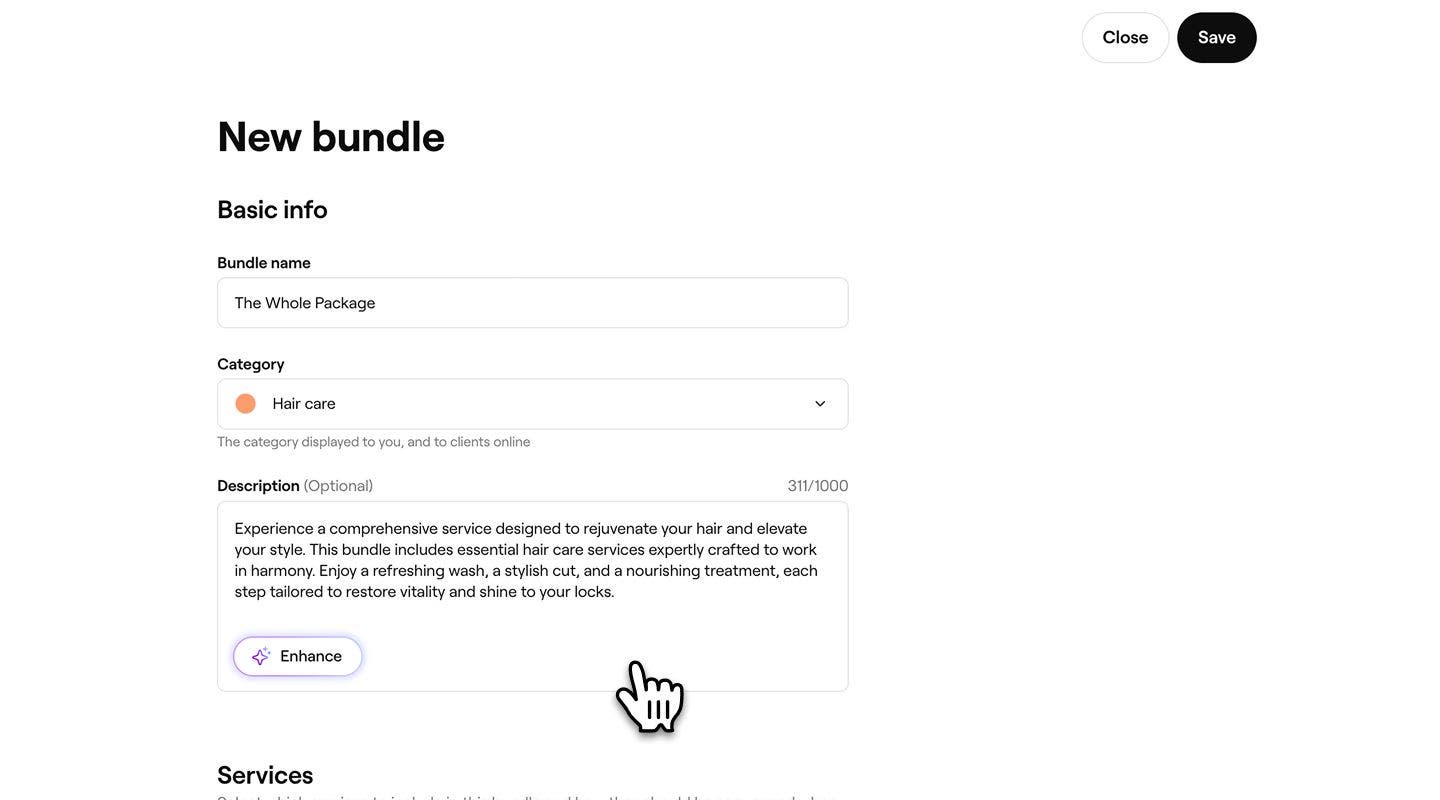
  4. In the New bundle view, enter the following details under Basic info:

    1. Bundle name: The name that appears in your service menu and to clients when booking.

    2. Category: Choose the category where this service should appear. This is visible to you and to clients online.

    3. Description: Add a short summary that helps clients understand what types of services are included in this bundle.   

      create_bundle_web_4.jpg

  5. Under Services, click on the Add service button and select at least two services to add to the bundle. bundles_web_5.jpg

  6. Below Schedule type, choose how the services will be delivered from:

    1. Booked in sequence: Services are added to the calendar one after another.
    2. Booked in parallel: Services are added to the calendar at the same time, across multiple team members. bundles_web_6.jpg
  7. Under Resource allocation, choose how resources are allocated when this bundle is booked, if resources are needed:

    1. Use same resources: Services that need the same resource share it. For example, a couples massage takes place in one room instead of two.
    2. Use separate resources: Each service in the bundle is booked into its own resource. For example, a couples massage would use two separate rooms.
  8. Under Pricing choose from the following options how the bundle should be priced:

    1. Service pricing: Automatically calculates the total based on the standard prices of all services in the bundle.
    2. Custom pricing: Set your own fixed price for the entire bundle.
    3. Percentage discount: Apply a percentage discount to the combined value of the services included.
    4. Free: Offer the bundle at no cost. bundles_web_7.jpg
  9. Below Online booking, use the toggle to allow clients to book the service online, then specify the service availability by gender. bundles_web_8.jpg

  10. Click on the Save button in the top right to save the bundle to your menu.

  1. From the main menu at the bottom of your screen, tap on More (grid icon) and open Catalog.

  2. Select Service menu from the menu. 

  3. Tap on the Add button in the top right, then select Bundle.

  4. In the New bundle view, enter the following details under Basic info:

    1. Bundle name: The name that appears in your service menu and to clients when booking.
    2. Category: Choose the category where this service should appear. This is visible to you and to clients online.
    3. Description: Add a short summary that helps clients understand what types of services are included in this bundle.
  5. Under Services, tap on the Add service button and select at least two services in the bundle.

  6. To include additional time in the services, tap on Actions (three dots) next to services, then select Add extra time.

  7. Under Resource allocation, choose how resources are allocated when this bundle is booked, if resources are needed:

    1. Use same resources: Services that need the same resource share it. For example, a couples massage takes place in one room instead of two.
    2. Use separate resources: Each service in the bundle is booked into its own resource. For example, a couples massage would use two separate rooms.
  8. Below Schedule type, choose how the services will be delivered from:

    1. Booked in sequence: Services are added to the calendar one after another.
    2. Booked in parallel: Services are added to the calendar at the same time, across multiple team members.
  9. Under Pricing choose from the following options how the bundle should be priced:

    1. Service pricing: Automatically calculates the total based on the standard prices of all services in the bundle.
    2. Custom pricing: Set your own fixed price for the entire bundle.
    3. Percentage discount: Apply a percentage discount to the combined value of the services included.
    4. Free: Offer the bundle at no cost.
  10. Below Online booking, use the toggle to allow clients to book the service online.

  11. Under Available for, specify the service availability by gender.

  12. Tap on the Save button at the bottom of the view to save the bundle to your menu.

Once saved, the bundle will appear in your service menu with all your selected settings applied. Clients will be able to book it online, and the services within the bundle will be added to your calendar automatically according to the schedule type you chose.

Reorder services by dragging and dropping them. The order will determine the sequence on the calendar.

Add extra time to a bundle

  1. From the main menu on the left of your screen, go to Catalog. 
  2. Select Service menu from the left menu panel. 
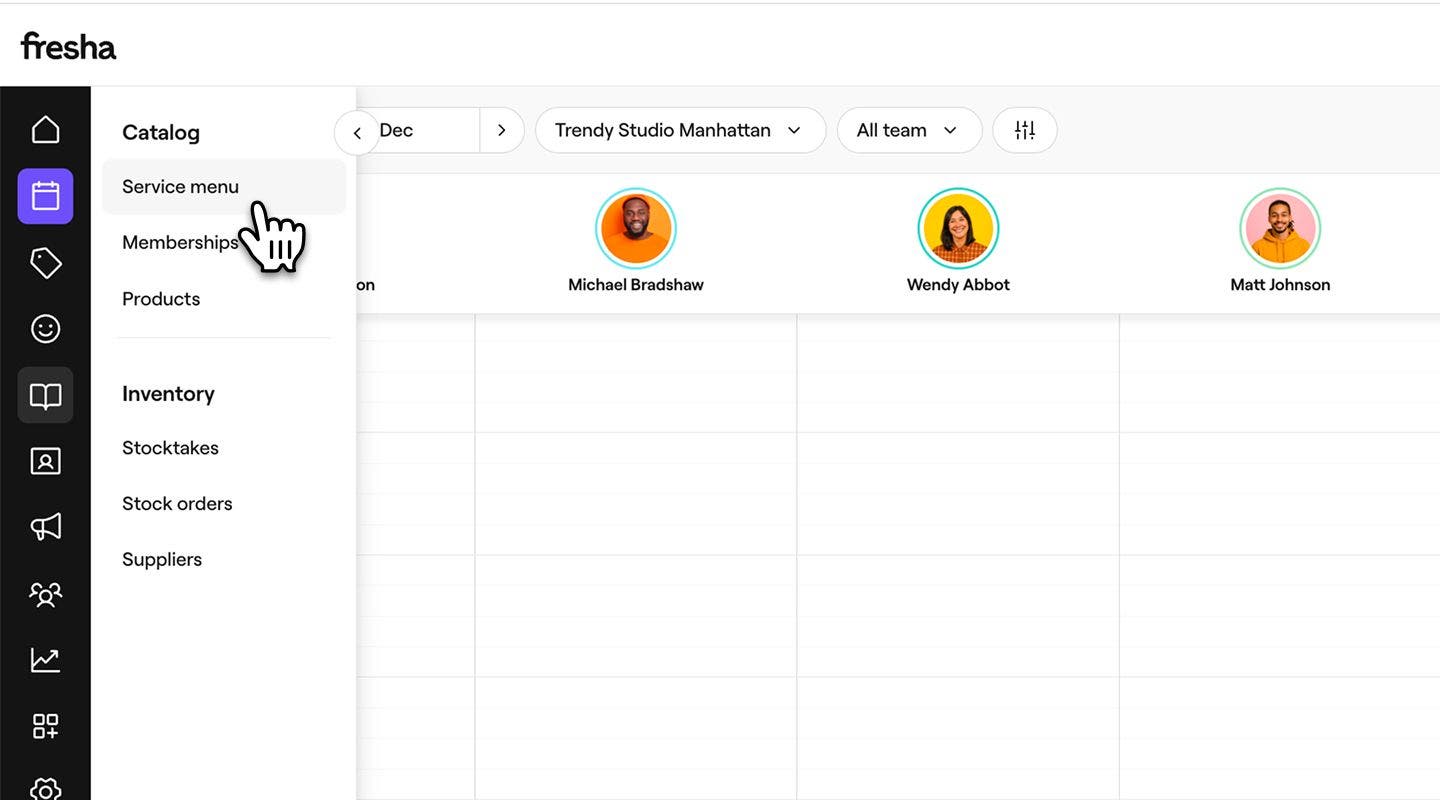
    extra_time_bundle_web_2.jpg
  3. Click on a bundle from the service menu to update. 
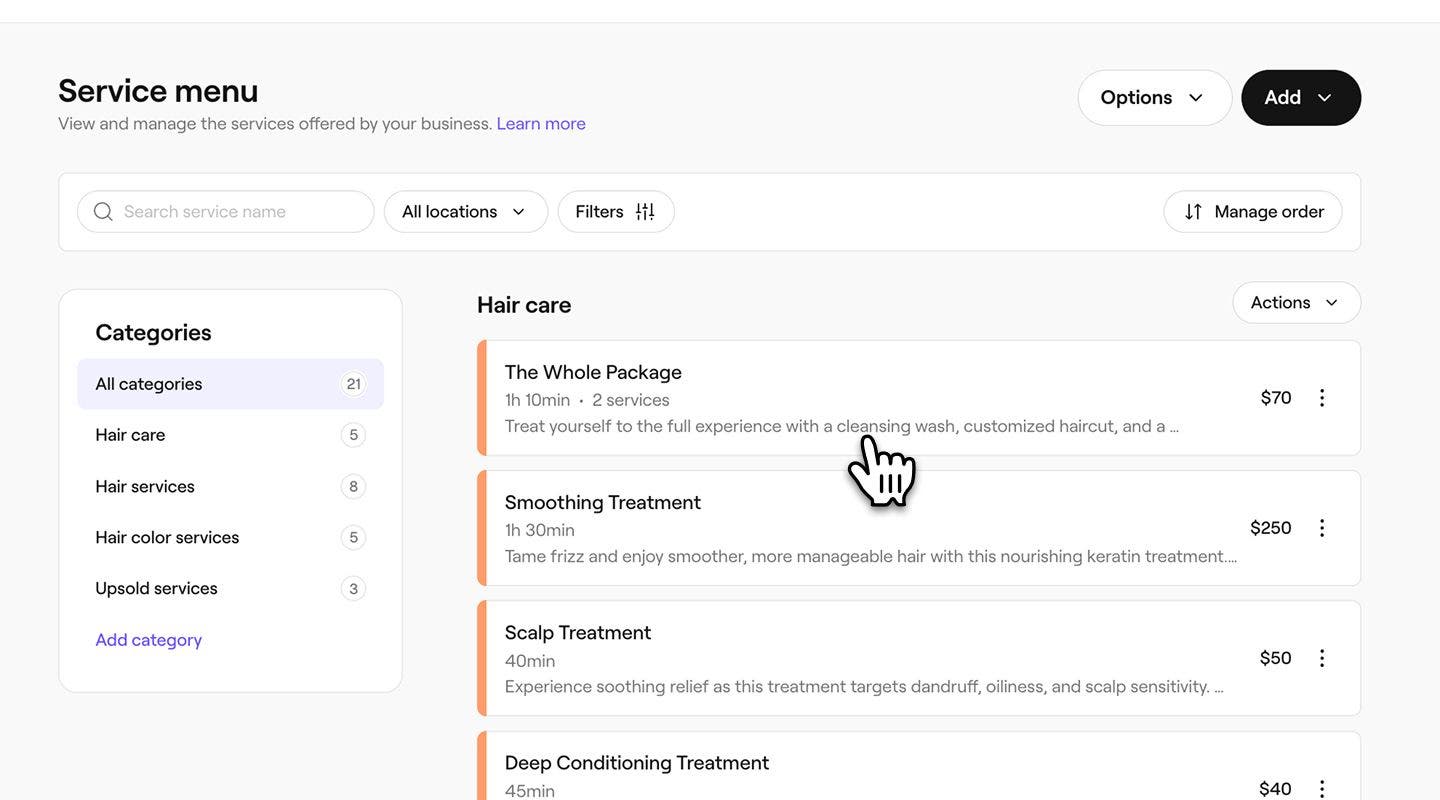
    extra_time_bundle_web_3.jpg
  4. In the Edit bundle view, click on Actions (three dots) next to the service you want to add any additional time to, and select Add extra time.
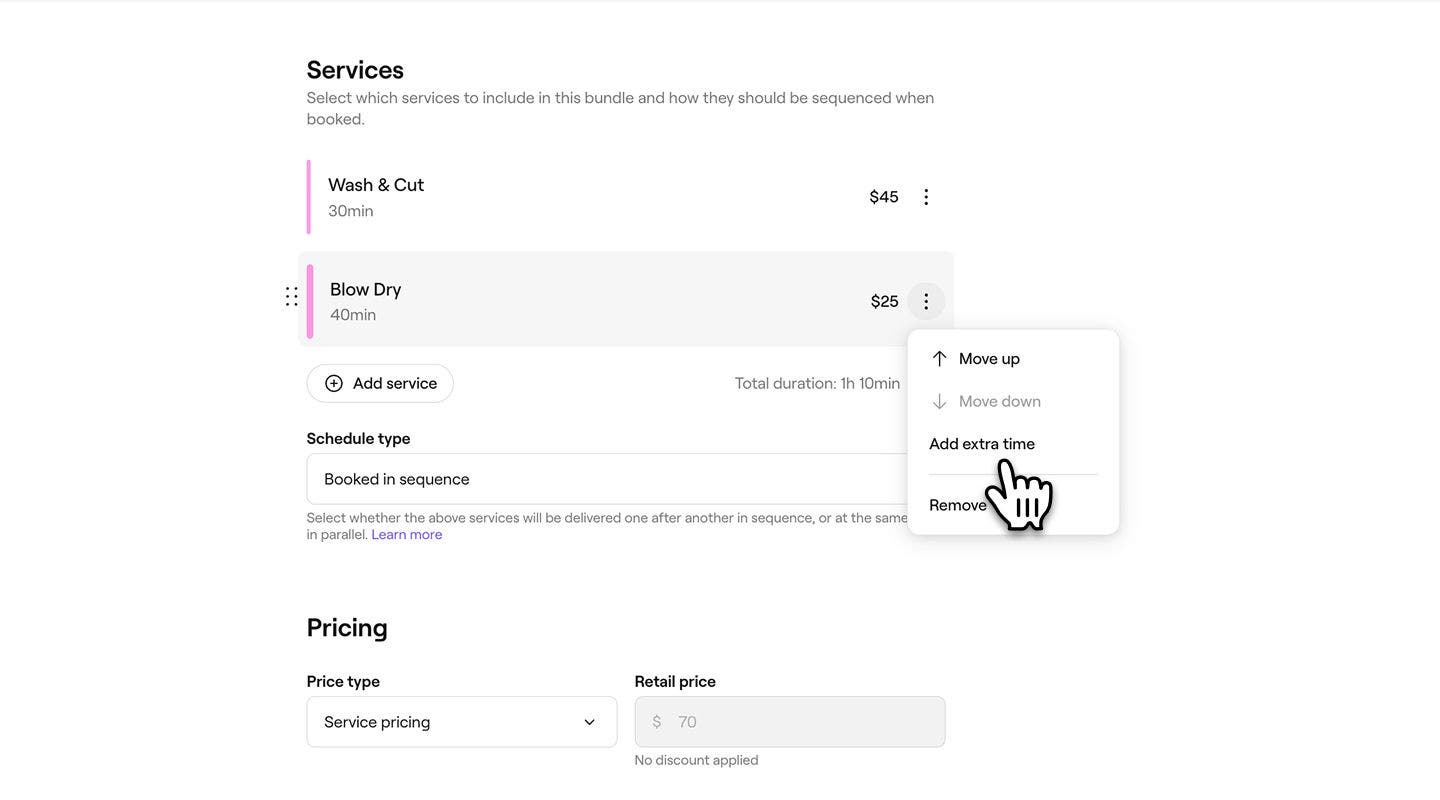
    extra_time_bundle_web_4.jpg
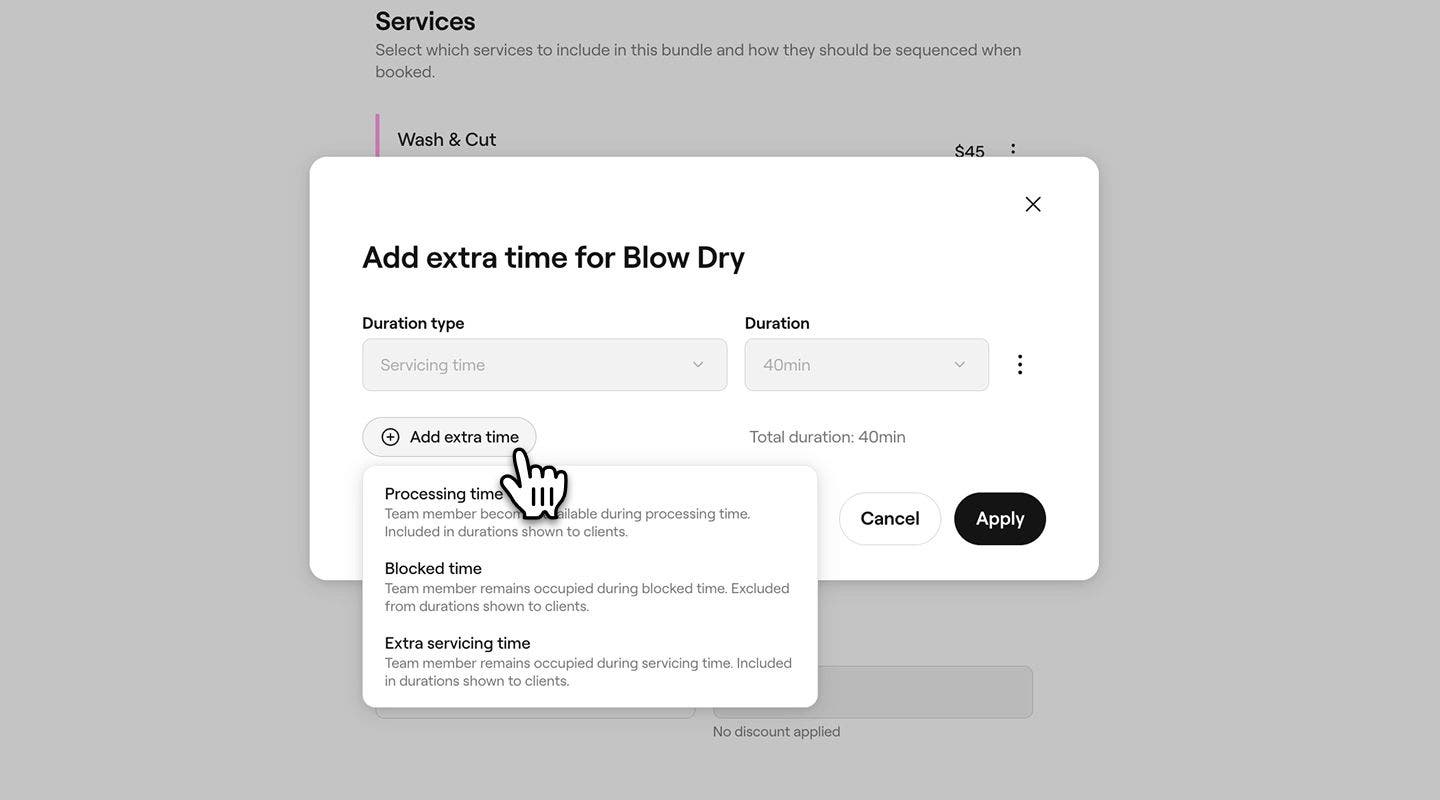
  5. In the Add extra time pop-up, click on the Add extra time button and select from Processing, Blocked, or Extra servicing time.
    extra_time_bundle_web_5.jpg
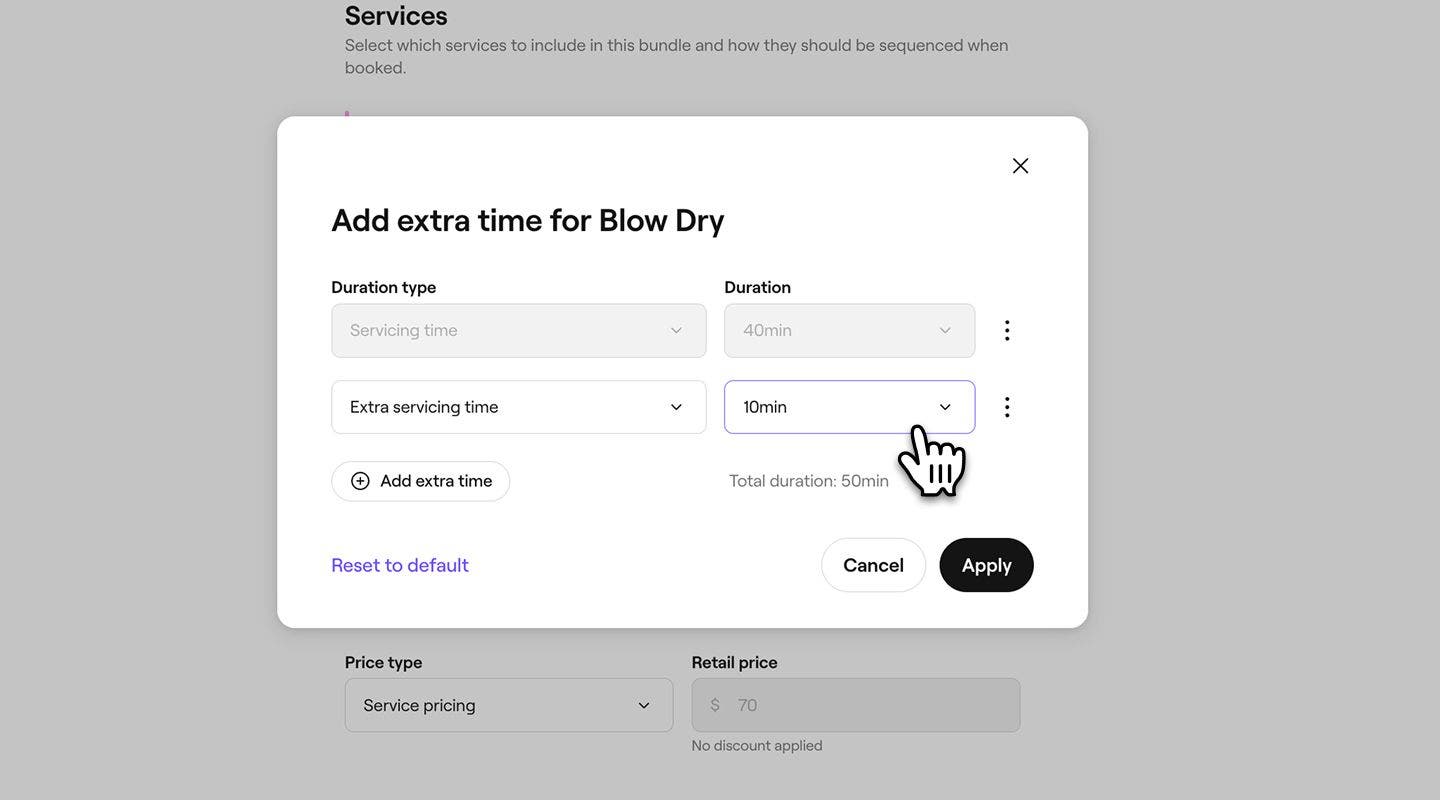
  6. Under the Duration, use the dropdown menu to set the length of the extra time, then click on the Apply button.
    extra_time_bundle_web_6.jpg
  7. Click the Save button in the top right to apply extra time to the bundle.
  1. From the main menu along the bottom of your device, tap on More (grid icon) and open Catalog.
  2. From the Catalog page, select Service menu.
  3. In your Service menu, tap on an existing bundle and select Edit.
  4. In the Edit bundle view, scroll down to find Services included in the bundle and tap on the service you would like to add extra time to.
  5. From the Add extra time pop-up, tap the Add extra time button to apply new extra time to the service.
  6. In the dropdown menu, choose from Processing, Blocked, or Extra servicing time.
  7. Next to the added extra time, use the dropdown menu to set the Duration of the extra time, and tap on the Apply button to save extra time added to the service in the bundle. 
  8. To finalise changes to the bundle duration, tap the Apply button.

Once extra time is added to a bundle, it only applies to the service within that specific bundle. If any services from the bundle are booked separately, this extra time won’t be included.

FAQ

    • You can hide your service bundles from online booking by opening a bundle from your Service menu, and disabling the toggle under Online booking. The bundle stays available in your account but is no longer shown to clients during online booking.


Service menu


Related articles

Fresha academy courses
Course video preview

Get the most from your services

6 lessons•12 mins

See all courses

Was this guide helpful?

Service menu

Create service bundles

Increase bookings with bundles that combine multiple services into one convenient option for clients.

Manage service categories

Organize your services into categories to make it easier for clients to browse and book.

Set services to book in sequence

Ensure your services are booked and delivered in the correct order with a service booking sequence.

Order your service menu

Organize your service menu to make it easier for clients to view and book services online.

Best practices for creating your service menu

Create a clear, professional service menu that improves your Marketplace visibility and helps clients easily understand and book your treatments.

Archive and delete items in your service menu

Keep your service menu up to date by archiving or deleting services and bundles.

Export your service menu

Export your service menu from Fresha for easy record keeping.

Related articles

Order your service menu

Organize your service menu to make it easier for clients to view and book services online.

Set services to book in sequence

Ensure your services are booked and delivered in the correct order with a service booking sequence.

Set advanced pricing and durations

Setting different prices and durations for team members or locations.

Fresha academy courses
Course video preview

Get the most from your services

6 lessons•12 mins

See all courses
Fresha
Get the app

About Fresha

Careers

Help and support

Blog

Sitemap

For business

For partners

Pricing

Features

Scheduling

Point of sale

Payments

Capital

Marketplace

Support

Status

Legal

Privacy Policy

Terms of service

Terms of use

Find us on social

Facebook
Linkedin
Instagram

© 2026 Fresha.com SV Ltd