Create a membership
Learn how to create a membership by combining services, products, and discounts into one recurring offer, with added benefits for your clients.
In this article
Create a membership
-
From the main menu on the left of your screen, go to Catalog.
-
Select Memberships from the side panel, click Add and select Membership to create a new one.

-
Under Membership details, enter a name that reflects what’s included. For example, ‘Ultimate Spa membership’.
-
To add a design to your membership, click the theme button and select a color theme.

-
-
Under Category, use the dropdown menu to select an existing category where the membership appears for clients booking online.
- To add a new category, select Create new category.
-
Add a short Description so clients know what’s included when they see the membership online.

-
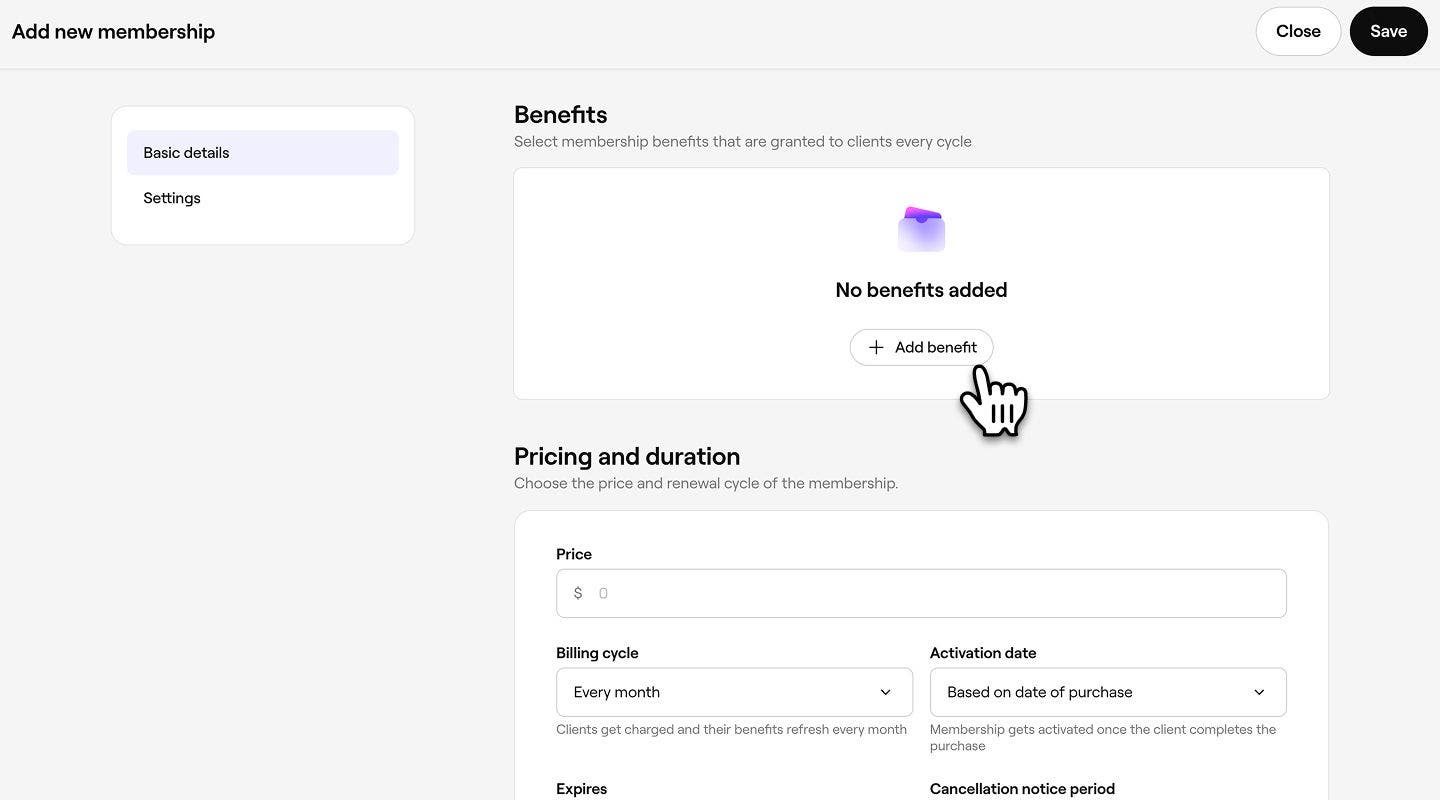
Under Benefits, click Add benefit. Benefits determine what the client has access to during their membership, there is no limit to how many benefits each membership can contain.
-
Select between any of the following benefit types:
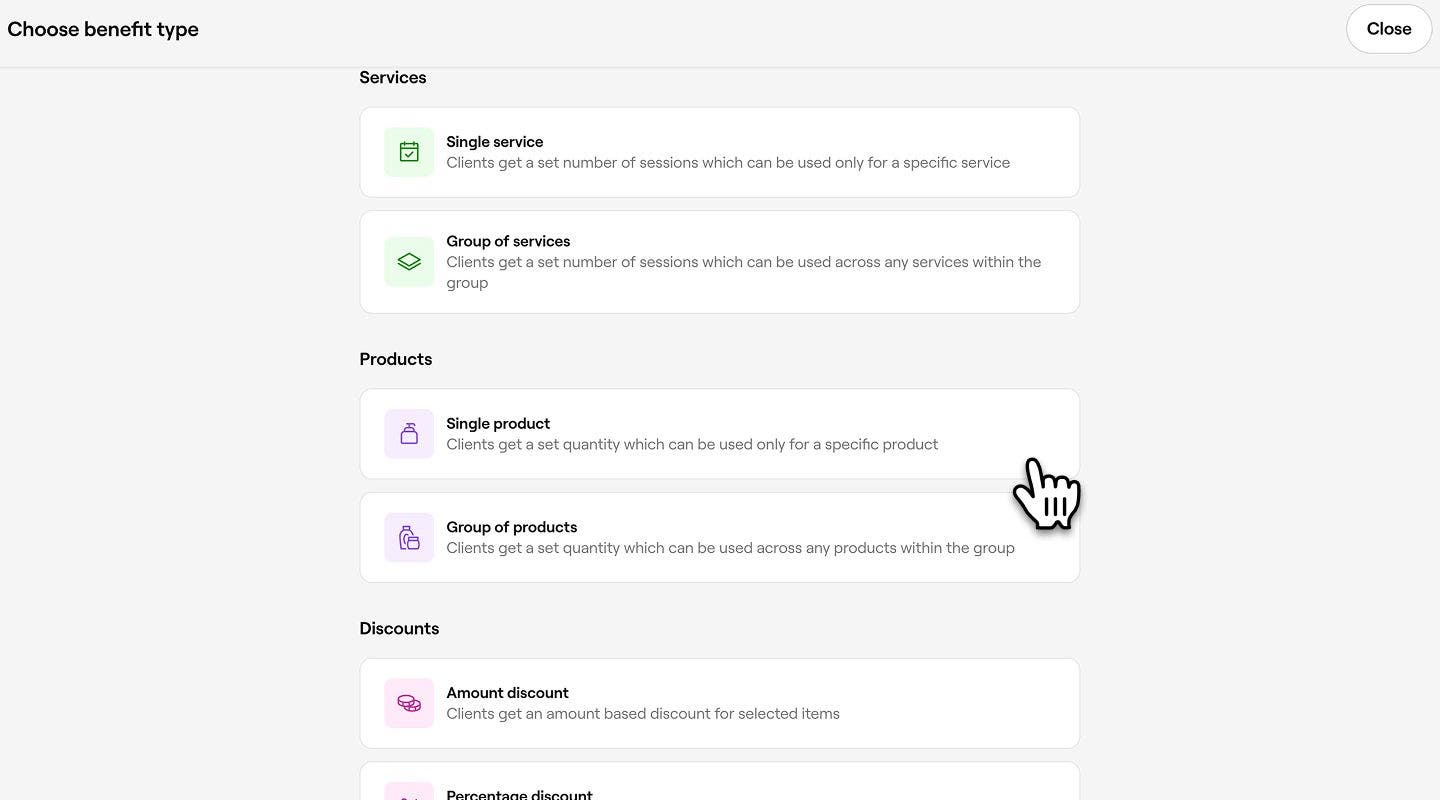
- Services: Choose a single service with a set number of sessions, or a group of services that clients can redeem across.
- Products: Choose a single product with a set quantity, or a group of products that clients can redeem across.
- Discounts: Offer a fixed amount or percentage discount on selected services and products.
-
Select the services, products, or discounts you want to include and click Apply in the top right of your screen.

-
Next to each benefit, set how many times the client can redeem the benefit within that billing cycle. Each benefit will have a different value type:

- Sessions: Set the number of service sessions clients can redeem.
- Quantity: Set the number of products clients can receive.
- Uses: Set the number of times a discount can be redeemed.
-
Under Type, choose how the benefit is provided:
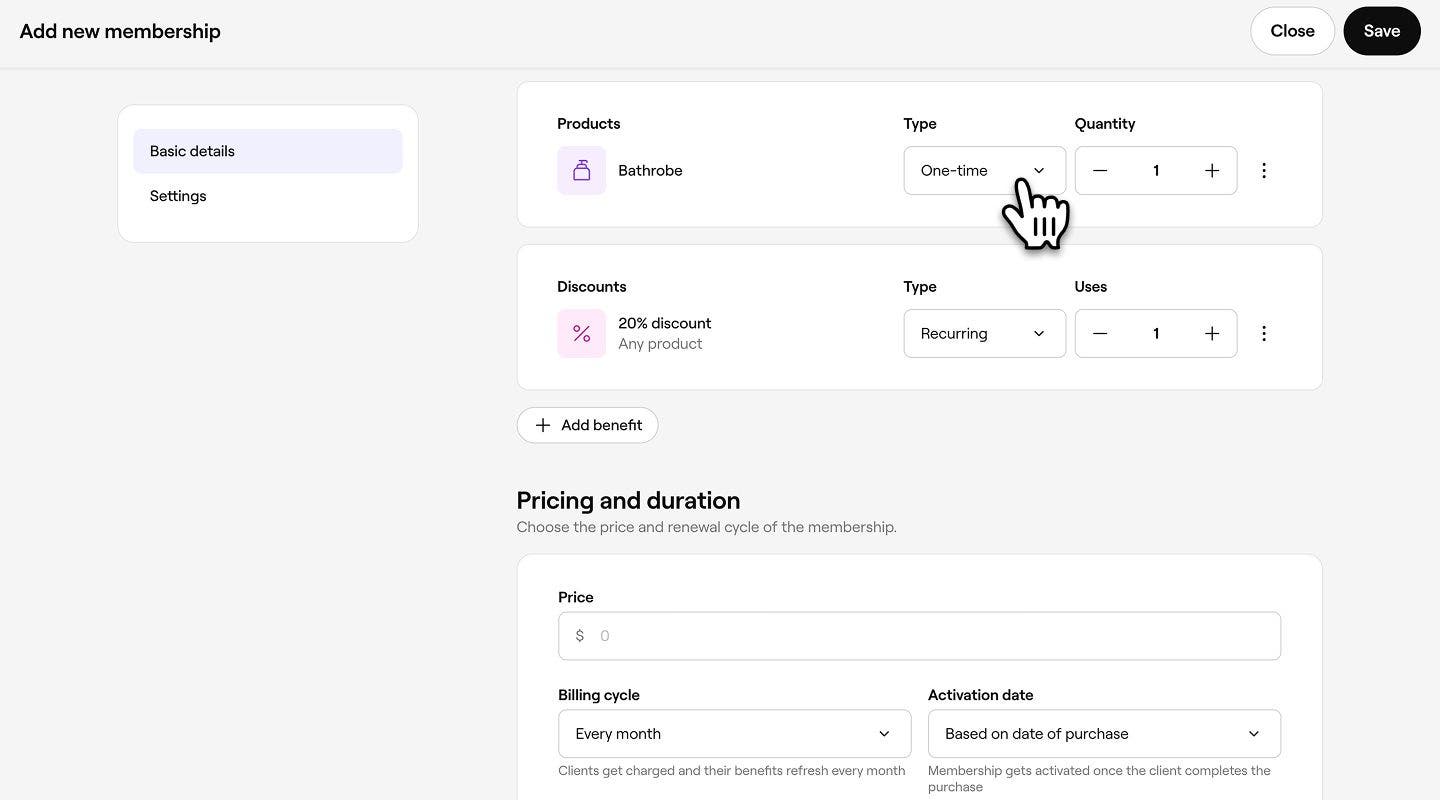
- Recurring: The benefit refreshes each billing cycle.
- One-time: The benefit is available once during the membership.
-
Once you’ve added all your benefits, under Pricing and duration, enter the Price clients pay each billing cycle for their membership to renew.

-
Choose the following membership settings:
- Billing cycle: Choose how often clients are charged and recurring benefits refresh.
- Activation date: Choose when the membership becomes active.
- Expires: Choose how long the membership remains active.
- Cancellation notice period: Choose how much notice clients need to give before their membership ends.
-
Click Save in the top right of your screen to create the membership.
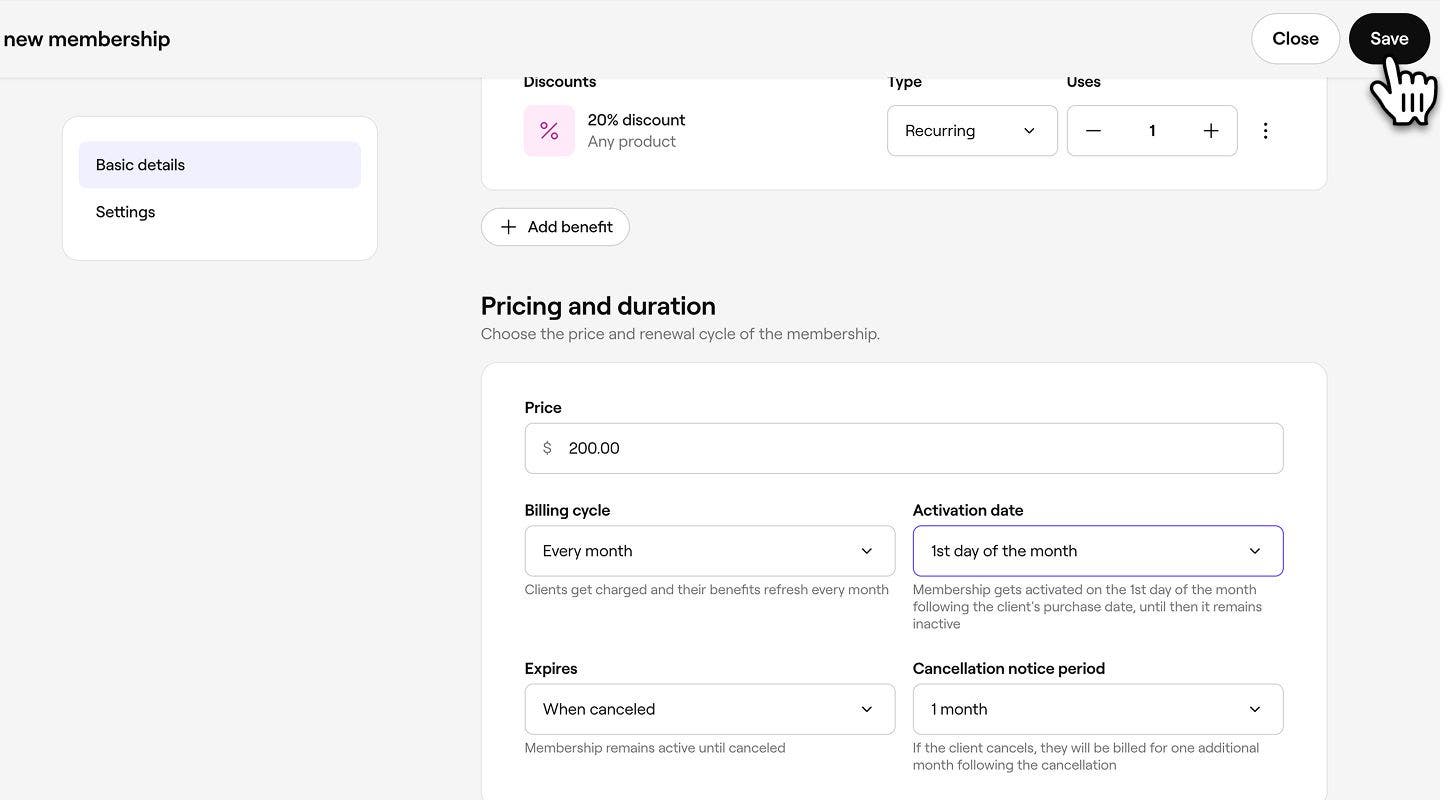
Once you create a membership, it’s ready to start selling online or in-store based on your selected settings.
Update advanced membership settings
- From the main menu on the left of your screen, go to Catalog and select Memberships from the side panel to view your memberships.

- Click on Actions (three dots) next to the membership, and select Edit to update it's settings.

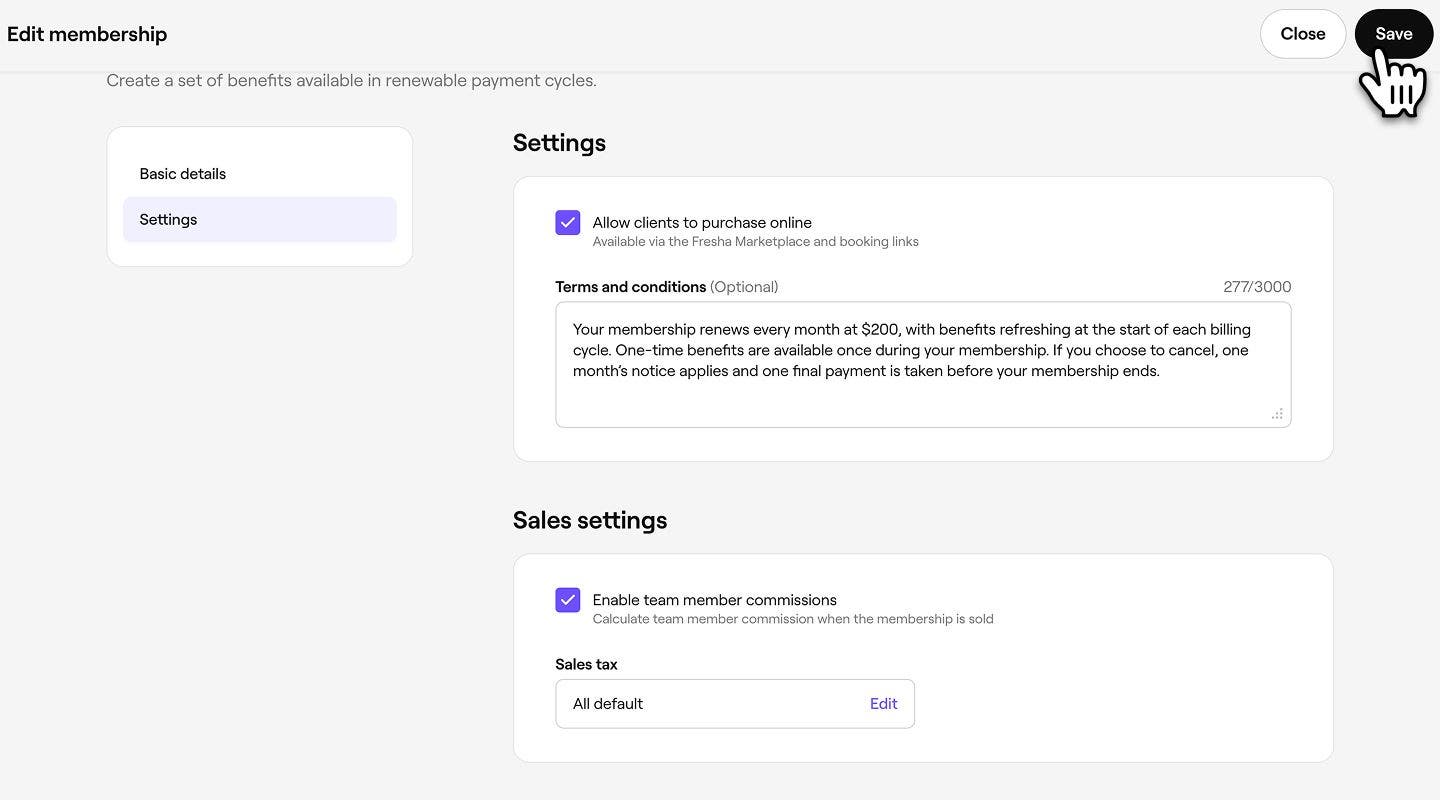
- In the left menu panel, select Settings to view the membership advanced settings.

- By default, clients are able to purchase memberships online. Untick the checkbox to remove this, and sell memberships in-store only.
- Add any important information that clients should know about their membership under the Terms and conditions text box provided.
- Under Sales settings, untick the checkbox to remove commission from being earned on membership sales.
- Use the dropdown meny under Sales tax, to select the tax that applies to the membership.
- Click Save in the top right of your screen to apply your changes.
Once you have updated a membership, the changes take immediate effect. If you make changes to price or benefits, these will apply to future purchases only and won’t affect membership that have already been sold.
FAQs
Your no-show and late cancellation policy will still apply to your memberships.
If the appointment hasn’t been checked out or payment wasn’t collected through Fresha payments, you can void the sale, then edit the appointment by removing and re-adding the service. If the client has an active membership, you’ll be able to select it and deduct the session.
However, if the appointment was checked out using Fresha payments, no changes can be made once the payment has been processed.
You can discount memberships by using a Flash Sale. This discount can be applied online and at checkout.
For example, if a membership costs €10/month and you apply a Flash Sale to sell it for €9, the client pays €9 for the first month. On the next renewal date, the price returns to €10/month.
To apply a membership to an existing appointment, open the appointment from your calendar. Click the Edit (pencil) icon next to the service, then select the membership from the Discount drop-down. Click on the Apply button, then choose Checkout or Save to update the appointment.