Update team member account details
In this guide, you'll learn how to manage a team member's profile details, including the services they can perform, the locations they work at.
In this article
Add a team member’s basic information to their profile
- From the main menu on the left of your screen, go to Team.
- Select Team members from the left menu panel.
- Select the team member to open their profile.
- In the team member view, click on Actions and select Edit to update their profile.
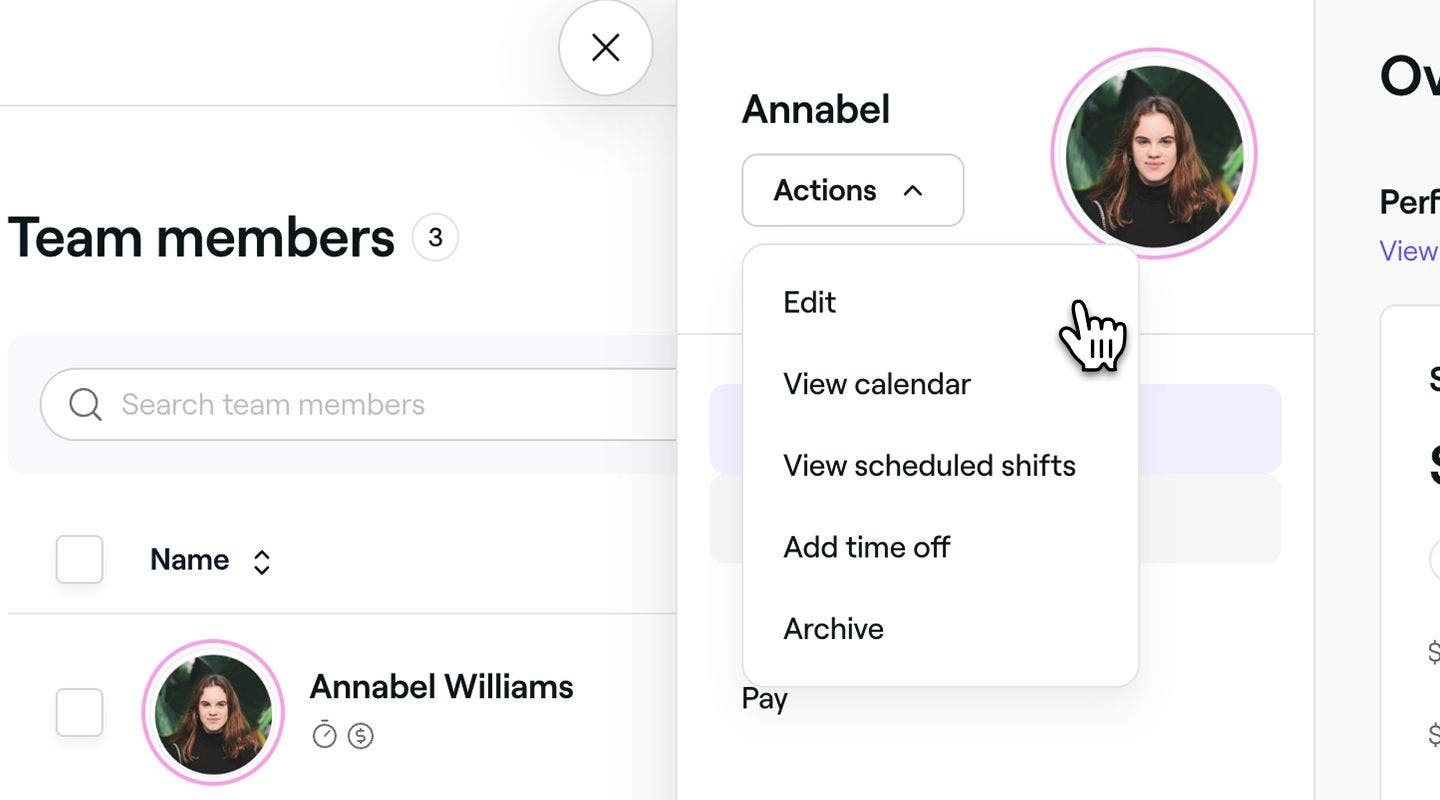
- In the Edit team member view, click the Edit icon on the profile photo to upload a new photo for the team member.
- Under the profile details, add the team member's personal and contact details.
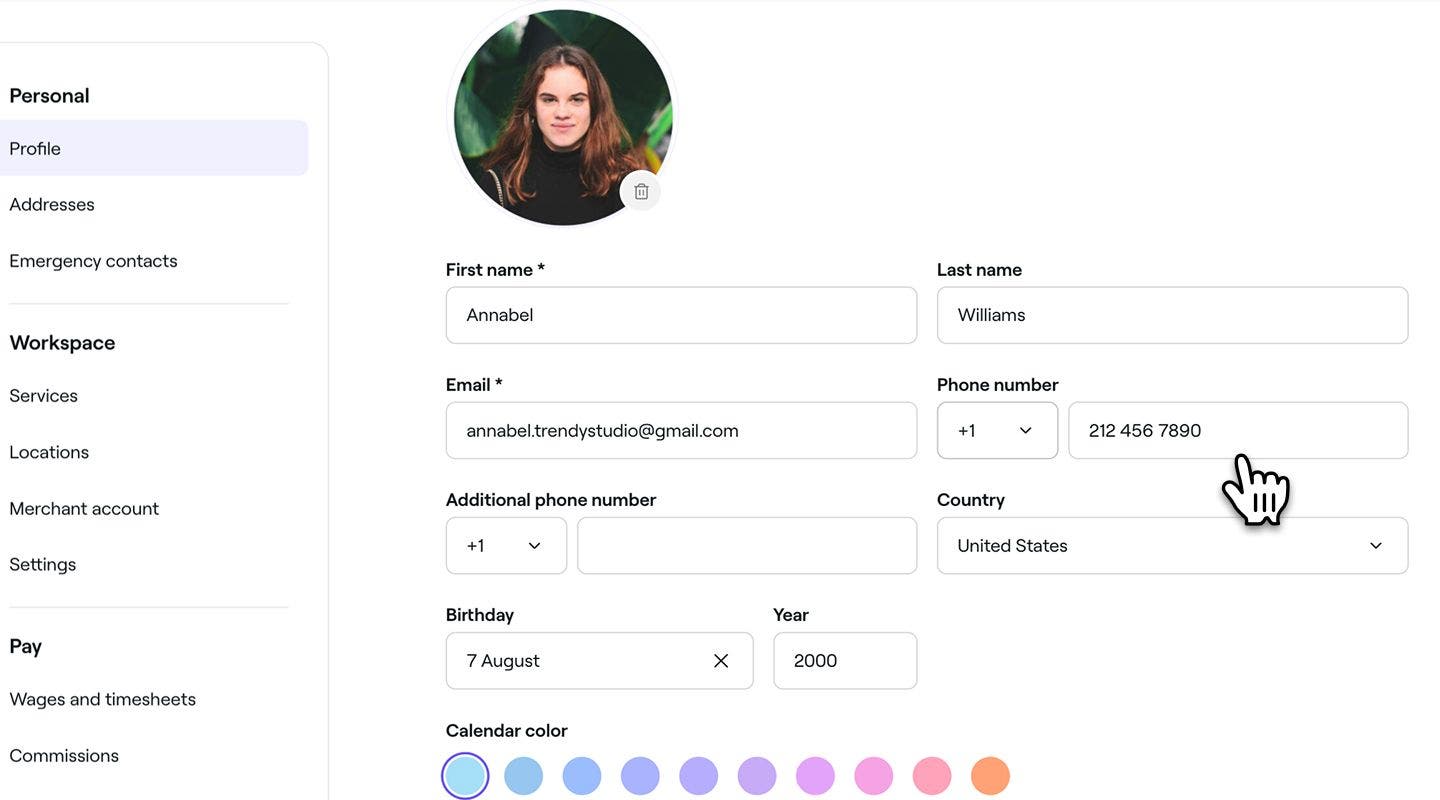
- Under Calendar color, select a color to represent the team member on your calendar, depending on your Calendar settings.
- Under Work details, add the team member's job title and employment information.
- Click on the Save button in the top right to update the team member's profile.


Once updated, the team member's profile photo and job title will be visible to clients when booking online.
Add a team member’s personal address to their profile
-
From the main menu on the left of your screen, go to Team.
-
Select Team members from the left menu panel.
-
Select the team member to open their profile.
-
In the team member view, click on Actions and select Edit to update their profile.
-
In the Edit team member view, select Addresses from the left menu panel and click on the Add an address button.

-
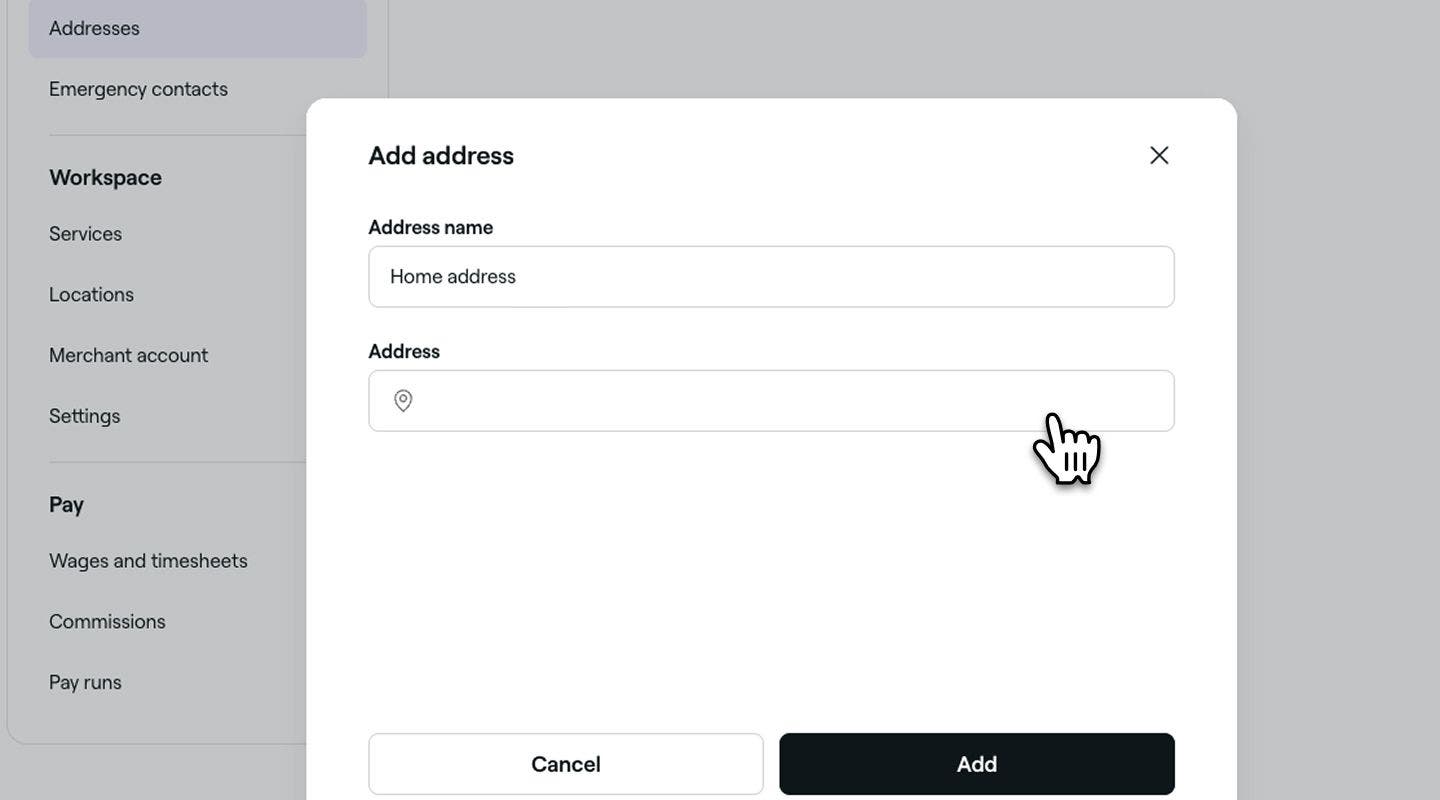
Enter the Address name in the pop-up and under Address, start typing the address and select from the suggested options. Once selected, click on the Add button.
-
Click on the Save button in the top right to update the team member profile details.
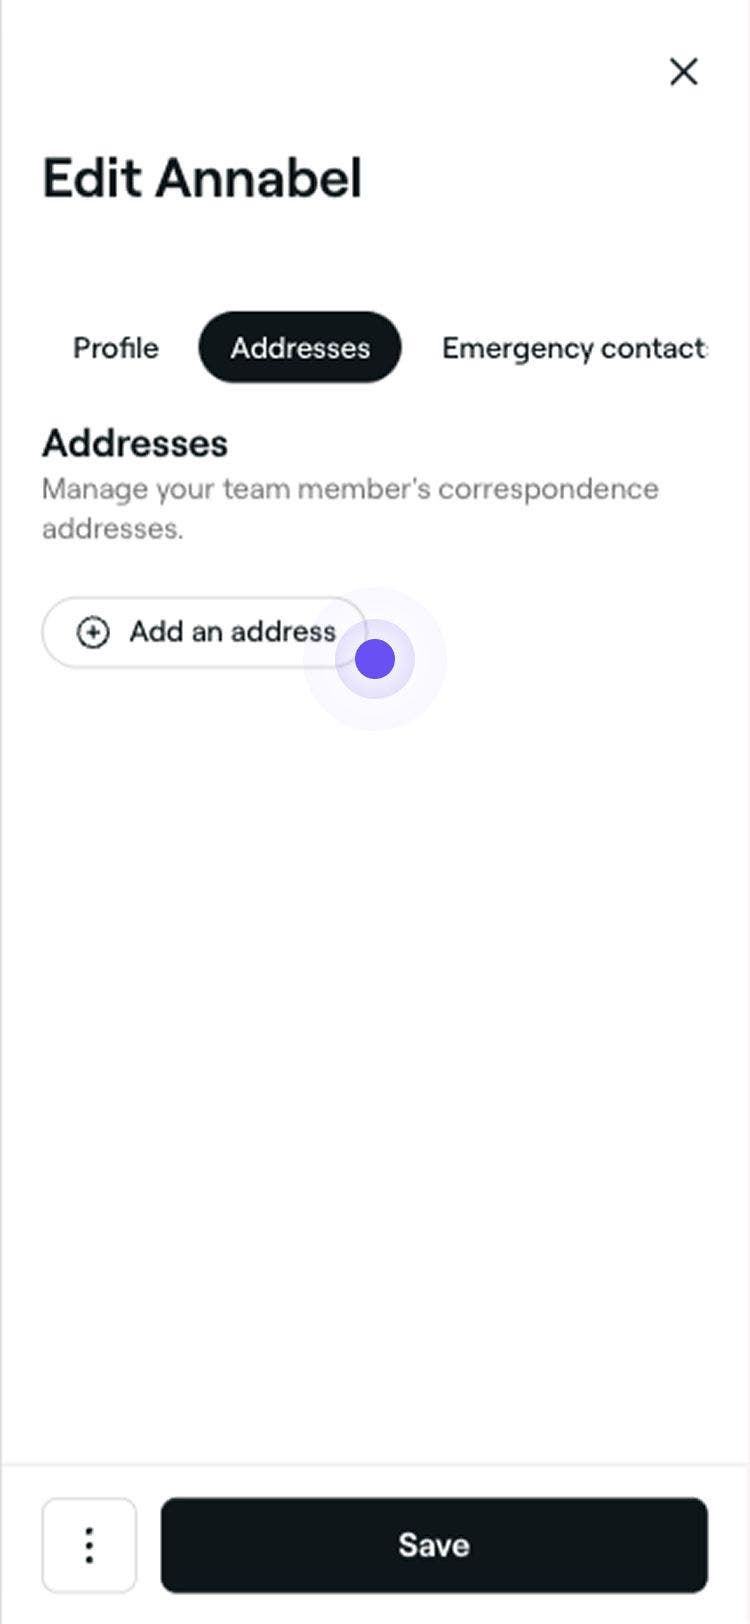

Once saved, the team member’s profile will be updated with the new address. You can make changes or delete the address at anytime by following the same steps.
Add emergency contacts for team members
-
From the main menu on the left of your screen, go to Team.
-
Select Team members from the left menu panel.
-
Select the team member to open their profile.
-
In the team member view, click on Actions and select Edit to update their profile.
-
In the Edit team member view, select Emergency contacts from the left menu panel and click on the Add an emergency contact button.

-
Enter the emergency contact details in the pop-up, and click on the Add button.

-
Click on the Save button in the top right to update the team member profile details.


Once saved, the emergency contact will be added to the team member’s profile. You can update it at any time by following the same steps.
Assign team members to the services they can provide
-
From the main menu on the left of your screen, go to Team.
-
Select Team members from the left menu panel.
-
Select the team member to open their profile.
-
In the team member view, click on Actions and select Edit to update their profile.
-
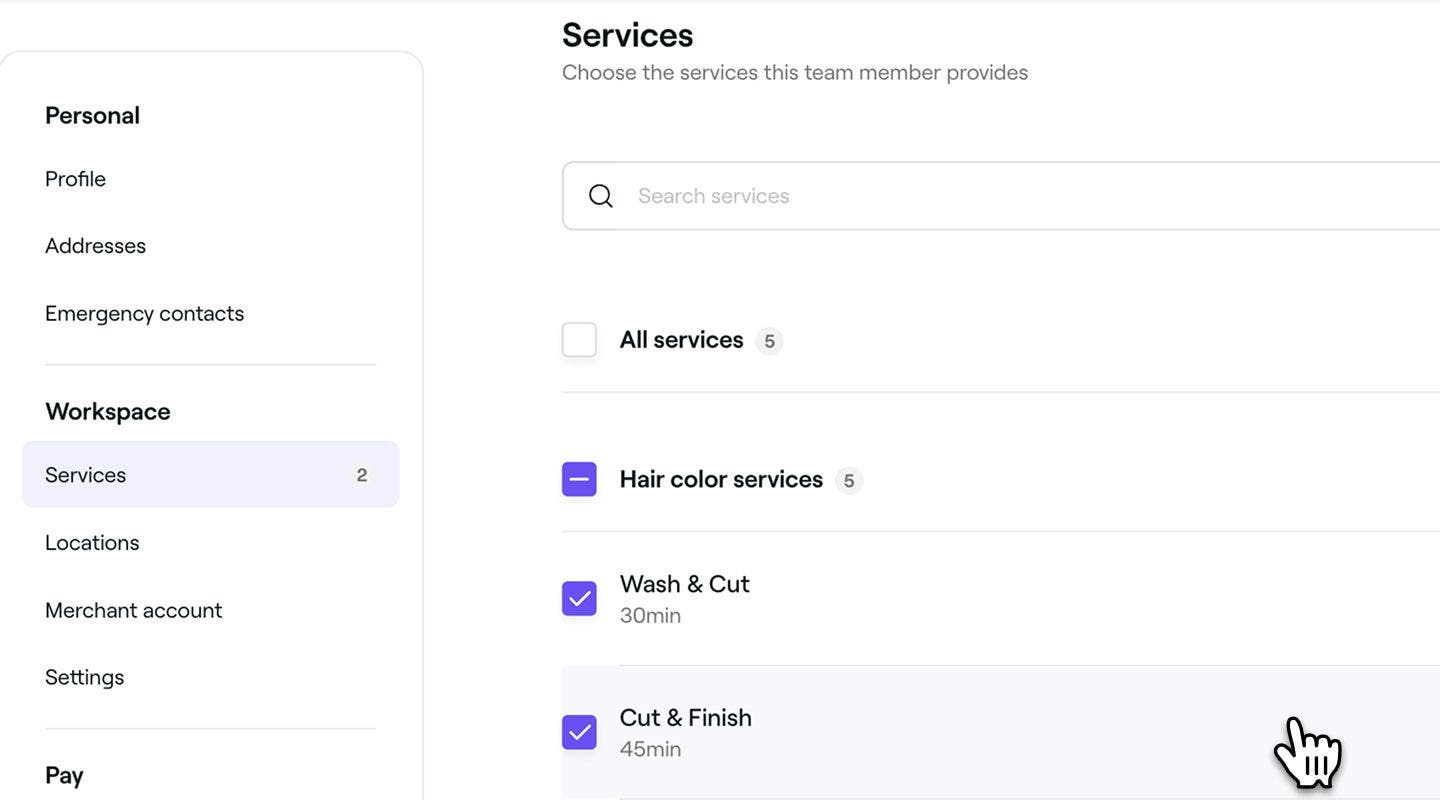
In the Edit team member view, select Services from the left menu panel to assign services that the team member can provide.
-
Tick the checkboxes next to each individual service or tick All services to assign everything at once.
-
Click on the Save button in the top right to update the team member profile details.
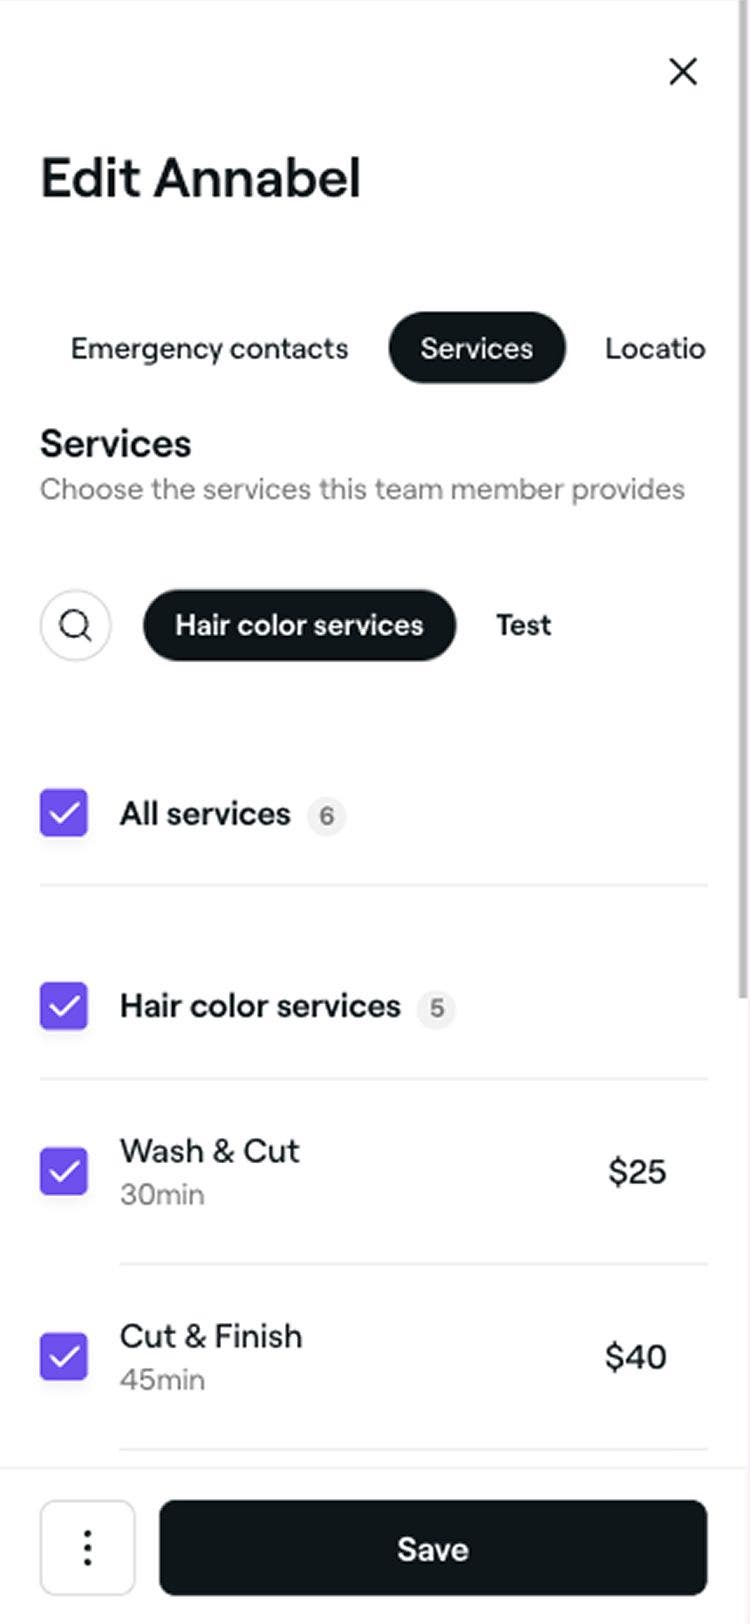
Once services are assigned to a team member, you can schedule appointments for those services under their name in the calendar. If the team member is bookable online, clients will be able to select them when booking the service.
Assign team members to additional locations
-
From the main menu on the left of your screen, go to Team.
-
Select Team members from the left menu panel.
-
Select the team member to open their profile.
-
In the team member view, click on Actions and select Edit to update their profile.
-
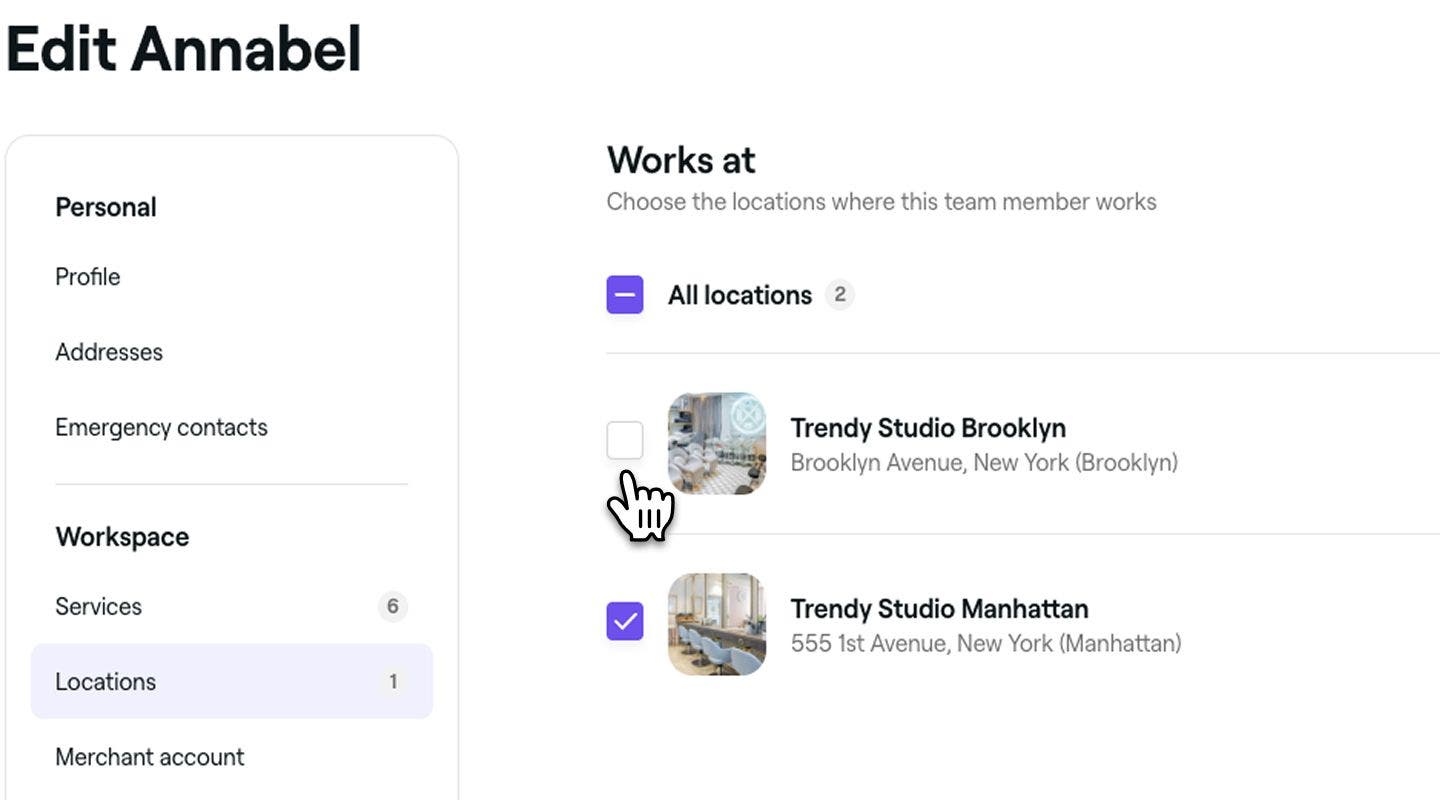
In the Edit team member view, select Locations from the left menu panel to choose the location that the team member works.
-
Tick the checkboxes next to each individual location or tick All locations to assign everything at once.
-
Click on the Save button in the top right to update the team member profile details.

Once locations are assigned to a team member, they will be bookable for appointments both online and in the calendar at those locations.
Make team members bookable for appointments
-
From the main menu on the left of your screen, go to Team.
-
Select Team members from the left menu panel.
-
Select the team member to open their profile.
-
In the team member view, click on Actions and select Edit to update their profile.
-
In the Edit team member view, select Settings from the left menu to update their appointment settings.
-
Use the toggle next to Calendar bookings to enable or disable online bookings for this team member.
-
In Advanced options, you can choose to:
- Exclude team member from online bookings: Prevent this team member from appearing in online booking channels. Clients won't be able to book appointments with them online.
- Exclude team member from auto assignment: This team member will still be bookable online but will never be automatically selected when a client selects "No preference".
-
Click on the Save button in the top right to update the team member profile details.
Once a team member is bookable, they will appear in your calendar for scheduling appointments. If online booking is enabled, clients will also be able to book them for assigned services.
Your Fresha plan price is based on the number of bookable team members. When you add or remove bookable team members, your monthly price will change accordingly. These automatic price adjustments will take effect in your next billing period.
You must also assign or create a Permission role for your team member, to determine which areas of your workspace they are able to access.
FAQs
If the team member has added their profile photo and is connected as a Fresha user, you cannot delete it. However, you can replace it for your workspace by uploading a different photo.
When a team member joins your workspace using an existing professional profile on Fresha, their existing details will be uploaded automatically. You can update all information in their profile, except their email address and mobile number, at any time without affecting their professional profile.
You can update a team member’s permission role at any time, from their team member profile, or your Permission roles tab.
It is not possible to change a team member’s email address on their behalf. Only the team member can make changes to their contact details. They can do this by clicking their profile picture in the top-right and selecting My Profile. From the left-hand panel, choose Personal Settings, then Personal Info. Under Contact, click Edit and update the email address. They’ll need to verify the new email by following the link in the verification email sent by Fresha.
A team member’s email address is linked to their personal Fresha account, so it can’t be edited directly from your workspace. If a team member needs to update their email, they should do this directly through their personal Fresha account setting. Alternatively, contact Fresha Support to help review and make the change securely.