In this article
About importing your client list
Bring your existing clients into Fresha using a CSV file or your mobile contacts. Importing your client list creates a profile for each client, so they're recognised as existing clients when they book online.
Fresha also identifies duplicate client profiles that can be merged, helping you keep your client list organised.
Import your client list from a file
- From the main menu on the left of your screen, go to Clients.
- Select Clients list from the left menu panel.
- Click on the Options button in the top right and select Import clients.
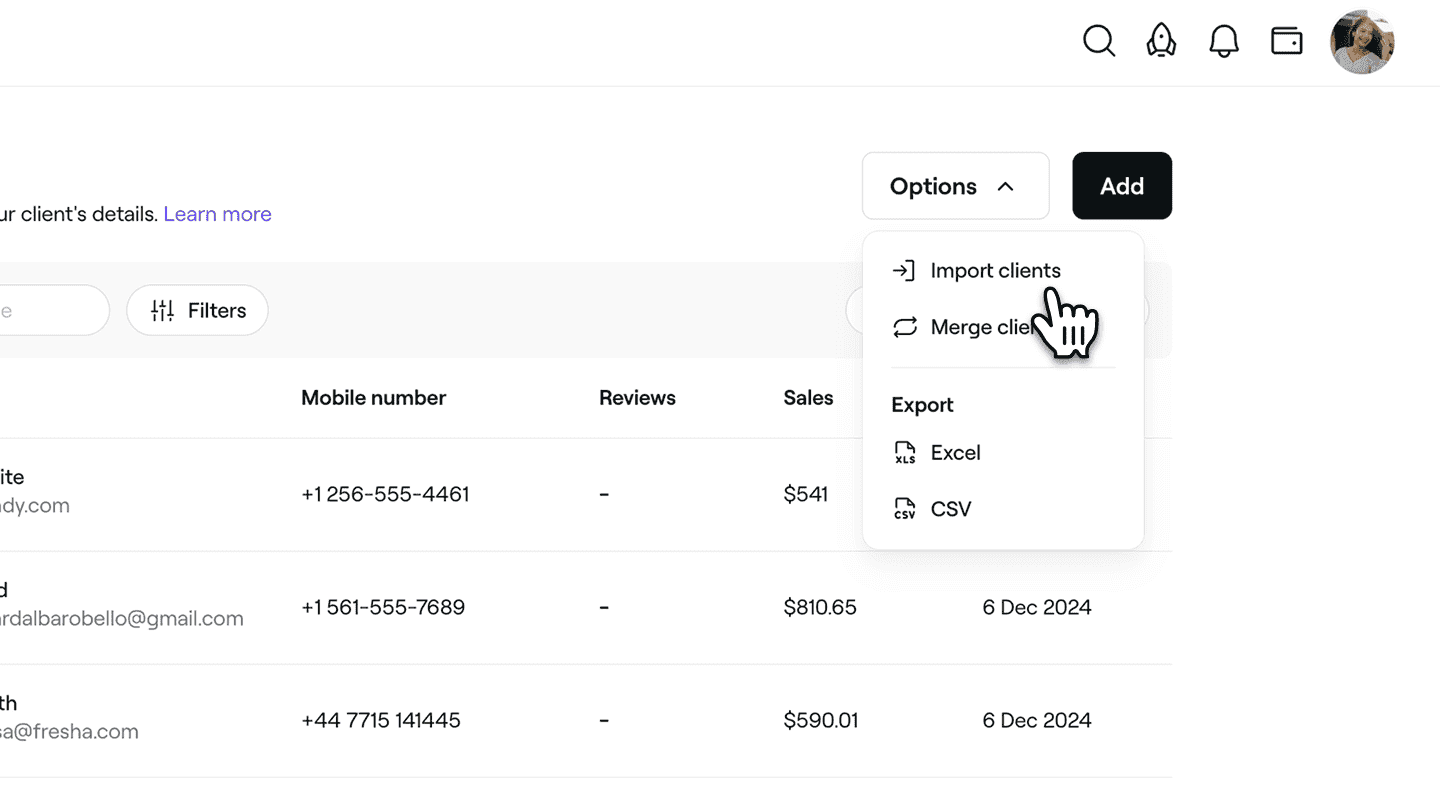
- In the Upload file step, choose one of the following options:
-
Select Upload CSV file or drag and drop the file into the box.
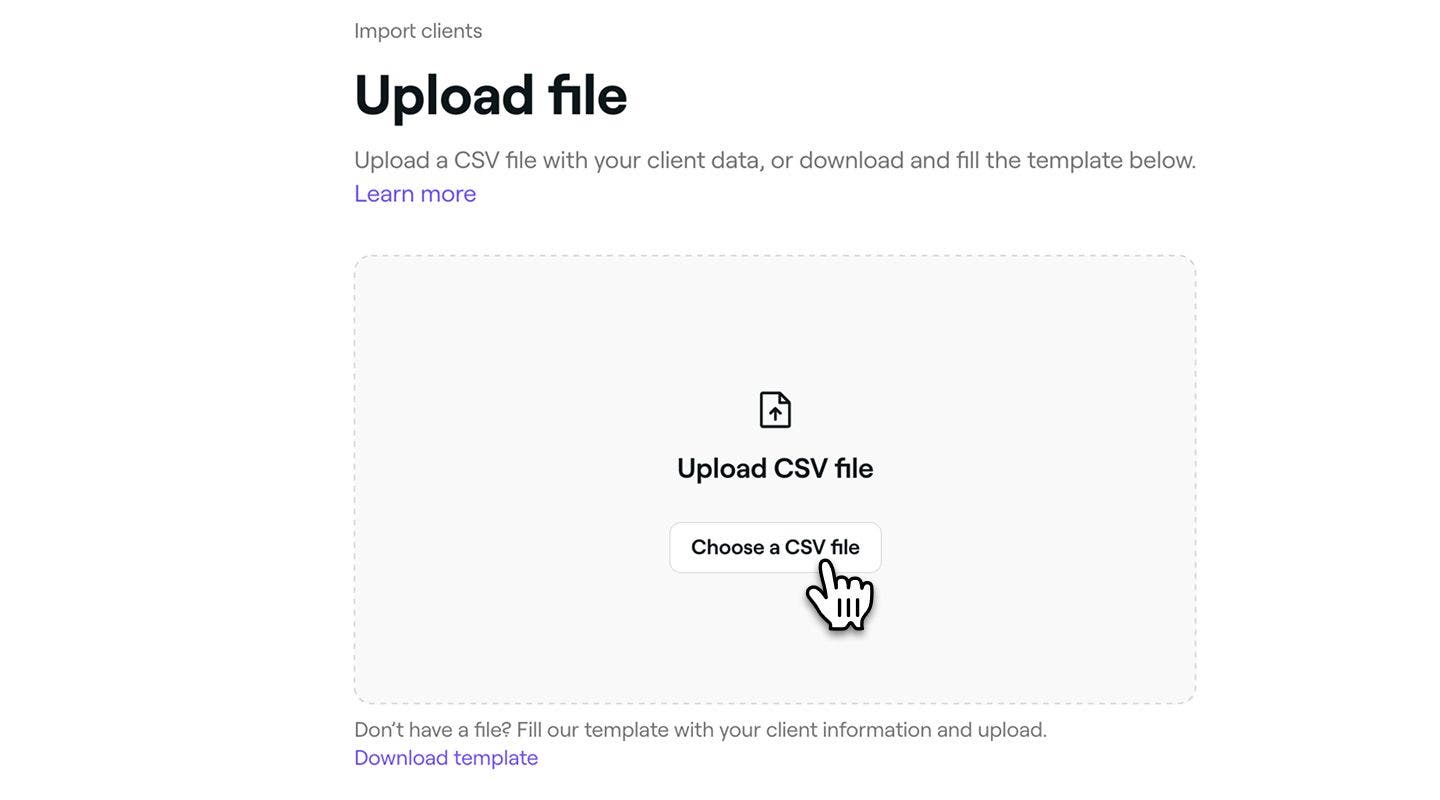
-
Download and fill in a ready-to-use template by selecting Download template.
-
- Once you've uploaded your client list, click the Next step button in the top right to continue.
- In the Review column step, make any adjustments to match your column names, then click the Next step button in the top right to continue.
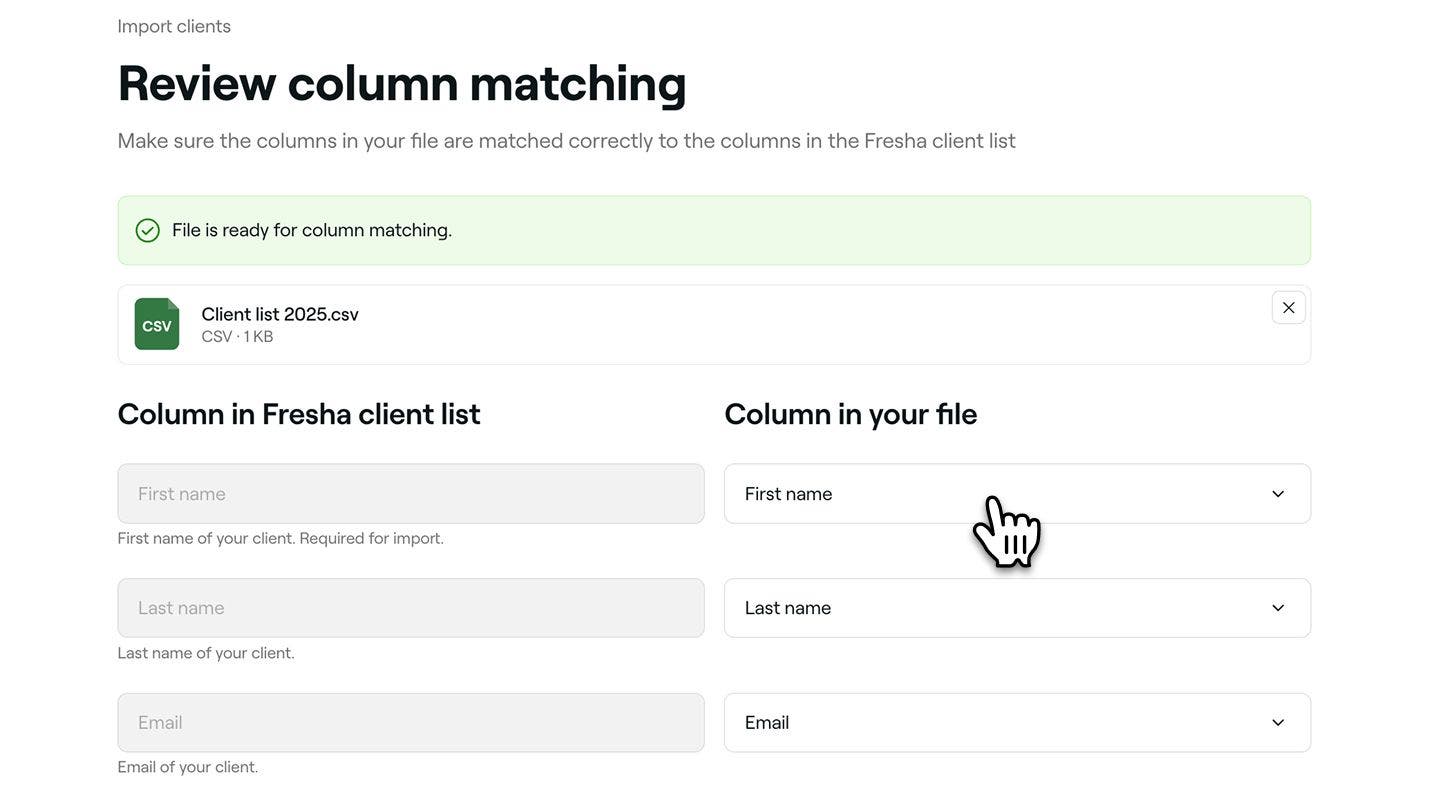
- In the Preview client list step, review the client list to ensure all details are correct.
- Click on the Start import button in the top right to begin uploading your file.
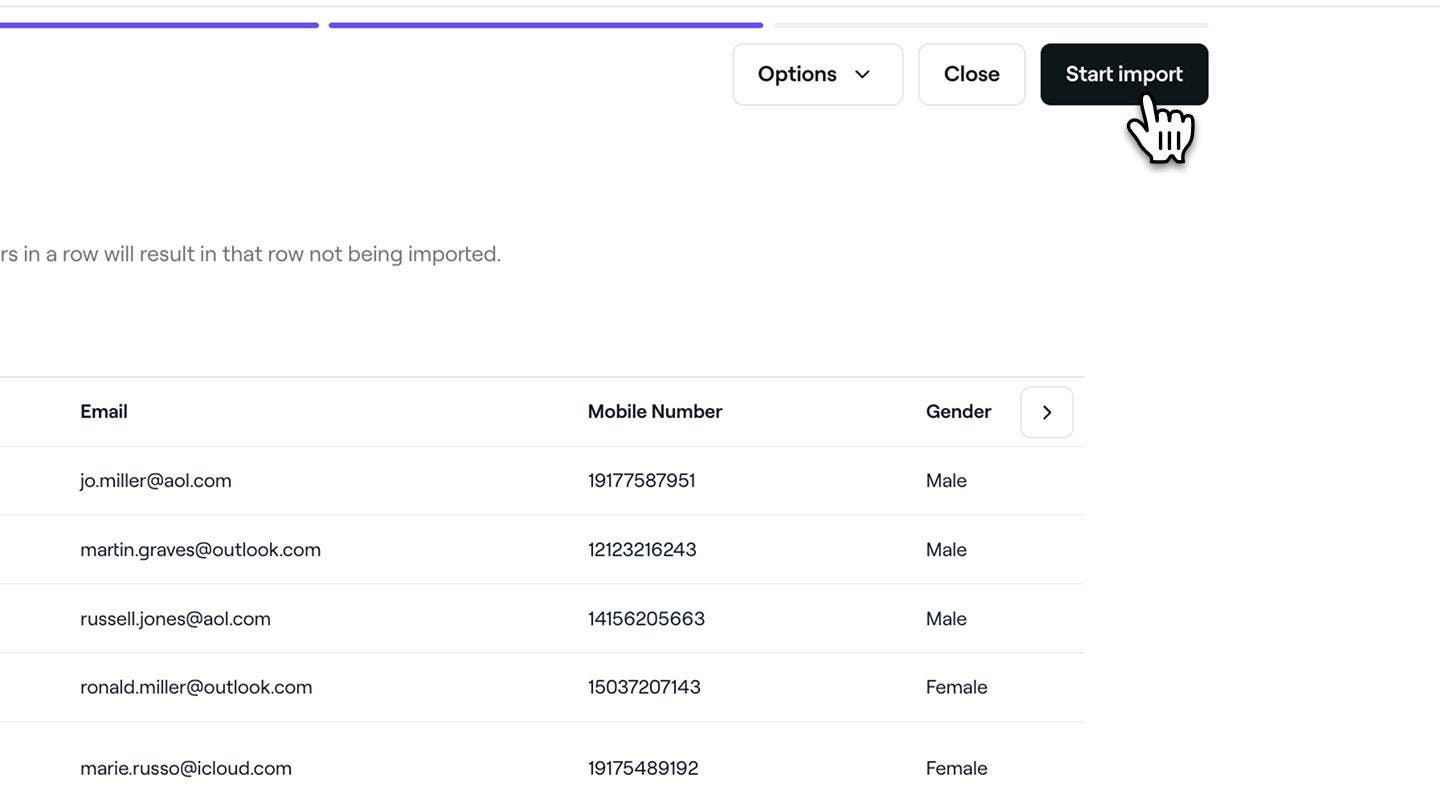
- Once imported, click on the Done button in the top right.


Once your import is complete, the clients will appear in your client list with all their details and will be recognized as existing clients.
Import clients from your mobile
- Open Clients, tap on Options (three dots) in the top right, and select Import clients.
- In the Add contacts step, select the Choose contacts button.
- If prompted, grant Fresha access to your contacts.
- In the Add contacts step, select the contacts you want to import, then tap on the Next button in the top right.
- In the Review and add step, review the contacts to ensure all details are correct.
- Select the Add contacts button at the bottom to begin importing your contacts.
- Tap on the Done button.
Client list file requirements
To upload your existing client list, the data will need to be formatted as a CSV file. If you don’t have a client list file, download our template and fill it out with the following information for each client:
- First name (mandatory)
- Last name
- Mobile phone
- Gender
- Client notes
- Birthday
We recommend including an email address and mobile phone number so your clients can receive appointment updates.
Formatting guidelines
To ensure your client list uploads correctly, follow the formatting rules below. We recommend downloading the template using the link at the bottom of the Upload file section, to make sure your columns are set up correctly.
Use a valid email format, for example:
name@gmail.com
Mobile phone
Include the full area code, for example:
+44 755 555 5555
Gender
Accepted values:
- M
- F
- Male
- Female
- Non binary
- Prefer not to say
Birthday
Enter dates in the following format:
- Most regions: DD-MM-YYYY
- United States, Panama, Philippines: MM-DD-YYYY
You can use any of the following separators between the day, month, and year:
: (For example, 01:03:2002)
/ (For example, 01/03/2002)
\ (For example, 01\03\2002)
- (For example, 01-03-2002)
. (For example, 01.03.2002)
Handling errors
Use the steps below to review and correct any errors .
Review column matching
When you reach the Review Column Matching step, make sure your CSV file columns are correctly mapped to the expected fields.
- Columns that don’t match will be ignored during import.
- Review the list carefully to ensure that all important client data is recognized.
Review import errors
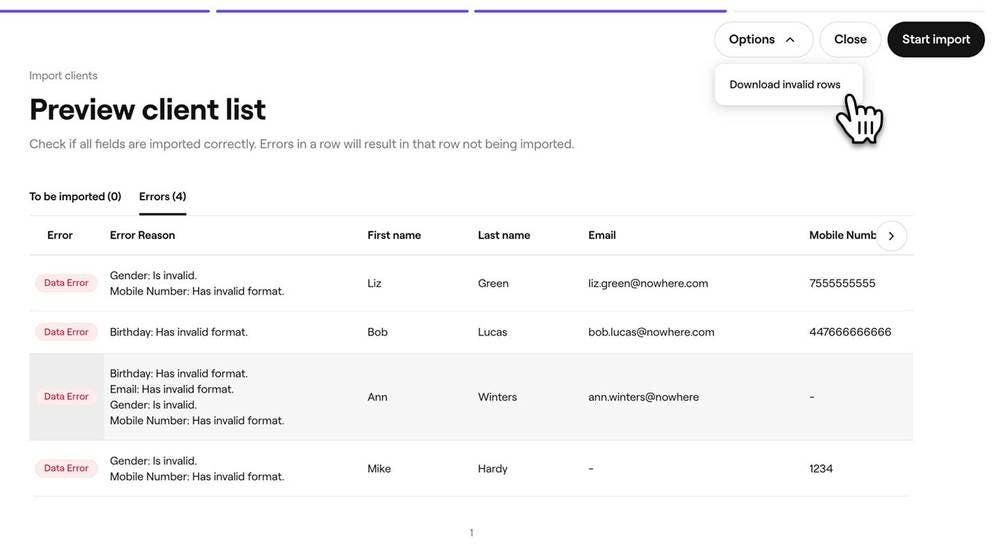
When you reach the Preview client list step, all detected errors will appear in the Errors tab. The number in brackets shows how many rows contain issues.
Each issue appears in the Error Reason column for its row. Use the arrow on the left of the table to scroll through the results and view all columns.
We recommend downloading the list of invalid rows using the Download invalid rows option from the Options menu at the top-right of your screen. You can then correct those rows in your CSV file and re-upload them as a sub-set.
Handling duplicates
Fresha automatically checks for duplicate entries based on email addresses and phone numbers. If two clients share the same email or phone number, they will be flagged as duplicates. Names are not used to detect duplicates, as multiple clients may have the same name.
See examples of duplicates below:
| Name | Email address | Mobile Number |
|---|---|---|
| John Smith | johnsmith@example.com | +44 113 496 0000 |
| John Smith | johnsmith@example.com | NA |
| Name | Email address | Mobile Number |
|---|---|---|
| John Smith | johnsmith@example.com | NA |
| John Smith | johnsmith@example.com | NA |
| Name | Email address | Mobile number |
|---|---|---|
| John Smith | johnsmith@example.com | +44 113 496 0000 |
| Jonny Smith | NA | +44 113 496 0000 |
See the example of non-duplicates below:
| Name | Email address | Mobile number |
|---|---|---|
| John Smith | NA | +44 113 496 0000 |
| John Smith | johnsmith@example.com | NA |
FAQs
Fresha will highlight any errors found in your file to help you correct them quickly. You can download a version with the issues by clicking on the Options button in the Preview client list step, make the changes, and upload it again.
Importing your existing clients’ contact details before going live on the Marketplace ensures they’re recognised as returning clients. This helps you prevent being charged a Marketplace New Client Fee when they book online through Fresha.
You can exit the process to review your file format and try again. Use the preview screen to check that the columns match correctly. If some entries still cannot be uploaded, you can manually add those clients afterward.
If you've uploaded an incorrect client list, you can delete your clients in bulk to remove those clients from your workspace. Once deleted, you can re-upload the correct file.