Create a basic form template
In this guide, you’ll learn how to build customizable forms that help you collect important client details before or during appointments.
How forms work
There are two types of consultation forms you can create and link to appointments or client profiles, automatic and manual. Automatic forms are attached to specific services and are sent to clients ahead of their appointment. Manual forms can be added to any appointment or client profile as needed. Once a form is created and activated, you can control how and when it’s shared with clients.
If a client hasn’t completed a form before their appointment, you can send a reminder or have them complete it in-store.
Create a basic form template
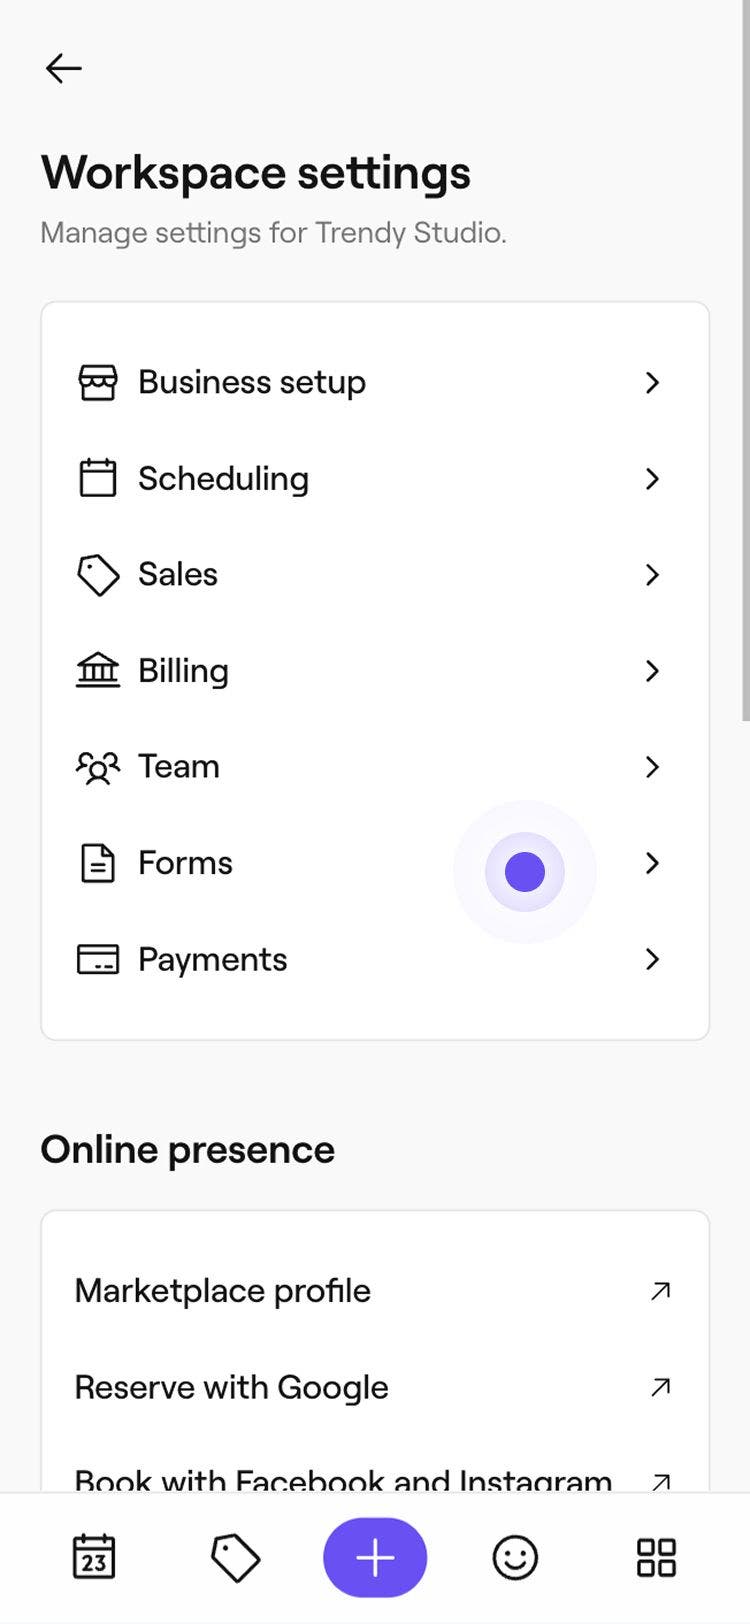
- From the menu on the left of your screen, go to Settings.

- Select the Forms category to access your form templates.
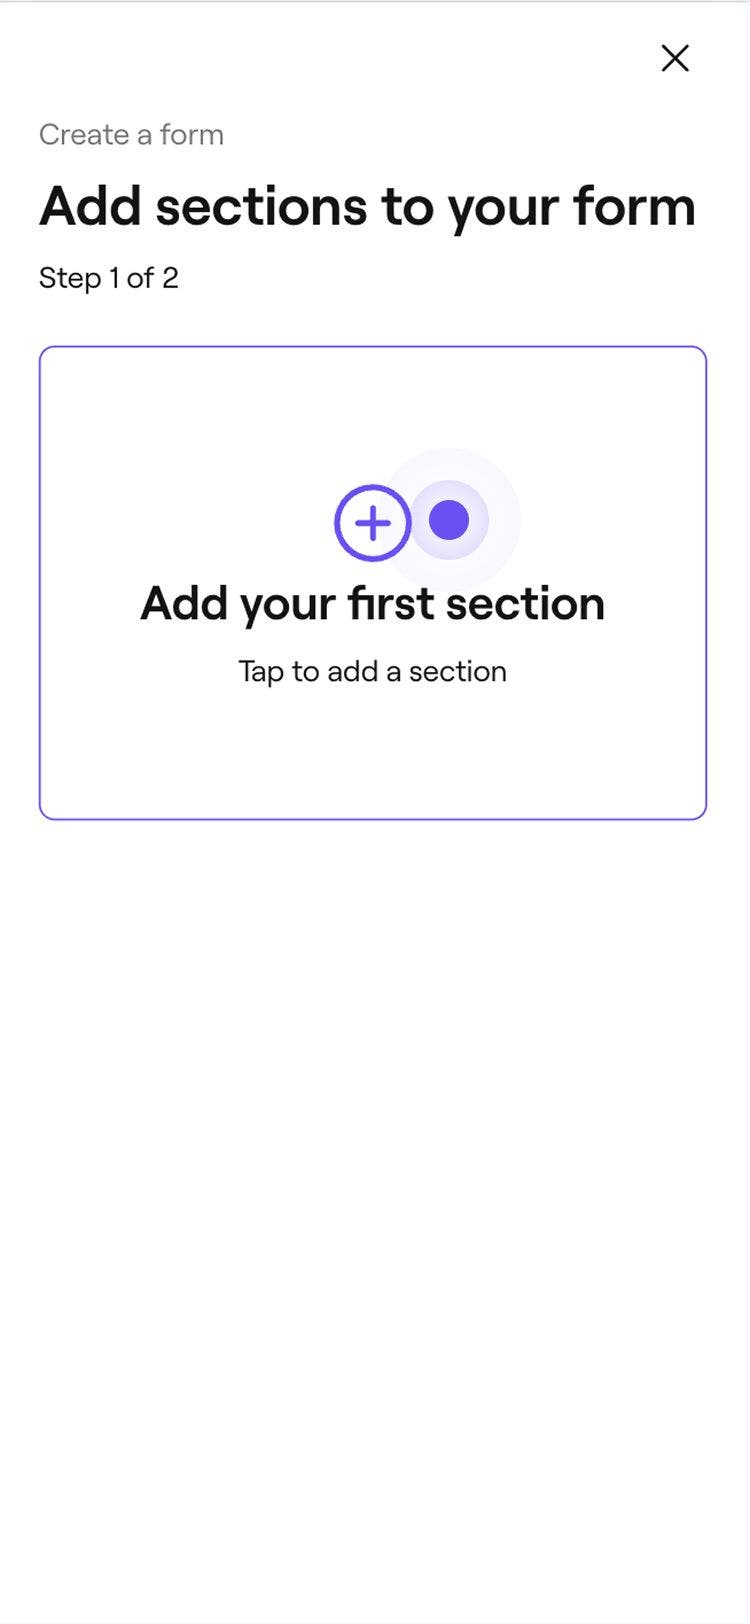
- Click on the Add button in the top right to create a new form.

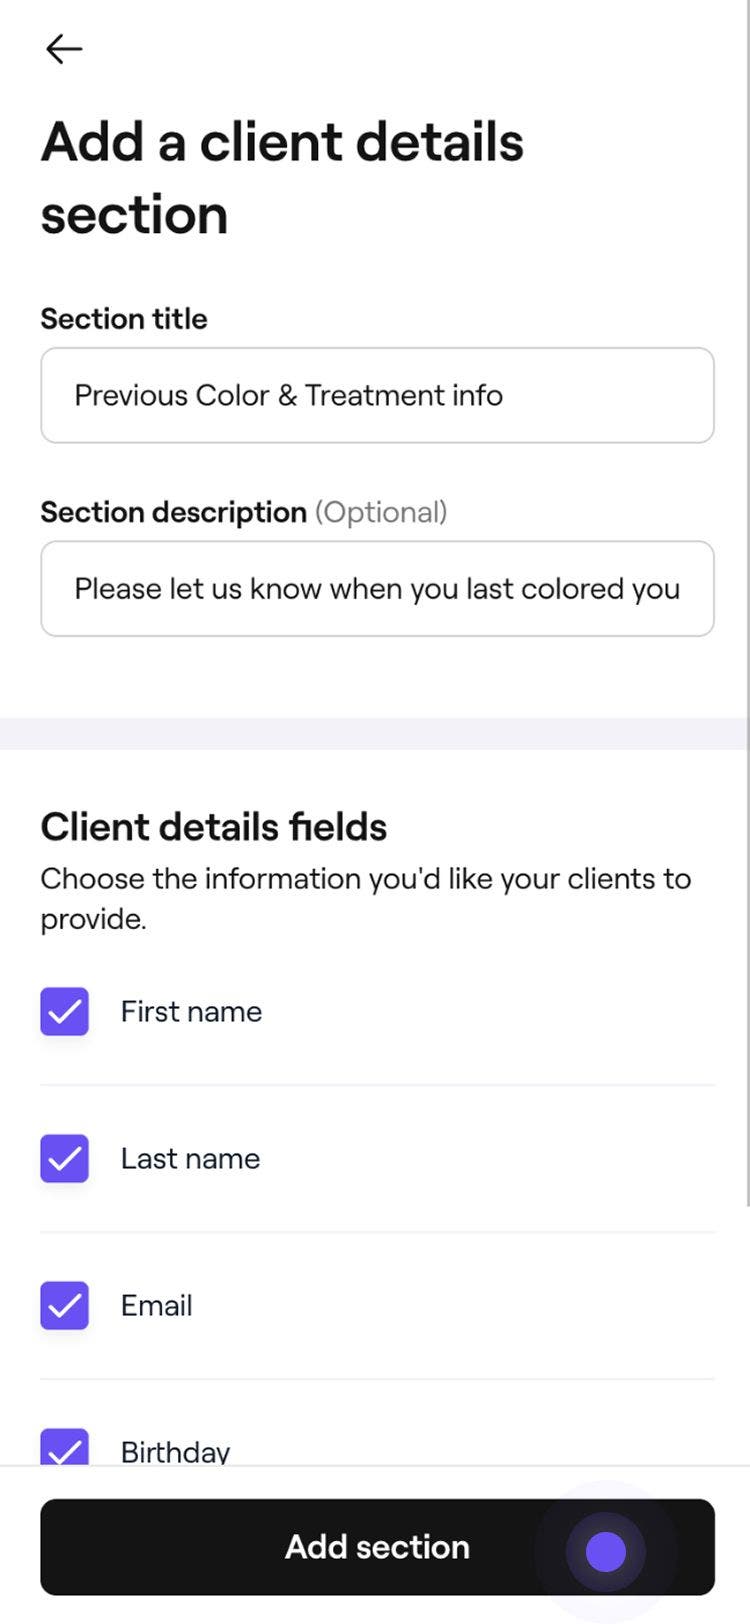
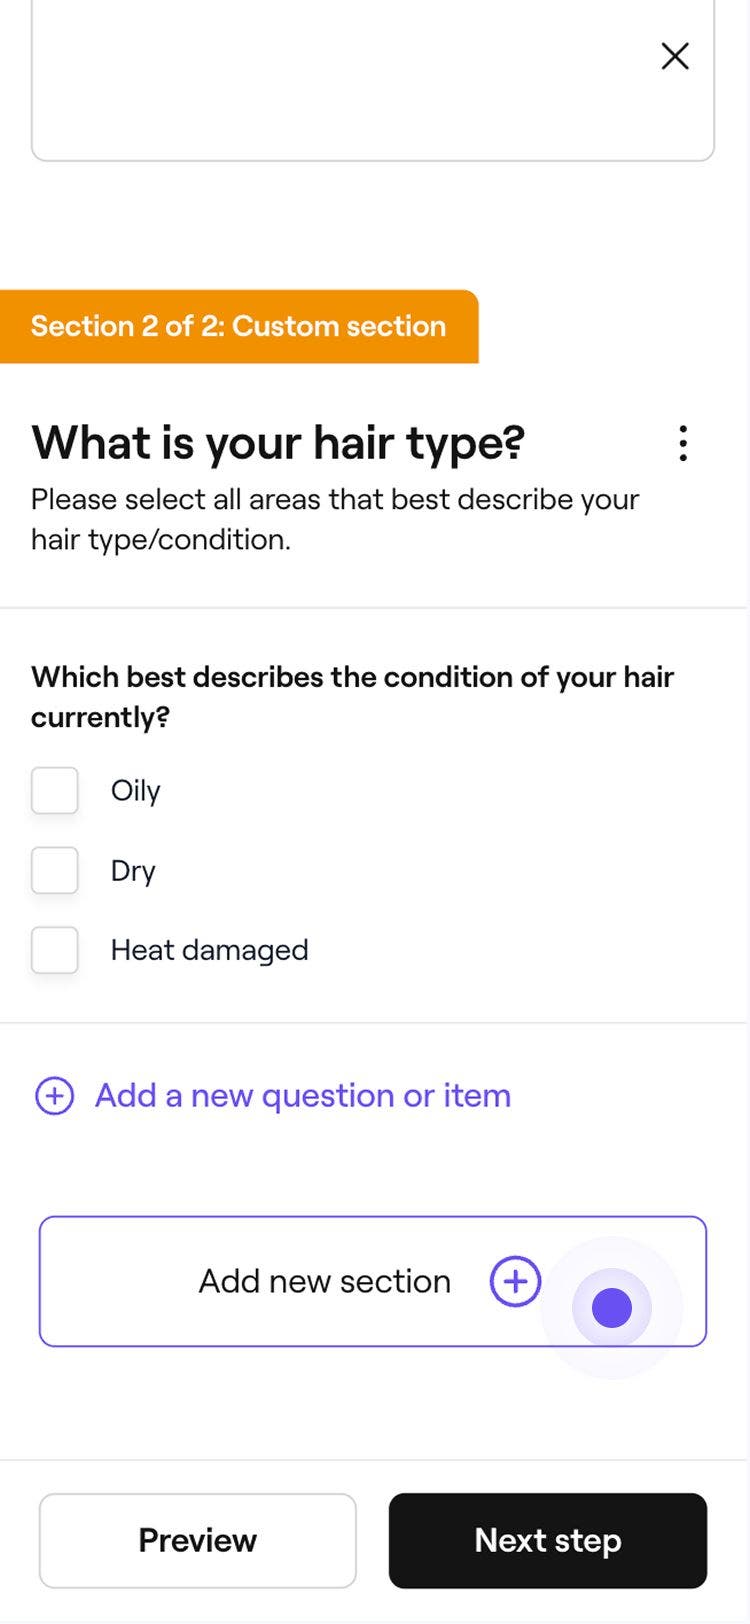
- In the Add sections step, select Client details from the menu on the left.

- In the pop-up, add a title, description, and select the pre-defined details you want your clients to provide.

- You can also add a custom section to the form.
- Click on the Add section button. Your new section will appear in the form builder.
- To add another section, click on the Add section button at the bottom. Select the Preview tab at the top to see how your form will look.

- To add another section, click on the Add section button at the bottom. Select the Preview tab at the top to see how your form will look.
- Click on the Next step button in the top right to add details to the form.

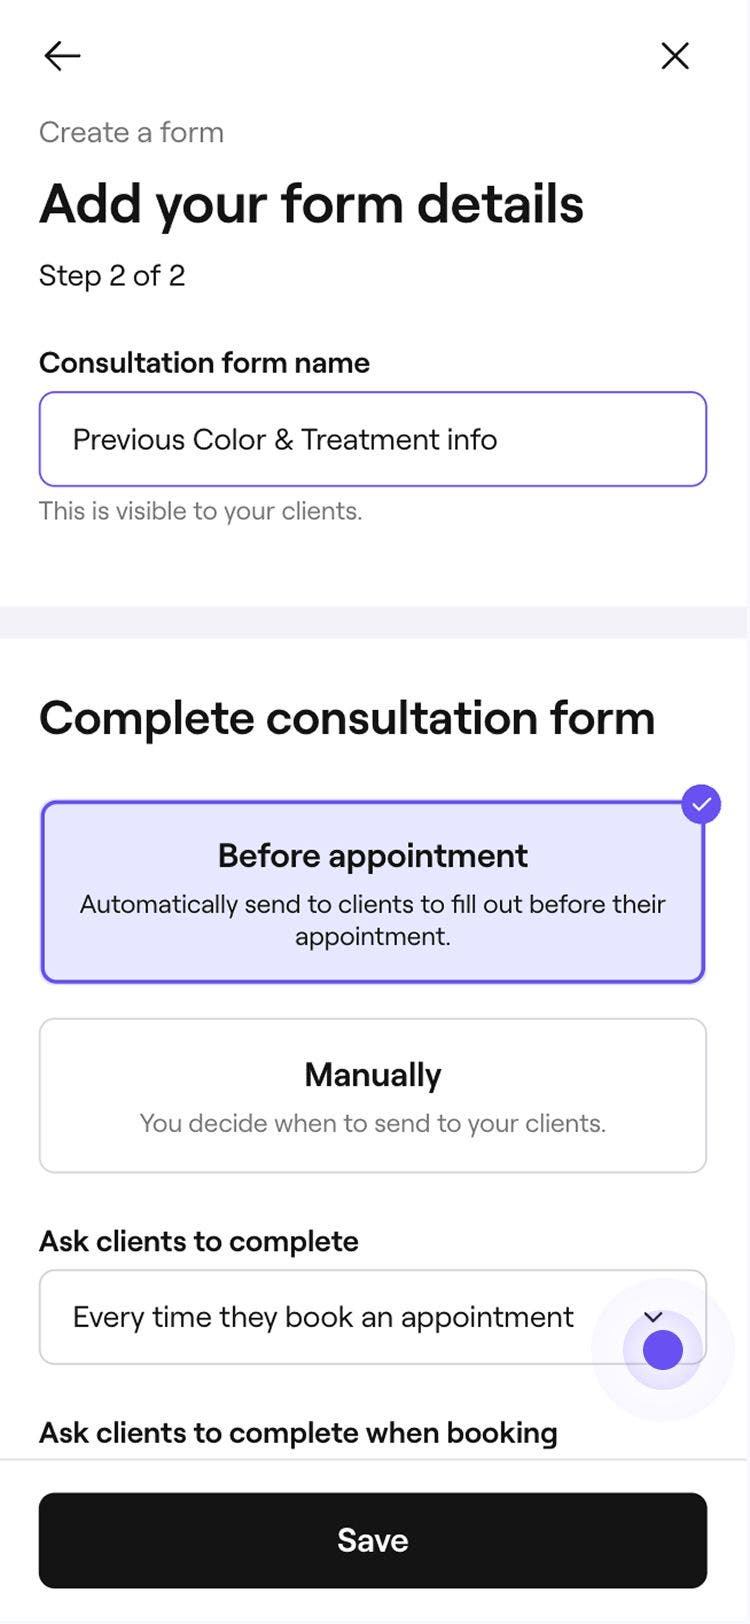
- In the left panel of the form details step, enter the form name as seen by clients. The right panel shows a preview of how the form appears to them.
- Under the left panel, choose how you want your form to be sent:
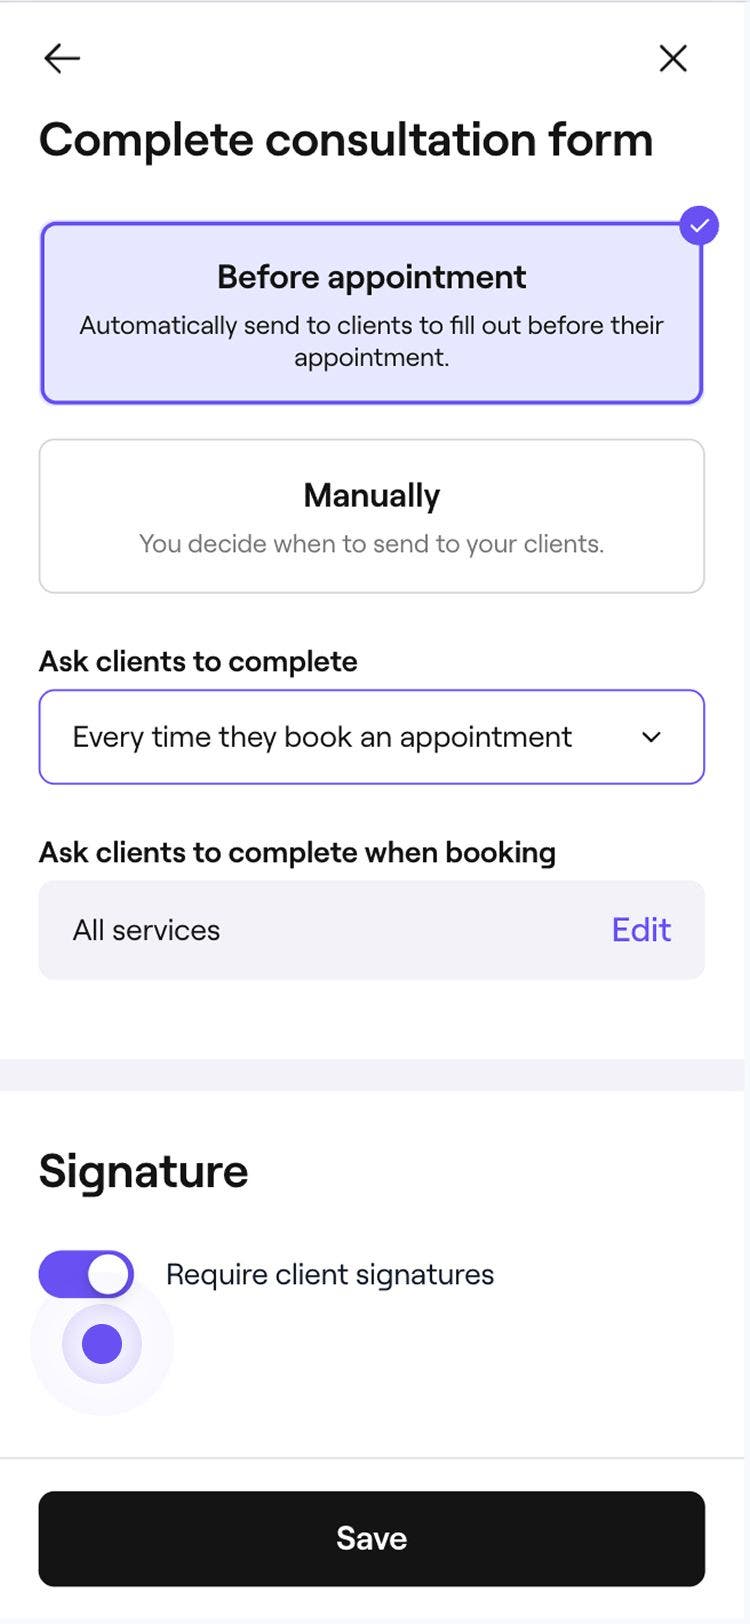
- Before appointment: Set the form to send automatically when an appointment is booked. Choose if clients complete it every time or only once. To customize the services enabled for the form, click Edit.
- Manually: Choose when to send your clients the form by adding it to their appointment.

- Choose whether a signature is required when clients are filling out the form.

- Click on the Save button in the top right to create the form.
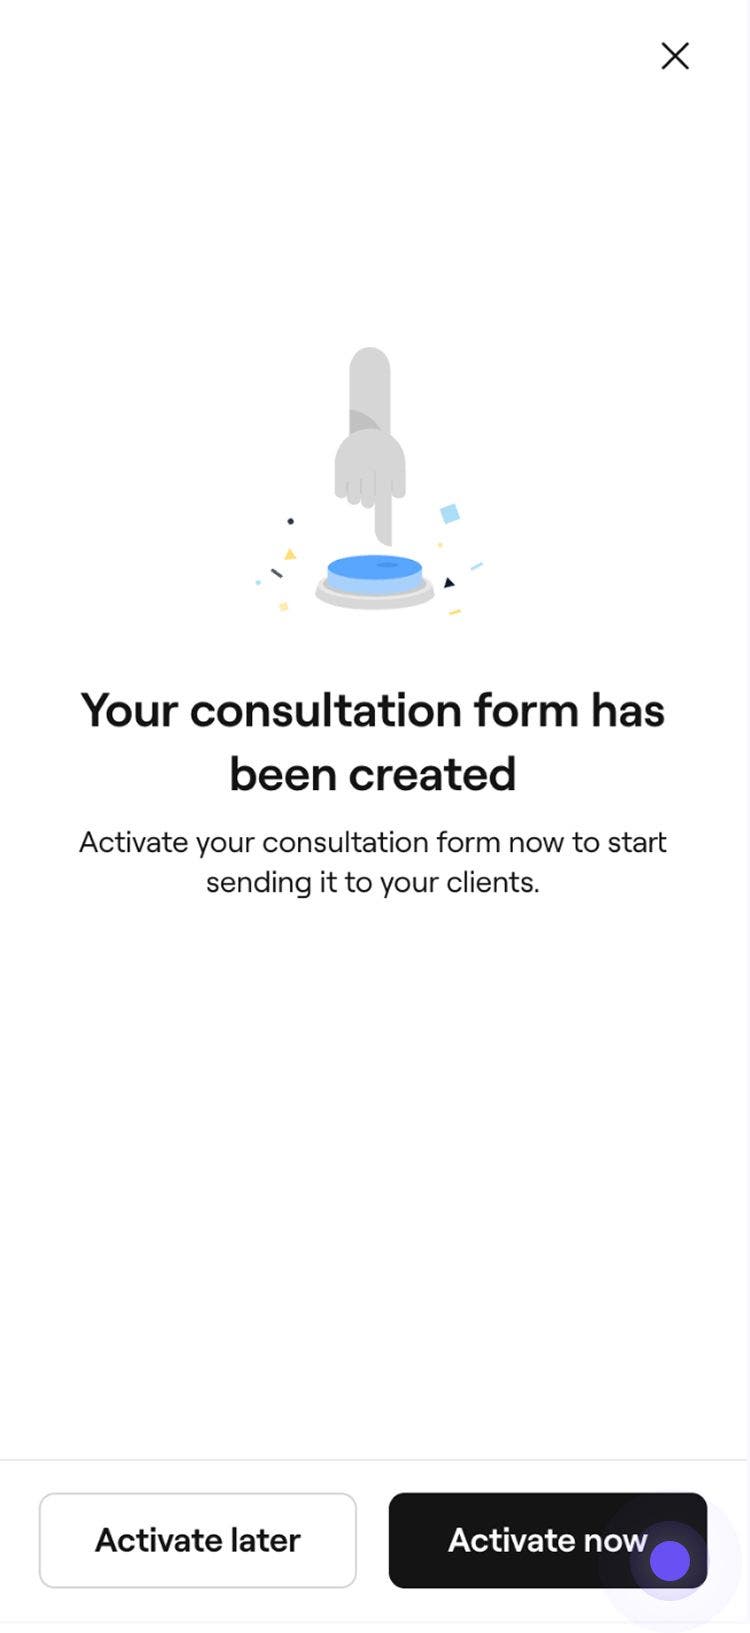
- Choose when to activate your form from the following:
Activate later: The form can't be sent to clients until it's activated. Activate now: The form is ready to be sent to clients. If you’ve set it to send automatically, clients will begin receiving notifications to complete the form. To include clients with upcoming appointments, tick the checkbox, then select Activate.

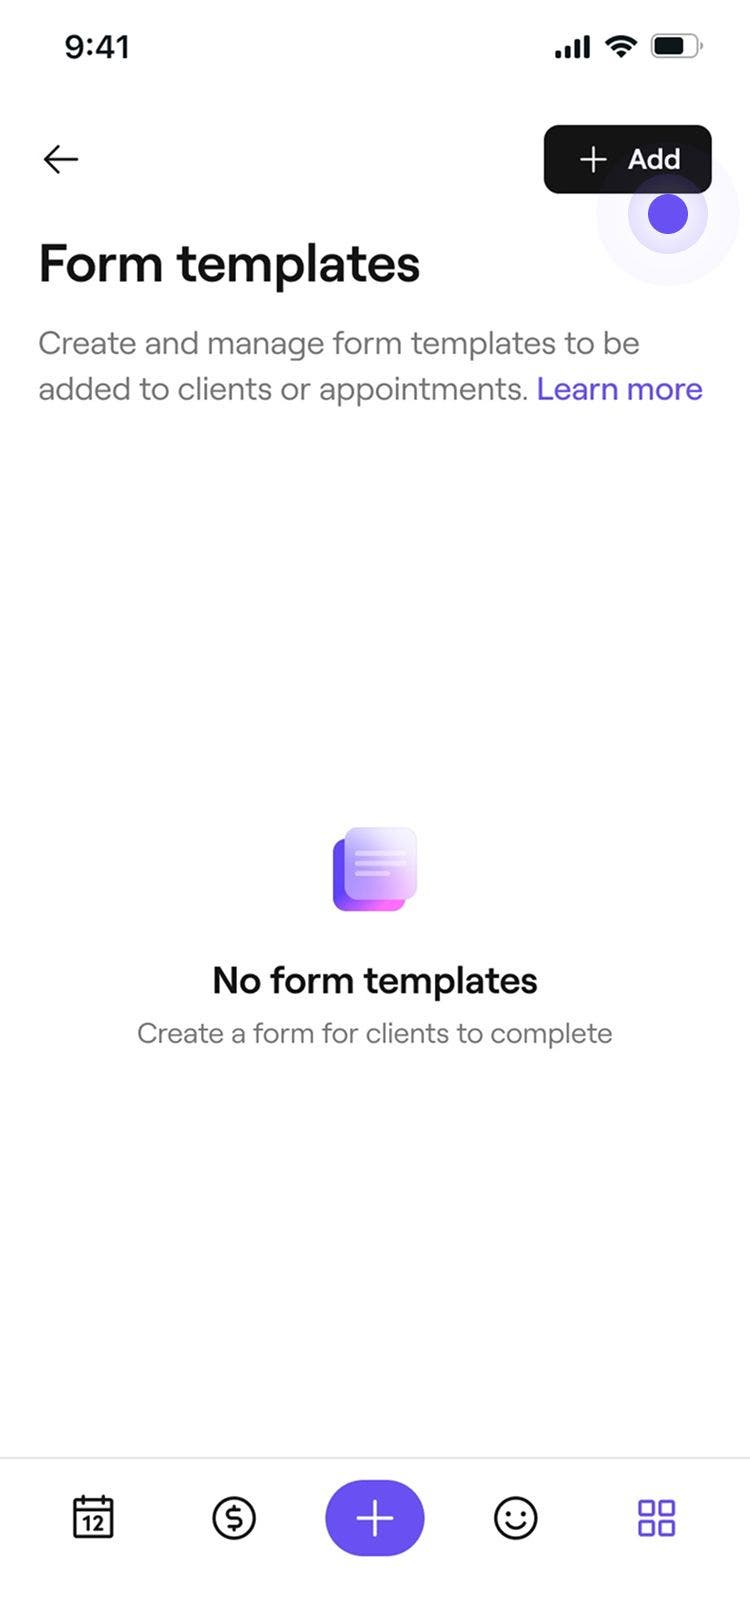

Once the template is saved, it appears in your list of forms.
The Client details section of your forms will be filled in automatically using the personal data that has been saved under the client’s profile.
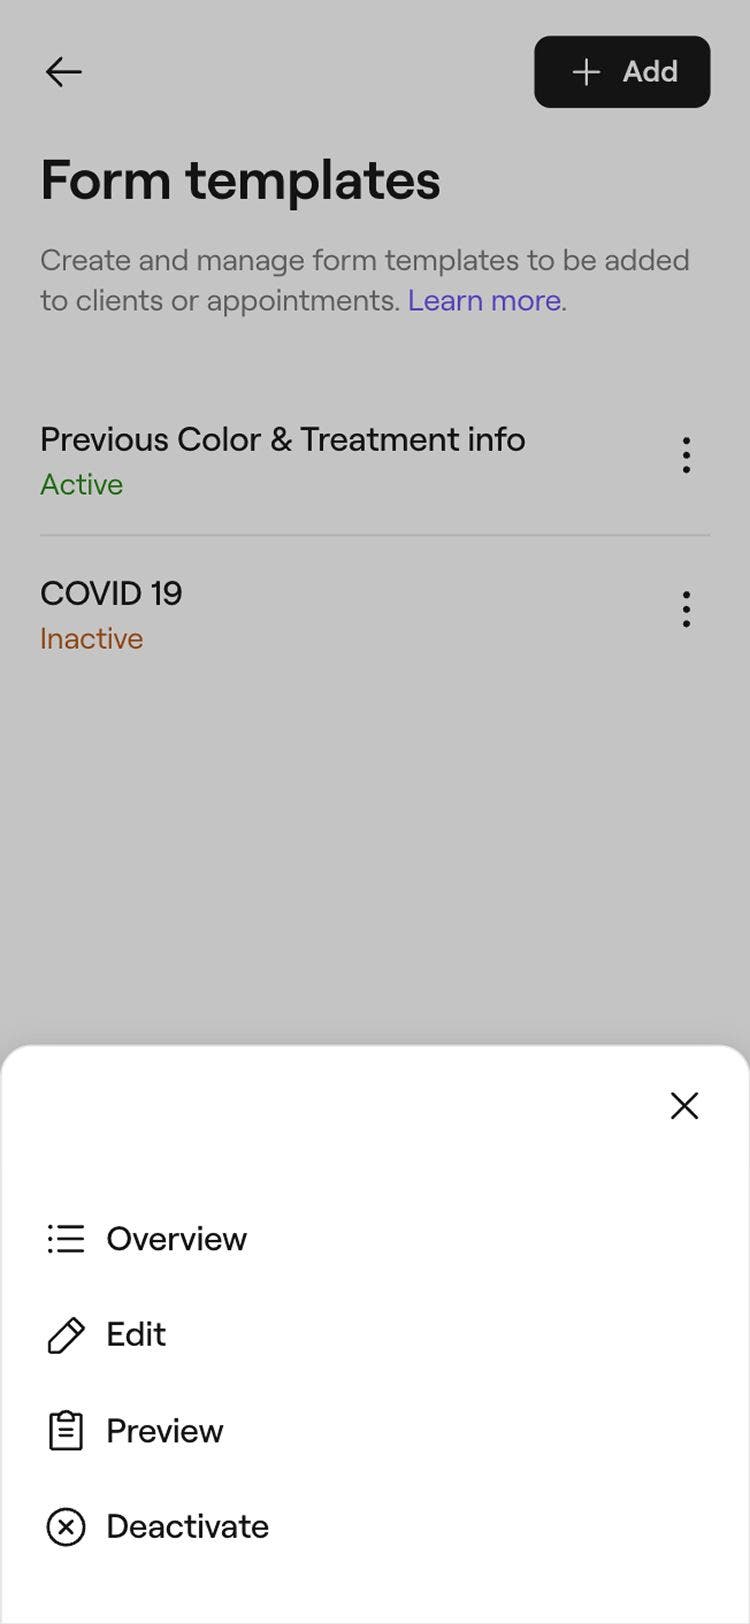
Manage form templates
- Open Forms from Settings.
- Click on the Actions button next to the form and select one of the following:

- Overview: View a summary of form activity, client form requests, and consultation form details.
- Edit: Make changes to the form’s sections, questions, or title.
- Preview: See how the form will appear to clients before activating it.
- Deactivate: Disable the form to stop it from being sent or manually added.
- Activate (only visible when form is deactivated): Enable the form to send automatically at booking or add manually to appointments and profiles.
FAQs
Forms are sent automatically when enabled and linked to a service at the time of booking. Forms added afterward are included in the client’s reminder as long as the service requires one.
Forms cannot be deleted. Instead, you can deactivate the form.
Deactivated forms will no longer be sent automatically and will need to be manually re-added if needed again. Any uncompleted draft forms will be removed, and their content will no longer be saved.
Updates to a form template won’t override forms that have already been signed by clients. This preserves the integrity of completed forms.