Send sale receipts to clients
In this guide, you’ll learn how to email and print receipts for your clients after completing a sale or checking out an appointment.
-
Open a completed sale.
-
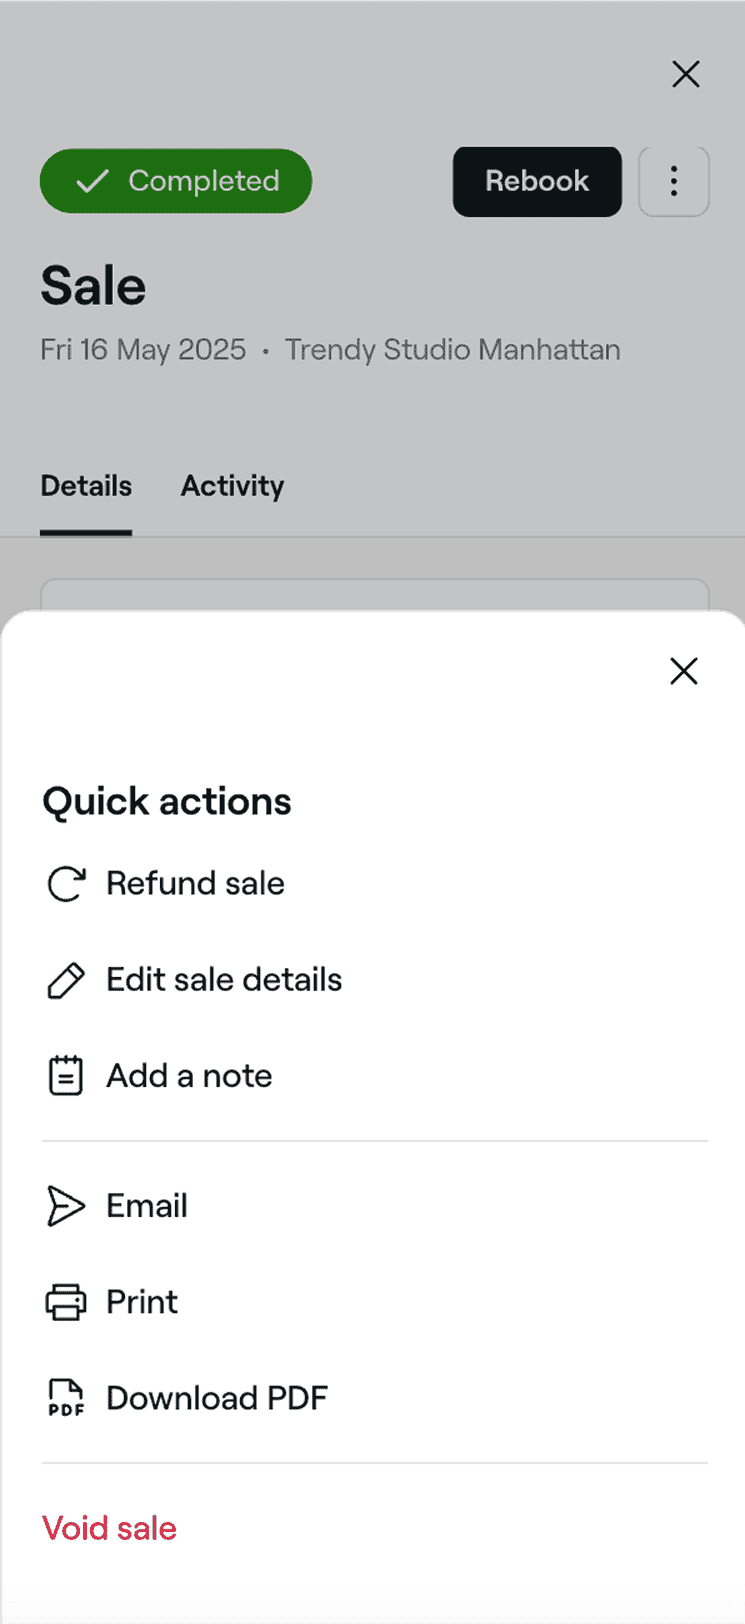
From the sale view, click Actions (three dots) in the top right.

-
Select one of the following options from the panel:
- Email: Send a digital copy to the client’s email. In the pop-up, you can update the recipient address before clicking Send.
- Print: Generate a printable copy of the receipt. In the pop-up, review your printer settings and continue through to print.
- Download PDF: Save a copy of the receipt to your device. A PDF will be automatically downloaded when selected.
Once sent or printed, the receipt will include all key sale details, such as the sale ID, client and business information, items purchased, discounts, tax, total paid, and the payment method.
FAQs
- Check the paper size: Make sure your settings match the size of your receipt paper.
- Turn off headers and footers: Uncheck 'headers & footers' in your print settings to remove unnecessary blank space.
- As long as your printer is compatible with your device running Fresha (either through an app or browser), it should work seamlessly for printing.
- Cash drawers typically connect via USB to the main computer and open automatically when a receipt is printed.
If your thermal printer is using more paper than expected or leaving large white spaces at the end of receipts, try adjusting your print settings on your device. We recommend:
Fresha can be accessed from any web-connected device and is compatible with a wide range of devices. To connect a printer or cash drawer, Fresha’s software doesn’t need any special hardware, except for the mPoP printer, which isn’t compatible with Fresha. For example: