Manage report access for team members
In this guide, you’ll learn how to control access to your business reports by setting custom permission levels for your team members, ensuring your data is secure and only shared with the right people.
In this article
How report permissions work
To view reporting, a team member must be granted a permission level that has been enabled to access reporting in your workspace permission settings.
Once a team member has reporting access, you can customize their permissions for each report, ensuring your data remains secure and available only to those who need it.
Reporting offers 4 levels of access that can be granted to team members:
- Full access:
Can edit reports and share them with others. - Can edit:
Can edit reports but cannot share them with others. - View only:
Can view reports but cannot edit or share them. - No access:
Cannot access or view reports.
Enable report access for team members
Grant team members access to specific reports by allocating the correct permissions for each individual.
- From the main menu on the left of your screen, go to Settings.
- Click on the Team category to access permission settings.

- In the left menu panel, select Permissions to define permission levels for your workspace.

- Scroll down to Reports to set the levels of permission for reports:
- Access reporting:
Enabled: If ticked, team members with that permission level can access your standard reports.
Disabled: If unticked, the team member under that permission level cannot access any reports. - Access reporting & insights:
Enabled: If ticked, the team member under that permission level can access both custom and standard reports.
Disabled: If unticked, the team member under that permission level cannot access newly created custom reports, but they can still view existing reports or any created before this setting was disabled.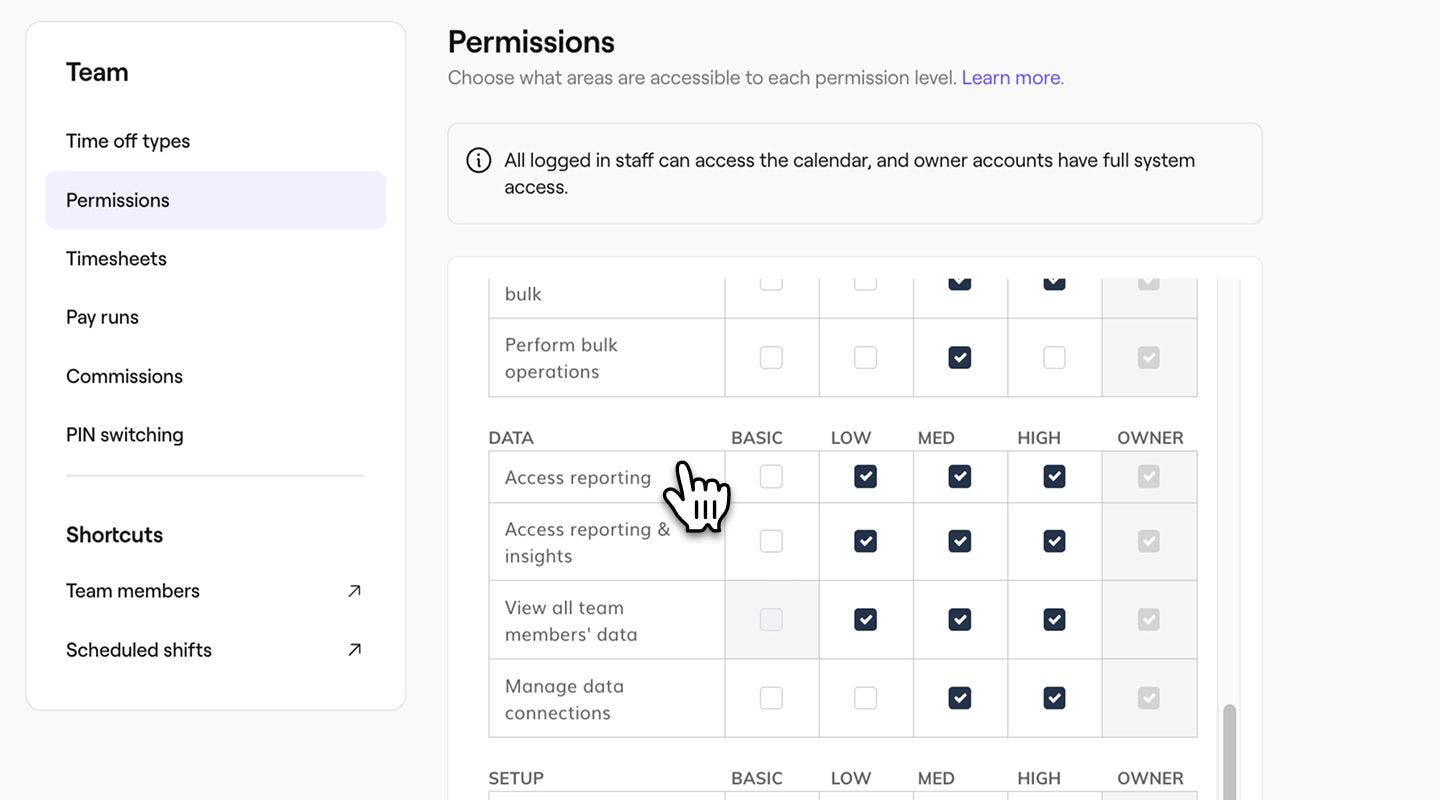
If a permission level is left unticked, team members with that level will have no access to reporting and cannot be shared reports.
Share reports with team members
Share reports with specific team members, using the access levels so your data is always in the right hands.
- From the main menu on the left of your screen, go to Reports.
- Use the search bar at the top to enter the name or description of the report and click to open the report.

- Click on the Options button in the top right of your screen and then select Share.

- In the pop-up, use the search bar at the top to search by the team members or group names.

- Click on the access level button (for example, "View only") next to the team member's name, and select the access level you want to provide from the options listed:
- Full access:
Can edit and share with others. - Can edit:
Can edit but not share with others. - View only:
Cannot edit or share with others, but can view. - No access:
Cannot access or view.
- Full access:
- The permission level will automatically save once selected.
Once you share access with a team member, the report will appear in their Reports, with the functionalities you’ve granted.
Team members set to No access in their profile will not appear as options when sharing reports.
FAQs
To share a specific report folder with a team member, open the folder in Reports, click on the Share button in the top right, and select the team member you want to give access to.
Team members with a No access permission level cannot receive reports in Fresha. However, you can export the report and share it with them manually.
Pricing for all of Fresha's add-ons, including Insights, is available on our pricing page.