HomeKnowledge baseFresha academy
Manage your merchant account
Back
  1. Knowledge base•
  2. Personal account•
  3. Manage your merchant account

Manage your merchant account

Learn how to keep your merchant account details up to date and manage your information in Fresha.

In this article

  • Disconnect your merchant agreement from a workspace
  • Update your payment method and billing details for your merchant account
  • Download your fees for your merchant account

Disconnect your merchant agreement from a workspace

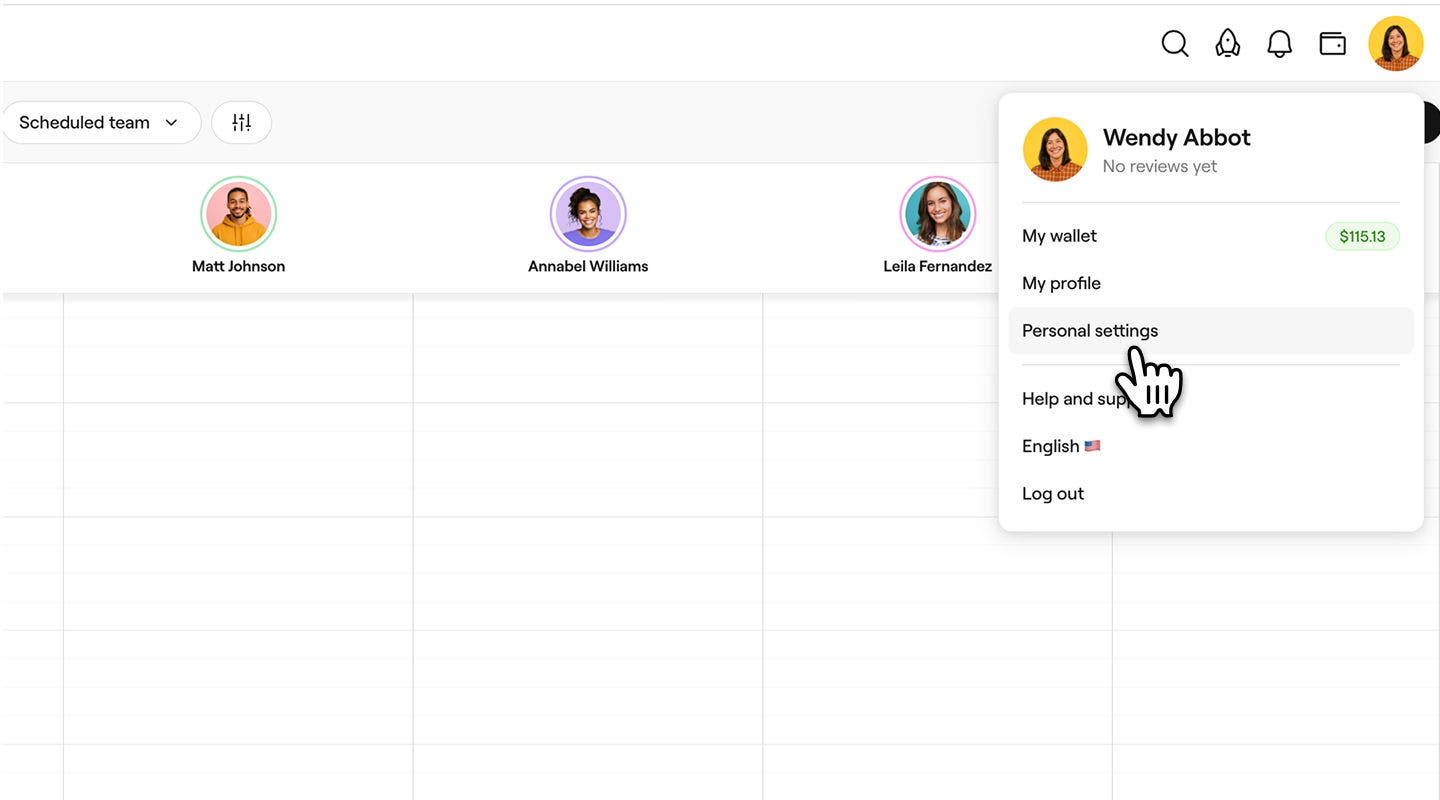
  1. From the toolbar on the top right of your screen, click on your Profile picture and select Personal settings from the panel.
    personal_Setting_web_1.jpg
  2. In the left menu panel, select Workspaces.
    disconnect_agreement_web_2.jpg
  3. Click on Manage next to your workspace to open your merchant settings.
    disconnect_agreement_web_3.jpg
  4. Under Merchant agreement, click Manage, then select Disconnect merchant account to remove your current agreement.
    disconnect_agreement_web_4.jpg
  5. In the pop-up, click on Disconnect to confirm.
  1. From the toolbar on the top right of your device, tap on your Profile picture and select Workspaces.
  2. Select Manage under your workspace to open your merchant settings.
  3. Under Merchant agreement, tap on Manage, then select Disconnect merchant account to remove your current merchant agreement.
  4. In the pop-up, click on Disconnect to confirm.

Once disconnected, the merchant agreement becomes inactive, and payments from clients are directed to your workspace wallet instead of your merchant wallet.

Update your payment method and billing details for your merchant account

Keeping your payment method and billing details up to date allows Fresha to process refunds and fees correctly, helping you maintain accurate records and smooth financial reporting.

  1. From the toolbar on the top right of your screen, click on your Profile picture and select Personal settings from the panel.
    personal_Setting_web_1.jpg
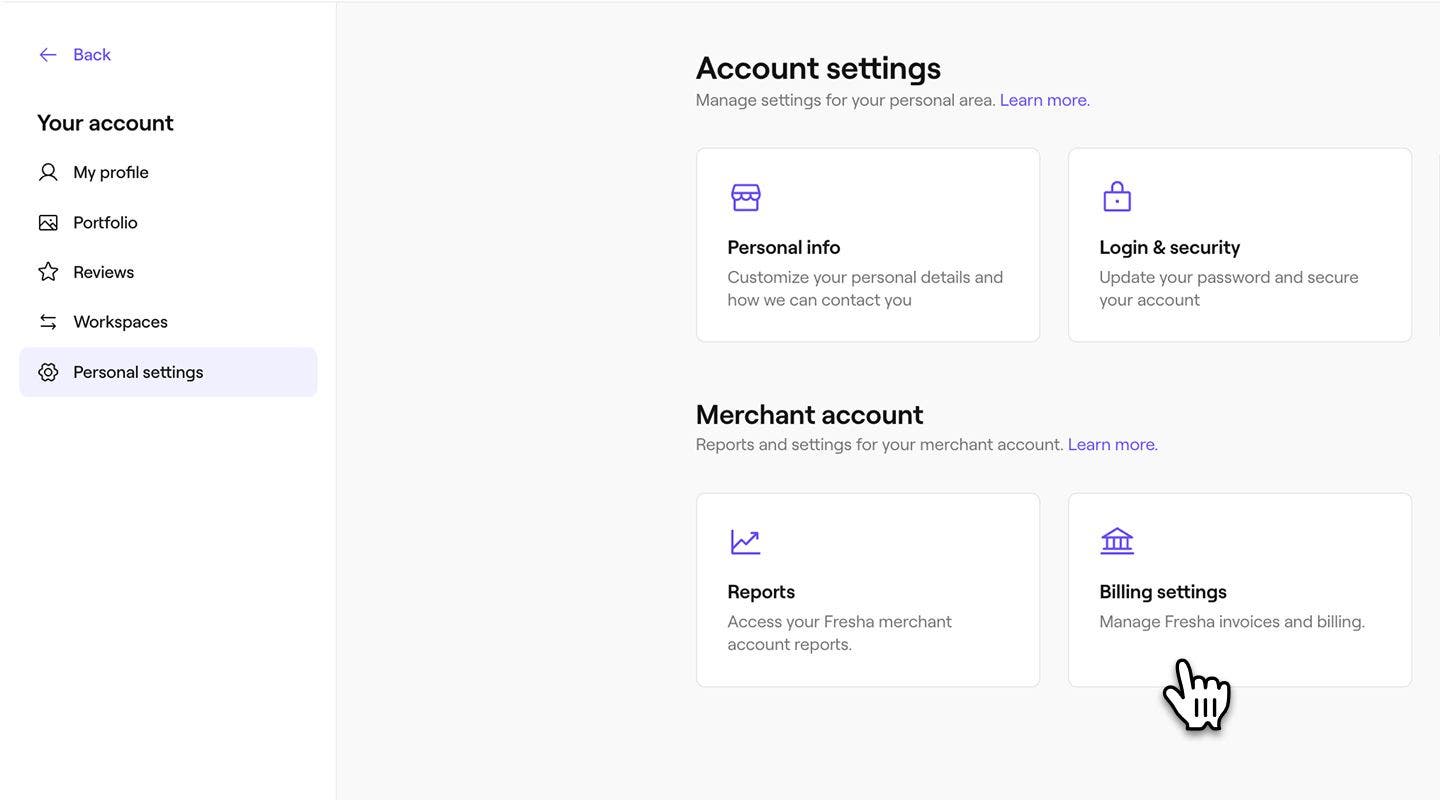
  2. Under Merchant account, click on Billing settings.
    update_payment_method_web_2.jpg
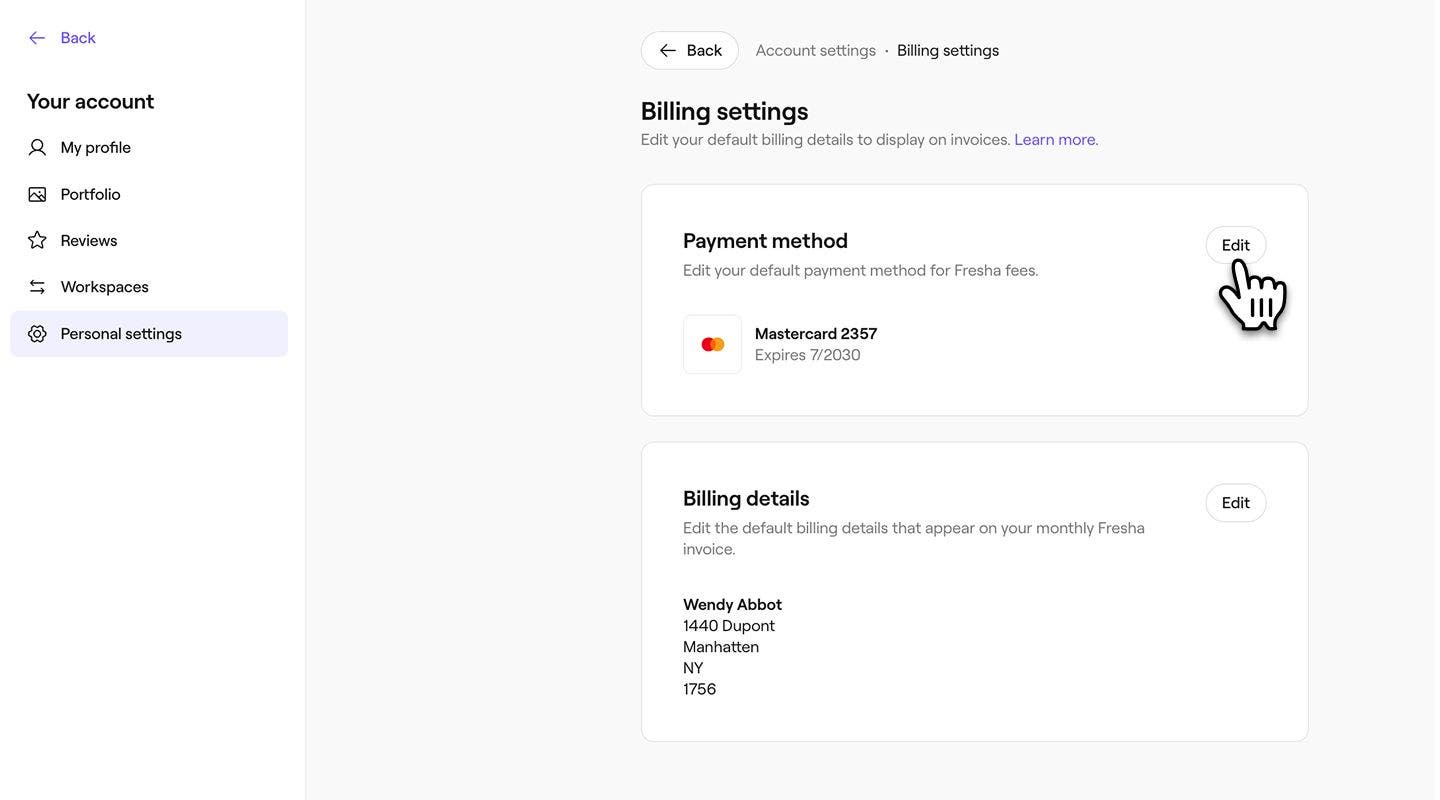
  3. Click on Edit next to one of the following to update your details:
    1. Payment method: Update your default payment method for Fresha fees.
    2. Billing details: Update your billing details that appear on your monthly Fresha invoice.
      update_payment_method_web_3.jpg
  1. From the toolbar on the top right of your device, tap on your Profile picture and select Personal settings.
  2. Under Merchant account, tap on Billing settings.
  3. Tap on Edit next to one of the following to update your details:
    1. Payment method: Update your default payment method for Fresha fees.
    2. Billing details: Update your billing details that appear on your monthly Fresha invoice.

Once updated, your new payment method and billing details are saved to your merchant account and will be used for future Fresha fee payments related to your merchant activity.

Download your fees for your merchant account

You can download detailed reports of your Fresha fees to keep track of your charges and invoices. This helps you stay organised and ensures full visibility of your merchant activity.

  1. From the toolbar on the top right of your screen, click on your Profile picture and select Personal settings from the panel.
    personal_Setting_web_1.jpg
  2. Click on Reports to view fresha merchant reports.
    download_fees_web_2.jpg
  3. Click on the View button next to Fees to view a history of your Fresha fees.
    download_fees_web_3.jpg
  4. Click the download icon next to either of the following to save the data to your device:
    1. Fresha Fee activity: Detailed breakdown of all paid feature charges, updated continuously throughout the month.
    2. Invoice: Finalised summary of all paid feature charges, generated at the beginning of each month.
      download_fees_web_4.jpg
  1. From the toolbar on the top right of your device, tap on your Profile picture and select Personal settings.
  2. Tap on Reports to view your payments.
  3. Select the View button next to Fees to view a history of your Fresha fees.
  4. Tap on the download icon next to either of the following to save the data to your device:
    1. Fresha Fee activity: Detailed breakdown of all paid feature charges, updated continuously throughout the month.
    2. Invoice: Finalised summary of all paid feature charges, generated at the beginning of each month.

FAQs

    • If you need to update your merchant agreement, contact your workspace owner, who can make changes on your behalf. Once you've disconnected a merchant, only the workspace owner can reactivate it.

      When you leave a workspace, your merchant account stays active with your professional profile, reports, and wallet information saved. Your account will be ready to use again when you join a new workspace.


Merchant accounts

Was this guide helpful?

Merchant accounts

Set up your merchant account

Get started as a merchant by joining a workspace and managing your payments independently.

Manage your merchant account

Take control of payments and performance with your Fresha merchant account. Update billing details, transfer funds, and track your sales.

Receiving money from your merchant account

Move funds easily between your merchant wallet, personal wallet, bank account, or workspace.

Understand your merchant sales

Monitor your performance and see how much you’re earning as a merchant.

Fresha
Get the app

About Fresha

Careers

Help and support

Blog

Sitemap

For business

For partners

Pricing

Features

Scheduling

Point of sale

Payments

Capital

Marketplace

Support

Status

Legal

Privacy Policy

Terms of service

Terms of use

Find us on social

Facebook
Linkedin
Instagram

© 2026 Fresha.com SV Ltd