Sync your calendar with Fresha
In this guide, you’ll learn how to sync your Fresha business calendar with external calendars like Google, Apple, or Outlook.
In this article
How calendar syncing works
You can sync your Fresha calendar with another personal calendar to automatically show Fresha appointment time blocks. Only the start and end times will be displayed.
Sync your personal calendar with Fresha
-
From the toolbar on the top right of your screen, click on your Profile picture and select My profile from the panel.

-
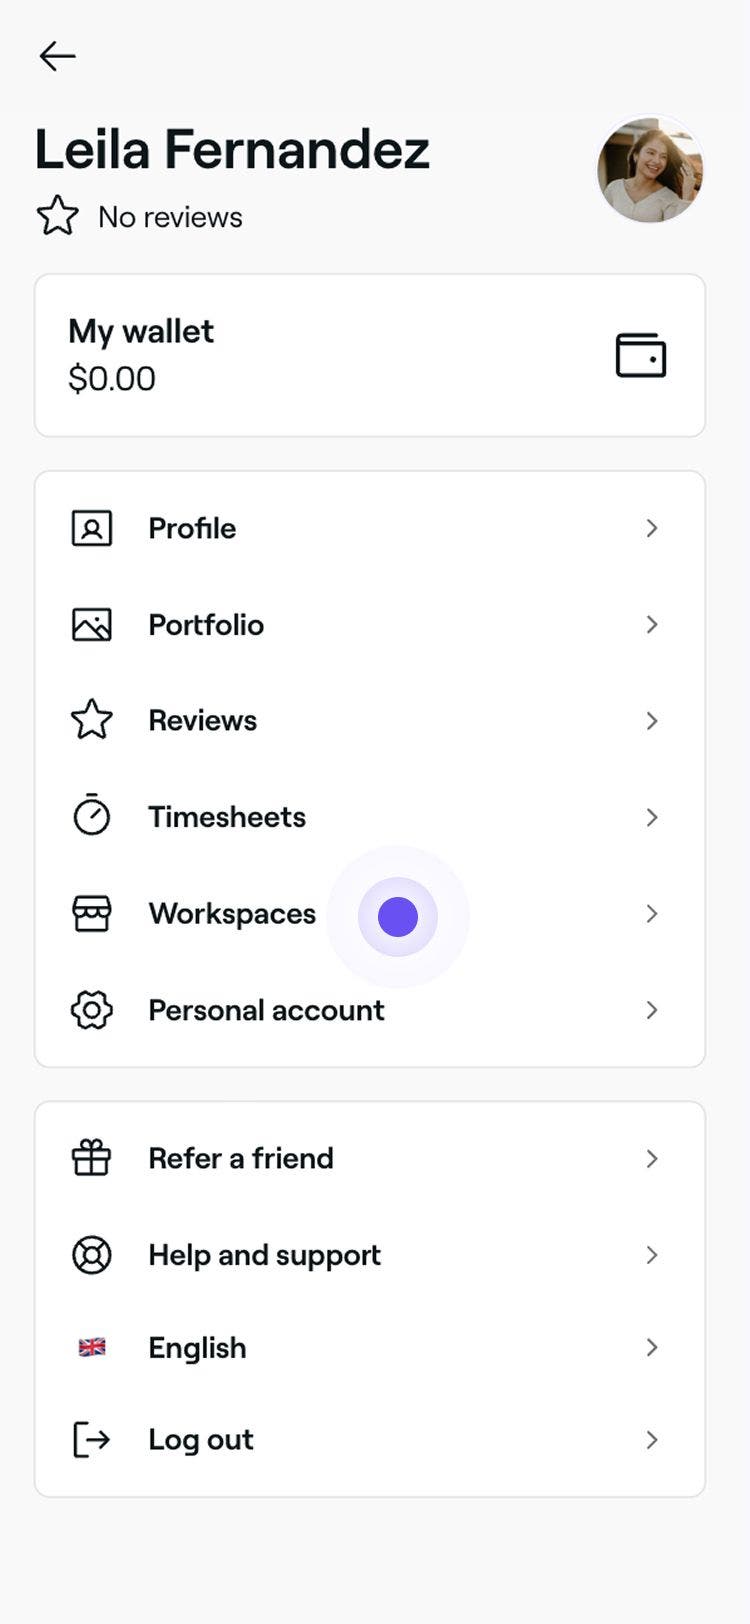
In the left menu panel, select Workspaces to view your workspace.

-
Next to your workspace, click on the Manage button to view your workspace settings.

-
Under Calendar sync, click on the option to Sync a calendar.

-
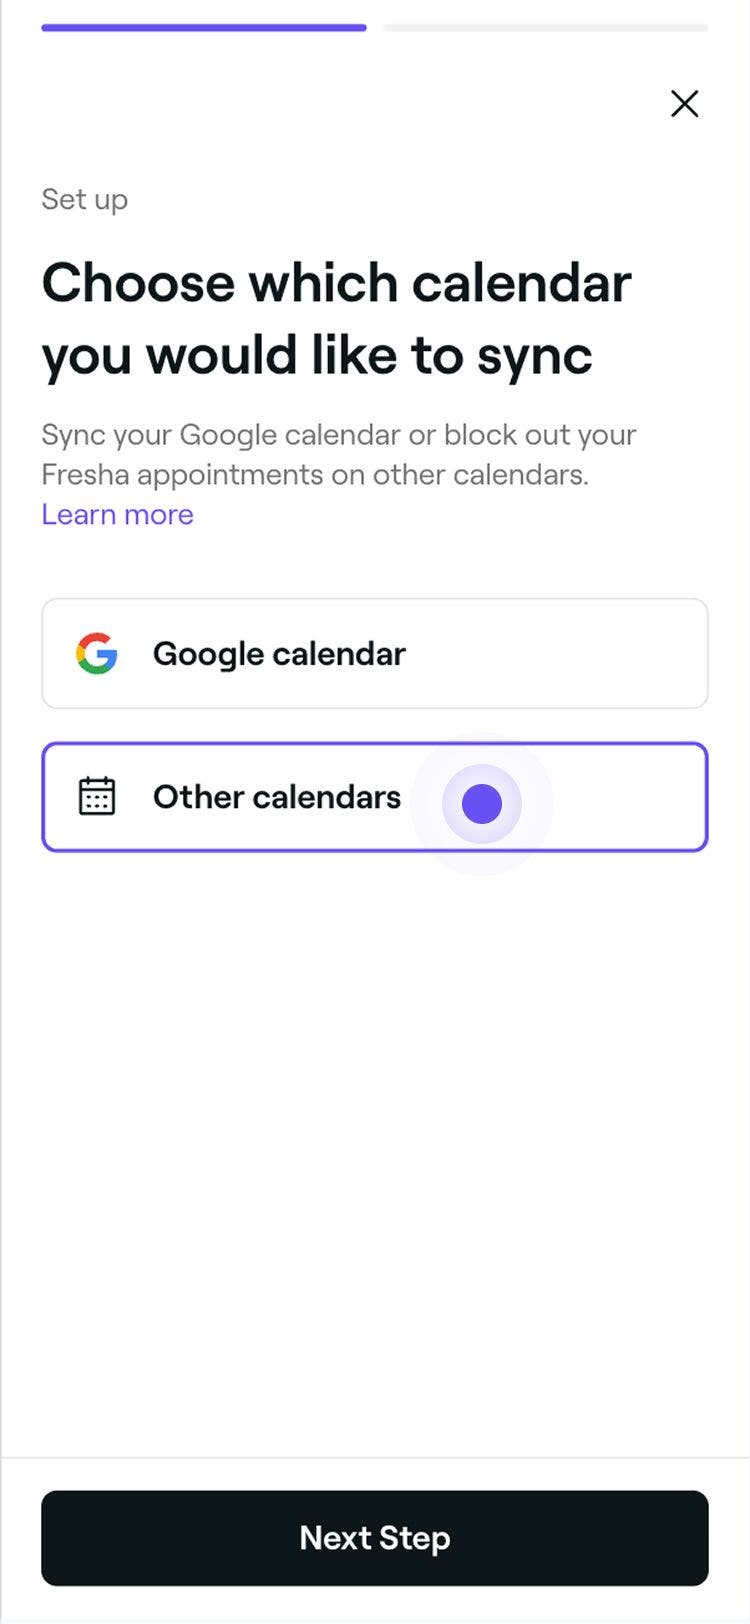
In the Choose which calendar you would like to sync step, select Other Calendars, and click on the Next step button in the top right.

-
In the Choose how you want to sync your calendar step, select the option to Export your Fresha Calendar and click on the Next step button in the top right.
-
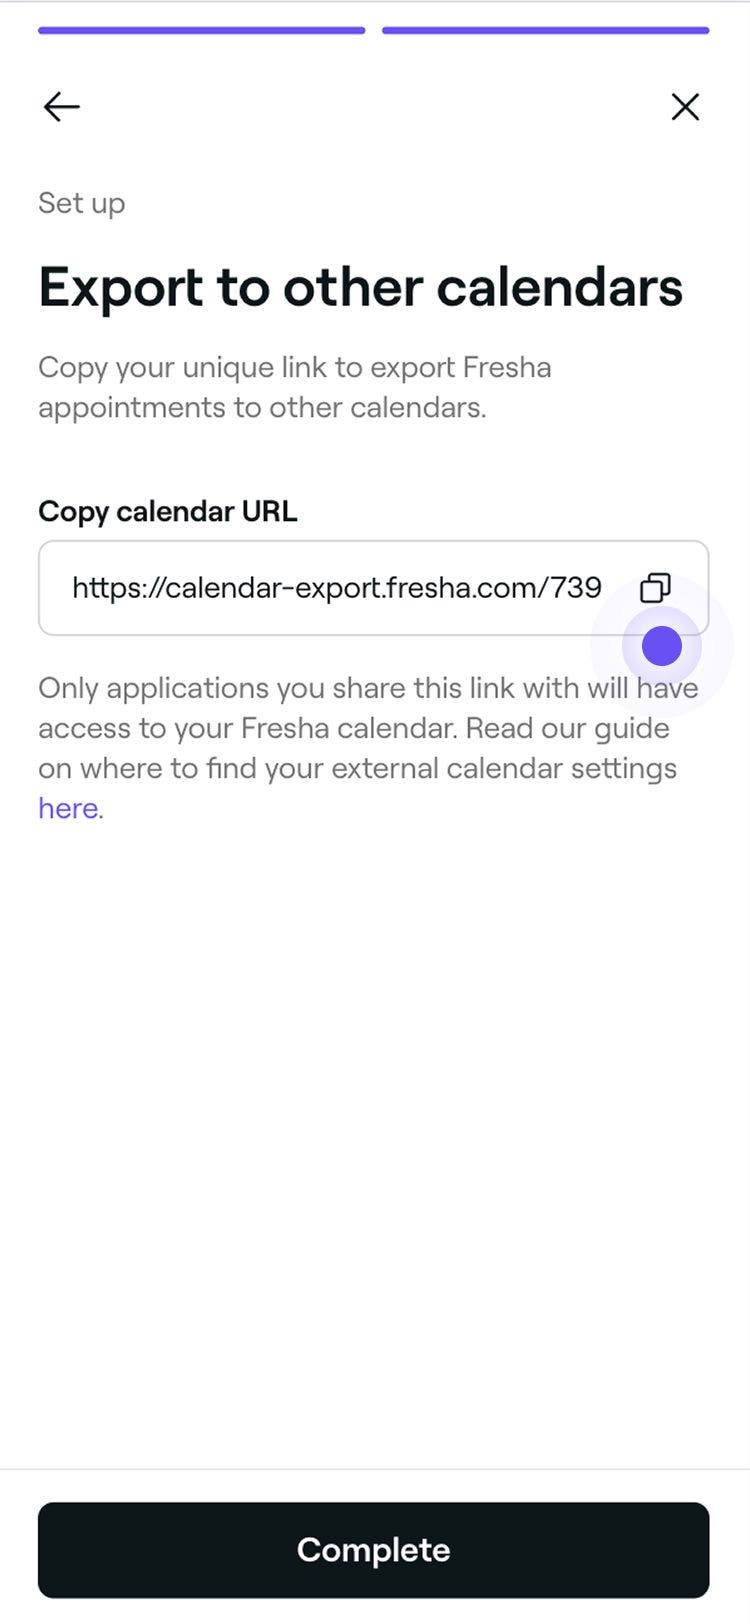
In the Export to other calendar step, click on the copy icon next to the calendar URL to paste into your personal calendar. Click on the Complete button in the top right.

-
Continue following the specific steps provided by your calendar application, where you'll be prompted to paste your calendar URL to complete the sync.
- You can sync Fresha with Google Calendar, Apple Calendar (iCal), Outlook calendar.
It may take up to 15 minutes for your calendar to sync. Once complete, the status will update from New to Synced, and all Fresha appointments from the past seven days, as well as any upcoming events, will appear in your personal calendar.
When selecting a calendar to sync with, you can choose to sync directly with Google calendar. This option lets you complete the sync without leaving Fresha.
Remove a synced calendar
- From the toolbar on the top right of your screen, click on your Profile picture and select My profile from the panel.

- In the left menu panel, select Workspaces to view your workspace.

- Next to your workspace, click on the Manage button to view your workspace settings.

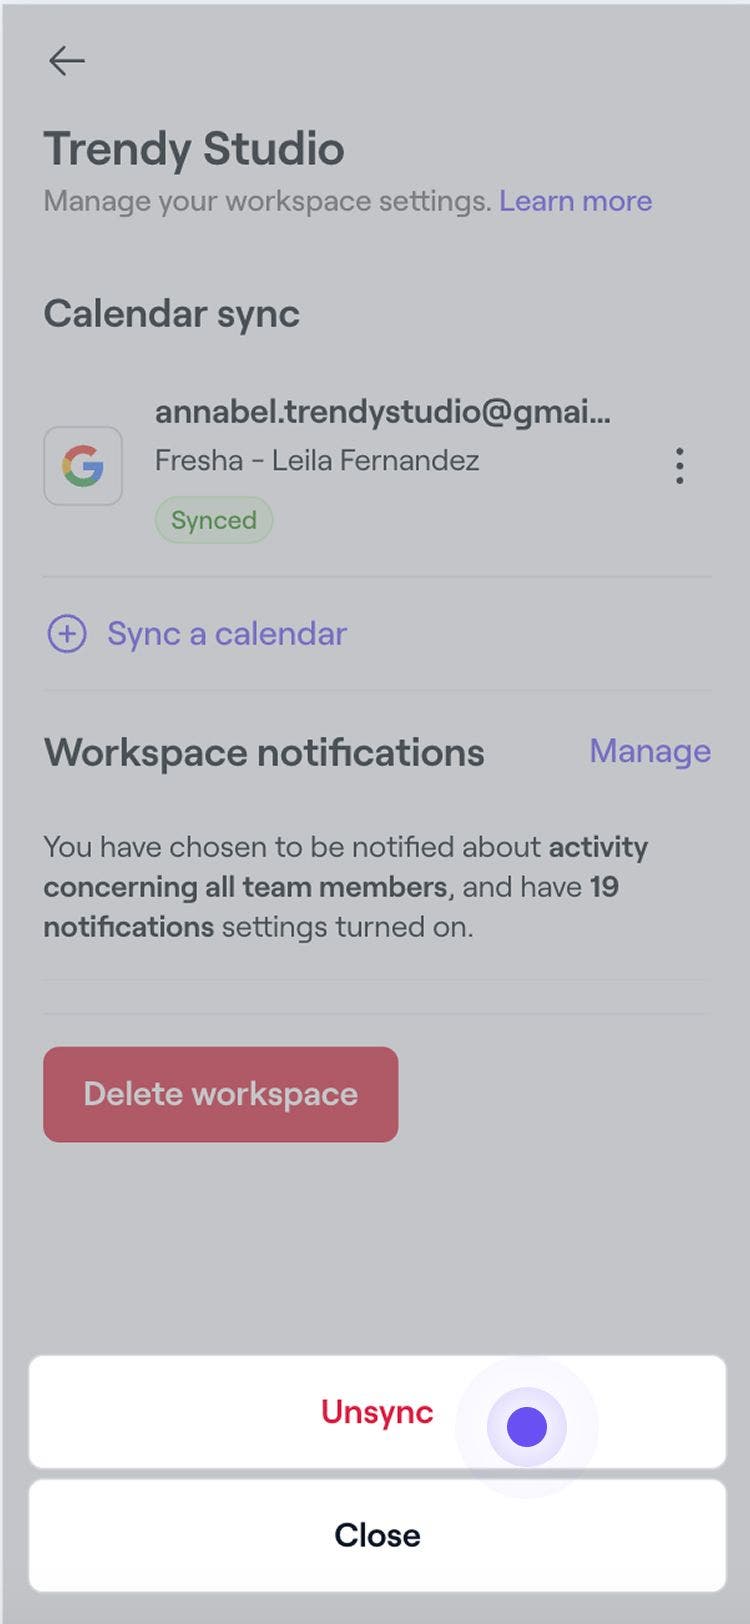
- Under Calendar sync, click on Actions (three dots) next to your synced calendar and select Unsyc from the panel.

- In the pop-up, click on the Unsync button to confirm.
Once your calendar has unsynced, any Fresha appointments will no longer show in your personal calendar.
FAQs
Yes, you can sync more than one personal calendar with your Fresha calendar. All Fresha events will appear across the calendars you sync with.
Yes, team members can sync their personal calendar with your Fresha calendar, as long as they have permission to book appointments enabled.
To keep both calendars aligned, it's best to make changes directly in Fresha. The sync is one-way only, so any updates made in your calendar will not reflect in Fresha.
For privacy and security reasons, client and service details are not included in your personal calendar when synced with Fresha. To view full details or make changes, click the link in the event description to open the appointment in your Fresha calendar.
Yes, you can sync your Google calendar with multiple Fresha calendars as long as each business has granted you access. Events from each Fresha calendar will appear in your Google calendar, allowing you to manage appointments across different locations in one place. For better clarity, consider assigning a unique color to each calendar in Google Calendar to easily distinguish between them.


