Create new Data connections
In this guide, you’ll learn how to integrate with platforms like Tableau, Power BI, and Google Looker Studio to build real-time dashboards, create detailed reports, and uncover valuable insights tailored to your business.
Using this integration effectively requires technical knowledge, and prior experience with Data connectors is helpful for both setup and data interpretation.
In this article
Create a new data connection
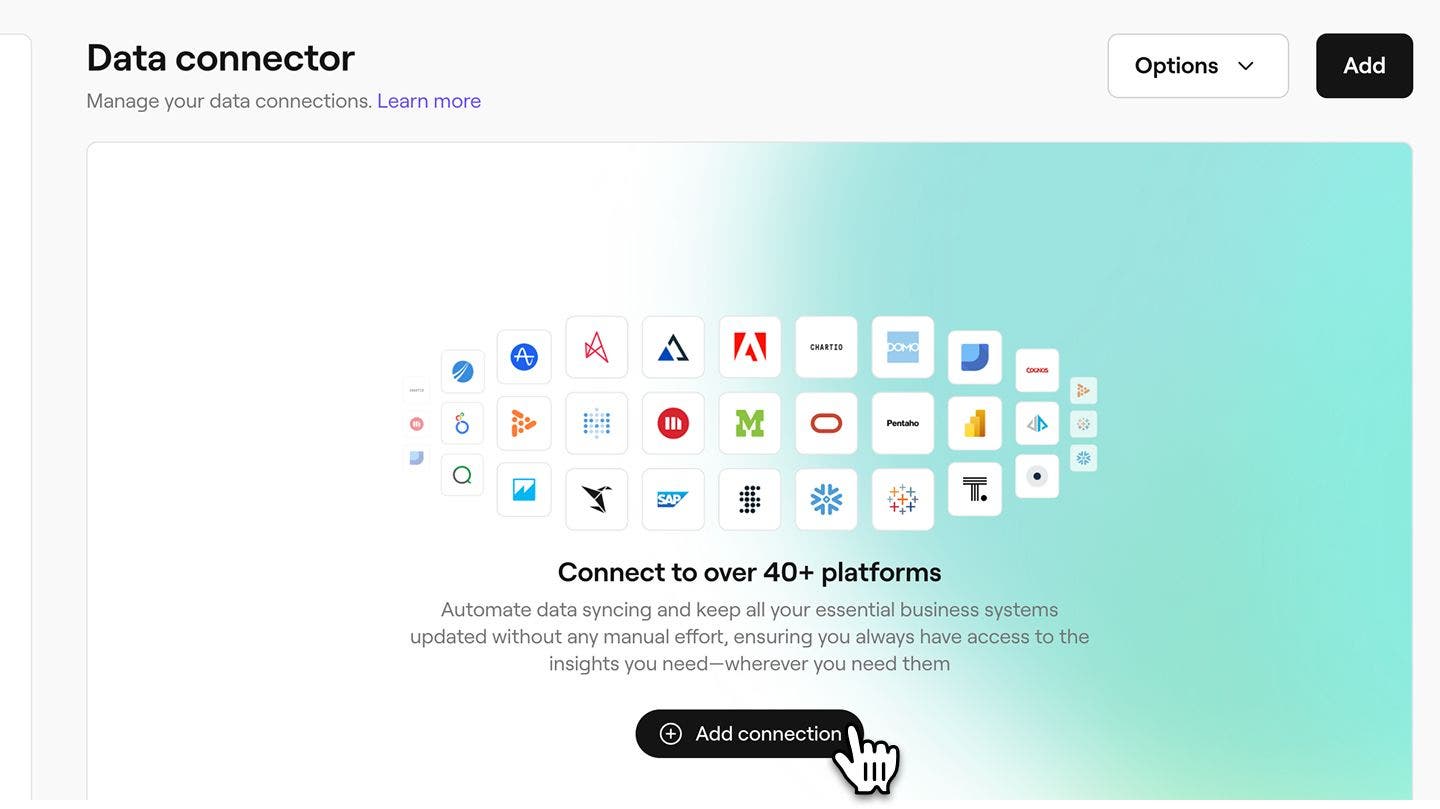
Once you’ve enabled the Data connector add-on for your business, you can create new data connections with over 40 external tools. To start syncing your data to external tools, you'll need to first create that connection through Fresha.
- From the main menu on the left of your screen, go to Reports.
- In the left menu panel, select Data connector to manage your Data connections.

- From the Data connector overview, click on the Add connections button to create a new data connection.
- After reviewing the overview of creating a data connection, click on the Continue button in the top right of your screen to proceed.

- Select your external tool from the list of connections. If your tool isn’t listed, click on the Custom tool option at the bottom and enter your own tool.
- Once you have selected your tool, click on the Create connection button in the top right of your screen to connect Fresha with your tool.

- After the connection is created, you’ll receive your Database details to copy and paste into your external tool. These details include:
- Database type = Snowflake
- Account URL (sometimes called 'Account name')
- Username
- Warehouse name
- Database name
- Schema
- Password

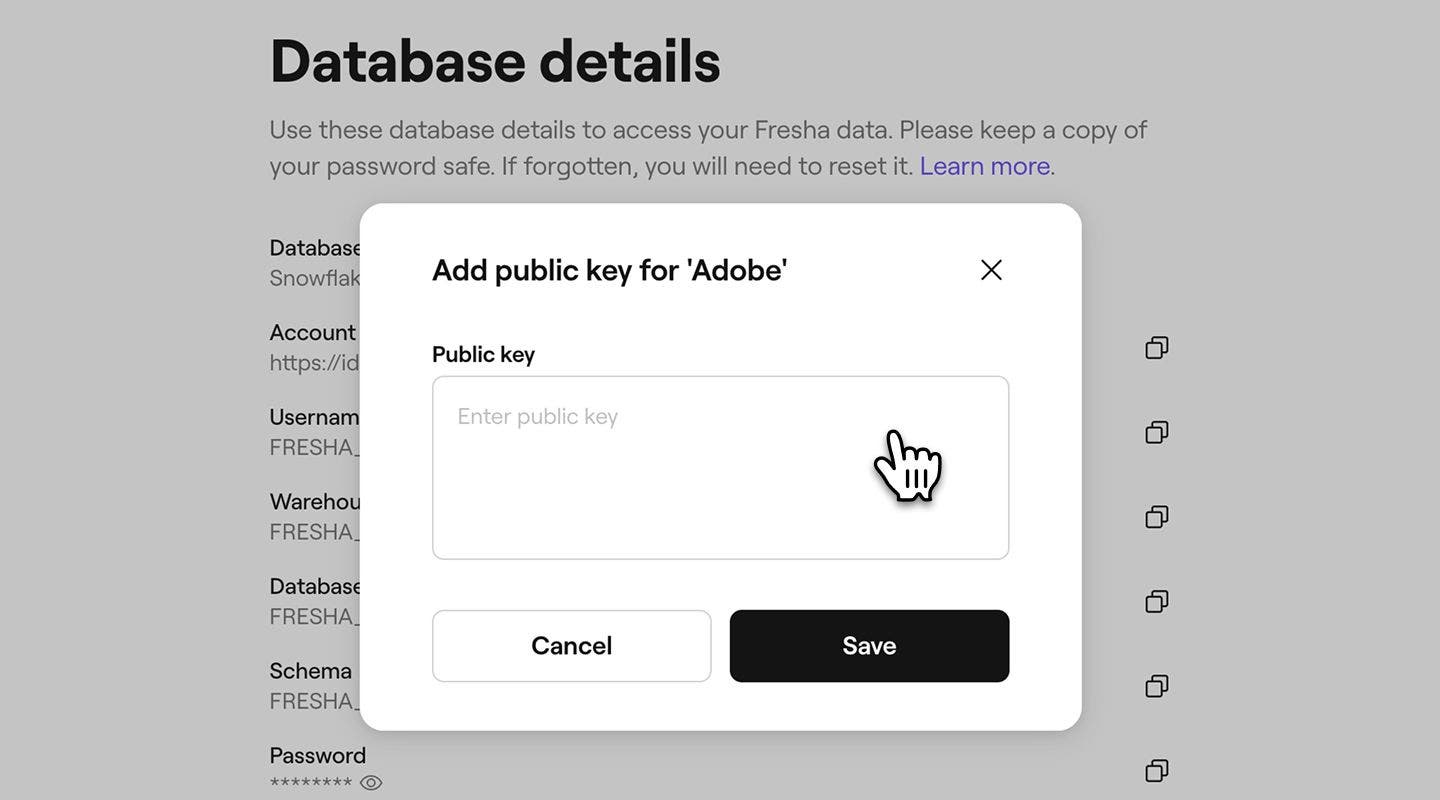
- To enhance security, you can also add a Public key to establish a trusted connection.
- A public key adds an extra layer of security to your connection. If your system requires secure SSH authentication, you can upload a public key to Fresha. This ensures that only authorized users can access your data.
- To add a public key, click on the Add key button.

- In the pop-up, enter your unique public key and click on the Save button to apply this to your database details.
- To exit the database details page, click on the Close button in the top right of your screen to return to your Data connections.

Once you have created a new data connection, you’ll also receive an email containing the database details for that connection.
Your database details include a password that can only be viewed once for security reasons. We recommend saving this password somewhere secure for future reference. If you lose the data connection password, you’ll need to reset your password on Fresha to reconnect your data.
Receive Fresha data
You can use the database details provided to receive Fresha data (via Snowflake) on a wide range of external data tools. The exact steps may vary depending on the platform, but below we’ve provided example instructions for connecting Fresha data with popular software.
Setup steps for popular tools
-
Sign in to Google Looker Studio.
-
Click +, and then select Data Source.
-
Under the Partner Connectors section, select the Snowflake connector (the connector with the Snowflake logo).
-
If required, authorize Google Looker Studio to use this community connector.
-
Enter the following Snowflake user credentials to connect to Snowflake:
- Username
- Password or private key
-
Click Submit.
-
Provide the following parameters required to connect to your Snowflake account:
- Account URL
- Role
- Warehouse
- Database
- Schema
- SQL query
Note: The SQL query cannot end with a semicolon.
-
Click Connect.
A page containing data source fields is displayed.
-
To visualize your data, click Create Report or Explore.
- Select Get Data from the Home ribbon in Power BI Desktop, select Database from the categories on the left, select Snowflake, and then select Connect.
- In the Snowflake window that appears, enter the name of your Snowflake server in Server and the name of your Snowflake computing warehouse in Warehouse.
- Optionally, enter values in any advanced options that you want to use to modify the connection query, such as a text value to use as a Role name or a command timeout. For more information: Connect using advanced options
- Select OK.
- To sign in to your Snowflake computing warehouse, enter your username and password, and then select Connect.
- In Navigator, select one or multiple elements to import and use in Power BI Desktop. Then select either Load to load the table in Power BI Desktop, or Transform Data to open the Power Query Editor where you can filter and refine the set of data you want to use, and then load that refined set of data into Power BI Desktop.
- Select Import to import data directly into Power BI, or select DirectQuery, then select OK. For more information: Use DirectQuery in Power BI Desktop
- On the Connect screen, under To a Server, select More, and then select Snowflake.
- On the General tab, enter the name of the server that you want to connect to.
- (Optional) Enter the Role and Warehouse.
- Select the Authentication method you'll use: Username and Password, Okta Username and Password, Sign in using OAuth, or Sign in using Key-pair.
- (Optional) Select Initial SQL if you want to run a SQL command at the beginning of every connection. For more information, see Run Initial SQL.
- (Optional) For Tableau Desktop and Server, enter any custom parameters on the Advanced tab you wish to use for this connection. (Not available on Tableau Cloud)
- Complete the login steps for the selected authentication method:
- Sign in using OAuth:
- Click Sign In.
- In the Web page that opens, log in to Snowflake by entering your Username and Password and selecting Log In. Alternately, select Single Sign On if Snowflake is configured to support SSO.
- Click OK to confirm authorization to access your Snowflake data.
- Username and Password:
- Enter the username and optional password.
- Click Sign In.
- Okta Username and Password:
- Enter the username and optional password.
- Enter the optional SAML IdP (The URL for your Okta server).
- Click Sign In.
- Sign in using Key-pair
- In Server, enter the Snowflake server address.
- Enter the Warehouse and optionally the Role.
- In Authentication, select Sign in using Key-pair.
- Enter the Username associated with these keys.
- In Private key file, browse to the .p8 file containing your private key.
- (Optional) Enter the Private key file password if it is protected by one.
- Sign in using OAuth:
- Next, follow the instructions under Set up the Data Source.
- Open Qlik Sense and navigate to Data Manager then Add Data.
- Choose Snowflake as the data source.
- Enter the connection details:
- Server (Account URL)
- Username
- Password
- Select the Warehouse, Database, and Schema.
- Click Test Connection to verify.
- Load the data into Qlik Sense.
- Navigate to the Mode home page for the Workspace to which you'd like to add the connection and click on your name in the top left corner.
- Click on Connect a Database.
- Select your database from the list.
- Follow the on-screen instructions to connect your database.
- Enter:
- Account URL (Host/Server)
- Username
- Password
- Warehouse
- Save and test the connection.
- Use SQL queries to explore your Fresha data.
- Download the Snowflake Excel Add-In from the Snowflake Partner Connect page or directly from Excel’s marketplace.
- Open Excel and go to the Snowflake tab (after installation).
- Click Add Connection and input your Snowflake connection details:
- Account URL
- Username
- Password
- Warehouse
- Database
- Schema
- Import Data:
- Use the Snowflake Add-In’s Query Wizard or SQL Mode to write queries and pull data into Excel.
- Download the ODBC driver from the Snowflake Downloads page and follow the installation instructions provided in the documentation.
- Configure ODBC Data Source.
- Open ODBC Data Sources on your computer (you’ll find it in Control Panel).
- Under the User DSN tab, click on Add,
- Select Snowflake ODBC Driver, and click Finish.
- Enter the required details:
- Data Source Name: A name for this connection.
- Server (Account URL)
- Warehouse
- Database
- Schema: (Optional)
- Open Excel, go to the Data tab, and select Get Data > From Other Sources > From ODBC.
- Choose the DSN you configured for Fresha (Snowflake) and enter your login credentials.
The Snowflake Connector for Google Looker Studio provides an interface to Google Looker Studio, a data visualization software that you can use to transform your raw data into the metrics and dimensions needed to create reports and dashboards. This connector is available to users with a Google account as a Partner Connector within Google Looker Studio.
To connect to Google Looker Studio:
To connect to Power BI:
To connect to Tableau:
To connect to Qlik Sense:
To connect to Mode Analytics:
To connect to Excel:
Once connected, data will automatically flow into your Excel worksheets.
You can connect with your Fresha (Snowflake) data over ODBC from any software that supports this method.
To connect using the ODBC driver:
Connect to ODBC in your tool, for example in Excel:
You can now run SQL queries directly from Excel and import data from Snowflake into Excel worksheets.
For other BI tools, refer to their official documentation on connecting with Fresha data (via Snowflake). Use the database details provided above to configure the connection.
-
FAQs
- Adobe - https://www.adobe.com/
- Amplitude - https://amplitude.com/
- Astrato - https://astrato.io/
- Atscale - https://www.atscale.com/
- CartO - https://carto.com/
- Chart IO - https://chartio.com/
- DOMO - https://www.domo.com/
- Google Data Studio - https://datastudio.google.com/
- IBM Cognos - https://www.ibm.com/products/cognos-analytics
- Looker - https://looker.com/
- MachEye - https://www.macheye.com/
- Metabase - https://www.metabase.com/
- Microstrategy - https://www.microstrategy.com/
- Mode - https://mode.com/
- Oracle - https://www.oracle.com/
- Pentaho - https://pentaho.com/
- Power BI - https://powerbi.microsoft.com/
- Pyramid - https://www.pyramidanalytics.com/
- Quick sight - https://quicksight.aws/
- Qilik - https://www.qlik.com/
- SAP - https://www.sap.com/
- Sigma - https://www.sigmacomputing.com/
- Sisense - https://www.sisense.com/
- Snowflake - https://www.snowflake.com/
- Tableau - https://www.tableau.com/
- TIBC - https://www.tibco.com/
- ThoughtSpot - https://www.thoughtspot.com/
- Choose an ETL Tool:
- Select a tool that supports both Snowflake as a data source and your desired software as a data destination (e.g., Fivetran).
- Set Up Snowflake as a Source:
- Provide your Snowflake credentials (account URL, database name, warehouse, username, and password) to the ETL tool.
- Define the tables or queries from Snowflake to extract data.
- Set Up your desired software as a Destination:
- Authenticate the ETL tool with your desired software using API credentials or OAuth.
- Map Snowflake data to your desired software fields (e.g., invoices, expenses, etc.).
- Automate the Sync:
- Schedule regular data transfers based on your requirements (e.g., daily, hourly).
- Export Data from Snowflake:
- Query and export data from Snowflake into a CSV file using your existing BI tool.
- Import to your desired software:
- Use your desired software's import functionality to load the CSV file into relevant sections (e.g., transactions, invoices).
Fresha does not store passwords for data connections to ensure the security of your business data. If you lose your password, you can easily generate a new password by resetting it.
Many tools can connect to Fresha data using the database details provided, some examples include:
There are a number of other options to connect your Fresha data with software that doesn't have a snowflake integration.
Option 1: Use ETL/ELT Middleware Tools
Tools like Fivetran or Stitch can act as intermediaries between Snowflake and your desired software. Here's how to do it:
Option 2: Export and Import Data
For simple, manual workflows:
You can add or update your public key by opening your data connection in the Data connector tab in Fresha and updating the key from there.